Table of Contents
Advertisement
Advertisement
Table of Contents

Related Manuals for Sharp XV-Z30000


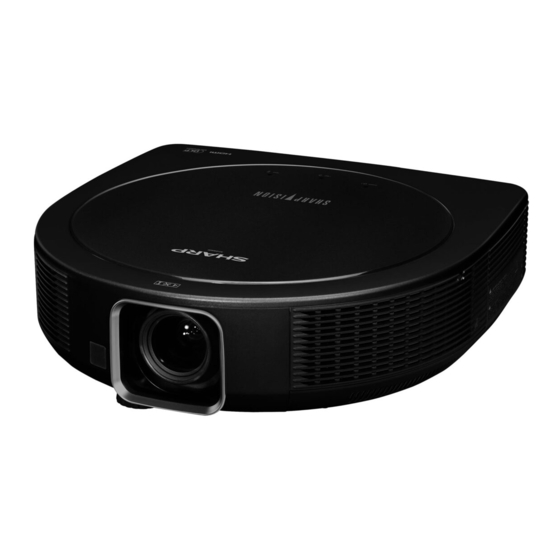
Summary of Contents for Sharp XV-Z30000
- Page 1 PROJECTOR MODEL XV-Z30000 OPERATION MANUAL...
- Page 2 O CD-ROM fornecido contém instruções de operação em Inglês, Alemão, Francês, Espanhol, Sueco, Português e Chinês. Leia cuidadosamente todas as instruções de operação antes de operar o projetor. Authorized representative responsible for the European Union Community Market SHARP ELECTRONICS (Europe) GmbH Sonninstraße 3, D-20097 Hamburg Model No.: Serial No.:...
-
Page 3: Product Disposal
Disposal of these materials may be regulated due to environmental considerations. For disposal or recycling information, please contact your local authorities, the Electronics Industries Alliance: www.eiae.org, the lamp recycling organization www.lamprecycle.org, or Sharp at 1-800-BE-SHARP. This product contains a CR Coin Lithium Battery which contains Perchlorate Material –... -
Page 4: Declaration Of Conformity
* If you wish, you may have the lamp replaced at your nearest Sharp Authorized Projector Dealer or Service Center. * If the new lamp does not light after replacement, take your projector to the nearest Sharp Authorized Projector Dealer or Service Center for repair. -
Page 5: How To Read This Operation Manual
Example: “Picture” screen menu Menu item Picture Net. Picture Mode Standard Contrast Bright Color Tint Sharp Red Gain Green Gain Blue Gain CLR Temp IRIS1 (Manual) High Brightness IRIS2 (Auto) Eco+Quiet Advanced Reset SEL./ADJ. ENTER... -
Page 6: Table Of Contents
Contents Preparing Introduction How to Read this Operation Manual ...3 Contents ...4 IMPORTANT SAFEGUARDS ...6 How to Access the PDF Operation Manuals...11 Accessories ...12 Part Names and Functions ...13 Side View ... 13 Top View ... 13 Front View ... 13 Rear View (Terminals) ... - Page 7 Caution Concerning the Lamp ... 78 Replacing the Lamp ... 78 Removing and Installing the Lamp Unit ... 79 Resetting the Lamp Timer ... 80 Compatibility Chart ...81 Troubleshooting ...83 For SHARP Assistance ...86 Specifi cations ...87 Dimensions ...88 Index ...89...
-
Page 8: Important Safeguards
IMPORTANT SAFEGUARDS CAUTION: Please read all of these instructions before you operate this product and save these instructions for later use. Electrical energy can perform many useful functions. This product has been engineered and manufactured to assure your personal safety. BUT IMPROPER USE CAN RESULT IN POTENTIAL ELECTRICAL SHOCK OR FIRE HAZARDS. - Page 9 15. Overloading Do not overload wall outlets, extension cords, or integral convenience receptacles as this can result in a risk of fi re or electric shock. 16. Object and Liquid Entry Never push objects of any kind into this product through openings as they may touch dangerous voltage points or short-out parts that could result in a fi...
- Page 10 As long as the projector is regularly cleaned, use in these environments will not reduce the overall operation life of the unit. Internal cleaning should only be performed by a Sharp Authorized Projector Dealer or Service Center. Rest your eyes occasionally.
- Page 11 Caution regarding usage of the projector ■ If you are not to use the projector for a long time or before moving the projector, make certain you unplug the power cord from the wall outlet, and disconnect any other cables connected to it. ■...
- Page 12 Observe the following safeguards when using the 3D Glasses. Prevention of accidental ingestion ■ Keep the batteries and band accessory out of the reach of small children. Small children can accidentally swallow these parts. – If a child accidentally swallows any of these parts, seek immediate medical attention.
-
Page 13: How To Access The Pdf Operation Manuals
How to Access the PDF Operation Manuals PDF operation manuals in several languages are included in the CD-ROM. To utilize these manuals, you need to install Adobe ® ® (Windows or Macintosh ® Please download Adobe Reader Accessing the PDF Manuals ®... -
Page 14: Accessories
■ 3D Glasses Note • Some of the optional accessories may not be available depending on the region. Please check with your nearest Sharp Authorized Projector Dealer or Service Center. Two R-6 batteries (“AA” size, UM/SUM-3, HP-7 or similar) IR emitter <PSETNA007FMF0>... -
Page 15: Part Names And Functions
Part Names and Functions Numbers in refer to the main pages in this operation manual where the topic is explained. Side View STANDBY/ON button For turning the power on and putting the projector into Standby mode. LENS button For toggling the menu screens for adjustments of the lens (LENS SHIFT, FOCUS, ZOOM, etc.). -
Page 16: Rear View (Terminals)
Part Names and Functions (Continued) Rear View (Terminals) COMPUTER/COMPONENT input terminal 23, 25 Terminal for computer RGB and component signals. Component (YP Terminals for connecting video equipment with component output terminal. 23, 24 HDMI terminals Terminals for HDMI input. LAN terminal Terminal for controlling the projector using a computer via network. - Page 17 Numbers in refer to the main pages in this operation manual where the topic is explained. ON button For turning the power on. STANDBY button For putting the projector into the Standby mode. CONTRAST, BRIGHTNESS, COLOR and TINT buttons For adjusting the contrast, brightness, color and tint.
-
Page 18: Inserting The Batteries
Part Names and Functions (Continued) Inserting the Batteries Pull down the tab on the cover and remove the cover towards the direction of the arrow. Insert the batteries. • Insert the batteries making sure the polarities correctly match the m and n marks inside the battery compartment. Insert the upper tab of the cover into the opening, and lower the cover until it clicks in place. -
Page 19: Usable Range
Usable Range The remote control can be used to control the projector within the ranges shown in the illustration. Note • Another remote control sensor is located on the rear of the projector. (See pages and 14.) • The signal from the remote control can be refl... -
Page 20: Easy Start
Easy Start This section shows the basic operation (projector connecting with video equipment). For details, see the page described below for each step. Setup and Projection In this section, connection of the projector and video equipment is explained using one example. - Page 21 4. Adjust the angle Adjust the projector angle: • Shift the lens horizontally and vertically. Press H&V SHIFT on the remote control. Press P, R, O or Q on the remote control. • Adjust the projector angle by rotating the adjustment feet.
-
Page 22: Setting Up The Projector
Setting Up the Projector Video Setup If using this projector outside the U.S.A., please change setting to “0 IRE” in Video Setup. (See page 50.) Setting Up the Projector For optimal image quality, position the projector perpendicular to the screen with the projector's feet fl... -
Page 23: Screen Size And Projection Distance
Screen Size and Projection Distance When using a wide screen (16:9): In case of displaying the 16:9 picture on the whole of the 16:9 screen Picture (Screen) size Diag. [x] Width Height 500" (1270 cm) 1107 cm (436") 623 cm (245") 15.7 m (51' 7") 400"... -
Page 24: Projection (Prj) Mode
[Menu item ➞ “Rear”] a Ceiling-Mount Setup It is recommended that you use the optional Sharp ceiling-mount adaptor and unit for this installation. Before mounting the projector, contact your nearest Sharp Authorized Projector Dealer or Service Center to obtain the recommended ceiling-mount adaptor and unit (sold separately). -
Page 25: Connecting The Projector To Other Equipment
Connecting the Projector to Other Equipment Before connecting, ensure that the power cord of the projector is unplugged from the AC outlet and turn off the equipment to be connected. After making all connections, turn on the projector and then the other pieces of equipment. When connecting a computer, ensure that it is the last equipment to be turned on after all the connections are made. -
Page 26: Connecting To Video Equipment
Connecting to Video Equipment Before connecting, be sure to unplug the power cord of the projector from the AC outlet and turn off the devices to be connected. After making all connections, turn on the projector and then the other devices. Connecting Equipment with HDMI Output Terminal to the HDMI Terminal on the Projector For video connection, use a cable that conforms to HDMI standards. -
Page 27: Connecting To A Computer
Depending on the computer you are using, an image may not be projected unless the computer's external output port is switched on (e.g. Press “Fn” and “F5” keys simultaneously when using a SHARP notebook computer). Refer to the specifi c instructions in your computer's operation manual to enable your computer's external output port. -
Page 28: Controlling The Projector By A Computer
Controlling the Projector by a Computer When the RS-232C terminal on the projector is connected to a computer with an RS-232C serial control cable (cross type, commercially available), the computer can be used to control the projector and check the status of the projector. Refer to the “SETUP MANUAL” contained on the supplied CD-ROM for “RS-232C Specifi... -
Page 29: Connecting The Power Cord
When connecting to the LAN terminal using a LAN cable Note • When connecting to a hub, use a straight-through Category 5 (CAT.5) type cable (commercially available). • When connecting to a computer, use a cross-over Category 5 (CAT.5) type cable (commercially available). -
Page 30: Turning The Projector On/Off
Turning the Projector On/Off Turning the Projector On Note that the connections to external equipment and power outlet should be done before performing the operations written below. (See pages Press STANDBY/ON on the projector or ON on the remote control. •... -
Page 31: Image Projection
Image Projection Shifting the Lens In addition to the zoom function and adjustment of projection angle using the adjustment feet, you can adjust the position of the projection using the lens shift function. This is a useful function in cases such as when the screen cannot be moved. When moving upward or downward Adjustable range... -
Page 32: Using The Adjustment Feet
Image Projection (Continued) Using the Adjustment Feet • When the position of the projected image cannot be adjusted with the lens shift function, use the adjustment feet to adjust the projected angle. • The height of the projector can be adjusted using the adjustment feet when the screen is located higher than the projector, the screen is inclined or when the installation site is slightly inclined. -
Page 33: Correcting Trapezoidal Distortion
Correcting Trapezoidal Distortion When the image is projected either from the top or from the bottom towards the screen at an angle, the image becomes distorted trapezoidally. The function for correcting trapezoidal distortion is called Keystone Correction. There are three types of the Keystone Correction. 1) “GEOMETRIC ADJUSTMENT”... - Page 34 Image Projection (Continued) GEOMETRIC ADJUSTMENT Press KEYSTONE. • The KEYSTONE MODE list appears. (See page 31.) Press P/R to select “GEOMETRIC ADJUSTMENT”, and then press ENTER. Press P, R, O or Q to move the position for the upper left of the image.
- Page 35 H&V KEYSTONE Press KEYSTONE. • The KEYSTONE MODE list appears. (See page 31.) Press P/R to select “H&V KEYSTONE”, and then press ENTER. Press P or R to parallelize the left and right sides of the projected image. Press O or Q to parallelize the upper and lower sides of the projected image.
- Page 36 Image Projection (Continued) SPHERE Press KEYSTONE. • The KEYSTONE MODE list appears. (See page 31.) Press P/R to select “SPHERE”, and then press ENTER. Press P/R/O/Q to adjust the sphere correction. Press KEYSTONE to set the position. ROn-screen display ROn-screen display SPHERE SPHERE ADJUST...
-
Page 37: Switching The Input Mode
Switching the Input Mode Select the appropriate input mode for the connected equipment. Press HDMI 1/2, COMPONENT or COMPUTER on the remote control to select the input mode. ■ When you select the input mode with INPUT R/P on the projector: When R/P is pressed, the INPUT list •... -
Page 38: Resize Mode
Image Projection (Continued) Resize Mode This function allows you to modify or customize the Resize mode to enhance the input image. Depending on the input signal, you can choose a desired image. Press RESIZE on the remote control or on the projector. -
Page 39: Operating With The Remote Control
Operating with the Remote Control CONTRAST, BRIGHTNESS, COLOR and TINT buttons IRIS 1/2 buttons PICTURE MODE button MENU HIDE button AUTO SYNC button ECO+QUIET button Adjusting the Image You can adjust the contrast, brightness, color and tint. Press image adjustment buttons. Button + button CONTRAST... -
Page 40: Switching The Iris Setting
Operating with the Remote Control (Continued) Switching the Iris Setting This function controls the quantity of the projected light and the contrast of the image. Press IRIS 1 or 2. • Each time the button is pressed while the display is on, the mode changes in the following order: ■... -
Page 41: Menu Items
The following shows the items that can be set in the projector. “Picture” menu Main menu Picture Picture Mode Page Page Contrast Bright Color Tint Sharp Red Gain Green Gain Blue Gain CLR Temp Page IRIS1(Manual) Page IRIS2(Auto) [On/Off] Page Eco+Quiet [On/Off]... - Page 42 Menu Items (Continued) “Signal adjustment (SIG-ADJ)” menu Main menu SIG-ADJ Clock -150 +150 Page Phase H-Pos -150 +150 V-Pos Reset Page Resolution Page Auto Sync [On/Off] Page Signal Type Page Video Setup Page Dynamic Range Page Signal Info Page “Screen adjustment (SCR-ADJ)” menu Main menu Sub menu SCR-ADJ...
- Page 43 “Projector adjustment (PRJ-ADJ)” menu Main menu PRJ-ADJ Auto Power Off [On/Off] Page Page No Operation off Page Economy Mode [On/Off] Page One Touch Play [On/Off] System Standby [On/Off] Input Name Page LED [On/Off] Page Demo Mode [On/Off] Page Fan Mode Page Memory Menu Page...
-
Page 44: Using The Menu Screen
Example: “Picture” screen menu Menu item Picture Picture Mode Standard Contrast Bright Color Tint Sharp Red Gain Green Gain Blue Gain CLR Temp IRIS1 (Manual) High Brightness IRIS2 (Auto) Eco+Quiet Advanced Reset SEL./ADJ. -
Page 45: Press Menu
• The adjustment is stored. Press MENU. • The menu screen will disappear. Picture Picture Mode Standard Contrast Bright Color Tint Sharp Red Gain Green Gain Blue Gain CLR Temp IRIS1 (Manual) High Brightness IRIS2 (Auto) Eco+Quiet Advanced Reset SEL./ADJ. -
Page 46: Picture Adjustment ("Picture" Menu)
Picture Adjustment (“Picture” Menu) Picture Picture Mode Contrast Bright Color Tint Sharp Red Gain Green Gain Blue Gain CLR Temp IRIS1 (Manual) IRIS2 (Auto) Eco+Quiet Advanced Reset SEL./ADJ. RETURN Selecting the Picture Mode This function allows you to select the picture mode that best suits the room brightness and the type of image being projected. -
Page 47: Adjusting The Image
For more color intensity. intensity. Tint For making skin For making skin tones purplish. tones greenish. Sharp For less sharpness. For more sharpness. Red Gain For making images For making images less reddish. more reddish. Green Gain For making images For making images less greenish. -
Page 48: Custom Gamma
Picture Adjustment (“Picture” Menu) (Continued) 7 Custom Gamma The Custom Gamma function can be used when “Picture Mode” is set to “User1” or “User2”. You can adjust the gamma curve and save your custom setting. Adjust it to suit the picture brightness. - Page 49 • If there is data for the stored corrected color, the C.M.S. color adjustment screen is displayed. (Go to step 3.) C.M.S.1 Select Color Saturation Value Effect C.M.S.1 Reset Return SEL./ADJ. RETURN Use the picker and select the color of the projected image to correct.
-
Page 50: Adjusting The Bright Boost
Picture Adjustment (“Picture” Menu) (Continued) 9 Adjusting the Bright Boost Bright Boost uses Texas Instruments’ Bright Boost technology. The image becomes brighter while the color reproduction is kept at a high level. Selectable Description items The Bright Boost function is activated. The Bright Boost function is not activated. -
Page 51: Computer Image Adjustment ("Sig-Adj" Menu)
Computer Image Adjustment (“SIG-ADJ” Menu) Pict. SIG-ADJ Clock Phase H-Pos V-Pos Reset Resolution Auto Sync Signal Type Auto Video Setup 0IRE Dynamic Range Auto Signal Info : 1080P H : XX.X kHz/ SEL./ADJ. RETURN * Displayed when the input mode is HDMI input. Adjusting the Computer Image Use the SIG-ADJ function in case of irregularities such as vertical stripes or... -
Page 52: Signal Type Setting
Computer Image Adjustment (“SIG-ADJ” Menu) (Continued) Signal Type Setting When using an input mode of HDMI1, HDMI2, or COMPUTER, set the signal type to the corresponding input signal type (RGB or YPbPr). Selectable Description items Auto Automatically selects the appropriate input signal between RGB and YPbPr. -
Page 53: Adjusting The Projected Image ("Scr-Adj" Menu)
Adjusting the Projected Image (“SCR-ADJ” Menu) Pict. SCR-ADJ Resize Normal V-Image Shift Trigger Anamorphic Overscan Black Mask CBNR OSD Display OSD Brightness Standard Background Logo Menu Position Upper Left Front PRJ Mode Language English SEL./ADJ. RETURN 1 Setting the Resize Mode Note •... -
Page 54: Adjusting The Overscan
Selectable Description items Standard Standard brightness Level 1 Darker than the “Standard” brightness Level 2 Darker than the “Level 1” brightness 0 Selecting the Background Image Selectable Description items Logo SHARP logo screen Blue Blue screen None — (Black screen) -
Page 55: Selecting The Menu Screen Position
Selecting the Menu Screen Position Select “Menu Position” in the “SCR-ADJ” menu and the desired position for the menu screen. Selectable Description items Center Displayed on the center of the image. Upper Right Displayed on the upper right of the image. -
Page 56: ("Prj-Adj" Menu)
Adjusting the Projector Function (“PRJ-ADJ” Menu) Pict. Auto Power Off No Operatin Off Economy Mode One Touch Play System Standby Input Name Demo Mode Fan Mode Memory Menu All Reset Lamp Timer (Life) min ( SEL./ADJ. RETURN Setting Auto Power Off Mode This function automatically switches the projector to Standby mode if no signals are received for a set period. -
Page 57: Setting One Touch Play, System Standby And Input Name
(“One Touch Play” and “System Standby”). Note • The CEC function may not work with some CEC devices. (When the projector is connected to a non-Sharp product, the CEC function may not work.) ■ Setting the One-Touch Playback Function (One Touch Play) -
Page 58: Turning Led Off
Adjusting the Projector Function (“PRJ-ADJ” Menu) (Continued) 5 Turning LED Off LEDs (indicators) on the projector can be turned off when they are disturbing the projection. Selectable Description items LEDs are turned on. LEDs are turned off while the projector is in operation. -
Page 59: Returning To The Default Settings
a Clear Memory Select the item where the settings you want to erase are stored. In this case, the memory name you have changed returns to the default setting. Note • Selecting “All Clear” erases all the stored settings. a Memory Lock Selectable Description items... -
Page 60: Setting Up The Projector Network Environment ("Network" Menu)
Setting Up the Projector Network Environment (“Network” Menu) Pict. Password DHCP Client TCP/IP Reset Network Setting Restart Network IP Address XXX.XXX.XXX.XXX MAC Address XX:XX:XX:XX:XX:XX Projector XX-XXXX SEL./ADJ. RETURN 1 Setting a Password If you do not want others to change the setting for the “Network”... -
Page 61: Dhcp Client Setting
2 DHCP Client Setting Connect the LAN cable before turning the projector on. If not, the DHCP Client function does not work. Selectable items Description Obtains confi guration parameters for TCP/IP network automatically. Sets the TCP/IP manually. Select “On” for “DHCP Client”. “Obtaining IP Address...”... -
Page 62: Confi Rming The Projector Information
Setting Up the Projector Network Environment (“Network” Menu) (Continued) 6 Confi rming the Projector Information You can confi rm the following items. Selectable Description items IP Address The IP address of the projector is displayed. MAC Address The MAC address of the projector is displayed. -
Page 63: Enjoying 3D Image Viewing
Request your authorized dealer or installation service provider to install the IR emitter securely while taking the necessary safety measures. ■ SHARP will not be liable for any accident or damage due to improper installation, insuffi cient mounting strength, misuse, or natural disasters. -
Page 64: Precautions On Viewing 3D Images
Enjoying 3D Image Viewing (Continued) Precautions on viewing 3D images ■ When viewing 3D images continuously, be sure to take a break periodically to prevent eye strain. ■ Take regular breaks, at least 5 to 15 minutes after every 30 to 60 minutes of 3D viewing. - Page 65 WARNING ■ The following people should limit stereoscopic 3D viewing: – Children under 6 years of age (to protect the eye growth process) – People with a history of photosensitivity – People with heart disease – People in poor health –...
-
Page 66: Supplied Accessories For The 3D Glasses
Enjoying 3D Image Viewing (Continued) Supplied Accessories for the 3D Glasses Make sure the following accessories are provided with the 3D Glasses. Two sets of 3D Glasses are provided. 3D Glasses (×2) Pages 65, 66, Glasses case (×2) * Use the 3D Glasses band and nose pad as needed. Note •... -
Page 67: Before Using The 3D Glasses
Before Using the 3D Glasses Before using the 3D Glasses for the fi rst time, remove the insulating sheet attached to them. Replacing the Button Cell Battery The battery has an expected service life of approximately 75 hours. • When the battery power is low, the LED light blinks six times after the power is turned on. -
Page 68: Attaching The Nose Pad
Enjoying 3D Image Viewing (Continued) Attaching the Nose Pad Attach either of the supplied nose pads as needed (such as when the glasses do not fi t properly). The glasses come with a large and small nose pad. Attaching the nose pad the nose pad Attaching the 3D Glasses Band... -
Page 69: Connecting The Ir Emitter To The Projector
Connecting the IR Emitter to the Projector Install the IR emitter unit to the stand. Insert the IR emitter cable to the unit. Connect the IR emitter and the projector. Position the IR emitter. • 3D images are intended to be viewed while facing the screen from the front. -
Page 70: Viewing 3D Images
Enjoying 3D Image Viewing (Continued) 3D MENU button Note • The screen may temporarily become black when the projector is trying to detect a 3D image signal and when switching from 3D to 2D mode. Viewing 3D Images Receiving a 3D Image Signal That Can Be Detected Automatically The image signal may contain a 3D identifi... - Page 71 Receiving a 3D Image Signal That Cannot Be Detected Automatically Press 3D MENU. • The 3D MENU screen is displayed. Press P/R to select “3D”. Press O/Q to select “On” or “Off”. • To view in 3D mode: Select “On”, and then go to step 4.
-
Page 72: Settings ("3D Menu")
Enjoying 3D Image Viewing (Continued) 3D Settings (“3D MENU”) 3D MENU 3D Format 3D Depth Adjust 3D Auto Change Viewing Time Info Invert You can switch between 2D and 3D mode. Selectable Description items Projects 3D images. Projects 2D images instead of 3D images. Note •... -
Page 73: Setting The 3D Format Menu
Setting the 3D Format Menu Select the appropriate 3D format for viewing while referring to the table below. Input signal 720P Frame 720P Packing 1080I with 3D identifi cation 1080I signal 1080P 1080P 1080P 720P 720P 1080I with 3D identifi cation 1080I signal 1080P... - Page 74 Enjoying 3D Image Viewing (Continued) Note • These 3D Glasses can only be used with Sharp 3D-compatible LCD TVs or projectors that use infrared control technology. 3D Glasses lenses • Do not apply pressure to the lenses of the 3D Glasses. Also, do not drop or bend the 3D Glasses.
-
Page 75: Specifi Cations - 3D Glasses
Specifi cations – 3D Glasses Model AN-3DG10 Lens type Liquid crystal shutter Power supply 3 V DC Battery Lithium button battery (CR2032 × 1) Battery life Approx. 75 hours of continuous use Dimension (W x H x D) (172.7 × 47.5 × 170.0 mm) Weight 0.2 lbs./65.0 g (including the lithium button battery) 50°F to 104°F (10°C to 40°C) -
Page 76: Specifi Cations - Ir Emitter
Enjoying 3D Image Viewing (Continued) Specifi cations – IR Emitter Dimension [W × H × D] Weight (approx.) Dimensions Effective Distance The 3D Glasses can receive infrared signals sent from the IR emitter within the range indicated in the diagram. Operating range (Distance from the IR emitter): Approx. -
Page 77: Maintenance
Maintenance Cleaning the projector ■ Ensure that you have unplugged the power cord before cleaning the projector. ■ The cabinet as well as the operation panel is made of plastic. Avoid using benzene or thinner, as these can damage the fi nish on the cabinet. -
Page 78: Maintenance Indicators
Maintenance Indicators ■ The warning lights (power indicator, lamp indicator and temperature warning indicator) on the projector indicate problems inside the projector. ■ If a problem occurs, either the temperature warning indicator or the lamp indicator will illuminate red, and the projector will enter Standby mode. After the projector has entered Standby mode, follow the procedures given below. - Page 79 • Relocate the projector to an area with proper ventilation. (See page 8.) • Take the projector to your nearest Sharp Authorized Projector Dealer or Service Center (see page 86) for repair. • Disconnect the power cord from the AC outlet, and then connect it again.
-
Page 80: Regarding The Lamp
* If you wish, you may have the lamp replaced at your nearest Sharp Authorized Projector Dealer or Service Center. * If the new lamp does not light after replacement, take your projector to the nearest Sharp Authorized Projector Dealer or Service Center for repair. -
Page 81: Removing And Installing The Lamp Unit
Removing and Installing the Lamp Unit Warning! • Do not remove the lamp unit from the projector right after use. The lamp and parts around the lamp will be very hot and may cause burns or injury. Info • Do not touch the glass surface of the lamp unit or the inside of the projector. -
Page 82: Resetting The Lamp Timer
Regarding the Lamp (Continued) Remove the lamp unit. • Loosen the securing screws from the lamp unit. Hold the lamp unit by the handle and pull it in the direction of the arrow. At this time, keep the lamp unit horizontal and do not tilt it. -
Page 83: Compatibility Chart
Compatibility Chart Computer Multiple signal support Horizontal Frequency: 15–110 kHz, Vertical Frequency: 43–85 Hz, Pixel Clock: 12–170 MHz Compatible with sync on green and composite sync signals (TTL level) PC/MAC Mode Resolution 640 × 400 720 × 400 640 × 480 SVGA 800 ×... - Page 84 Compatibility Chart (Continued) Horizontal Vertical Signal Frequency (kHz) Frequency (Hz) 15.7 480P 31.5 540P 33.8 15.6 576P 31.3 720P 37.5 720P 45.0 Horizontal Format Signal Frequency (kHz) 720P 75.0 Frame 720P 90.0 Packing 1080P 54.0 720P 37.5 720P 45.0 28.1 1080 Side By Side...
-
Page 85: Adjusting The Projector Function Troubleshooting
Troubleshooting Problem Projector power cord is not plugged into the wall outlet. Power to the external connected devices is off. The selected input mode is wrong. Cables are incorrectly connected to the projector. Remote control battery has run out. External output has not been set when connecting notebook com- puter. - Page 86 Sharp Video Products. One Touch Play function is enabled when the projector is con- nected to the Sharp Video Products with an HDMI cable. One Touch Play function of the projector is not set to “On”. CEC settings of connected Sharp Video Products or other CEC devices are incorrect.
- Page 87 Problem 3D images are not Switch to 3D mode. displayed. Is “3D Auto Change” set to “No”? Press 3D ON/OFF to switch to 3D mode. If “3D Auto Change” is set to “Yes” but no 3D images are dis- played, check the display format of the content being viewed. Some 3D image signals may not be recognized as 3D images auto- matically.
-
Page 88: For Sharp Assistance
For SHARP Assistance If you encounter any problems during setup or operation of this projector, fi rst refer to the “Troubleshooting” section on pages manual does not answer your question, please contact the SHARP Service departments listed below. U.S.A. Sharp Electronics Corporation 1-888-GO-SHARP (1-888-467-4277) lcdsupport@sharpsec.com... -
Page 89: Specifi Cations
Dimensions (main body only) [W × H × D] Weight (approx.) As a part of policy of continuous improvement, SHARP reserves the right to make design and specifi cation changes for product improvement without prior notice. The performance specifi cation fi... -
Page 90: Dimensions
Dimensions Units: inches (mm) (405) (202.5) ø68 (54) (41.25) (75) (95) (190) (304) -
Page 91: Index
Reset Network Setting ·····················································59 RESIZE button ··································································36 Restart Network ·······························································59 RETURN button ································································42 RS-232C terminal ·····························································26 SCR-ADJ ··········································································51 Screen Size and Projection Distance ·······························21 Sharp ················································································45 SIG-ADJ ···········································································49 Signal Info ·········································································50 Signal Type ·······································································50 SMART ZOOM ·································································36 SPHERE ···········································································34 STANDBY button ······························································28 STANDBY/ON button ·······················································28...