Table of Contents
Advertisement
Quick Links
Advertisement
Table of Contents

Related Manuals for HP f799w


Summary of Contents for HP f799w
- Page 1 Car Camcorder User Manual...
-
Page 2: Table Of Contents
目录 Regulatory Notices .................. 3 Prohibition of Co-location ................ 3 WEEE Notice ..................... 3 CE Regulatory Notice ................3 Notes on Installation ................4 Caution ....................4 1 Introduction ..................7 1.1 Features ..................... 7 1.2 Package Contents ................7 1.3 Product Overview ................ - Page 3 3.5 Parking Mode .................. 19 4 Setting Go Moto Plus App ..............21 4.1 Download app ................. 21 4.2 Wi-Fi connection ................22 4.3 Use Go Moto Plus app ..............23 4.3.1 Main Screen .................. 24 4.3.2 Playback, delete, download ............26 4.3.3 Camera Setting ................
-
Page 4: Regulatory Notices
About this Guide The content in this document is for information purpose and is subject to change without prior notice. We made every effort to ensure that this User Guide is accurate and complete. However, no liability is assumed for any errors and omissions that may have occurred. -
Page 5: Notes On Installation
Disposal of a battery into fire or a hot oven, or mechanically crushing or cutting of a battery, that can result in an explosion. Leaving a battery in an extremely high temperature surrounding environment that can result in an explosion or the leakage of flammable liquid or gas. - Page 6 GPS reception performance on each camcorder may differ. The camcorder cannot determine the accuracy of the positioning results from different hardware. The values displayed in this system, such as speed, position, and the distance warning to the speed camera set points, may be inaccurate due to the influence of surrounding environment.
- Page 7 Explosion Area or in a zone with a “Switch Off 2-way Radios” sign by switching off camcorders that may interfere with the radio frequency. HP Inc. is NOT responsible for the loss of any data/content during operation.
-
Page 8: Introduction
1 Introduction Thank you for purchasing this advanced camcorder. This camcorder is specifically designed for real time video and audio recording when driving. 1.1 Features • Super HD 2304*1296 • F/2.4 Big Aperture • 9.35” Touch Screen • Built-in Wi-Fi •... -
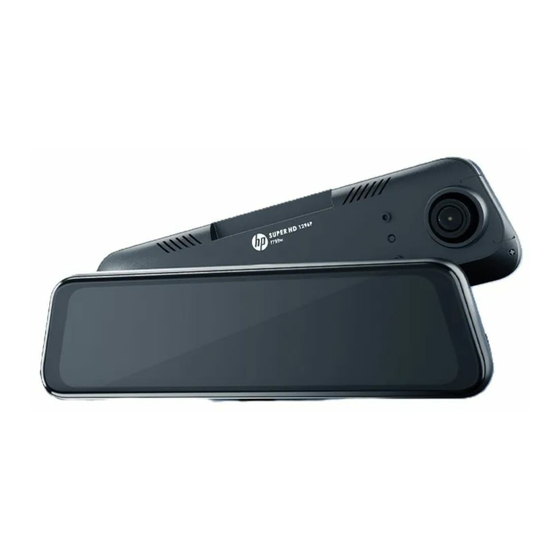
Page 9: Product Overview
1.3 Product Overview... - Page 10 Item Short press: manually power on, LCD on/off Press and hold 3 seconds: manually power off, reset LCD Screen GPS port for external GPS (option) USB port for car power adapter MicroSD memory card slot A/V port for rear camera (option) Lens Speaker 9,10...
-
Page 11: Getting Start
2 Getting Start 2.1 Insert the Memory Card Insert the memory card with the gold contacts facing the back of the camcorder. Push the memory card until it clicks into place. (Use class V30 or greater speed microSD cards for this camcorder; It is recommended to format the microSD cards before the initial use.) To remove the memory card Push the edge of the memory card inward until you hear/feel it click, then... -
Page 12: Install In Vehicles
2.2 Install in Vehicles Clip on to your original car mirror. Circle the clip with the band. Adjust the camcorder lens. Note: Image shown here is for installation illustration. The outlook may differ from what you purchased. -
Page 13: Connecting To Power
2.3 Connecting to Power Use only the supplied car adapter to power up the camcorder. 1. Connect one end of the car adapter to the USB connector of the camcorder. USB port input: DC 5V / 2A. 2. Plug the other end of the car adapter to the cigarette lighter socket of your vehicle. -
Page 14: Powering The Camcorder On / Off And Reset
2.4 Powering the Camcorder On / Off and Reset 2.4.1 Auto Power On/Off Once the vehicle engine is started, wait a few seconds to charge the camcorder, and then the screen will light up and camcorder automatically powers on, and start recording. Once the vehicle engine shuts down, the camcorder automatically saves the recording and turns off the power. -
Page 15: Initial Settings
2.5 Initial Settings 2.5.1 Set the Date and Time We recommend you to set up date and time before initial use. To set the correct date and time, do the following: In the recording screen, tap icon to stop recording. Tap icon to enter Menu. -
Page 16: Using The Camcorder
3 Using the Camcorder 3.1 Recording Videos 3.1.1 Auto Recording When the vehicle engine starts up, wait a few seconds to charge the camcorder, then it will automatically turn on and start recording. Recording will automatically stop when the engine is switched off. Note: 1. - Page 17 icon Item Description Recording Indicates the video current duration. Duration Indicates the current recording date Date / Time and time. Menu Menu set up. Playback File playback. Start/Stop Start/stop video recording. Record Photo Take snapshot Voice Turn on/off voice recording. Record During video recording, touch this icon Emergency...
-
Page 18: Emergency Recording
3.1.3 Emergency Recording This Car Camcorder is equipped with a G-Force sensor. If the G-sensor function is enabled, when collision is detected, the camcorder will automatically trigger the Emergency Recording feature. The yellow dot on left top screen corner will blink. The emergency recording files will not be overwritten by the normal loop recording files. -
Page 19: Gps (Option)
3.2 GPS (Option) Plug the optional GPS accessory into GPS port on the camcorder, you can preview current car speed and direction such information. Note: 1. GPS function is limited in certain areas. Please contact dealer for details. 2. When GPS is positioned, the icon will change from white to blue 3.3 Rear Camera (Option) Plug the phone jack of rear cam into A/V hole on the camcorder, and hide and install the cable well. -
Page 20: File Playback
3.4 File Playback In the recording screen, tap icon to stop recording. Tap icon to enter Playback. Slide the screen up and down to choose desired file to playback. Tap icon to switch front or rear camera recorded files. Note: Deleted files CANNOT be recovered. - Page 21 camcorder will stop Parking Mode and return to normal loop recording. When collision is detected during parking mode, the camcorder will automatically trigger the emergency recording. The emergency recording will not be overwritten by the normal loop recording files. Note: 1.
-
Page 22: Setting Go Moto Plus App
4 Setting Go Moto Plus App 4.1 Download app The camcorder allows you to connect to the smart phone via the app. When using for the first time, install the [Go Moto Plus] app for your smart phone. Scan below QR code or download Go Moto Plus app from Google Play or App Store. -
Page 23: Wi-Fi Connection
4.2 Wi-Fi connection In the recording screen, tap icon to stop recoding, and tap icon to enter menu. Scroll the screen and find and tap Wi-Fi. Turn it on. Tap icon to return to preview screen. Using the Wi-Fi function of your smart phone, search for the camcorder ID “hp_f799w_xxxxxx”... -
Page 24: Use Go Moto Plus App
4.3 Use Go Moto Plus app Tap [Go Moto Plus] icon to activate the application. The main screen will pop up. Follow the below instruction to operate this application. -
Page 25: Main Screen
4.3.1 Main Screen icon Description Go Moto Plus logo / SD card message... - Page 26 Preview screen Switch front and rear camera preview image Full screen display Start/Stop recording Camera File (check the files in microSD) Camera Setting To remind the emergency files in the microSD card is about to be full and going to over write the oldest files. Backup the files and clear up the emergency folder, and this message will be gone.
-
Page 27: Playback, Delete, Download
4.3.2 Playback, delete, download You can use this feature to playback or delete the file saved in camcorder, or to download the file from camcorder to your mobile device. Tap the icon [Camera File], the camcorder will stop recording. The files saved in the camcorder will be displayed on your smart phone. - Page 28 Tap the right top corner “Select” and pick up the files that you want to delete or download, and tap the icon in the screen bottom to execute. icon Description Download the file to “Local Album”. The downloaded file can be playback without connecting with the camcorder.
-
Page 29: Camera Setting
Delete the file in microSD card. Downloaded file will show “Downloaded” in thumbnail image. Note: 1. If you find the video playback without audio, please check if you turn on Voice Record on the Setting. If you do turn it on, it means the smart phone itself doesn’t support the video decoding. It’s not the problem of the file. -
Page 30: Album
4.4 Album You can use this feature to playback or delete the file that you download in your smart phone. The files in the Album can be reviewed without connecting with camcorder. Tap icon [Album]. (It will stop recording if the camcorder is connected.) - Page 31 Pick up the file that you want to playback, delete or edit. Icon Description Edit video or snapshot. Share the file to social media. Video Screenshot. The file will be saved in “Album”.
- Page 32 Save the file to smart phone’s album. When the file saving is done, screen message will show “Save to smartphone’s album successfully”, and the smart phone’s album will create a new folder named “Go Moto Plus”. Delete the file in the App’s Album. The file in the camcorder still exists.
-
Page 33: Adjust The Settings
5 Adjust the Settings In the recording screen, tap icon to stop recording. Tap icon enter Menu setting. Followings is available menu options. Menu Description Available option Resolution Setting of video resolution 1296P / 1080P Wi-Fi Turn on/off Wi-Fi On/ Off Set the recording duration for 1 min/ 2 min/ Record Interval... - Page 34 Menu Description Available option (note) To activate GPS function. On/ Off To activate GPS speech function. On/ Off (note) Broadcast Volume Adjust sound volume. 1 ~ 10 Reset the camcorder to the initial Default Yes / No factory default settings. Format Format memory card.
-
Page 35: Ota Firmware Upgrade
6 OTA Firmware Upgrade Connect Wi-Fi of the camcorder and smart phone, open the app. If there is a new firmware published, the screen will show notification as below. - Page 36 Follow the app instruction, note1 1. Tap “Upgrade Now” to download the new firmware to smart note2 phone . (Figure1) 2. When download is completed, screen will show “Upgrade file has been downloaded”. Make sure smart phone Wi-Fi is connected with camcorder, then, tap the “Upgrade Now”...
- Page 37 camcorder will then re-boot and automatically upgrade the firmware. After firmware is upgraded, the camcorder will power off. 4. Manually power on the camcorder, and it will work in the latest firmware.
- Page 38 NOTE: 1. If tap “Remind me later”, the app notification will pop up every time when the camcorder is connected. 2.When the smart phone’s Wi-Fi is occupied by the camcorder, iOS system will auto switch to cellular data, and the network is still useable; but, Android system won’t. Please attention the following notices to upgrade new firmware.
-
Page 39: Specifications
7 Specifications Item Description Image Sensor 3MP CMOS sensor Effective Pixels 2304 (H) x 1296 (V) Supports microSD V30 speed or greater, and capacity Storage Media 16GB and higher. LCD Display 9.35” touch screen Lens Wide Angle Fixed Focus lens Focus Range 1.5m~Infinity Front camera:... - Page 40 Item Description Storage -20° ~ 70° C Temperature Android 9.0 or higher Support iOS 13 or higher Operation System Harmony 2 or higher Dimensions 259.7 x 97.5 x 36 mm Weight Approx. 332g (not include memory card) Built-in IEEE 802.11g/n(HT20) Wi-Fi Chipset: RTL8189FTV Wi-Fi bandwidth 2412~2462MHz Wi-Fi Frequency Ch1~Ch11...