Table of Contents
Advertisement
Available languages
Available languages
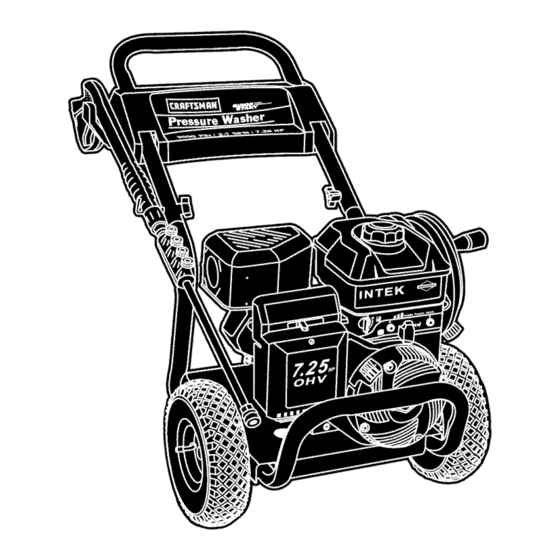
Owner's
Manuam
;H
7.25 HORSEPOWER
3000 PSI
2.7 GPM
Modem No. 580.753000
HOURS:
Mon.-
Fri. 8 a.m. to 5 p.m. (CT)
CAUTION:
Before
using
this product,
read this manual
and fotlow
ati Safety
Rules and Operating
[nstructionso
SEARS,
ROEBUCK
and
CO.,
Hoffman
Estates,
IL
60179
U.S.A.
visit our Craftsman
website:
www.sears.comlcraftsman
Safety
Assembmy
Operation
"
Maintenance
,
Parts
o EspaSol
Part No 194190 Draft 4 (05/04/2004)
9
8
Advertisement
Table of Contents

Related Manuals for Craftsman 580.753


Summary of Contents for Craftsman 580.753
- Page 1 Fri. 8 a.m. to 5 p.m. (CT) CAUTION: Before using read this manual and fotlow Rules and Operating [nstructionso SEARS, ROEBUCK visit our Craftsman website: Part No 194190 Draft 4 (05/04/2004) this product, ati Safety CO., Hoffman Estates, www.sears.comlcraftsman Safety...
-
Page 2: Warranty
SPECiFICATiONS LIMITED WARRANTY For one year from the date of purchase, when this Craftsman pressure washer is maintained and operated according to the instructions in the owner's manual, Sears will repair, free of charge, any defect in material and workmanship. - Page 3 _0 reduce P0ssibi!_ 0f fa!lS due t0 SliPpery surfaces. , Be extremely carefu! !fyou must use pressure washer from a iadderi SCaffolding Or any Other relatively unstable location , Firmly grasp spray gun with both hands when using high pressure Spray to avoid injury if gun kicks back.
- Page 4 WARNING WARNING vicinity of equipment in use. CAUTION .. DO NOT Operate pressure washer above rated pressure: CAUTION ' DO NOT secure sprayg un in open position NOT ]eave spray gun unattended while machine is running • , NEVER use a spray gun which does not have a trigger !ock 0r trigger guard in p!ace and in working order.
- Page 5 KNOW YOUR PRESSURE Read the owner's manual and safety rules before operating your pressure washer. Compare the illustrations with your pressure washer to familiarize yourself with the locations of various controls and adjustments. Save this manual for future reference. Accessory Tray...
- Page 6 1-800-222-3136. ASSEMBLING WASHER Your Craftsman high pressure washer was mostly assembled at the factory. However, you will need to perform these tasks before you can operate your pressure washer: Fill out and send in registration card.
- Page 7 ** If using SAE 30 oil in temperatures below 40_F (4_C), it will result in hard starting and possible engine bore damage due to inadequate lubrication. Place pressure washer on a level surface. Clean area around oil fill. Remove oil fill cap.
-
Page 8: Checklist Before Starting Engine
Tighten by hand. Before connecting garden hose to water inlet, inspect inlet screen. Clean screen if it contains debris or have it replaced if damaged. DO NOT run pressure washer if inlet screen is damaged, _;':_:i :_:./_ Fuel Run water through garden hose for 30 seconds to flush it of debris. - Page 9 This starting information also applies whenever you start the engine after you have let the pressure washer sit idle for at least a day. Place pressure washer near an outside water source capable of supplying water at a flow rate greater than 3.7 gallons per minute and no less than...
- Page 10 Stop How to Your Pressure Move variable pressure control lever on engine to "Stop" position. Squeeze trigger on the spray gun to relieve pressure in the hose. NOTE: A small amount of water will squirt out when you release the pressure. Accessory Tray How to Use...
- Page 11 (prevents streaking). IMPORTANT: You must flush the chemical injection system after each use by placing the filter into a bucket of clean water, then run the pressure washer in low pressure for 1-2 minutes. Pressure Washer...
-
Page 12: Specifications
Ho_rs0r ..i_ _WWWWWW_,_ !f anit is _# _emain idle for GENERAL The pressure washer's warranty does not cover items that have been subjected to operator abuse or 3000 PSI negligence. To receive full value from the warranty, 2,7 GPM the operator must maintain pressure washer as... -
Page 13: Before Each Use
Purge Pump of Air and Contaminants To remove air from the pump, follow these steps: Set up pressure washer as described in "Assembling Your Pressure Washer" section and connect water supply. Pull trigger on gun and hold until a steady stream of water appears. -
Page 14: Pump Maintenance
71-75116, at your local Sears or by calling 1-800-366-PART or online at www.sears.com. included with the pressure washer. This kit includes replacement o-rings, rubber washer and water inlet filter. Refer to the instruction sheet provided in the kit to service your unit's o-rings. - Page 15 Service Spark Plug Service the spark plug every 100 hours of operation or yearly, whichever occurs first. WARNING Clean area around spark plug. Remove and inspect spark plug. Replace spark plug if electrodes are worn, or if insulator is cracked or chipped. For replacement use either the standard resistor spark plug, Champion RC12YC or the long life platinum spark plug, Champion RC12PYP.
-
Page 16: After Each Use
AFTER EACH USE Water should not remain in the unit for long periods of time. Sediments or minerals can deposit on pump parts and "freeze" pump action. Follow these procedures after every use: Flush detergent siphoning tube by placing the filter into a pail of clean water while running pressure washer in low pressure mode. -
Page 17: Long Term Storage
LONG TERM STORAGE If you do not plan to use the pressure washer for more than 30 days, you must prepare the engine and pump for long term storage. It is important to prevent gum deposits from forming in essential fuel system parts such as the carburetor, fuel filter, fuel hose or tank during storage. - Page 19 Problem Pump has following problems: ... fa ure tO produce pressure erratic pressurei chatteringi !0ss Of pressurei!o water v0!umei Detergent fails to mix with sprayi Eh in r n e u sg0oeat 0_0aoeut ,bogs, when load is added: Engine will net start; or Starts and ron ough "...
- Page 20 CRAFTSMAN 3000 PSI Pressure Main Unit -- Exploded View and Parts List Item Part # Description M190156GS BASE M187602GS HANDLE 187606GS BILLBOARD 192648GS ASSY, Complete Hose Reel Kit 194004GS KIT, Inlet, Hose, Grdn, Srv 192134GS KIT, Engine Mounting Hardware 95457GS...
- Page 21 CRAFTSMAN 3000 PSI Pressure Pump -- Exploded View and Parts List Item Part # Description 194434GS O-RING 190639GS SPACER 190640GS WASHER 190646GS PISTON, Guide 191441GS VENT CAP, with O-Ring 194435GS O-RING 190654GS PUMP HEAD 190655GS GRUB SCREW & WASHER 190656GS...
- Page 22 ENGINE, 7.25 HP, Briggs and Stratton, 120312 - Exploded View 1029 1034 3s® 230© 300_ 24 0 3,,_32_ 3_...
- Page 23 ENGINE, 7.25 HP, Briggs and Stratton, 163 % 633 @ 692 i CARBURETOR CARBURETOR 104 _ 163 % ENGINE 868 _ 120312 - Exploded 186_ 127 o 95 _ GASKET 276_ 633A@ 633 0 OVERHAUL 033A ® 1_ _ 633 @ GASKET 1022 163 %...
- Page 24 ENGINE, 7.25 HP, Briggs and Stratton, 209_ 209A 663 __ 564A 347_ 1070 190_ 78 "_ 120312 - Exploded 222_ 1305 1052 799#, 613 _ _ 1005 1095 VALVE View 836A 3oo_-_ 832_ 883_ 836_' GASKET...
- Page 25 ENGINE, 7.25 HP, Briggs and Stratton, Item Parts Description _99510 Cylinder Assembly 399269 Kit_BushinglSeai 2998!9 Seal-Oi! (Magneto 699486 Head-Cy!inder 6982 ! O Gasket-Cy!inder 41692600 Tube-Breather 699485 Gasket-Crankcase 699482 Screw (Cylinder Head)334 691686 Ptug-Oil Drain _91682 P!ug-Oil Drain 699445 Crankshaft 699596 Cover-Crankcase 692550 Sea!*Oil (PTO Side)364...
- Page 26 Sears, Roebuck and Co., U.S.A. (Sears), the United Emission (Owner's EMISSION CONTROL WARRANTY COVERAGE _S APPLICABLE TO CERTiFiED ENGINES PURCHASED CALIFORNIA IN 1995 AND THEREAFTER USED _N CALIFORNIA, AND TO CERTIFIED MODEL YEAR 1997 AND LATER ENGINES WHICH ARE PURCHASED AND USED ELSEWHERE STATES (AND AFTER JANUARY 1, 2001 IN CANADA).
- Page 28 PRECAUCI6N), Superficies Resbalosas indica un riesgo Fuego Partesen Movimiento DE DAISES REPUESTOS . PAGINA POSTERIOR DE PRESION CRAFTSMAN Estates, IL 60179 de Peligro y Significados Gases Toxicos Descarga Electrica Caer Inyecci6nLiquida Explosion Superficie Caliente...
- Page 29 En el estado de California es obligatorio, segon la ley, el use 3e apagachispas (Secci6n 4442 del C6digo de Recursos Poblicos de California). Otros estados pueden tenet leyes similares. Las leyes federales se aplican en tierras Federales. Si equipa el silenciador con un apagachispas, _=stedeber_ set mantenido en buenas condiciones de _rabajo.
- Page 30 ADVERTENCIA e cuande est_ berca de deride se esf_ usando et equip 0 PRECAUCION PRECAUCION asegu_e fa pisloia de rociada en la posici6n (open = ab!erto}. NO abandone Ja p!st0!a de ro¢!ad0 bUabdO !a m,cquina est_ eb funcienarniebto , NUNCA uiilice u_a pistola de rociado qua no tenga un seguro Para gafJ[100 pi-0tec¢iOn para gatit!0 en su !ugar y en buenas , Siempre aseg_rese de que la pistola de _ObiadO, boquittas y accesoriOS...
- Page 31 CONOZCA SU MAQUINA Lea el manual del propietario y las reglas de seguridad antes de porter en marcha su m_quina lavadora a presibn. Compare las ilustraciones con su m_quina lavadora a presi6n para familiarizarse controles y ajustes. Guarde este manual para referencias futuras. Bandeja Acceseria Filtro y Tube para RecolecciSrr de Detergente'...
- Page 32 1-800-222-3136. MONTAJE LAVADORA A PRESION La gran mayoria de su m_quina lavadora a presi6n Craftsman ha sido ensamblada en la f_brica. Sin embargo, usted deberA Ilevar a cabo los siguientes procedimientos antes de porter en funcionamiento presi6n: resultar_ Llene y mande en tarjeta de matricula.
- Page 33 NOTA: Tal vez serA neceserio mover los soportes del manubrio de un ledo e otre para elineer el manubrio de tel manera que puede deslizarse sobre los soportes del mismo manubrio. mserte el perno del soporte e trev6s del orificie que se encuentre al lade izquierde del menubrio (viste desde le parte posterior de le unided) y fije le perille de plAstice.
-
Page 34: Arranque Del Motor
Limpie el Area alrededor de la tapa de Ilenado del combustible, retire la tapa. Agregue lentamente gasolina regular "SIN PLOMO" al tanque de combustible. Use un embudo para evitar que se derrame. Lleee el tanque lentamente hasta aproximadamente 1.5" por debajo de la parte la cima del cuello del tubo de Ilenado. - Page 35 COMO USAR SU MAQUINA LAVADORA A PRESION Si tiene problemas operando su m_quina lavadora a presi6n, per favor Ilame a la linea de ayuda para m_quinas lavadoras a presidn al 1-800-222-3136. Cbmo Darte Arranque a su M_quina Lavadora a Presibn Para darle arranque a su mbquina lavadora a presidn movida a motor por primera vez, siga estas instrucciones paso a paso.
- Page 36 17. Si el motor no arrenca despu_s de 6 tirones, mueva la palanca del ahogador ala posici6n "En marcha" ("Run"). PRECAUCION Cuando arranque et motor; life lentamente serif L_naresistencia Yi a co_i_Lia¢i6n, pare evita_ su retrocesQ. _ Si el motor arranca y de]a de funuiona_ o si la resisten_ia aumenla al tirar del cable en inten_s apdete e! gati!lo de ta pistola roci_dora Cbmo...
- Page 37 Cbmo Usar ta Boquilla a Chorro La boquilla a chorre hace girar la corriente de alta presi6n en un patr6n circular r_pido. Siempre comience a usar la boquilla a cherre a cierta distancia y vaya acerc_ndose a la superficie gradualmente basra que ebtenga la fuerza de limpieza que desee.
- Page 38 Despu_s de haber apticado et detergente, refriegue la superficie y enjuagela de la siguiente manera: Coloque el cerrojo de seguridad a la pistola de rociado. Retire la boquilla negra para quimicos de la extensi6n para bequillas. Seleccione e instale la boquilla de alta presi6n que desee siguiendo las instruccienes de °C6mo Usar las Puntas de Rocie"...
- Page 39 RESPONSABILIDADES Siga el programa de mentenimiento Se requiere de servicio con mayor frecuencia cuando opere la unidad en les condiciones adversas descritas a continuaci6n. CAEENDARIO DE MANTENIMIENTO ANOTE LA$ EECHA$ CONFORME CUMPLA CON EL SERVICi0 NORMAE Revise ia manguera de altapresi6n Revise !a manguera deldete_jente Carnb_ar et aceite del motor...
-
Page 40: Antes De Cada Uso
ANTES DE CADA USO Revise el nivel de aceite del motor. Revise si existen da_os en el colador de la entrada de agua. Revise si existen fugas en la manguera de alta presi6n. Revise si existen da_es en los flltres de quimicos. Revise si existen fugas en el conjunto de la vara y pistela. -
Page 41: Mantenimiento De La Bomba
Use el alambre Usando una manguera de jardin, remueva cualquier deseche adicienal, peniende agua en la extensi6n de la boquilla. Haga _ste de 30 a 60 segundos. lnstale de nuevo la puntas de rocio yen el flltro en-linea en la extensi6n. Conecte de nueve la extensi6n de la boquilla a la pistola rociadora. - Page 42 Para dar servicio al filtro de awe, siga los pasos que se detallan a continuacibn: Afloje el tornil]o y quite ]a cubierta. LaS Etiquetas y tas Ranuras El Cartuch0 El Torni]lo Remueva cuidadosamente elcartucho. Para limpiar el cartucho, golpee ligeramente su cestado de papel plegade sebre una superificie firme.
-
Page 43: Despues De Cada Uso
DESPUES DE CADA USO No deberA haber agua en la unidad por largos periodos de tiempo. Los sedimentos de minerales se pueden depositar en partes de la bombay "congelar" su funcionamiento. Lleve a cabo estos procedimientos Lave el tubo de succi6n de detergente colocando el filtro en un balde de agua limpia al mismo tiempo que hace funcionar la mAquina lavadora a presi6n en el modo de baja presi6n. - Page 44 ALMACENAMIENTO PROLONGADO Si usted no planea usar la mAquina lavadora a presi6n per mAs de 30 dias, deberA preparar el motor para un almacenamiento prolongado. Es importante evitar la formaci6n de dep6sitos de goma en las partes esenciales del sistema del combustible tales como carburador, filtro del combustible, del combustible durante el almacenamiento.
- Page 45 Problema Cause La bomba presenta los siguientes prob!emas: no producepresi6noproduce traquete0i p_/dida de presi_n; bajo voiumen de El detergente no se mezcta ... con ei rociadOi El motor funci0na bien La velociclad clei motor es demasiado lenta pero funci0na ,imal_i Cuand01 se ¢onecta una carga;...
- Page 46 Sears, Roebuck and Co., U.S.A. (Sears), California Air Resources Board (Consejo de Recursos sobre et Airs de California, CARB, por sus siglas en ingles) y United States Environmental Ambientat de EE.UU., Declaracibn (derechos y obligaciones LA COBERTURA DE LA GARANTIA DE CONTROL APLICA A LOS MOTORES...
- Page 48 For repair - in your home - of all major brand appliances, lawn and garden equipment, or heating and cooling systems, no matter who made it, no matter who sold itt For the replacement parts, accessories and owner's manuals that you need to do-it-yourself. For Sears professional installation of home appliances and items like garage door openers and water heaters.