Table of Contents
Advertisement
Advertisement
Table of Contents

Related Manuals for Electrolux EOC68000X


Summary of Contents for Electrolux EOC68000X
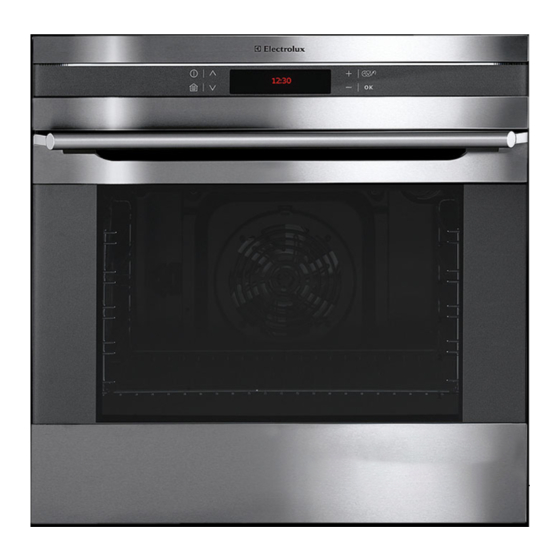
- Page 1 user manual Built-In Electric Oven EOC68000...
- Page 2 We were thinking of you when we made this product...
- Page 3 Thank you for choosing a first class product from Electrolux, which hopefully will provide you with lots of pleasure in the future. The Electrolux ambition is to offer a wide variety of quality products that make your life more comfortable.
-
Page 4: Table Of Contents
4 electrolux contents Contents Safety instructions Description of the Appliance Before using for the first time Operating the Oven Cleaning and care What to do if … Electrical Connection Installation Instructions Disposal Guarantee/Customer Service Index The following symbols are used in this user manual: Important information concerning your personal safety and information on how to avoid damaging the appliance. -
Page 5: Safety Instructions
Child Safety • Never leave children unsupervised when the appliance is in use. safety instructions electrolux 5 Safety whilst Using • This appliance is intended to be used for cooking, roasting and bak- ing food in the home. - Page 6 6 electrolux safety instructions How to avoid damage to the appliance • Do not line the oven with aluminium foil and do not place baking trays, pots, etc. on the oven floor, as the heat that builds up will damage the oven enamel.
-
Page 7: Description Of The Appliance
In order to switch off the light bar, oven switch on with off again. description of the appliance electrolux 7 Oven displays and switch Light bars. Oven door... -
Page 8: The Electronic Oven Controls
8 electrolux description of the appliance The electronic oven controls Indicators Menu option symbol (with oven shelf level) Symbols Various symbols will now be shown in the display depending on the selected function. Symbol Short timer Time Duration End Time... - Page 9 To set values (e.g. temperature, time, weight, degree of cook- ing). description of the appliance electrolux 9 When you are using the controls make sure that you only touch one sensor field. If your finger is applied too flat, a neighbouring sensor field could be touched as well.
-
Page 10: Oven Features
10 electrolux description of the appliance Oven Features Smell Filter Shelf positions Inside of door On the inside of the oven door you will find the numbers of the different oven shelves. You will also find some brief information about the oven's functions, recom- mended shelves and temperatures for cooking the most popular dishes. -
Page 11: Oven Accessories
11 Oven Accessories Shelf For dishes, cake tins, items for roasting and grilling. Grill set Grill Insert for the roasting pan for roasting and grilling. Roasting Pan For baking and roasting or as a pan for collecting fat. -
Page 12: Before Using For The First Time
12 electrolux before using for the first time Before using for the first time If you would like to change one of these base settings at a later date, please refer to the chapter Basic Settings. Setting the language 1. When the appliance has been con- nected to the electrical supply, the following is shown in the display. -
Page 13: Setting The Clock
2. Remove all oven accessories, and clean them with warm water and a scouring agent. 3. Wash the oven in the same way, and wipe dry. 4. Wipe the front of the appliance with a damp cloth. before using for the first time electrolux 13... -
Page 14: Operating The Oven
14 electrolux operating the oven Operating the Oven The menus in overview Main menu Assisted Cooking Heating Functions Cleaning Menu My Programmes Sub-menu Pork/Veal Beef/Game/Lamb Poultry Fish Cake Pizza/Pie/Bread Casseroles/Gratins Convenience Specials Fan Cooking Conventional Cooking Pizza Setting Turbo Grill... - Page 15 15 Main menu Sub-menu Basic Settings Set Time of Day Time Indication Set+Go Heat+Hold Time Extension Display Contrast Display Brightness Set language Buzzer Volume Key Tones Alarm/Error Tones Smell Filter Service Factory Settings...
- Page 16 16 electrolux operating the oven Operation of the menus Example 1. Switch the appliance on with You will find yourself in the main menu. 2. With select the desired main menu. 3. Use to move to the appropriated sub-menus. The sub-menu selected is displayed.
- Page 17 17 Heat indicator Heating up indicator When an oven function has been switched on the bar that keeps getting longer indicates how far the oven has heated up. Fast heating indicator With some oven functions the heating up time is shortened by the automatic function Fast heating.
-
Page 18: Roasting Pan
18 electrolux operating the oven Inserting the Oven Shelf and the Roasting Pan Shelf runner safety and anti-tip de- vice As a shelf runner safety device all insertable components have a small curved indentation at the bottom on the right and left-hand edge. - Page 19 19 Inserting the oven shelf: Insert the oven shelf so that the feet point downwards. Push the oven shelf between the guide bars of the selected oven level. The high rim around the oven shelf is an additional device to prevent cookware from slipping.
-
Page 20: Grill Set
20 electrolux operating the oven Grill set The grill set consists of grill and roasting pan. The grill can used on both sides. Warning: There is a risk of burning when removing the rosting pan from the hot oven! Inserting the grill tray underneath: The grill tray rests in the roasting pan. -
Page 21: The Menu Assisted Cooking
Whole chicken Whole turkey Whole duck Whole goose Turkey breast Whole fish Fish fillet Stockfish Fish in salt crust operating the oven electrolux 21 Dish Knuckle of veal Ossobuco Stuffed breast of veal Meatloaf Roast hare Rabbit in mustard Wild boar... - Page 22 22 electrolux operating the oven Category Cake Pizza/Pie/Bread Casseroles/Gratins Convenience Specials You will find practical information on the various automatic systems, Lemon cake Swedish cake Sponge base Cheesecake Fruit cake Streusel cake Butterzopf Yeast cake Tray pizza Onion tart Quiche Lorraine Goat’s cheese tart...
- Page 23 If the suggested weight is not changed within approx. 5 seconds, the programme starts automatical- The weight can be altered at any time. With all poultry programmes turn the food after 30 minutes. A reminder is displayed. operating the oven electrolux 23...
- Page 24 24 electrolux operating the oven Assisted Cooking with Meatprobe Automatic The oven switches itself off automatical- ly when the pre-set core temperature set is reached. Important: Only the Meatprobe sup- plied may be used. If replacing, please use only original replace- ment parts.
- Page 25 2. Confirm each one with 3. Using select Manual. 4. Confirm with You are now in the corresponding oven function and can carry out the setting you want (see section “Operating the oven functions”). operating the oven electrolux 25...
-
Page 26: The Oven Functions Menu
26 electrolux operating the oven The Oven Functions menu The oven functions in overview Using the oven functions you can set baking and roasting sessions to suit your requirements. Oven function Fan Cooking Conventional Cooking Pizza Setting Turbo Grill Economy Grill... - Page 27 • the symbol for the oven function is animated. • the oven light is switched on. • the corresponding heating element (e.g. fan) is switched on. Besides the temperature other functions can be set using (see section Additional functions). operating the oven electrolux 27...
-
Page 28: The Menu My Programmes
28 electrolux operating the oven The menu My Programmes My Programmes in overview Sub menu 1- My Program 2- My Program Edit Programme Name You can store 20 programmes. Operation of My Programmes Storing a programme 1. Select oven function or Assisted Cooking with the desired settings. - Page 29 4. Using the direction keys lect the stored programme. 5. Confirm with The stored programme with its settings starts. If no programmes have been stored, a message appears to say how pro- grammes are stored. select the select operating the oven electrolux 29...
- Page 30 30 electrolux operating the oven The cleaning menu Cleaning in overview Sub-menu Pyrolytic Cleaning Assistant Cleaning Reminder For instructions on how to operate and the Cleaning Assist- Pyrolytic antand switch the Cleaning Re- minder on/off, please refer to the section on cleaning and care.
-
Page 31: The Menu Basic Settings
Alarm tones sound if a step cannot be carried out. – Off Switch alarm tones on/off. – On Smell Filter on/off. – Off ECAIA207 Shows the software version and configuration. V03IA003 Reset all settings to factory settings (including My Programmes). operating the oven electrolux 31 Description... - Page 32 32 electrolux operating the oven Between 22:00 and 6:00 the display re- duces its brightness when the appliance is switched off to save energy. Operation of the Basic Settings Example 1. Using select the menu option Basic Settings. 2. Confirm with 3.
- Page 33 2. Press any key to switch off the sig- nal. While the selected oven function with is operating Set+Go, the Key Lock is active (see section Key Lock). Set+Go can be activated or deacti- vated in the Basic Settings menu. operating the oven electrolux 33...
- Page 34 34 electrolux operating the oven Heat+Hold The function Heat+Hold keeps your pre- pared dish warm for 30 minutes, after the baking or roasting has ended. This is helpful, for example, when your guests are late. Condition for Heat+Hold: • Fixed temperatur is above 80°C •...
- Page 35 The settings of the oven funtion are dis- played with the new cook time. The rest of the procedure is the same as a normal oven function. The Time Ex- tension can be set repeatedly. operating the oven electrolux 35 or let it...
- Page 36 36 electrolux operating the oven Smell Filter The catalytic effect of the filter removes odours as much as possible. The Smell Filter switches on automati- cally when a baking or roasting cycle (except Specials) is started. It switches off as soon as the baking or roasting cycle is finished.
-
Page 37: Additional Functions
2 minutes and a mes- sage is displayed. 3. Press any key to stop the signal (ex- cept The Minute Minder remains active if you change to another function or the appliance is switched off. operating the oven electrolux 37... - Page 38 38 electrolux operating the oven Duration or End Time Duration For setting how long the oven is to op- erate. End Time For setting when the oven is to switch it- self off again. 1. Select oven function. 2. Press key repeatedly until the ”Duration/End Time”...
- Page 39 7. The selected oven function is dis- played with the cooking time and switch-off time set for a few sec- onds.. A message is displayed when the pro- gramme starts. com- can be function, set function, set operating the oven electrolux 39...
- Page 40 40 electrolux operating the oven Key Lock The key lock protects all functions set from accidental changes. To switch on Key Lock 1. Select oven function. 2. Press key repeatedly until the ”Key Lock” window appears. 3. Confirm with The Key Lock is now activated.
- Page 41 30 - 120°C after 120 - 200°C after 200 - 250°C after 250 – max °C after Switching on again after safety shut-off Press the button. 12.5 hours 8.5 hours 5.5 hours 3 hours operating the oven electrolux 41...
- Page 42 42 electrolux operating the oven Meatprobe The oven switches itself off when the core temperature set by you is reached. Important!: Only the Meatprobe supplied may be used. If replacing, please use only original replace- ment parts. Setting Meatprobe core tempera- ture 1.
- Page 43 There is a risk of being burned when removing the plug and the tip of the meat probe. 1. Remove the Meatprobe´s plug from the socket and take the meat out of the oven. 2. Switch off the appliance. key. operating the oven electrolux 43...
-
Page 44: Cleaning And Care
44 electrolux cleaning and care Cleaning and care Warning: For cleaning, the appli- ance must be switched off and cooled down. Warning: For safety reasons, do not clean the appliance with steam jet or high-pressure cleaning equip- ment. Important: Do not use any abrasive cleaners, sharp scrapers or abra- sive items. - Page 45 – Light for a light degree of soiling (du- ration 2:15), – Normal for a normal degree of soiling (duration 2:45), – Intense for a high degree of soiling (duration 3:15). The Duration is shown on the dis- play. The Pyroluxe process starts. cleaning and care electrolux 45...
- Page 46 46 electrolux cleaning and care The oven light does not work. When a pre-set temperature is reached, the door is locked. Changing the Pyroluxe switch-off time 7. The Pyroluxe switch-off time can be delayed by up to two minutes using the End Time clock function.
-
Page 47: Cleaning Assistant
Cleaning Reminder 5. The Cleaning Reminder recognises when pyrolytic cleaning is required and alerts the user to this fact. The Cleaning Reminder is switched on/off in accordance with the Cleaning Assistant. (see section on Cleaning Assistant). cleaning and care electrolux 47... -
Page 48: Shelf Support Rails
48 electrolux cleaning and care Shelf Support Rails The shelf support rails on the left and right hand sides of the oven can be re- moved for cleaning the side walls. Removing the shelf support rails First pull the front of the rail away from the oven wall (1) and then unhook at the back (2). -
Page 49: Oven Lighting
1. Remove the glass cover by turning it anti-clockwise and then clean it. 2. If necessary: Replace bulb with a 40 watt, 230 V, 300 °C heat-resistant oven light bulb. 3. Refit the glass cover. cleaning and care electrolux 49... -
Page 50: Oven Door
50 electrolux cleaning and care Oven door For easier cleaning of the oven interior the oven door of your appliance can be taken off its hinges. Removing the oven door from its hinges 1. Open the oven door as far as it will 2. - Page 51 Let the door slide down as far as it will go. 2. Open the oven door as far as it will 3. Fold up the clamping levers (A) on both door hinges back into their orig- inal positions. 4. Close the oven door. cleaning and care electrolux 51...
-
Page 52: Oven Door Glass
52 electrolux cleaning and care Oven door glass The oven door is fitted with four panels of glass mounted one behind the other. The inner panels can be removed for cleaning. Important Rough handling, espe- cially around the edges of the front panel, can cause the glass to break. - Page 53 Cleaning the door glass panels Clean the door glass panels thoroughly with a solution of water and washing up liquid. Then dry them carefully. cleaning and care electrolux 53...
- Page 54 54 electrolux cleaning and care Putting the door glass panels back. 1. From above insert the door glass panels one after the other into the door profile at the bottom edge of the door at an angle and lower them.
- Page 55 3. Open the oven door as far as it will 4. Fold up the clamping levers (A) on both door hinges back into their orig- inal positions. 5. Close the oven door. cleaning and care electrolux 55...
-
Page 56: What To Do If
56 electrolux what to do if … What to do if … Problem The oven is not heating up The oven has not been switched The oven lighting is not op- erating Pyroluxe is not working A message appears in the display “F11”... -
Page 57: Electrical Connection
The manufacturer declines any re- sponsibility should these safety measures not be carried out. Cable/ flex Fuse type min: max: electrical connection electrolux 57... -
Page 58: Installation Instructions
58 electrolux installation instructions Installation Instructions Attention: The new appliance may only be installed and connected by a registered expert. Please comply with this. If you do not, any damage resulting is not covered by the warranty. Safety information for the installer •... - Page 59 59...
- Page 60 60 electrolux installation instructions...
- Page 61 61...
-
Page 62: Disposal
62 electrolux disposal Disposal Packaging material The packaging materials are envi- ronmentally friendly and can be re- cycled. The plastic components are identified by markings, e.g. >PE<, >PS<, etc. Please dispose of the packaging materials in the appro- priate container at your local waste disposal facilities. -
Page 63: Guarantee/Customer Service
• Products of Electrolux manufacturer that are not marketed by Electrolux European Guarantee This appliance is guaranteed by Electrolux in each of the countries listed at the back of this user manual, for the period specified in the appli- ance guarantee or otherwise by law. If you move... - Page 64 64 electrolux guarantee/customer service www.electrolux.com Albania +35 5 4 261 450 Belgique/België/ +32 2 363 04 44 Belgien Èeská republika +420 2 61 12 61 12 Danmark +45 70 11 74 00 Deutschland +49 180 32 26 622 Eesti +37 2 66 50 030 España...
- Page 65 +90 21 22 93 10 25 Ðîññèÿ +7 095 937 7837 guarantee/customer service electrolux 65 Electrolux Slovakia s.r.o., Electrolux Domáce spotrebièe SK, Seberíniho 1, 821 03 Bratislava Electrolux Service, S:t Göransgatan 143, S-105 45 Stockholm Tarlabaþý caddesi no : 35 Taksim Istanbul 129090 Ìîñêâà, Îëèìïèéñêèé...
-
Page 66: Index
Reminder function Repairs Residual heat Roasting Pan Safety Safety shut-off Set+Go Setting the clock Settings Shelf Shelf support rails Sound settings Storing Symbols Time extension Zubehör index electrolux 66 26, 30, 31 26, 27 21, 22 11, 18 11, 12, 18... - Page 68 822 928 091-D-230107-03...