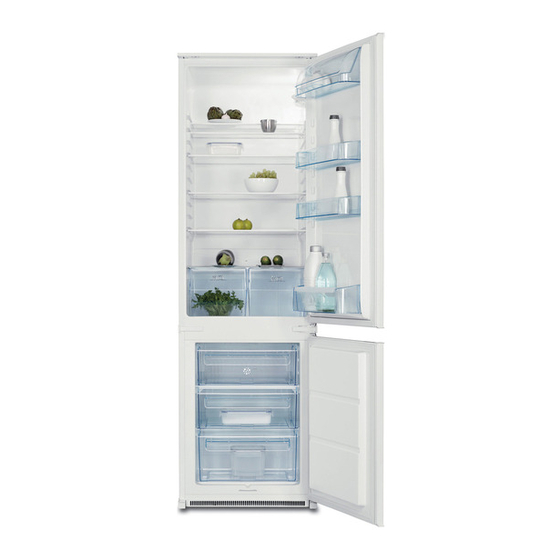
Electrolux ERN29600 User Manual
Fridge freezer
Hide thumbs
Also See for ERN29600:
- Instruction booklet (68 pages) ,
- User manual (20 pages) ,
- Brochure (7 pages)

Related Manuals for Electrolux ERN29600


Summary of Contents for Electrolux ERN29600
- Page 1 ..ERN29600 EN FRIDGE FREEZER USER MANUAL...
-
Page 2: Table Of Contents
10. ENVIRONMENT CONCERNS ..........22 WE’RE THINKING OF YOU Thank you for purchasing an Electrolux appliance. You’ve chosen a product that brings with it decades of professional experience and innovation. Ingenious and stylish, it has been designed with you in mind. -
Page 3: Safety Instructions
SAFETY INSTRUCTIONS In the interest of your safety and to ensure the correct use, before installing and first using the appliance, read this user manual carefully, including its hints and warnings. To avoid unnecessary mistakes and acci- dents, it is important to ensure that all people using the appliance are thoroughly familiar with its operation and safety fea- tures. -
Page 4: Daily Use
Do not pull the mains cable. If the power plug socket is loose, do not insert the power plug. There is a risk of electric shock or fire. You must not operate the appli- ance without the lamp cover (if foreseen) of interior lighting. -
Page 5: Operation
1.7 Environment Protection This appliance does not contain gasses which could damage the ozone layer, in either its refrigerant circuit or insulation materials. The appliance shall not be discarded together with the urban refuse and rubbish. The insulation foam con- 2. -
Page 6: Movable Shelves
In this condition, the refrigerator compartment temperature might drop below 0°C. If this occurs re- set the temperature regulator to a warmer setting. Place the fresh food to be frozen on the top compartment. 3.3 Storage of frozen food... -
Page 7: Helpful Hints And Tips
3.8 Positioning the door shelves 4. HELPFUL HINTS AND TIPS 4.1 Hints for energy saving • Do not open the door frequently or leave it open longer than absolutely necessary. • If the ambient temperature is high and the Temperature Regulator is set to low temperature and the appliance is fully loaded, the compressor may run con- tinuously, causing frost or ice on the... -
Page 8: Care And Cleaning
• wrap up the food in aluminium foil or polythene and make sure that the packages are airtight; • do not allow fresh, unfrozen food to touch food which is already frozen, thus avoiding a rise in temperature of the lat- ter;... -
Page 9: Defrosting The Freezer
5.2 Defrosting of the refrigerator 5.3 Defrosting the freezer A certain amount of frost will always form on the freezer shelves and around the top compartment. Defrost the freezer when the frost layer reaches a thickness of about 3-5 mm. Frost is automatically eliminated from the evaporator of the refrigerator compart- ment every time the motor compressor... - Page 10 10 www.electrolux.com 5.4 Periods of non-operation When the appliance is not in use for long periods, take the following precautions: • disconnect the appliance from elec- tricity supply • remove all food • defrost (if foreseen) and clean the appli-...
-
Page 11: What To Do If
6. WHAT TO DO IF… WARNING! Before troubleshooting, discon- nect the mains plug from the mains socket. Only a qualified electrician or com- petent person must do the trou- bleshooting that is not in this man- ual. Problem The appliance does not operate. -
Page 12: Replacing The Lamp
12 www.electrolux.com Problem Water flows on the ground. The temperature in the appliance is too low/high. The temperature in the refrigerator is too high. The temperature in the freezer is too high. There is too much frost. 6.1 Replacing the lamp 6.2 Closing the door... -
Page 13: Installation
7. INSTALLATION WARNING! Read the "Safety Information" carefully for your safety and cor- rect operation of the appliance before installing the appliance. 7.1 Positioning Install this appliance at a location where the ambient temperature corresponds to the climate class indicated on the rating plate of the appliance: Cli- Ambient temperature... -
Page 14: Door Reversibility
14 www.electrolux.com The appliance is supplied with a 13 amp plug fitted . In the event of having to change the fuse in the plug supplied, a 13 amp ASTA approved (BS 1362) fuse must be used. WARNING! A cut off plug inserted into a 13 amp socket is a serious safety (shock) hazard. -
Page 15: Ventilation Requirements
7.4 Ventilation requirements min. 200 cm 7.5 Installing the appliance CAUTION! Make sure that the mains cable can move freely. The airflow behind the appliance must be sufficient. min. 200 cm Do these steps. If necessary cut the adhesive sealing strip and then apply it to the appliance as shown in figure. - Page 16 16 www.electrolux.com 4 mm 44 mm Install the appliance in the niche. Push the appliance in the direction of the arrow (1) until the upper gap cover stops against the kitchen furniture. Push the appliance in the direction of the arrow (2) against the cupboard on the op- posite side of the hinge.
- Page 17 Remove the correct part from the hinge cover (E). Make sure to remove the part DX, in the case of right hinge, SX in op- posite case. Attach the covers (C, D) to the lugs and the hinge holes. Install the vent grille (B). Attach the hinge covers (E) to the hinge.
- Page 18 18 www.electrolux.com ca. 50 mm ca. 50 mm Disconnect the parts (Ha), (Hb), (Hc) and (Hd). Install the part (Ha) on the inner side of the kitchen furniture. 90° 21 mm 90° 21 mm Push the part (Hc) on the part (Ha).
- Page 19 Open the appliance door and the kitchen furniture door at an angle of 90°. 8 mm Insert the small square (Hb) into guide (Ha). Put together the appliance door and the furniture door and mark the holes. Remove the brackets and mark a dis- tance of 8 mm from the outer edge of the 8 mm door where the nail must be fitted (K).
-
Page 20: Noises
20 www.electrolux.com Do a final check to make sure that: • All screws are tightened. 8. NOISES There are some sounds during normal running (compressor, refrigerant circula- tion). SSSRRR! SSSRRR! Press the part (Hd) on the part (Hb). • The sealing strip is attached tightly to the cabinet. -
Page 21: Technical Data
HISSS! BLUBB! 9. TECHNICAL DATA Dimension of the recess Rising Time Voltage Frequency The technical information are situated in the rating plate on the internal left side of the appliance and in the energy label. HISSS! CRACK! BLUBB! Height Width Depth ENGLISH CRACK! -
Page 22: Environment Concerns
22 www.electrolux.com 10. ENVIRONMENT CONCERNS Recycle the materials with the symbol . Put the packaging in applicable containers to recycle it. Help protect the environment and human health and to recycle waste of electrical and electronic appliances. Do not dispose appliances marked with the symbol with the household waste. - Page 23 ENGLISH...
- Page 24 www.electrolux.com/shop...