Table of Contents
Advertisement
Quick Links
Advertisement
Table of Contents

Related Manuals for Beko SLGR 30423SS


Summary of Contents for Beko SLGR 30423SS
- Page 1 30" Slide-In Gas Range Owner’s Manual SLGR 30423SS 285.6003.03 / R.AA/ 15.06.2023...
- Page 2 Store / Dealer City State Zip Code If you have questions or comments, please contact your local authorized Beko dealer, or call our Toll Free Customer Hotline number. 1-888-352 BEKO (2356) BEKO.COM/US-EN To register your product with Beko, please go to...
-
Page 3: Table Of Contents
Settings............................11 Operation ............................13 Care and Maintenance ........................ 22 Troubleshooting ..........................25 Warranty and Service ........................26 FURTHER INFORMATION Browse the Beko website for helpful information on using your slide-in range, care and maintenance, troubleshooting and more just visit http://www.beko.us... -
Page 4: Premium Technology
PREMIUM TECHNOLOGY At Beko, we believe a truly revolutionary product is one that redefines what is possible in terms of performance. Secondly, it must achieve that performance while using the least amount of natural resources possible. And finally, it needs to be priced within reach of everyone who wants to lead a healthy and sustainable life. -
Page 5: Technical Information
TECHNICAL INFORMATION General Overall Height 36" (914 mm) Overall Width 29 - 13/16" (757 mm) Overall Depth 28 - 3/4" (730 mm) Total electric power 1.03 kW Electrical connection / Fuse 120/240 V~;60 Hz 2AC~N / min 7.6 A Cable type / cross section / SJT 3x18 / AWG / max. -
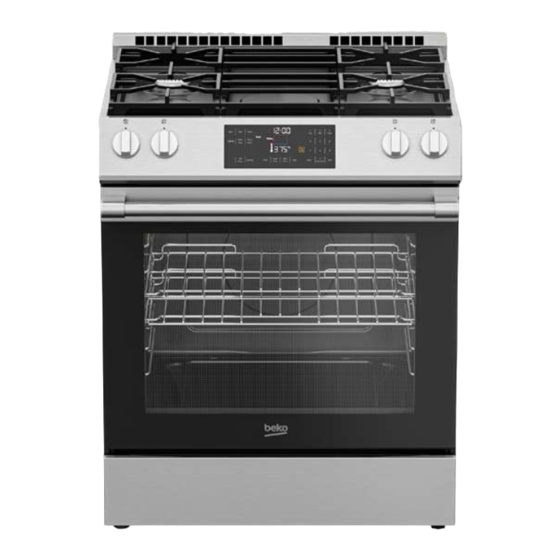
Page 6: Slide-In Range Overview
SLIDE-IN RANGE OVERVIEW Control knobs Model / Serial Tag / Rating Label (Located on bottom of control panel) Storage Drawer Foot... - Page 7 SLIDE-IN RANGE OVERVIEW Splashback Burners Control panel Handle Front door...
-
Page 8: Control Panel Overview
CONTROL PANEL OVERVIEW Display The selected functions are shown here as well as the current oven operating conditions. Burner Control Knobs These knobs are used to turn on and adjust burner temperatures. - Page 9 Numeric Keypad This section is used to enter temperature, time, start and stop cooking modes. Start / Cancel Keys These keys are used to start and cancel cooking modes.
-
Page 10: Preparation
PREPARATION The following information will help you to Caution: The cooling fan continues to operate for about 20-30 minutes after use your appliance in an ecological way, and to save energy. the oven is switched off. TIPS FOR SAVING ENERGY INITIAL HEATING •... -
Page 11: Settings
SETTINGS Warning: Before using the oven, the 24 Hour 12 Hour 24 Hour 12 Hour clock must be set. If the clock is not set, the oven some functions will not 10:00 10:00 AM 22:00 10:00 PM work properly. 11:00 11:00 AM 23:00 11:00 PM... - Page 12 SETTINGS attempt to extinguish a possible fire with water! When oil catches fire, cover it with a fire blanket. Turn off the hob if it is safe to do so and call the fire department. Warning: Never extend the flame beyond the outer edge of the cooking utensil.
-
Page 13: Operation
OPERATION BURNERS • Use flat bottomed saucepans or vessels Igniting the gas burners only. • Gas burners are controlled with gas hob • Put appropriate amount of food in sauce- knobs). pans and pans. Thus, you will not have to make any unnecessary cleaning by prevent-ing the dishes from overflowing. - Page 14 OPERATION OVEN TIMER CANCEL AN ALARM 1. To cancel an alarm after it has been set, • The oven timer can be used as a warning press “Timer” on the touchpad. or reminder and operates separately from the oven functions. It can be used for any purpose with the oven on or in standby.
- Page 15 OPERATION OVEN 3. For cooking time, press the 'Cook Time' key once. Enter the cooking time using numbers on the right keypad while Cook and Time are flashing. 4. Press “Cook Time” key once to set the cooking time. Enter how long you wish program to last, using the numbers •...
- Page 16 OPERATION OVEN COOKING TIPS Cooking Vegetables • Cook vegetables in a pan with a lid to Baking keep them from running out of liquid and drying out. • Use dark-colored or -enamel coated cookware to improve heat transfer. • Boil vegetables before cooking in the oven to make sure they cook fully.
- Page 17 OPERATION OVEN OVEN FUNCTION MODES Broil Bake For best results, preheat oven for For best results, preheat oven when 5 to 6 minutes when using the using bake mode. broil mode. Turn items once while Heat radiates from the bake cooking.
- Page 18 OPERATION OVEN Roast Warm Keep For best results, preheat oven when • Always preheat oven and start with hot using roast mode. food when using the warm keep mode. Roast items on a single rack using a • Heat radiates from the bake element, roasting tray or broiler pan, and position situated at the bottom of the oven in the middle of the rack.
- Page 19 OPERATION OVEN Oven Functions Table Temperature Functions Recommended Maximum Minimum Bake 350°F (175°C) 550°F (290°C) 125°F (50°C) Roast 375°F (190°C) 550°F (290°C) 125°F (50°C) Broil 375°F (190°C) 550°F (290°C) 375°F (190°C) Sabbath 350°F (177°C) 450°F (230°C) 125°F (50°C) Warm Keep 150°F (65°C) 200°F (95°C) 150°F (65°C)
- Page 20 OPERATION SUGGESTED BAKE/ROAST TIMES CHART Number of Food Cooking Mode Oven Temp. Rack Position Racks Sponge cake Bake 360 °F ( 182 °C) Single Bread loaf (leavened) Bake 400 °F ( 205 °C) Single Toast bread Broil High Single Chicken thigh (2-2.5 lb) Broil High Single...
- Page 21 OPERATION SUGGESTED BAKE/ROAST TIMES CHART Pan Size and Time(min.) Explanation Type 8" (200mm) or 9" The cakes are positioned in the middle of the oven. Bake foods with 25 - 35 (230mm) 1" (25 mm) - 1.5" (38 mm) space between pans and oven wall. round 40 - 50 Baking tray...
-
Page 22: Care And Maintenance
CARE AND MAINTENANCE SELF CLEANING FUNCTION Warning: Do not clean the door gasket. Fiberglass gasket is highly sensitive and can get damaged easily. In case Warning: If the oven is hot, self cleaning of a damage on the oven door gasket, mode cannot be operated until the replace with the new one from the oven is cold. - Page 23 CARE AND MAINTENANCE force door open or closed the hinge could force door open or closed the hinge could Caution: During the Self-Cleaning cycle, be damaged and injury could result. the electrical flow to hob burners will be cut. After turning the function and •...
- Page 24 CARE AND MAINTENANCE 1. Turn off power at the main power REPLACING THE OVEN LAMP supply (your fuse or breaker box).. Warning: Hot surfaces cause burns! 2. Turn the glass cover counter clockwise Before replacing the oven lamp, make to remove it. sure that the product is disconnected (See Cleaning the oven.) from mains and cooled down in order...
-
Page 25: Troubleshooting
TROUBLESHOOTING OVEN LIGHTS DO NOT TURN Warning: Consult your Authorized Service Agent or the dealer where you purchased the product if the instruction above do not remedy • Defective oven light bulb. >>>Replace your issue. Never attempt to repair a bulb. -
Page 26: Warranty And Service
WARRANTY AND SERVICE The warranties provided by Beko in these statements only apply to Beko ranges sold to the original purchaser or homeowner in the US and Canada. The warranty is not transferable. To obtain warranty service, please contact our nearest distributor as listed by state and province. - Page 27 No Other Warranties. This Warranty Statement is the complete and exclusive warranty from the manufacturer. No employee of Beko or any other party is authorized to make any warranty statements in addition to those made in this Warranty Statement.
- Page 28 1-888-352 BEKO (2356) beko.com/us-en ©2022 Beko U.S., Inc. All rights reserved.