Table of Contents
Advertisement
Quick Links
Advertisement
Table of Contents

Related Manuals for Panasonic NN-DF38PB


Summary of Contents for Panasonic NN-DF38PB
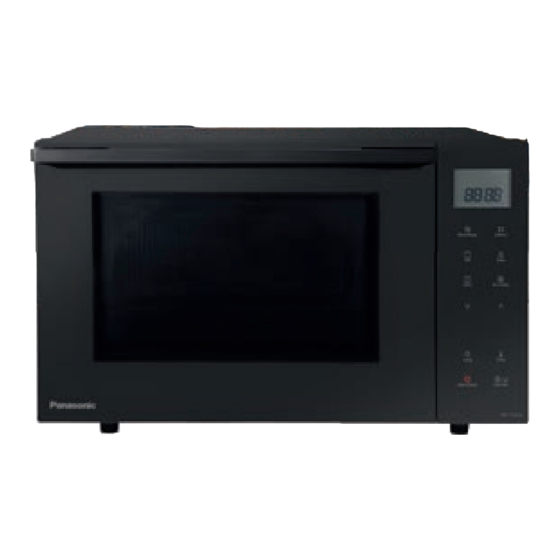
- Page 1 Operating Instructions Combination Microwave Oven Model No. NN-DF38PB Household Use Only Scan the QR code for more recipes: https://www.panasonic.com/nn-df38p-df37p/ IMPORTANT SAFETY INSTRUCTIONS. PLEASE READ CAREFULLY AND KEEP FOR FUTURE REFERENCE.
- Page 3 Customer Communications Centre 0344 844 3899 Selected Spares and Accessories: Order direct on line at www.panasonic.co.uk or by telephoning the Customer Communications Centre number above. For Cookery Advice call: 01344 862108 (open Monday to Wednesday 9 am - 12 pm) Alternatively visit our web site at experience-fresh.eu...
-
Page 4: Table Of Contents
CONTENTS Thank you for purchasing this Panasonic appliance. Safety Instructions ................6-11 Disposal of Old Equipment ..............12 Important Safety Instructions ............12-13 Before Using Your Oven ..............14 Placement of Your Oven ..............15 Care & Cleaning of Your Oven ............15-17 Maintenance of Your Oven .............17-18 Accessories Advice ................18... - Page 5 Oven Cooking ..................46-48 Eco Combi ..................49-50 Multi-stage Cooking ................51-53 Using the Timer ................54-57 Using the Add Time Function ..............58 Defrost ....................59-61 Auto Sensor Programs ..............62-66 Auto Cook Programs ...............67-71 Cleaning Setting ...................72 Cooking and Reheating Guidelines ..........73-74 Reheating Charts ................75-80 Cooking Charts ................81-85 Eco Combi Charts ................86-89 Questions and Answers ..............90-91...
-
Page 6: Safety Instructions
Safety Instructions Important safety instructions. Before operating this oven, please read these instructions carefully and keep for future reference. This appliance can be used by children aged from 8 years and above and persons with reduced physical,sensory or mental capabilities or lack of experience and knowledge if they have been given supervision or instruction concerning use of the... - Page 7 Safety Instructions WARNING! Do not attempt to tamper with or make any adjustments or repairs to the door, control panel housing, safety interlock switches or any other part of the oven. WARNING! Do not remove the outer panel from the ...
- Page 8 Safety Instructions When heating food in plastic or paper containers, check the oven frequently as these types of containers ignite if overheated. When heating food in plastic or paper containers, keep an eye on the oven due to the possibility of ignition.
- Page 9 Safety Instructions Clean the inside of the oven, door seals and door seal areas regularly. When food splatters or spilled liquids adhere to the oven walls, base of the oven, door seals and door seal areas wipe off with a damp cloth. Mild detergent may be used if they get very dirty.
- Page 10 Safety Instructions Exterior oven surfaces, including air vents on the cabinet and the oven door will get hot during Grill, Oven, and Eco Combi modes, take care when opening or closing the door and when inserting or removing food and accessories.
- Page 11 Safety Instructions The oven lamp must be replaced by a service technician trained by the manufacturer. Do not attempt to remove the outer casing from the oven. Caution! In order to avoid a hazard due to inadvertent ...
-
Page 12: Disposal Of Old Equipment
A replacement fuse cover can plug. Should the fuse need to be be purchased from your local replaced, please ensure that the Panasonic dealer. replacement fuse has a rating of 13 amps and that it is approved by How to replace the fuse ... - Page 13 Important Safety Instructions Earth symbol or coloured green If the fitted moulded plug is or green-and-yellow. unsuitable for the socket outlet in your home then the fuse should The wire which is coloured blue be removed and the plug cut off must be connected to the terminal and disposed of safely and an in the plug which is marked with...
-
Page 14: Before Using Your Oven
Before Using Your Oven Examine your Oven Caution! 1. Unpack oven, remove all Hot Surfaces! packing material, and examine the oven for any damage such Exterior oven surfaces including as dents, broken door latches, air vents on the cabinet and the or cracks in the door. -
Page 15: Placement Of Your Oven
Placement of Your Oven This oven is intended for counter- 2. When the oven door opens, do top use only. It is not intended not drag the container over the for built-in use or for use inside a door window, and the load on the cupboard. -
Page 16: Care & Cleaning Of Your Oven
Care & Cleaning of Your Oven 3. After using Grill, Oven and Eco 6. If the control panel becomes Combi cooking the walls of the dirty, clean with a soft, dry cloth. oven should be cleaned with Do not use harsh detergents a soft cloth and soapy water. -
Page 17: Maintenance Of Your Oven
2. Do not attempt to tamper with or a service call your local make any adjustments or repairs to door, control panel housing, Panasonic engineer (Customer safety interlock switches or any Communications Centre on other part of the oven. Do not... -
Page 18: Accessories Advice
3. The oven lamp must be replaced by a service technician 4. These may be ordered directly trained by the manufacturer. Do on line at www.panasonic. not attempt to remove the outer co.uk or by telephoning the casing from the oven. -
Page 19: Oven Accessories
Oven Accessories The following chart shows correct use of the accessories in the oven. Cooking modes Enamel Shelf Wire Rack Micro Power × × Grill Oven Eco Combi × * Metal containers can not be placed directly on the wire rack. Care of the Oven Accessories 1. -
Page 20: Parts Of Your Oven
Parts of Your Oven Front View Rear View q Door handle i Grill elements Pull the door handle downwards o LED lights to open. When you open the The oven lamp lights as soon oven door during cooking, as the oven door is opened. the cooking is stopped a Shelf positions temporarily without clearing... -
Page 21: Important Information
Important Information Small Quantities of Food Safety Take care when heating small If smoke is emitted or a fire occurs quantities of food as these can in the oven, tap Stop/Cancel pad easily burn, dry out or catch fire if and leave the door closed in order cooked too long. - Page 22 Important Information Boiled Eggs After heating, allow to stand in the oven for a short time, stirring Eggs in their shell and whole again before carefully removing hardboiled eggs should not be the container. heated in microwave ovens since they may explode even after Microwave heating of beverages microwave heating has ended.
- Page 23 Important Information Standing Time Paper, Plastic Standing time refers to the period When heating food in plastic or at the end of cooking or reheating paper containers, keep an eye on when food is left before being eaten, the oven due to the possibility of i.e.
-
Page 24: Microwaving Principles
Important Information Before use check that utensils/ the contents must also be stirred containers are suitable for use in or shaken before the temperature microwave ovens. See pages 32- is checked. This should be carried out before consumption in order to avoid burns. - Page 25 Microwaving Principles traditional oven, the food cooks Transmission from the outside inwards. Then they pass through the cooking Foods Not Suitable for containers to be absorbed by the Cooking by Microwave Only water molecules in the food, all foods contain water to a more or Yorkshire pudding and souffles.
-
Page 26: Control Panel
Control Panel 1. Micro Power (pages 39-40) 2. Defrost (pages 59-61) 3. Grill (pages 44-45) 4. Auto Program (pages 62-72) 5. Oven (pages 46-48) 6. Eco Combi (pages 49-50) 7. Up/Down Selection (pages 27, Select the power, temperature, time, weight or auto menu by tapping 8. -
Page 27: Up/Down Selection
Up/Down Selection Select the power, temperature, time, weight or auto menu by tapping . The power, temperature, time, weight or auto menu number appears in the display window. The time/weight/temperature can be adjusted quickly by holding pad. Power/Temperature/Time/Weight/Auto Menu Selection: Select the power, time, weight, temperature or auto menu by tapping Add Time Selection:... -
Page 28: General Guidelines
General Guidelines Standing Time Meat Joints Dense foods e.g. meat, jacket Stand for 15 minutes potatoes and cakes, require a wrapped in aluminium foil. standing time (inside or outside Plated Meals of the oven) after cooking, to allow Stand for 2-3 minutes. - Page 29 General Guidelines Cling Film Spacing Cling film helps keep the food moist Foods cook more quickly and and the trapped steam assists evenly if spaced apart. Never pile in speeding up cooking times. foods on top of each other. However it should be pierced before cooking, to allow excess steam to Shape escape.
- Page 30 General Guidelines Arranging Liquids Individual foods e.g. chicken All liquids must be stirred before, portions or chops, should be placed during and after heating. Water in a dish so that the thicker parts especially must be stirred before are to the outside. and during heating, to avoid eruption.
-
Page 31: Quick Check Guide To Cooking Utensils
Quick Check Guide to Cooking Utensils Choosing the correct Result container is a very important factor in If the dish is suitable for deciding the success microwaving, it will remain cool, or failure of your whilst the water in the jug will cooking. -
Page 32: Containers To Use
Containers to Use Foil/Metal Oven Glass Containers Never attempt to cook in foil or Everyday glass that is heat resistant metal containers on Microwave only ® e.g. Pyrex , is ideal for Microwave, as the microwaves cannot pass Oven or Eco Combi cooking. Do not through and the food will not heat use delicate glass or lead crystal evenly, it may also damage your... - Page 33 Containers to Use Cling Film Paper Microwave cling film can only Plain white absorbent kitchen paper be used for covering food that is (kitchen towel) can only be used for reheated by microwave. It is also microwave cooking e.g. for covering useful for covering food to be bacon to prevent splattering.
-
Page 34: Cooking Modes
Cooking Modes The diagrams shown below are examples of the accessories. It may vary depending on recipe/dish used. Cooking modes Defrosting Reheating Melting: butter, chocolate, cheese. Cooking fish, vegetables, MICROWAVE fruits, eggs. Uses Preparing: stewed fruits, jam, sauces, custards, choux, pastry, caramel, meat, fish. - Page 35 Cooking Modes Cooking modes Baking of small items with short cooking times: puff pastry, cookies, roll cakes, scones. OVEN Uses Special baking: bread rolls or brioches, sponge cakes. Baking of pizzas and tarts. Preheating advised Heatproof, metal tin can be used Accessories on Enamel Shelf in lower or upper shelf positions.
-
Page 36: Let's Start To Use Your Oven
Let’s Start to Use Your Oven Plug in. Plug into a 13 amp fused electrical socket. Select 200 °C Oven to burn off the oil. will appear in the display window with the oven temperature) (this procedure is to burn off the oil used for rust protection in the oven.) Remove all accessories from the oven. -
Page 37: Beep Choice
Beep Choice The oven has both "Beep On" and "Beep Off" mode. This unique function of your Panasonic microwave oven allows you to establish the initial non- cooking features of your oven. Tap the Start/Set pad after first plugged in. -
Page 38: Child Lock
Child Lock Using this system will make the oven controls inoperable; however, the door can be opened. Child lock can be set when the display shows a “0”. To activate: Tap Start/Set pad 3 times. “0” will disappear. " " is indicated in the display. -
Page 39: Microwave Cooking And Defrosting
Microwave Cooking and Defrosting There are 7 different microwave power levels available. Do not place food directly on the base of the oven. Use your own dishes, plates or bowls covered with a lid or pierced cling film directly on the base of the oven. Tap Micro Power pad once. - Page 40 Microwave Cooking and Defrosting Note 1. You can change the cooking time during cooking if required. Tap to increase or decrease the cooking time. Time can be increased/decreased in 1 minute increments, up to 10 minutes. 2. Do not attempt to use microwave only with any metal container in the oven.
-
Page 41: Defrosting Guidelines
Defrosting Guidelines By selecting the 270 W and setting It is essential when defrosting a time, you can defrost food in your chickens and joints of meat. microwave. The biggest problem is The outside thaws out first, so getting the inside defrosted before protect wings/breast and fat with the outside starts to cook. -
Page 42: Defrosting Charts
Defrosting Charts The times given below are a guideline only. Always check the progress of the food by opening the oven door and then re-starting. For larger quantities adjust times accordingly. Food should not be covered during defrosting. Standing Weight/ Defrosting time &... - Page 43 Defrosting Charts Standing Weight/ Defrosting time & Food Times Quantity mode (minimum) 200 g 270 W 6-8 mins 15 mins Red fruit (2) 300 g 270 W 10-12 mins 15 mins 500 g 270 W 10-12 mins 15 mins 250 g Salami (thin) (2) 270 W 4-5 mins 5 mins...
-
Page 44: Grilling
Grilling The grill system on the oven gives fast efficient cooking for a wide variety of foods e.g. chops, sausages, steaks, toast, etc . Do not pre-heat on grill mode with the Accessories in position. Tap Grill pad once. Select the power level. Tap the until the power you require appears in the display window. - Page 45 Grilling Oven Accessories to Use Guidelines When grilling fish, chops or small 1. You can change the cooking food items, the Enamel Shelf time during cooking if required. should be placed in the upper shelf Tapping the to increase position. For larger food items, the or decrease the cooking Enamel Shelf should be in the lower time.
-
Page 46: Oven Cooking
Oven Cooking The oven can be used as an oven using the oven mode which uses top and bottom heat. For best results always place food in a preheated oven. When using oven mode, the Enamel Shelf can be placed in the upper or lower shelf position. - Page 47 Oven Cooking Note 1. If the oven has previously been used and it is too hot to ferment dough on 30/40 °C, ‘HOt’ will appear in the display window. Please wait until the cavity cools down. After the ‘HOt’ disappears, 30/40 °C may be used again, otherwise you can ferment dough at room temperature.
- Page 48 Oven Cooking You can use the Enamel Shelf for baking dish for roasting potatoes or vegetables, and for baking fairy cakes, scones and cookies. It is also ideal for re-heating pre-baked convenience pastry items. Roasting Vegetables / Potatoes: Reheating: Enamel Shelf in lower shelf position. Enamel Shelf in lower shelf position.
-
Page 49: Eco Combi
Eco Combi On the base of the oven in your own microwaveable and heatproof dishes, this mode is suitable for cooking lasagne, gratins, meat, potatoes. To cook successfully by this Eco Combi you should always use a minimum of 200 g food. Small quantities should be cooked by oven or grill. It is not possible to preheat when using this Eco combi mode and food should always be cooked uncovered. - Page 50 Eco Combi Note 1. Preheating is not available for Eco Combi. 2. You can change the cooking time during cooking if required. Tapping to increase or decrease the cooking time. Time can be increased/decreased in 1 minute increments, up to 10 minutes. 3.
-
Page 51: Multi-Stage Cooking
Multi-stage Cooking 2 or 3 stage cooking Select desired Function. Tap the until the power you require appears in the display Tap the until window. the power you require appears in the display window. Tap the Start/Set pad to confirm the selection. Tap the Start/Set pad to confirm the selection. - Page 52 Multi-stage Cooking Example: To Grill 1 for 4 minutes and cook food on 440 W for 5 minutes. Tap the Tap Grill pad once. select 440 W. Tap the select Grill 1 (Low). Tap the Start/Set pad to confirm the selection. Tap the Start/Set pad to confirm the selection.
- Page 53 Multi-stage Cooking Example: To 270 W for 2 minutes and cook food on 1000 W for 3 minutes. Tap Micro Power pad Tap Micro Power pad once. once. Tap the Tap the Start/Set pad to select 270 W (defrost). confirm the selection. Tap the Start/Set pad to Select the cooking time confirm the selection.
-
Page 54: Using The Timer
Using the Timer Delay start cooking By using the timer, you are able to program delay start cooking. Tap Timer pad once. Set the delay time by tapping the (up to 9 hours). Set the cooking program, by entering cooking mode and time required. Tap the Start/Set pad to start. - Page 55 Using the Timer Delay start cooking Example: Delay start: 1 hour, 1000 W: 10 mins, 300 W: 20 mins. Tap Timer pad once. Tap Micro Power pad once. Set the delay time to 1 hour by tapping the Tap the .
- Page 56 Using the Timer To set a standing time: By using the Timer, you can program Standing time after cooking is completed or use to program the oven as a minute timer. Select Cooking Mode & Time Set the cooking program, by entering cooking mode and time required.
- Page 57 Using the Timer To set a standing time: Example: 1000 W: 4 mins, Standing time: 5 mins, 1000 W: 2 mins Tap Micro Power pad Tap Micro Power pad once. once. Tap the Start/Set pad to Tap the Start/Set pad to confirm the selection.
-
Page 58: Using The Add Time Function
Using the Add Time Function This feature allows you to add cooking time at the end of previous cooking. After cooking, tap the Tap the Start/Set pad to start. select Add Time function. Time will be added. The time in the display window will count down. -
Page 59: Defrost
Defrost This feature allows you to defrost minced meat, chops, chicken portions, meat joints and bread. Tap Defrost pad to select the correct defrost category and then enter in the weight of the food in grams (see page 60-61). Foods should be placed in a suitable dish, whole chickens and joints of meat should be on an upturned saucer or on a microwave safe plate. - Page 60 Defrost With this feature you can defrost frozen foods according to the weight. Select the category and set the weight of the food. The weight is programmed in grams. For quick selection, the weight starts from the most commonly used weight for each category.
- Page 61 Defrost Weight/ Program Instructions Placement To defrost rolls, buns, slices of bread and loaves. Place on a plate. Place Bread 100 g - 900 g the container on base of oven. Select program number 3. Enter the weight Base of oven of the bread.
-
Page 62: Auto Sensor Programs
Auto Sensor Programs This feature allows you to cook or reheat foods without entering the weight. The built-in sensor measures the humidity of the food and calculates the recommended microwave power level together with a suggested cooking time. How it Works Once the food has been selected and Start/Set pad tapped the food is heated up. - Page 63 Auto Sensor Programs Adjust to Taste Preferences for degree of cooking vary for each individual. After having used Auto Sensor Programs a few times, you may decide you would prefer your food cooked to a different degree of cooking. After tapping Start/Set pad, “...
- Page 64 Auto Sensor Programs Weight/ Program Instructions Placement To reheat a fresh precooked meal. All foods must be pre-cooked. Foods should be at refrigerator temperature approx. + 5°C. Reheat in container as purchased. Pierce covering film with a sharp knife once in the centre and four times around the edge.
- Page 65 Auto Sensor Programs Weight/ Program Instructions Placement To cook fresh vegetables. Place prepared vegetables into a suitable sized container. Sprinkle with 1 tbsp Fresh cold water per 100 g vegetables. 200 g - 1000 g Vegetables Cover with cling film. Pierce cling film with a sharp knife once in the Base of oven centre and four times around the...
- Page 66 Auto Sensor Programs Weight/ Program Instructions Placement For cooking rice for savoury dishes not rice puddings. (Thai, Basmati, Jasmine, Suriname, Arborio or Mediterranean rice). Rinse the rice thoroughly before cooking. Use a large bowl. Add 2 times boiling water Rice 100 g - 300 g to rice.
-
Page 67: Auto Cook Programs
Auto Cook Programs This feature allows you to cook some of your favourite foods by setting the weight only. Select the category and set the weight of the food. The weight is programmed in grams. For quick selection, the weight starts from the most commonly used weight for each category. - Page 68 Auto Cook Programs Guidelines 1. This programs must only be used for foods described. 2. Only cook foods within the weight ranges described. 3. Always weigh the food rather than relying on the package weight information. 4. The temperature for frozen food is assumed to be -18 °C to -20 °C. The temperature of chilled food is assumed to be +5 °C to +8 °C (refrigerator temperature).
- Page 69 Auto Cook Programs Weight/ Program Instructions Placement To cook frozen potato products. e.g. hash browns, wedges,fries etc. Select Program number 11, tap Start pad to preheat the oven. Spread out potato products onto Enamel Shelf. After preheated, place Enamel Shelf in 200 g - 500 g Frozen upper shelf position.
- Page 70 Auto Cook Programs Weight/ Program Instructions Placement For reheating and browning frozen pizza (purchased). Remove all packaging and place the frozen pizza 100 g - 450 g on wire rack on base of oven. Select Frozen program number 14. Enter the weight Pizza of the frozen pizza.
- Page 71 Auto Cook Programs Gratin Potato ingredients 1. Cut the potatoes into thin slices. Serves 4 Peel and chop the garlic. 700 g peeled potatoes, 2. Arrange the potato slices in garlic clove, ® shallow Pyrex dish. Scatter over 100 g emmental (grated), the garlic, half the cheese, salt salt and pepper,...
-
Page 72: Cleaning Setting
Cleaning Setting F1. Deodorization This feature is recommended for eliminating any odours from the oven. Tap Auto Cook pad once. Select “F1” by tapping the Tap the Start/Set pad to confirm the selection. Tap the Start/Set pad to start. -
Page 73: Cooking And Reheating Guidelines
Cooking and Reheating Guidelines If you cannot find the equivalent Most foods reheat very quickly in food in the chart then choose a your oven by 1000 W. Meals can be similar type and size listed and brought back to serving temperature adjust the cooking time if necessary. - Page 74 Cooking and Reheating Guidelines Caution - Mince pies Remember even if the pastry is cold to the touch, the filling will be piping hot and will warm the pastry through. Take care not to overheat otherwise burning can occur due to the high fat and sugar content of the filling.
-
Page 75: Reheating Charts
Reheating Charts The times given in the charts below are a guideline only, and will vary depending on STARTING temperature, dish size and quantity. Pastry or bread items reheated by microwave will be soft not crisp. Heating category Your oven is Heating Category E and this is displayed on the Identification label. - Page 76 Reheating Charts Time to Weight/ Power Instructions/ Food Select Quantity Level Guidelines (approx) Canned pasta Ravioli/ Place in a heatproof Macaroni 2 mins bowl and cover. Place 400 g 1000 W cheese/ 30 secs on base of oven and Spaghetti stir halfway.
- Page 77 Reheating Charts Time to Weight/ Power Instructions/ Food Select Quantity Level Guidelines (approx) Light dishes and snacks – Chilled 120 g 1 min 40 secs Use microwavable Pancakes/ 1 pce Combi 3 French stick dish on the base of 240 g 2 mins with filling oven.
- Page 78 Reheating Charts Time to Weight/ Power Instructions/ Food Select Quantity Level Guidelines (approx) 100 g - 2 mins Remove packaging, 130 g 40 secs & Combi 3 place directly on the 1 pce rest 2 mins wire rack, for smaller Sausage roll items put baking 200 g -...
- Page 79 Reheating Charts Time to Weight/ Power Instructions/ Food Select Quantity Level Guidelines (approx) Macaroni Place on base of 450 g 10 mins cheese Combi 3 oven. Ready meals – frozen. Transfer food from foil container to a similar sized heatproof dish. 1000 W 10 mins Lasagne/...
- Page 80 Reheating Charts Time to Weight/ Power Instructions/ Food Select Quantity Level Guidelines (approx) Desserts – Chilled 50 g 1000 W 20-30 secs Use microwavable 1 pce Sweet dish on base of oven. pancakes 100 g Cover dish. 1000 W 40-50 secs 2 pces Desserts –...
-
Page 81: Cooking Charts
Cooking Charts Points for checking Always check that food is piping hot after cooking in the microwave. If unsure return to oven. Foods will still require a standing time, especially if they cannot be stirred. The denser the food the longer the standing time. Weight/ Time to Select Food... - Page 82 Cooking Charts Weight/ Time to Select Food Power Level Quantity (approx) Vegetable – Fresh Artichokes (whole) 500 g 1000 W 9-11 mins Artichokes (hearts) 500 g 1000 W 8-10 mins Asparagus (1) 500 g 1000 W 5-6 mins Aubergines 500 g 1000 W 7-8 mins Beetroot (1)
- Page 83 Cooking Charts Weight/ Time to Select Food Power Level Quantity (approx) 500 g Broad beans (1) 1000 W 13-16 mins 500 g Thin sliced leeks 1000 W 10-12 mins 500 g Green beans (1) 1000 W 8-10 mins Dwarf beans 500 g 1000 W 9-12 mins...
- Page 84 Cooking Charts Weight/ Time to Select Food Power Level Quantity (approx) Vegetable – Frozen Artichokes (hearts) 500 g 1000 W 11-12 mins Asparagus (1) 500 g 1000 W 10-11 mins Chinese Leaves 500 g 1000 W 12-13 mins Broccoli 500 g 1000 W 9-10 mins Mushrooms...
- Page 85 Cooking Charts Weight/ Time to Select Food Power Level Quantity (approx) 500 g Leek stalks 1000 W 12-13 mins 500 g Capsicums 1000 W 10 mins 500 g Ratatouille 1000 W 12-15 mins Salsify 500 g 1000 W 12-15 mins Meat and Poultry 10-12 mins then Maximum...
-
Page 86: Eco Combi Charts
Eco Combi Charts This chart provides 2 kinds of cooking methods, you can choose Eco Combi mode or oven mode according to your needs. Points for checking Always check that food is piping hot after reheating in the microwave. If unsure return to oven. - Page 87 Eco Combi Charts Time & Energy Eco Combi Weight/ Oven mode Food Effi ciency vs mode & Quantity & TIme Oven cooking TIme Chicken wings 200 °C : 61-70% Eco combi 3 (with preheat) 4 pcs 12-14 mins 30-35 mins : 50-59% Drumsticks 200°C...
- Page 88 Eco Combi Charts Time & Energy Eco Combi Weight/ Oven mode Food Effi ciency vs mode & Quantity & TIme Oven cooking TIme Potatoes Roast potatoes 200 °C : 38-48% Eco combi 3 (with preheat) 500 g 24-26 mins 35-40 mins (4) (5) : 26-37% (2) (5)
- Page 89 1 h 10 mins : 16-31% Tested by Panasonic internal laboratory (1) Place on dish on base of oven. (2) Place on Enamel Shelf in lower shelf position. (3) Place on Wire Rack with a dish underneath. (4) Place dish on...
-
Page 90: Questions And Answers
Questions and Answers Q: Why won’t my oven turn on? Q: The oven won’t accept my A: When the oven does not turn on, program. Why? check the following: A: The oven is designed not to 1. Is the oven plugged in securely? accept an incorrect program. - Page 91 Questions and Answers Q: There are humming and Q: “d” appears in the display and clicking noises from my oven the oven does not cook. Why? when I cook by Eco Combi. A: The oven has been programmed What is causing these noises? in demo mode.
-
Page 92: Recipes
Quiche Lorraine Ingredients Accessory Servings 6 Enamel Shelf 100 g back, smoked bacon Dish: 25 cm flan dish 1 roll of pastry (approx. 300 g ) 100 g gruyère, grated 130 ml milk Time & Setting salt and pepper approx. 41-46 minutes 3 eggs Oven 180-200 °C 150 ml cream... - Page 93 Tomato and Red Pepper Soup Ingredients Accessory Servings 4 – ® 5 large tomatoes Dish: large Pyrex bowl 30 ml olive oil 1 onion, chopped 450 g red or orange peppers, thinly Time & Setting sliced 30 ml tomato purée approx.
- Page 94 Greek Lamb Stew Ingredients Accessory Servings 4 – 700 g lamb fillet, cut into chunks Dish: 3 litre casserole dish with lid 2 onions, chopped 1 red chili 2 cloves garlic, crushed Time & Setting 1 sprig rosemary approx. 60 minutes 275 ml white wine, Microwave 600W/440W 400 g can chopped tomatoes...
- Page 95 Normandy Style Chicken Ingredients Accessory Servings 4-5 – ® 800 g chicken fillets Dish: 1 Pyrex dish (25 cm 2 shallots diameter) 40 g butter 1 glass of white wine or cider Time & Setting salt and pepper approx. 21-24 minutes 4 large apples Microwave 1000 W 4 tbsp double cream sauce...
- Page 96 Spinach and Ricotta Lasagne Ingredients Accessory – Servings 4-6 2 onions, chopped Dish: 2 large bowls, large shallow 2 cloves garlic, crushed dish. 30 ml oil 2 deseeded red peppers, chopped Time & Setting 400 g canned tomatoes approx. 24-35 minutes 15 ml tomato puree salt and pepper Eco Combi 3...
- Page 97 Stuffed Courgettes Ingredients Accessory Servings 4 Enamel Shelf 2 courgettes, halved lengthways 2 tsp extar virgin olive oil For the stuffing: 30 g dried white breadcrumbs Time & Setting 20 g pine nuts approx. 25-32 minutes 3 spring onions, trimmed and finely Oven 200 °C sliced 1 garlic clove, crushed...
- Page 98 Coconut Fish Curry Ingredients Accessory Servings 4 - 5 – ® 1 onion Dish: 1 Pyrex dish (22 cm 1 red pepper diameter) 200 ml coconut milk 1 tomato Time & Setting 1 tbsp curry paste approx. 26-28 minutes juice of ½ lemon Microwave 1000 W 600 g coley or pollock salt and pepper.
- Page 99 Seafood Bake Ingredients Accessory Servings 4 Wire Rack 500 g frozen mixed seafood Dish: 1 bowl + 1 small shallow dish 3 shallots (24 cm diameter) 1 carrot 150 g mushrooms Time & Setting 30 g butter approx. 30-33 minutes 3 tbsp flour Microwave 600W/1000W 250 ml milk...
- Page 100 Apple Tart Ingredients Accessory Servings 8-10 Enamel Shelf 1 x roll of sweet short crust pastry Dish: flan dish (Ø 28 cm) 250 g apple compote 2 to 3 apples Apricot jam Time & Setting approx. 31 minutes Oven 200 °C Microwave 1000 W Method 1.
- Page 101 Small Cakes Ingredients Accessory Making 9 little cakes Enamel Shelf 100 g butter Dish: 1 baking tray, 24 cm x 24 100 g sugar cm each with 9 holes + 9 2 eggs, beaten individual paper cases 100 g self-raising flour Time &...
-
Page 102: Specifications
Panasonic Appliances Microwave Oven (Shanghai) Co., Ltd. 888, 898 Longdong Road. Pudong, Shanghai, 201203, China. Imported by: Panasonic UK, a branch of Panasonic Marketing Europe GmbH Maxis 2, Western Road, Bracknell, Berkshire, RG12 1RT Authorized Representative in EU: Panasonic Marketing Europe GmbH, Panasonic Testing Centre... - Page 104 Scan the QR code for more recipes https://www.panasonic.com/nn-df38p-df37p/ PHONE OUR CUSTOMER COMMUNICATIONS CENTRE 0344 844 3899 For service or spares. Or order spares direct on line at www.panasonic.co.uk Panasonic Corporation http://www.panasonic.com F0003CX20BP PA0923-0 © Panasonic Corporation 2023 Printed in P.R.C.