Polaris Vac-Sweep 165 - Automatic Pool Cleane Manual
- Owner's manual (11 pages)
Advertisement
Introduction
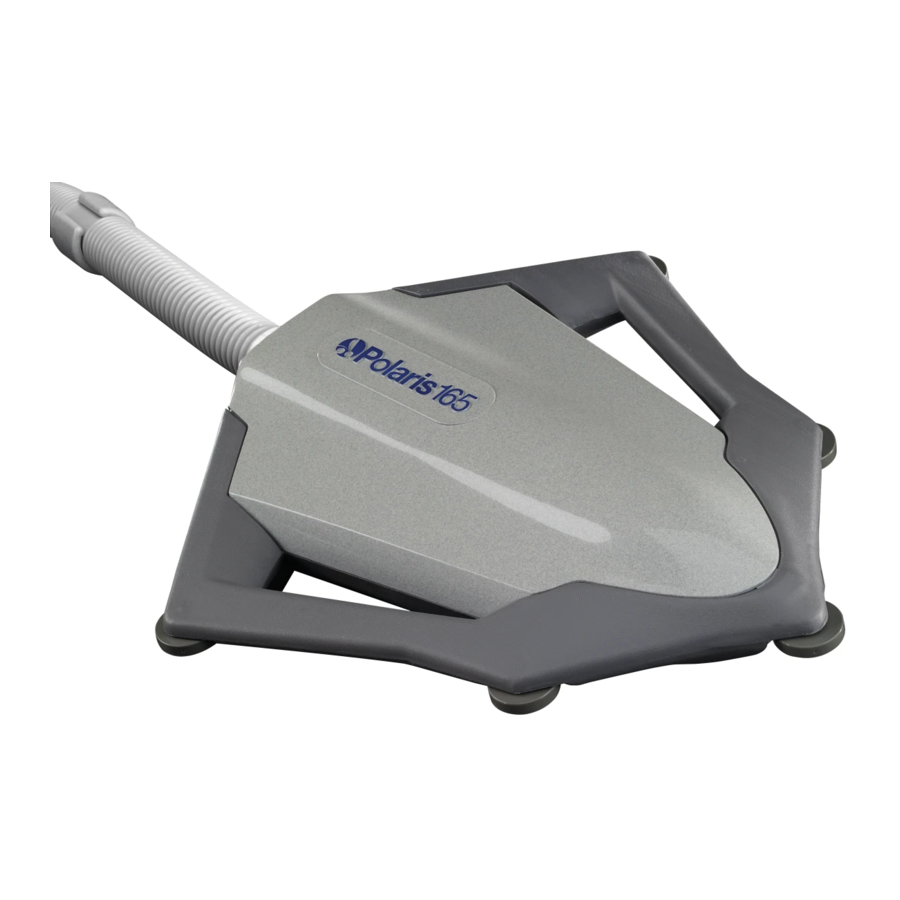
Thank you for choosing a Polaris 165. It will vacuum the bottom and sweeps the sides of any size or shape in-ground vinyl, fiberglass or tile pool. The Polaris 165 does all the hard work for you, leaving you with a sparkling clean pool. It's simple to use and easy to install. Just follow these step-by-step instructions.
Installation Instructions
Components
The Polaris 165 box contains:

- Surface Module
- Jet Sweep Assembly
- All-Purpose Bag
- Sweep Hose, 10 Ft.
- Float Hose Extension, 8 Ft.
- Float Hose, 24 Ft.
- Quick Disconnect
- Universal Wall Fitting
- Two Eyeball Regulators
Installing the Universal Wall Fitting
It is important to have a clean pool filter before installing the Polaris 165.
- Turn on the pool filtration pump and flush out the plumbing line. Turn off the pump.
- Choose the return line nearest the centerpoint of the longest pool wall for the Polaris. If there are two return lines at an equal distance from the centerpoint, select the return line that is closer to the pool equipment. Place one eyeball regulator into one of the remaining return lines.
![]()
Note: Once installed, verify the cleaner is operating according to the Operation Section. - Unscrew the universal wall fitting from the quick disconnect.
- If the return line for the Polaris has 1-1/2" female threads exposed, screw in the universal wall fitting by hand. Turn the quick disconnect clockwise (also by hand) into the universal wall fitting to tighten it into place; do not overtighten. Once secure, the quick disconnect can be removed without removing the universal wall fitting.
- If the return line for the Polaris looks like the one below, remove the parts shown and install the universal wall fitting.

- If the return line for the Polaris looks like the one below, remove the parts shown and install the universal wall fitting as described in number 3.
![]()


If the return line does not look like those shown, contact our Customer Service Department at 1-800-VAC-SWEEP.
Adjusting the Sweep Hose
- The sweep hose should be two feet longer than the greatest pool depth. Measure the deepest part of the pool (usually the main drain) with a telepole. Mark the pole two feet above the water level. If the pool depth is over eight feet, an additional sweep hose (part #6-106-00) will be needed.

- Lay the telepole next to the sweep hose. If the sweep hose is longer than the mark on the telepole, cut off the excess hose.
- Remove the hose connector from the portion of excess hose that was removed. Attach it to the new end of the sweep hose. See the diagram below.
Removing the Connector

- Collapse hose with fingers.
- Replace connector with only first corrugation inside lip of connector.
- Pop hose back into shape.


Adjusting the Float Hose
- With the filtration pump off, connect the float hose to the pool wall by turning the quick disconnect clockwise into the universal wall fitting. Pull away from the pool wall to secure.
![]()
- Extend the float hose to the farthest point in the pool.
- Cut the float hose so it is four feet short of the farthest point in the pool.
![]()
If the float hose is shorter than four feet of the farthest point in the pool, add the float hose extension included with the Polaris 165 between the existing float hose and the surface module. Repeat Steps 2 and 3. - Remove the hose connector from the portion of excess hose that was removed. Attach it to the new end of the float hose. See the "Removing the Connector" diagram.
- Attach the sweep hose and filter bag to the jet sweep assembly. When attaching the bag, make sure its frame is completely open.
- Attach the float hose and the sweep hose to the surface module. When attaching the sweep hose, make sure the large ends of the wheel cages are pointing toward the bag.

NOTE: The connectors twist independently of the hose. When attaching them, twist only the connectors so the hose does not get twisted.

- Put the Polaris in the pool and turn on the pool filtration pump. Extend the float hose back to the farthest point in the pool. With the pump running, the surface module is approximately one foot from the pool wall.


Operation
When operating correctly, the surface module will float level on the pool surface. It will change directions approximately every 15-25 seconds. As the Polaris moves randomly throughout the pool, it recirculates clean, filtered water.
The filter bag should contact the pool floor a majority of the time collecting dirt and debris. It will remove debris as large as leaves or as fine as sand. The Polaris 165 will vacuum and sweep the pool in three hours or less.
The Polaris comes equipped with an automatic pressure relief valve in the quick disconnect. If the Polaris is receiving too much water pressure it will release water at the quick disconnect.
Fine Tuning
Observe the movement of the surface module to verify that the cleaner is not operating too slowly.
If it takes longer than 25 seconds to change directions, feel around the pressure relief valve to see if it is releasing excess water. If not, install the second eyeball regulator in the remaining return line. Reobserve the movement of the surface module and verify that it is not operating too fast.
The cleaner is operating too fast if the sweep hose and bag are not in contact with the pool bottom a majority of the time and the surface module changes directions more frequently than every 15 to 25 seconds. In this case, unscrew the pressure relief valve until the surface module slows down. For further information, please refer to the Troubleshooting Section.

IMPROPER OPERATION MAY RESULT IN DAMAGE TO CLEANER, POOL OR POOL EQUIPMENT.
Maintenance
To ensure the Polaris is operating at its optimal efficiency, it is important to empty the filter bag and clean the filter screen on a regular basis. It is also important to maintain a clean pool filter.
A dirty filter can result in sluggish or inefficient operation. Make sure the Polaris 165 is disconnected from the pool wall before cleaning and backwashing the pool filter.
Emptying the Filter Bag
- Turn off the pool pump. Push in on the buttons and slide the filter bag off the jet sweep assembly.

- Turn the bag inside out over a trash can.
- Reattach the filter bag making sure the frame of the bag is completely open.

Cleaning the Filter Screen
Inside the quick disconnect there is a filter screen. It acts as a safety filter to keep any debris that is not caught by your pool filtration system out of the Polaris. If the filter screen clogs often, consult your pool professional.
Please Note: Running the Polaris without the filter screen can damage the Polaris.
To clean the filter screen, pull it out of the quick disconnect. Rinse out the debris and press the filter screen firmly back into place.

Backwashing the Pool Filter
Always disconnect the Polaris from the pool wall before cleaning or backwashing the pool filter. Afterwards, let the pool filtration system run for at least five minutes to flush out the return lines before reconnecting the Polaris.
Storage and Winterizing
When storing the Polaris 165, remove the sweep hose and float hose from the surface module. Also remove the jet sweep assembly from the sweep hose.
Drain the surface module carefully. Twist it in all directions to aid in the removal of the water. THIS IS ESPECIALLY IMPORTANT WHEN YOU ARE PUTTING THE POLARIS 165 AWAY FOR THE WINTER. We suggest storing the surface module in a clean, dry and warm environment out of direct sunlight. We also recommend the jet sweep assembly lay flat and the hoses lay or hang straight.
Remove the universal wall fitting when winterizing your pool. With the quick disconnect attached, pull the quick disconnect away from the wall as you unscrew the universal wall fitting. Leave the universal wall fitting attached to the quick disconnect while storing the Polaris.
In some cases, it may be necessary to use a universal wall fitting removal tool (part #10-102-00) to remove the universal wall fitting from your pool wall. The tool is available from a participating Polaris dealer.
Accessories
- Leaf Bag (Part #6-207-00)
The Polaris 165 comes with an all-purpose bag designed to collect sand, silt and light leaf loads. The leaf bag is designed to collect larger, heavier types of debris. You may want to purchase the leaf bag and rotate between the two bags as needed. - Turtle Top (Part #6-309-00)
Add some fun to your pool cleaning by turning your Polaris 165 into a Super Turtle. - WaterStars (Part #7-400-00) and
WaterStars WF (Part #11-100-00)
Transform your pool into a beautiful fountain adding the soothing sounds of tumbling water. Choose a WaterStars WF to create a fountain at the pool wall or the WaterStars that floats anywhere in the pool. - SpaWand (Part #5-100-00)
A simple, effective hand-cleaning device to quickly clean your spa, pool steps, swimouts and other small bodies of water without hoses or hookups.
Troubleshooting
The numbers in parentheses below refer to specific parts on the Exploded Parts Diagram. For best results, follow the troubleshooting solutions in the order they are listed.
Exploded Parts

| No. | Part # | Description | Qty |
| 1 | 6-306-00 | Surface Module Top, Granite | 1 |
| 2 | 6-400-00 | Mechanism | 1 |
| 3 | 6-407-00 | Cylinder | 1 |
| 4 | 6-413-00 | Screw, Mechanism, #6 x 5/16" SS Sheet Metal, Blunt-end | 4 |
| 5 | 6-411-00 | Piston Assembly | 1 |
| 6 | 6-412-00 | Center Chamber Assembly | 2 |
| 7 | 6-403-00 | Randomizer Ball | 1 |
| 8 | 6-406-00 | Filter Connector/Randomizer Tube Kit | 1 |
| 9 | 6-408-00 | Connector Chamber | 1 |
| 10 | 6-507-00 | Drain Plug Assembly | 1 |
| 11 | 6-305-00 | Body Bottom Assembly, Gray | 1 |
| 12 | 6-301-00 | Body Bottom Wheel Kit, Gray | 5 |
| 13 | 6-104-00 | Hose Connector, Female | 4 |
| 14 | 6-302-00 | Screw, Top, #10 x 3/4" SS Sheet Metal, Pan Head | 2 |
| 15 | 6-107-00 | Wheel Cage Assembly | 9 |
| 16 | 6-110-00 | Hose Weight | 9 |
| 17 | 6-114-00 | Sweep Hose Complete, 10 Ft. | 1 |
| 18 | 6-116-00 | Jet Body Assembly | 1 |
| 19 | 6-119-00 | Jet Body Ball Kit | 1 |
| 20 | 6-211-00 | Jet Sweep Harness | 1 |
| 21 | 6-210-00 | Jet Sweep Head | 1 |
| 22 | 6-212-00 | Jet Sweep Assembly | 1 |
| 23 | 6-206-00 | All-Purpose Bag | 1 |
| 24 | 6-222-00 | Float, Gray | 24 |
| 25 | 6-221-00 | Float Hose Extension Kit, 8 Ft, Gray | 1 |
| 26 | 6-103-00 | Hose Connector, Male | 1 |
| 27 | 6-225-00 | Float Hose, 24 Foot (Hose only), Gray | 1 |
| 28 | 6-502-00 | Quick Disconnect, UWF | 1 |
| 29 | 6-508-00 | UWF Connector Assembly | 1 |
| 30 | 6-503-00 | Pressure Relief Valve | 1 |
| 31 | 6-505-00 | O-ring, UWF/QD | 1 |
| 32 | 6-500-00 | Universal Wall Fitting (UWF) | 1 |
| 33 | 9-100-8006 | Standard Eyeball Regulator Disk | 2 |
| 34 | 6-504-00 | Filter Screen, UWF/QD | 1 |
| Parts Not Shown | |||
| G-21 | Ladder Guard, 2 Panels | ||
| 6-109-00 | Hanger Kit (Includes 8 brackets) | ||
| 6-112-00 | Sweep Hose, 10 Foot (Hose only) | ||
| 6-113-00 | In-line Pressure Tester | ||
| 6-207-00 | Leaf Bag | ||
| 6-309-00 | Turtle Top | ||
| 6-511-00 | UWF Eyeball Fitting | ||
| 9-100-8021 | Vinyl Eyeball Kit | ||
| 10-102-00 | UWF Removal Tool, Plastic | ||
| 11-203-00 | Adjustable Plug, UWF |
To ensure proper operation and long life for the Polaris, be sure to insist on genuine Polaris parts.
Problems and Solutions
Problem: Polaris 165 does not clean the entire pool or runs slowly.
Solution:
- Feel around the pressure relief valve (#30). If it is not releasing excess water, clean the pool filter.
- Check the filter screen (#34) in the quick disconnect for debris and clean it, if necessary.
- Check that the eyeball regulators (#33) are installed in all of the return lines.
- Check the float hose (#27) length, see "Adjusting the Float Hose".
- Check the surface module operation by following the steps below.
- Remove the surface module top (#1) by unscrewing the two phillips-head screws (#14) from the body bottom (#11) and lifting slightly at the rear of the surface module top.
- Turn on the Polaris. Make sure the randomizer tube (#8) is moving from front to back. If it is, refer to step c below. If it is not, the filter connector (#8) may be clogged. To check the filter connector, disconnect the float hose (#27), or float hose extension (#25) if installed, from the mechanism (#2) and look into the mechanism. About half way down in the center of the randomizer tube, you can see the white filter connector. If it is covered with debris or algae, remove the connector chamber (#9), pull out the randomizer tube and clean the filter connector. If it is not, the piston (#5) will need to be replaced.
- While the Polaris is operating, watch the randomizer ball (#7) in the mechanism (#2). If it does not move within two minutes and the randomizer tube (#8) is moving back and forth, the mechanism will need to be replaced.
- Verify that the water pressure is between 5 and 10 psi. A pressure tester (part #6-113-00) is available through your participating Polaris dealer.
Problem: Surface module dives under the water or leans to one side.
Solution:
- Make sure the hoses are not twisted.
- Hold the surface module out of the water and drain the water. Shake the surface module. If there is water sloshing in the body bottom (#11), it will need to be drained. To drain the body bottom, disconnect both the float hose (#27), or the float hose extension (#25) if installed, and the sweep hose (#17) from the surface module. Remove the two phillips-head screws (#14) on the bottom of the surface module. Remove the surface module top (#1) and the mechanism (#2). Remove the drain plug (#10) from the front of the body bottom and drain the water. Reinstall the drain plug, mechanism, top, two screws, and hoses.
- Unscrew the pressure relief valve (#30) to expose the holes on the side of the valve. Adjust it in or out until the surface module levels off.
Problem: The float hose remains coiled.
Solution:
- See "Polaris 165 does not clean the entire pool".
- Lay the float hose out straight in the sun to remove the coils.
Problem: Surface module moves too fast.
Solution:
- Feel around the pressure relief valve (#30). If it is releasing excess water, try removing one of the eyeball regulators (#33) from another return line. If this causes the Polaris to move too slowly, reinstall the eyeball regulators and go to the next step.
- Unscrew the pressure relief valve (#30) to expose the holes on the side of the valve. Adjust it until the surface module slows down.
- Verify that the water pressure is between 5 and 10 psi. A pressure tester (part #6-113-00) is available through your participating Polaris dealer.
Problem: Bag does not stay on the pool floor.
Solution:
- Check that the bag (#23) has been installed correctly.
- Check for air bubbles around the jet body assembly (#18). If bubbles are present, there may be air entering the plumbing line. Contact a pool professional.
- The flow of water through the Polaris 165 could be too high. See "Surface module moves too fast".

The Polaris Vac-Sweep® 165 automatic pool cleaner comes ready to connect to 1-1/2" female pipe threads on a return line. The following are important points to remember when installing and operating the Polaris 165.
- Always disconnect the Polaris from the pool wall when cleaning or backwashing the pool filter.
- After cleaning or backwashing, let the filtration system run for at least five minutes before reconnecting the Polaris.
- New plumbing lines should be flushed out before installing the Polaris.
- Always handle the Polaris with care. Do not let children play with it; it is not a toy.
- Never handle the Polaris when it is operating.
- Always remove the Polaris before swimmers enter the pool.
- Always remove the Polaris from the pool before chemical shock treatments. As a general rule, any pool water that is unsafe for swimming is unsafe for the Polaris.
- Carefully cut the hoses.
By following these simple guidelines, you can help protect against injury and prolong the life of the Polaris 165.
When replacing any Polaris parts, always insist on genuine Polaris replacement parts. You can be sure you are buying genuine Polaris parts if they come in Polaris part bags or have the Polaris logo ![]() on them. Non-Polaris parts are not made to our specifications. They may have an adverse effect on the operation of the Polaris or may even damage it. If you are unable to find genuine Polaris parts in your area, contact us at 1-800-VAC-SWEEP to receive the name of the participating Polaris dealer nearest you.
on them. Non-Polaris parts are not made to our specifications. They may have an adverse effect on the operation of the Polaris or may even damage it. If you are unable to find genuine Polaris parts in your area, contact us at 1-800-VAC-SWEEP to receive the name of the participating Polaris dealer nearest you.
If you have any questions regarding these instructions, please call our Customer Service Department toll-free at 1-800-VAC-SWEEP (USA and Canada only) or (760) 599-9600, Monday through Thursday, 6:00 a.m. - 5:00 p.m., Friday, 6:00 a.m. - 3:00 p.m. (Saturdays 6:00 a.m. - 2:30 p.m. during summer months) PST.
USE OF POLARIS 165 IN A VINYL LINER POOL
Certain vinyl liner patterns are particularly susceptible to rapid surface wear or pattern removal caused by a variety of objects coming into contact with the vinyl surface, including pool brushes, pool toys, floats, fountains, chlorine dispensers, and automatic pool cleaners. Some vinyl liner patterns can be seriously scratched or abraded simply by rubbing the surface with a pool brush. Ink from the pattern can also rub off during the installation process or when it comes into contact with objects in the pool. Polaris is not responsible for, and the Limited Warranty does not cover, pattern removal, abrasion or markings on a vinyl liner.

Documents / ResourcesDownload manual
Here you can download full pdf version of manual, it may contain additional safety instructions, warranty information, FCC rules, etc.
Download Polaris Vac-Sweep 165 - Automatic Pool Cleane Manual
Advertisement
Thank you! Your question has been received!


Need Assistance?
Do you have a question about the Vac-Sweep 165 that isn't answered in the manual? Leave your question here.