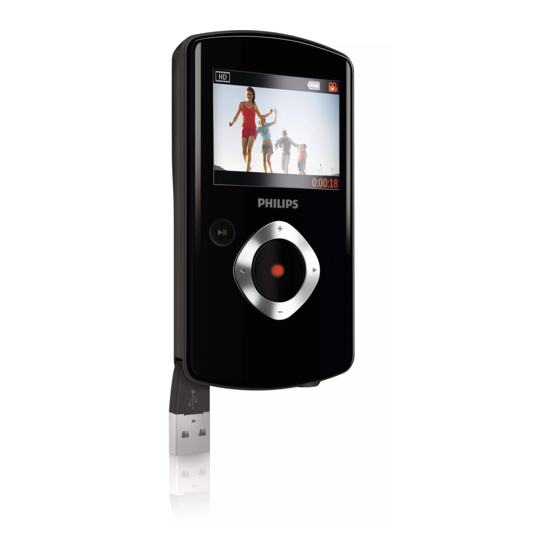
Summary of Contents for Philips CAM110BL
- Page 1 Register your product and get support at www.philips.com/welcome CAM110 EN User manual...
-
Page 3: Table Of Contents
Contents Important Safety Notice Your camcorder Introduction What’s in the box Functional overview Get started Load the Micro SD card Turn on First-time setup Charge the built-in battery Use your camcorder Record video Take pictures Play Options during video play Adjust settings Use more of your camcorder View video or pictures on TV... -
Page 4: Important
Any changes or modifications made to this device that are not expressly approved by Philips Consumer Lifestyle may void the user’s authority to operate the equipment. Notice This product complies with the radio interference requirements of the European Community. -
Page 5: Your Camcorder
Note • The safety logo and power rating information are located at the USB arm of the camcorder. Always bring your product to a professional to remove the built-in battery. 2 Your camcorder Introduction With this portable camcorder, you can: •... -
Page 6: Functional Overview
Functional overview a Display panel • In viewfinder mode, switch to play mode. • In play mode, play a selected video clip. • Confirm settings. • Navigate left/right in a menu. • Select a menu option. • In play mode, turn to the previous/ next picture/video clip. -
Page 7: Get Started
j HDMI • Connect to a TV through an HDMI cable with a mini HDMI connector (type C). k MICRO SD • Connect a Micro SD card. l RESET • Restore default settings. • Turn on/off the camcorder. n Mode switch button •... -
Page 8: First-Time Setup
To turn off the camcorder: • Press and hold The backlight on the display panel » turns off. • To save energy, the camcorder turns off automatically after being idle for 3 minutes. First-time setup When you turn on the camcorder for the first time, a menu for OSD language selection is displayed. -
Page 9: Use Your Camcorder
You can also charge the camcorder via a USB adaptor (not supplied) connected to mains power. The charge time is about 2 hours. 4 Use your camcorder Record video Switch the mode switch button to The selected resolution and » remaining recording time are displayed on the display panel. -
Page 10: Play
Play In viewfinder mode, press play mode. The last recorded media is played » automatically. Press to select a picture or video clip for play. If the selected file is a video clip, press to start play. Delete a file In play mode, press Press + to enter the edit window. -
Page 11: Options During Video Play
Play tagged files During preview, hold A tag operation menu is displayed. » Press +/- to select an option, then press to highlight [Yes] for confirmation. Menu option Description [Play all] Play all files. [Play tagged] Play tagged files only. [Quick impression] Play excerpts of tagged files. -
Page 12: Use More Of Your Camcorder
5 Use more of your camcorder View video or pictures on TV SOURCE Connect an HDMI cable (not supplied) HDMI socket on the camcorder • (requiring a mini HDMI connector) • the HDMI input socket on an HDTV • An inquiry box for output mode selection is displayed. -
Page 13: Technical Specifications
Install and use the camcorder software On your PC, click Start\(All) Programs\ ArcSoft MediaImpression HD Edition. The main screen of the software is » displayed. Click an option to select the corresponding operation. Follow the on-screen instructions to complete the operation. Transfer video/pictures to a PC/Mac Connect the camcorder to a PC/Mac (see ‘Get started’... -
Page 14: Frequently Asked Questions (Faq)
Battery 1100mAh Li-ion (built- in); 120-minute battery life time based on 720P recording PC interface Mini USB 2.0 port System support Windows XP/Vista/ Windows 7, Mac (mass storage only ) TV out NTSC/PAL selectable, Mini HDMI (type C) Power rating DC 5V, 500mA Weight 0.06kg... - Page 15 How do I charge the camcorder? • You can charge the camcorder via the USB pop-out connector. When you connect it to your PC/laptop it will automatically charge. You can also plug the camcorder via the pop-out USB into a USB charger. How long do I have to charge the camcorder? •...
- Page 16 resolution that HD TV programs are broadcast in. “720” refers to the display resolution, in terms of the number of horizontal lines onscreen. “p” stands for progressive scan, or the sequential appearance of the lines in each frame. HD 720p gives video quality that is superior to that found in typical mobile phones and digital cameras.
- Page 18 © 2011 Koninklijke Philips Electronics N.V. All rights reserved. CAM110_00_UM_V1.0...


