Table of Contents
Advertisement
Quick Links
Advertisement
Table of Contents

Related Manuals for Philips DTR320


Summary of Contents for Philips DTR320
- Page 1 NOTICE DTR 320_290405.qxd 29/04/05 14:07 Page 1...
-
Page 2: Welcome To Digital Television
- Personal channel list and favourite lists - Electronic Programme Guide PHILIPS have made every effort to ensure this product meets your every day needs for years to come. This User Manual covers the installation of your receiver, together with explanations of the standard and unique features of the product. -
Page 3: Unpacking
NOTICE DTR 320_290405.qxd Unpacking Unpack your receiver and check that the following cables and accessories are also included in the package: - 1 remote control - 2 batteries (2 x LR6 AA 1.5 V) - 1 SCART lead - 1 RF coaxial lead - 1 mains cord - 1 user manual - 1 Worldwide Warranty booklet... -
Page 4: Table Of Contents
NOTICE DTR 320_290405.qxd TABLE OF CONTENTS Welcome to digital television Meaning of symbols Unpacking Quick installation Table of contents Important safety instructions Product description Front view Rear view Using the remote control Connecting your digital receiver 10 Connecting to a TV and a VCR both fitted with one SCART socket Connecting to your HiFi/Audio receiver equipment... -
Page 5: Important Safety Instructions
NOTICE DTR 320_290405.qxd Important safety instructions For safe operation and optimal lifetime Your receiver has been manufactured to meet the appropriate safety standards, but the instructions below must be followed to operate it safely.These instructions must be kept for future reference. - Before connecting the receiver to the mains, check that the mains supply voltage corresponds to the voltage printed on the rear of the receiver. - Page 6 NOTICE DTR 320_290405.qxd Mains connection Important note This apparatus is fitted with an approved moulded BS1363 plug. To change a fuse in this type of plug proceed as follows: - Remove fuse cover and fuse. - Fit a new fuse that should be a BS1362 ASTA approved type. - Refit the fuse cover.
-
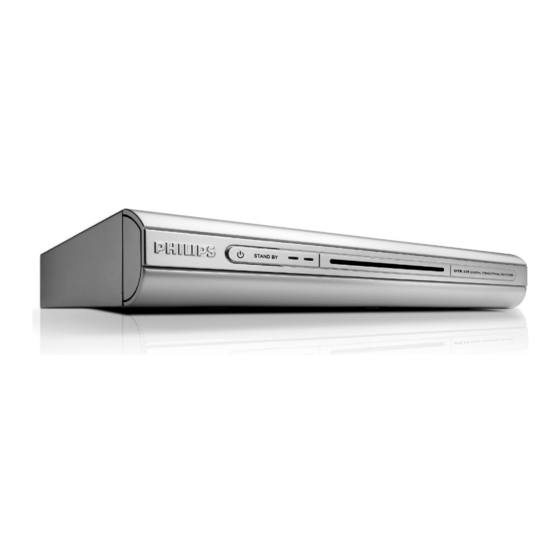
Page 7: Product Description
NOTICE DTR 320_290405.qxd Product description Front view STANDBY button: ......LED1 (Red): ....... . . LED2 (Red/Green/Orange): Remote control receiver window Status indicator table... -
Page 8: Rear View
NOTICE DTR 320_290405.qxd Rear view AERIAL IN (*): ......RF OUT (*): ......TV(*): . -
Page 9: Using The Remote Control
NOTICE DTR 320_290405.qxd Using the remote control 0-9 number keys - In viewing mode: selects channels - In menu: directly selects a menu item or sets a setting - In standby: wakes up the receiver INFO - Opens the info banner - Then shows extended program information - Then closes the banner... -
Page 10: Connecting Your Digital Receiver
NOTICE DTR 320_290405.qxd Connecting your digital receiver There are several ways you can connect and incorporate your digital receiver into your existing audio/video equipment set up. Warning! Before starting to connect: - Unplug all equipment (TV set,VCR and/or DVD, etc.) from the mains. - Do not connect your digital receiver to the mains supply now. - Page 11 NOTICE DTR 320_290405.qxd RF Cable TV set EXT 2 EXT 1 - Plug your aerial lead plug into the “AERIAL IN” socket of your digital receiver. - Connect the “RF OUT” socket of your digital receiver to the “ANT IN” socket of your VCR by means of the RF coaxial lead supplied with your digital receiver.
-
Page 12: Connecting To Your Hifi/Audio
NOTICE DTR 320_290405.qxd Connecting to your HiFi/Audio receiver equipment (Analogue/Digital) Depending on your HiFi / Audio receiver equipment, you might have several options to connect your digital receiver. AUDIO Analogue input Analogue connection (a) Connect the L/R audio output sockets to the relevant L/R audio input sockets of your audio equipment by means of a double CINCH cable (not supplied). -
Page 13: First Installation
NOTICE DTR 320_290405.qxd First installation Requirements for a fast and successful first installation are as follows: • You already have an aerial. • Your aerial is correctly pointed at the terrestrial transmitter corresponding to your area (1). • Your digital receiver connection is according to the diagrams depicted in chapter 2.1 or 2.2. -
Page 14: Day To Day Operation
NOTICE DTR 320_290405.qxd Day to day operation Switching your receiver ON/OFF (standby) To wake up your receiver from standby mode, press <P+>, <P->, <BACK>, or any number button of the remote control. Alternatively, press the <Standby> button on the front panel of the receiver. -
Page 15: Channel Banner
NOTICE DTR 320_290405.qxd Channel banner Each time you select a new channel, a banner appears at the top of the screen. This banner indicates: • the current channel number and name, • the start and end time of the current programme, •... -
Page 16: Electronic Programme Guide
NOTICE DTR 320_290405.qxd Electronic Programme Guide You are watching digital TV or listening to a digital radio programme: - Press the <GUIDE> button to open the programme guide.The current programme list (called “Now/Next”) appears. - Press the button to consult the current day programme list. -
Page 17: General Information
NOTICE DTR 320_290405.qxd Changing the settings of your receiver You can change the receiver settings to adapt the receiver to your aerial conditions, Audio/Video set up or other preferences. General information 5.1.1 Basic menu navigation - When watching digital or listening to digital radio, press <MENU>... - Page 18 NOTICE DTR 320_290405.qxd - Scroll to the setting you want to change. The corresponding values are displayed on the right-hand side of the screen. - Press the button to access the settings. 5.2.2 Location Location is selected in the Preferences sub- menu.This item is used to select the country where you operate your receiver and corresponding time zone.
- Page 19 NOTICE DTR 320_290405.qxd 5.2.3.2 VCR This item is used to select the format of the output signal for the VCR SCART socket. - Scroll to the setting you want to change. The corresponding values are displayed on the right-hand side of the screen. - Press the button to access the available values:...
-
Page 20: Installation
NOTICE DTR 320_290405.qxd Installation - Press the <MENU> button to open the main menu. - Press the button to select Installation. - Press the button to access the Installation sub-menu. 5.3.1 Service lists This item is used to manage your service lists. - Press the button to access the service list features. - Page 21 NOTICE DTR 320_290405.qxd - Press to exit the screen and return to the Service lists sub-menu, or press the blue colour button to exit the menu. 5.3.1.3 Listen to new Radio stations - This feature is used to listen to the new radio stations found while your receiver is in standby.
-
Page 22: Information
NOTICE DTR 320_290405.qxd 5.3.3 Test reception This feature is used to help you position your antenna and check the availability of signals on specific RF channels. The selection is on RF channel. - Press to access the list of RF channels. Default selection corresponds to the current channel. -
Page 23: Timers
NOTICE DTR 320_290405.qxd - Press <OK> to confirm. - Press to exit the screen and return to the System software item, or press the blue colour button to exit the menu. Note: to carry out the update when new software is available, simply follow the on-screen instructions. -
Page 24: Favourites
NOTICE DTR 320_290405.qxd Note: when a recording timer is active, you cannot zap through digital channels, but you can switch to analogue TV using the <TV/STB> button and zap through analogue channels. To cancel an active timer: Refer to paragraph 4.9.3. 5.5.2 Sleep This item is used to set sleep timers. -
Page 25: Access Restrictions
NOTICE DTR 320_290405.qxd 5.6.2 Radio Stations This item is used to create and edit favourite radio lists. - If need be, press the <TV/RADIO> button to switch to radio mode. - Proceed as indicated above. Access Restrictions This item is used to enable and edit access restrictions. -
Page 26: Menu Tree
NOTICE DTR 320_290405.qxd Menu tree Timers Favourites Preferences Information Access restrictions Installation 26 MENU TREE 29/04/05 14:07 Page 26 Record / Remind Sleep TV Channels Radio Stations Language Location System settings System Software Set PIN code protection Maturity Rating TV channels Radio stations Parental Timers Change PIN code... -
Page 27: Advanced Settings
Changing the remote control setting If you have other items of equipment in your home and the remote control of the PHILIPS receiver interferes with them, you can change the setting of the remote control. For this you must change the setting of both your receiver and remote control. - Page 28 NOTICE DTR 320_290405.qxd 7.2.2 Digital receiver and VCR settings Refer to paragraph 5.2.3.2 on how to enable the “Easy Record” function of your digital receiver. - Depending on your VCR brand and type, you have to set the “VCR control” option to “Prepare Record”...
-
Page 29: Troubleshooting Guide
NOTICE DTR 320_290405.qxd Troubleshooting guide Experiencing difficulty operating your digital receiver? Check the following points first! Problem No picture, no sound and no front panel indication. No picture, no sound, but the front panel red LED is on. No picture, no sound but the front panel the left hand LED is on. - Page 30 NOTICE DTR 320_290405.qxd Problem You cannot select all of the channels and the P+/- or Arrow up/down buttons do not always work. You cannot access a particular channel, even using the number buttons. You have forgotten your PIN code. You set a timer but it did not record what you wanted.
-
Page 31: Technical Specifications
NOTICE DTR 320_290405.qxd Technical specifications This product is in conformity with the requirements of the 95/47/EC and 2002/21/EC directives. Video Decoding - Reception-Demodulation COFDM 2K/8K QPSK Network: MFN/SFN - Frequency range VHF III & UHF IV/V Audio Decoding - Compression format MPEG layer I/II Convenience - Ease of Installation... - Page 32 NOTICE DTR 320_290405.qxd 29/04/05 14:07 Page 32...