Advertisement
Quick Links
Advertisement

Related Manuals for Pioneer CDX-P1280


Summary of Contents for Pioneer CDX-P1280
- Page 1 P,oneer sound vision. soul MULTI-COMPACT COMPACT DISC POUR DISC PLAYER MULTI-LECTURE CDX-P1280 CDX-P680 Owner's Manual This product conforms to CEMA cord colors. Mode d'emploi Le code de couleur des cables utilise pour ce produit est conforme CEMA. <KFJFF/OOHOOOOO> <CRD3728-A/N> UC...
- Page 2 _--------_ _ - - - - - - - - - -_.,_ After-sales service for Pioneer products Please contact the dealer or distributor from where you purchased the product for its aftersales service (including warranty conditions) or any other information. In case the necessary information is not...
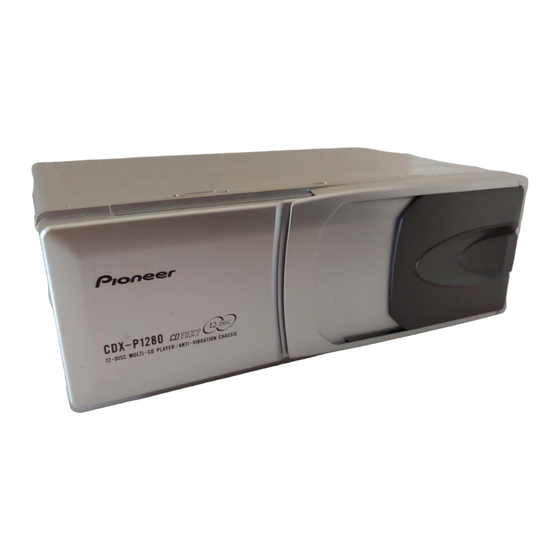
- Page 3 Extra magazines If you need more magazines, please ask your nearest dealer for magazine JD-1212S. (for CDX-P1280) or JD-612V (for CDX-P680) Attaching the label Attach the supplied label in the specified position. Attaching the label in an incorrect place or attaching more than one label will cause malfunction.
- Page 4 Discs/Disques r!lCOMPACT l.QjO~(]5 r!lCOMPACT l.Qj0 ~ (]5 DIGITAL AUDIO TEXT DIGITAL AUDIO • Use only use magazines and discs carrying the above marks. • This product is designed for use with conventional, fully circular CDs only. Use of shaped CDs are not recommended for this product. <9 •...
- Page 5 Loading a magazine in the multi CD player/Mise en place The figure shows this product with CDX-P1280 as an example.lL'illustration montre, titre d'exemple Inserting discs/Mise en place des disques Jnsert,discs wjth the laO\'llside up, tray Slide out the disc Introduisez les disques de fayon que...
- Page 6 Loading the magazine/Mise en place d'un chargeur Load the magazine and close the door. Slide and open the door. Open it fully until it locks with a click. Faites glisser Ie volet. Ouvrez-Ie completement; il se ver- Introduisez Ie chargeur rouille et vous entendez un dedic.
- Page 7 Transportation of multi-CD Player/ Transport du lecteur de CD chargeur "0 Transport screw ~~~lM~1~? ~~~ .~~~Jr."k!g~illi~t.~~~j\l;r.~:.!.':::~~<:~It~~~Ii£E1ii!1L_Jl!11L. Vis de transport Replacez ces vis dans leur position d'origine avant de transporter I'appareil. fa~on A transport screw has been attached to the set in order to protect it Des vis sont fixees sur Ie lecteur de Ie proteger pendant Ie during transportation.
-
Page 8: Specifications
If the error is displayed even after corrective action is taken, de I'anomalie. Si Ie code d'erreur demeure affiche apres que vous contact your dealer or the nearest authorized PIONEER Service avez pris les mesures correctives, adressez-vous 8 un centre Station. - Page 9 Connecting the {lnits/Connexion des appareils IP-BUS cable To pl'event incorrect connection, the input side of the IP-BUS connector is colored in blue, and the output side in black. Connect the connectors of the same colors GOrrectly, Cable Ip·BUS Pour eviter toute erreur de branchement, Ie cote entree du cable IP-BUS est bleu et Ie cote sortie est noir, Tenez compte de ces couleurs des rac-...
- Page 10 • Before mounting, connect the units temporarily. Check that the units are connected correctly by operating the multi-CD controller. • After connection is complete, press the clear buttons on the play- er and the multi-CD controller with the tip of a pencil. •...
- Page 11 Consult with your nearest dealer if installation requires the drilling of holes or other modifications of the vehicle. Before finally installing the unit, connect the wiring temporarily and make sure it is all connected up properly and the unit and the system work properly.
-
Page 12: Installation
Installation Mounting the player on the mounting board with self-tapping screwsl Fixation du lecteur sur une platine aide de vis autotaraudeuses HorizontallyIHorizontalement Vertically/Verticalement Put marks, Platine Marquez ces emplacements, Platine Marquez ces emplacements. Use the holes indicated with arrows Percez les trous indiques par les fiElphes. ®... - Page 13 Mounting parts/Pj~cesdefiX~ltil>~ Les pieces servant la fixation du lecteur sont illustrees ci-dessous. © ®?'X4 Suspen~~~$J,)~b~,~lv~rf'~ITI~heparcelst(. FixationduleetluJI'$Q(l$l.iplagearriere au·move, Putmarks. Marquez ces emplacements. hol¢SiildiciltedWith~tr~\tY~::: . .' •Use, PI age arriere f1e.c~e$. Percez les trousindiques piules 6.5 -7 mm <P...
- Page 14 Mounting anglel Angle de montage The player can· Use any angle in notbeinstalled this range (up to Sammet inthis direction. 90 degrees). Le lecteur ne Tout angle com- i1 ; i&illpeut pas etre pris entre 0 et 90 ..installe de cette degres convient.
- Page 15 Pressing the clear button/Touche d'initialisation If the power does not switch on or if the compact disc player does not operate when the button on the multi-CD controller is pressed, or if the multi-CD controller display is incorrect, press this button on the player with the tip of a pencil to restore normal operation.
- Page 16 Bag for keeping transportation screws The transportation screws removed during installation will need to be reinstalled if you transport the unit later, so keep the screws in this bag. (DEALERS: Put the removed screws in this bag and give the bag to the customer.) Etui pour conserver les vis pour Ie transport Les vis pour Ie transport deposees durant...
- Page 17 ~~~-- NOTE I REMARQUE I NOTA I H1NWEIS ~,.,...,..,.. Yltidl~ be«! mac:I'IeOlO:tlesetinon*'lO pro:eeti:<ll.lM!j ..1oftl8.s:.aac:Ql:la~ ..ditraspoo1Ooausar.~11l'aS;lOr1l) AtTan$pOItSO'ew lias NOTA/OPUERKlNGINOTA/~ lilio.:I- ~.N:,.,~tfII~~~1het'lOle'friltllhe dlf'lritls:llSla. DopolMlttil'llossolll.pariftr'asp(n:).QOPIh iftctoc:ol :awolcCniaoindotaziotle.Primtd~i1IeU1:1te.Ia.deYeS«l'lQO'e $l4lPIied$lNl.8eanlO~the:rar:sporz~_ll«cnlllOUl'4inglhe Ther~~kJewS!'lOuldberetalnedinth&aor::8S$Cl"/bag set. Y'8'ireIOl:LConsetYar!apoinellesaa:acleifliacees.sonintrlOdOdl:l)Otetla JorusellWnextlimehesetis:tar'lS9O"'.ed. _ uA.-edirlUO\lOincasodi1nlSloco. " ~~M P'NcauricnOClnCll'T*ll"'¥iII"~pClft \botzotg«'l . . . betNftdll"' .._ ..
- Page 18 We Want You Listening For A Lifetime Used wisely, your new sound equipment will provide a lifetime of fun and enjoyment. Since hearing damage from loud noise is often undetectable until it is too late, this manufacturer and the Electronic Industries Association's Consumer Electronics Group recommend you avoid prolonged exposure to excessive noise.
- Page 19 Copyright © 2002 Pioneer Corporation. TEL: (905) 479-4411 Taus droits de reproduction et de traduction reserves. PIONEER ELECTRONICS DE MEXICO, S.A. de C.V. San Lorenzo 1009 3er. Piso Desp. 302 Printed in Thailand Col. Del Valle Mexico, D.F. C.P. 03100...
-
Page 20: Limited Warranty
WARRANTY PERIOD For the period specified below from date of original retail purchase (the warranty period) from an authorized Pioneer dealer, Pioneer Electronics (USA) Inc. (PA), and Pioneer Electronics Of Canada, Inc. (POC), warrant that products distributed by PA in the U.S.A., and by POC in Canada that fail to function properly under normal use due to a manufacturing defect when installed and operated according to the owner's manual enclosed with the unit will be repaired or replaced with a unit of comparable value, at the option of PA or POC, without charge to you for parts or actual repair work.