
Related Manuals for Toshiba Gigashot GSC-R60


Summary of Contents for Toshiba Gigashot GSC-R60
- Page 1 Toshiba HARD DISK CAMERA Owner’s Manual GSC-R60/GSC-R30 Please read the owner’s manual before using the R30/R60 camera.
- Page 2 WARNING: Handling the cord on this product or cords associated with accessories sold with this product, will expose you to lead, a chemical known to the State of California to cause [cancer, and] birth defects or other reproductive harm. Wash hands after handling.
- Page 3 CAUTION If you modify the camera in any way, without getting approval from Toshiba Corporation, your camera may violate FCC regulations. Violation of FCC regulations may cause the FCC to void your right to use the modified camera.
- Page 4 Preface Before Using Your Camera Accessories Safety Precautions Contents Handling Your Camera and Cradle Handling the AC Adapter Handling the Battery About the Built-in Hard Disk Drive About SD Memory Cards...
-
Page 5: Before Using Your Camera
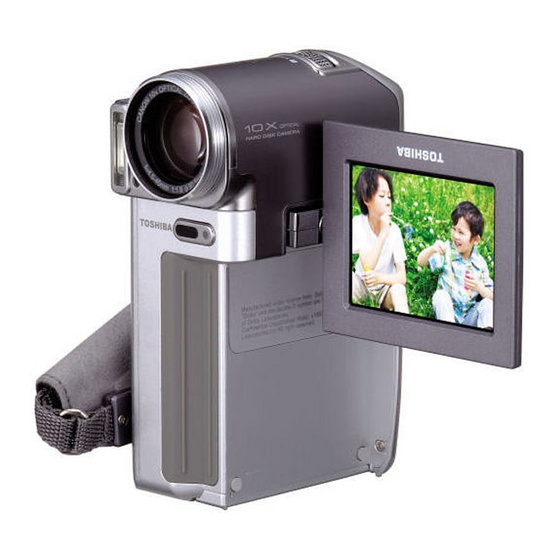
Before Using Your Camera Thank you for buying this Toshiba HARD DISK CAMERA. This is a camera equipped with 1.8-inch 60GB or 30GB hard disk drive and a 10× zoom lens. It will shoot 2-megapixel still images as well as MPEG-2 format videos. - Page 6 Software and Owner’s Manual • Neither the entirety nor a portion of the accompanying Software or Owner’s Manual can be transferred or reproduced without permission. • The accompanying Software and Owner’s Manual can be used with a single apparatus. • Please note that we cannot be held liable for damages incurred by you or a third party as a result of using an apparatus with this Software and Owner’s Manual.
-
Page 7: Accessories
Make sure that you have all of the items below. If any item is missing, damaged or mismatched, please contact the Toshiba Customer Service Department [(800) 319-6684] (for U.S.A.) or Toshiba Customer Support Department [(800) 268-3404] (for Canada). Rechargeable battery... -
Page 8: Safety Precautions
Safety Precautions • Read these safety precautions carefully before using this product. • These precautions provide valuable safety instructions that you must observe. • The indications used for the precautions have the following meanings: ■ Graphic symbol definitions Graphic Symbol Meaning Indicates a prohibited action that must not be carried out. - Page 9 Do not use the camera in the For details on repair, consult the bath or shower. Toshiba Customer Service This might cause fire or electric Department or Toshiba Customer shock. Support Department. Do not disassemble, modify, or If foreign objects or water have repair the camera.
- Page 10 CAUTION Turn off power and do not use Do not place the camera on the camera where its use is inclined or unstable surfaces. restricted, such as in an This might cause the camera to airplane or hospital. fall or tilt over, causing injury or This might affect flight or medical malfunction.
-
Page 11: About The Ac Adapter
About the AC adapter WARNING Use the AC adapter only with Do not place blankets over the the indicated power supply AC adapter connected with the voltage. power source or place the adapter near a heater or on an Use with any other power supply electric (warm) carpet. -
Page 12: About The Battery
CAUTION Do not connect or disconnect If you plan not to use the the AC adapter plug with a wet camera for a long period of hand. time, remove the AC adapter plug from a wall outlet for This might cause electric shock. safety. - Page 13 WARNING Use only the specified battery If fluid leaks from the battery (GSC-BT5). and comes into contact your eyes, immediately wash your Use of a battery other than eyes with clean, running water, specified might cause fire, and ask a physician for damage, or malfunction.
-
Page 14: Table Of Contents
Contents Preface Advanced Photography Before Using Your Camera ......5 Setting the Scene ........58 Accessories ............7 Setting the Flash ......... 60 Safety Precautions .........8 Setting the Focus ........62 Contents ............14 Using Exposure Bias ........64 Handling Your Camera and Cradle ....16 Using the Backlight Compensation Handling the AC Adapter......18 Function .......... - Page 15 Advanced Playback Connecting to Other Devices Changing Levels .......... 99 Connecting to a TV ........148 Selecting the Video Playback Method ..101 Connecting to a PC........150 Capturing Single Video Frames as Connecting to a DVD Recorder with DVR . 153 Still Images ........
-
Page 16: Handling Your Camera And Cradle
Handling Your Camera and Cradle Before using the camera, carefully read and observe the “Safety Precautions” p.8) and the notes described below: Avoid Using or Storing the Camera in the Following Places • Places subject to humidity, dust, and dirt •... - Page 17 When Cleaning the Camera • To prevent the lens and the surface of the LCD monitor from being scratched, blow off any dust from them with a blower brush and lightly wipe with a soft dry cloth. • Clean the body of the camera with a soft dry cloth. Do not use volatile liquids such as paint thinner, benzene, or other harsh chemicals because these may cause deformation or remove the coating.
-
Page 18: Handling The Ac Adapter
• To connect the AC adapter, fully insert the DC plug on the AC adapter into the DC IN 10V terminal on the camera or the cradle (comes with GSC-R60). • When disconnecting the AC adapter cable or DC plug, turn the power OFF, then disconnect while holding its plug. -
Page 19: Handling The Battery
Handling the Battery This camera uses a special rechargeable lithium-ion battery. It is referred to simply as “battery” in this manual. Do not use a different battery. When you use the battery, carefully read and observe the “Safety Precautions” p.8) and the notes described below. * The battery included with the camera does not come fully charged. -
Page 20: Charging The Battery
Charging the Battery • Charging is done with the camera body. You must not charge the battery with any other charger. • When you use the battery for the first time or when the battery has not been used for a long time, be sure to charge the battery before use. -
Page 21: About The Built-In Hard Disk Drive
• You should back up the data saved on the hard disk drive frequently in case of damage to the hard disk drive or any modification or erasing of the data. Toshiba accepts no liability whatsoever for any loss or corruption of data stored on the hard disk drive. -
Page 22: About Sd Memory Cards
(or erased) during normal use, but misuse can result in data corruption (loss). Toshiba accepts no liability whatsoever for any damages or loss arising from the corruption (loss) of data stored on SD cards, regardless of the details or cause. -
Page 23: Preparation
Preparation Component Names Inserting and Removing the Battery Charging Inserting and Removing SD Cards Turning the Camera On and Off Setting the Date and Time Creating Albums Using the LCD Monitor About the Remote Control Quick Reference Guide... -
Page 24: Component Names
Component Names Camera Flash Lens Assist light Front LED Remote control sensor Grip belt Battery cover Tripod screw socket Connection terminal Speaker REC button Microphone Zoom lever LCD monitor STATUS LED MEDIA LED (assist light) button Terminal cover (backlight compensation) ·... - Page 25 Using the OK Button Pressing directly down on the OK button confirms the selected item, but you can also move it up , down , left and right Use the OK button in recording mode to adjust the focus, select the scene, set the flash and exposure bias, and to select items from menus.
- Page 26 Cradle* (only with GSC-R60) LAN button RELEASE button POWER button USB button DC IN 10V terminal LAN terminal USB terminal POWER LED MEDIA LED LAN LED A/V OUT terminal CHARGE LED USB LED Cradle LEDs* POWER CHARGE MEDIA Mode Status...
-
Page 27: Remote Control
Remote Control Buttons/levers Camera Remote control REC button T button POWER – W button REC button Mode switch MODE REC button OK button Mode switch MODE PLAY button button button MENU button MODE REC button button – half-pressed MODE PLAY button button fully pressed Zoom lever... -
Page 28: Inserting And Removing The Battery
Inserting and Removing the Battery Check that the camera is turned off. Inserting the Battery Open the battery cover. Slide the battery cover lock on the bottom of the camera in the direction of the arrow and open the battery cover in the direction of the arrow Battery lock lever Use the battery to push the battery lock lever in the... -
Page 29: Removing The Battery
Removing the Battery Open the battery cover. Push the battery lock lever in the direction of the arrow and remove the battery. When you push the battery lock lever, the battery pops up slightly and comes out. Close the battery cover. IMPORTANT •... -
Page 30: Charging
Charging You should charge the battery the first time you use the camera and whenever the battery is low. Charging the battery fully takes around 2.5 hours. Time needed for recharging increases or decreases depending on factors including the surrounding temperature. Check that the battery is loaded in the camera and that the camera is turned off. -
Page 31: Battery Level Display
• If a problem arises during charging, unplug the power cord from the mains power outlet, remove the battery from the camera and contact Toshiba Customer Service Department or Toshiba Customer Support Department. Be careful when removing the battery as it can become hot. - Page 32 Camera Operation Time Using the Battery The length of time for which the camera will operate on battery power varies considerably depending on a number of factors, including the battery's storage time, the temperature of the battery and camera, and the shooting conditions (whether the flash and zoom are used, etc.). Dirt and/or other debris on the positive (+) and/or negative (–) battery terminals, or on the corresponding terminals in the camera, can obstruct current flow and the camera to incorrectly indicate that the battery is not charged.
-
Page 33: Inserting And Removing Sd Cards
Inserting and Removing SD Cards Turn the camera off before inserting or removing an SD card (sold separately). Inserting an SD Card Insert the SD card into the SD slot, ensuring that the card is facing in the right direction (as shown below). With the notch facing upwards (towards the lens), push the card firmly all the way into the slot. -
Page 34: Turning The Camera On And Off
Turning the Camera On and Off Load the battery. See “Inserting and Removing the Battery” p.28. Turning the Camera On and Off by Opening and Closing the LCD Monitor Opening the LCD monitor turns the camera on and closing the LCD monitor turns the camera off. The first time you use the camera, or when the battery has been left out of the camera for a long period, the screen for setting the date and time appears. -
Page 35: Setting The Date And Time
Setting the Date and Time The first time you use the camera, or when the battery has been left out of the camera for a long period, the screen for setting the date and time automatically appears. Use this screen to set the date and time. Note that you cannot set seconds. Move the OK button to to select a setting and then use the jog dial to select a value. -
Page 36: Creating Albums
TRASH DRIVE PARTY TRAVEL MUSIC SPORTS BEACH LANDSCAPE BUSINESS MEMO BIRTHDAY WEDDING CEREMONY BABY KIDS FAMILY1 FAMILY2 FAMILY3 SPRING SUMMER AUTUMN WINTER HAPPY LOVE LUCKY PARK * Toshiba reserves the right to add or delete album types without prior notice. - Page 37 Albums and Drives To save your recorded images, you must have albums. You can choose the type of album based on the recording date or on the type of shot (travel, pets, etc.). Drives are where your albums are kept. On this camera, albums are kept on the hard disk drive and on SD cards.
-
Page 38: Using The Lcd Monitor
Using the LCD Monitor The LCD monitor can be adjusted to a variety of positions. Off position • When the camera is turned off • When the camera is on standby for photography or playback • When you are charging the camera Normal position •... -
Page 39: About The Remote Control
About the Remote Control The remote control allows you to photograph or play images and videos from a distance. Effective Range The following limitations apply to the range of the remote control: • Distance : Up to roughly 12 feet (4 meters) from the camera •... -
Page 40: Quick Reference Guide
Quick Reference Guide To extend video To erase unwanted To reduce wind noise recording time parts of a video when recording videos Editing Videos Wind Noise Reduction Setting the Video Quality p.124 p.86 p.78 To watch recorded To view a list of To shoot a video at videos on a TV recorded images... - Page 41 To erase images once To set up a slide To rotate still images show Advanced Deletion Setting up and Running Viewing Rotated Still p.129 Auto Play p.110 Images p.106 To move images from To print still images To save images onto the hard disk drive to a DVD an SD card...
-
Page 42: Shooting Video
Shooting Video Before You Shoot Shooting Video Taking Still Images Shooting with the Zoom Playback Erasing Images (Erase one Image) -
Page 43: Before You Shoot
Before You Shoot Holding the Camera When shooting, hold the camera firmly, taking care not to block the lens or flash with your fingers. When moving the camera while shooting a video, avoid sudden or extreme movements. For example, when you are panning the camera left or right, lock your wrists so that camera does not move up and down and slowly turn your body as you shoot. - Page 44 LCD Display When in Recording Mode (Normal Display) Available video Still image icon No. of available shots recording time Battery level Video icon From left: Self-timer*, Continuous recording* Focus* Scene* Zoom bar Flash* Backlight compensation* From left: White balance*, Exposure bias* Assist light* DISPLAY Operation guide...
-
Page 45: Shooting Video
Shooting Video This section describes how to shoot a video. Sound is also recorded in the video. Check that the battery is loaded in the camera and that you have removed the lens cap. Then open the LCD monitor to turn the camera on. Use the grip belt to avoid dropping the camera. - Page 46 IMPORTANT • Do not disconnect the AC adaptor, open or close the battery cover, or remove the battery or SD card while the camera is in operation. Doing so may damage the camera, hard disk drive and/or SD card, and may corrupt the data stored on the hard disk drive or SD card.
- Page 47 Button Operations during Video Recording Status REC PAUSE OFF REC PAUSE ON During recording During recording While paused Button/lever Restarts recording Ends recording Pauses recording and inserts a chapter – – End recording REC half-pressed – – AF/AE lock REC fully pressed Takes a still image OK button Manual focus...
-
Page 48: Taking Still Images
Taking Still Images The camera automatically controls the exposure (the combination of shutter speed and aperture size) to suit the photography conditions. Slide the mode switch in the direction of the arrow to select recording mode. Looking at the LCD monitor, compose the shot. If the LCD monitor is too bright or too dark, adjust the monitor brightness. - Page 49 Focusing You can determine whether an image is focused from the color of the focus area frame that appears when you press the REC button down halfway. The frame is green if the image is focused and red if it is not. If the exposure is incorrect, the ISO sensitivity, shutter speed and aperture are displayed in red.
-
Page 50: Shooting With The Zoom
Shooting with the Zoom Depending on the distance to your subject, you can the 10✕ optical zoom and the 4✕ or 20✕ digital zoom to magnify the image by up to 200✕. POINT • You can also defocus the background by using the optical zoom to enlarge your subject. - Page 51 MEMO • The digital zoom can be set to 4✕, 20✕ or OFF in the recording menu. See “Digital Zooming” p.88. • During digital zooming, the camera focuses on the subject in the center of the LCD monitor, regardless of the AF mode setting. See “Selecting the Focus Area (AF Mode)”...
-
Page 52: Playback
Playback Open the LCD monitor to turn the camera on. Playing back Still Images Slide the mode switch in the direction of the arrow to select playback mode. The last image shot appears on the LCD monitor. If the LCD monitor is too bright or too dark, adjust the monitor brightness. -
Page 53: Playing Back Video
Playing Back Video Slide the mode switch in the direction of the arrow to select playback mode. The last image shot appears on the LCD monitor. If the LCD monitor is too bright or too dark, adjust the monitor brightness. See “Changing the LCD Brightness”... - Page 54 Button Operations during Video Playback Status Stopped Playing Paused Fast-forwarding Rewinding Button/lever Switches the display OK button Plays the video Pauses the video Plays the video Selects the OK button Stops the video playback method OK button Previous image One-touch replay –...
- Page 55 LCD Monitor Display during Video Playback The text, numbers and icons displayed differ depending on the selected camera settings. Album number Album icon File number Video playback method icon Playback drive Playback icon Battery level Volume bar* Reservation Direction key operation guide Video status icon Changes to...
-
Page 56: Erasing Images (Erase One Image)
Erasing Images (Erase one Image) This section describes how to erase images one at a time. Note that you cannot use this method to erase protected images ( p.112), images with DPOF settings ( p.119), images included on a DVD creation list ( p.127), or images stored on a locked SD card p.22). -
Page 57: Advanced Photography
Advanced Photography Setting the Scene Setting the Flash Setting the Focus Using Exposure Bias Using the Backlight Compensation Function Photography Using the Assist Light Shooting Still Images during Video Recording Using the Conversion Lens or Lens Hood Changing the Recording Menu Settings Creating and Selecting Albums Shooting with the Self-timer Continuous Recording... -
Page 58: Setting The Scene
Setting the Scene This camera function automatically adjusts the shutter speed and aperture to suit the scene you are shooting or the purpose of the shot. Your scene setting is retained even when you turn the camera off or the Auto power off function is activated. - Page 59 MEMO • You cannot specify scene settings when shooting video. • The explanations for the different scenes are only intended as a general guide. Select the scene setting that works best for you.
-
Page 60: Setting The Flash
Setting the Flash You can set the flash when you are shooting still images. Select the setting that best suits the conditions in which you are shooting. Your flash setting is retained even when you turn the camera off or the Auto power off function is activated. Set the camera to recording mode and move the OK button to A list of flash icons appears. - Page 61 IMPORTANT • For still images shot during video recording, the flash is set to Suppressed flash. MEMO • You cannot use the flash while recording video. However, you can use the flash to shoot a still image while video recording is paused (when [REC PAUSE] is enabled).
-
Page 62: Setting The Focus
Setting the Focus This section describes how to set the focus to match the distance to the subject you are photographing or filming. Your focus setting is retained even when you turn the camera off or the Auto power off function is activated. -
Page 63: Manual Focus
Manual Focus You can also focus the camera manually. POINT • Manual focus allows you to fix the focus at a set location, so it can be very useful for shots of moving subjects and for dark or strongly backlit situations where the camera has difficulty focusing. -
Page 64: Using Exposure Bias
Using Exposure Bias When there is a large difference (contrast) between the brightness of the subject and the background, or when the subject makes up only a very small part of the image, you can use exposure bias (see “Glossary” p.197) to get the correct image brightness (exposure). -
Page 65: Using The Backlight Compensation Function
Using the Backlight Compensation Function In shots where a lot of light enters the camera, such as shots taken facing towards the light source, the subject may appear too dark. Backlight compensation is a type of exposure bias that adjusts the exposure so that the subject appears brighter in the shot. The backlight compensation setting reverts to off when you turn the camera off or the Auto power off function is activated. -
Page 66: Photography Using The Assist Light
Photography Using the Assist Light Use this feature to make focusing on your subject easier when you are shooting in a dark location. This setting reverts to off when you change the mode, turn the camera off or the Auto power off function is activated. -
Page 67: Shooting Still Images During Video Recording
Shooting Still Images during Video Recording Use this procedure to shoot still images while you are recording video. ATTENTION • If the still image size is not set to [0.3M], video recording will be interrupted while the photographed image is saved. At this point, an animation showing the shutter closing is recorded in the video. -
Page 68: Using The Conversion Lens Or Lens Hood
Using the Conversion Lens or Lens Hood The conversion lens is mounted in front of the lens to change the shooting angle. Use the conversion lens for more distant, wide-angle shooting. The lens hood is a cover designed to prevent sunlight shining directly into the lines. Use the lens hood when shooting backlit subjects. -
Page 69: Changing The Recording Menu Settings
Changing the Recording Menu Settings The recording menu allows you to change the camera settings. Except for the “self-timer” setting, your recording menu settings are retained even when you turn the camera off or the Auto power off function is activated. In recording mode, press the MENU button. - Page 70 Button Operations during Recording Menu Setting Screen Menu displayed Setting displayed Button/lever Confirms the selected setting OK button Selects a menu setting Selects a setting OK button Selects a menu setting Selects a setting Confirms the selected OK button – setting OK button –...
-
Page 71: Recording Menu
Recording Menu Recording Menu item Description Ref. mode DRIVE & Selects the drive and selects or creates ALBUM albums. ERASE Erases images. – SELF-TIMER Sets the self-timer. CONTINUOUS Sets continuous photography. RECORDING VIDEO Sets the image quality for videos. QUALITY STILL IMAGE Sets the size of still images. -
Page 72: Creating And Selecting Albums
Creating and Selecting Albums Albums provide a way for you to save and organize your images into categories according to date, location, etc. Creating Albums on the Hard Disk Drive From the recording menu, use the jog dial to select [DRIVE &... - Page 73 Changing the Type of an Album on the Hard Disk Drive From the recording menu, use the jog dial to select [DRIVE & ALBUM] and press the OK button. Use the jog dial to select [HDD] and press the OK button. Use the jog dial to select the album you want to change.
- Page 74 Selecting an Album on the Hard Disk Drive as the Save Location From the recording menu, use the jog dial to select [DRIVE & ALBUM] and press the OK button. Use the jog dial to select [HDD] and press the OK button. Use the jog dial to select the desired album and press the OK button.
-
Page 75: Shooting With The Self-Timer
Shooting with the Self-timer When you use the self-timer, a shot will be taken automatically after a set delay (10 seconds or 2 seconds). This setting reverts to off when you turn the camera off or the Auto power off function is activated. POINT •... -
Page 76: Continuous Recording
Continuous Recording The gigashot offers two continuous recording modes: normal continuous recording or continuous recording in which the exposure is automatically changed (AEB photography). [AEB] provides a convenient way to try out shots with different exposure settings. POINT • Continuous recording is ideal for subjects where photo opportunities are easily missed, such as with children and pets. - Page 77 MEMO • The number of shots taken in continuous recording differs depending on factors such as the still image size settings and the amount of space available on the media. • If there is insufficient available space on the hard disk drive or SD card, recording ends before the limit on the number of shots is reached.
-
Page 78: Setting The Video Quality
SD cards. Because the amount of data used varies depending on the subject being recorded, the recording durations listed below are approximate and may vary. Hard disk drive SD card Video quality 60GB* 30GB 512MB 256MB 128MB (GSC-R60) (GSC-R30) Approx. 13hr30min 6hr40min 27min 13min 6min 3min 1min 9 Mb/sec. - Page 79 MEMO • When you select [SHQ(WIDE)], [HQ(WIDE)] or [SP(WIDE)], a black border appears at the top and bottom of the LCD monitor. • If you shoot a still image with [SHQ(WIDE)], [HQ(WIDE)] or [SP(WIDE)] selected, the still image is also shot in the wide size. •...
-
Page 80: Setting The Still Image Size
Hard disk drive SD card Still image size 60GB* 30GB 512MB 256MB 128MB (GSC-R60) (GSC-R30) 32,000 30,508 2,056 1,036 1.2M 32,000 32,000 3,427 1,728 0.3M... - Page 81 MEMO • The printing and other applications for the different image sizes are as follows: : Printing at L or postcard size, etc. 1.2M : Wallpaper on a PC, etc. 0.3M : As an e-mail attachment, etc. • The number of available shots actually displayed will vary depending on the image size and the amount of space available on the drive.
-
Page 82: Shooting With Natural Color Tones
Shooting with Natural Color Tones (White Balance) When you take pictures under a range of different light sources, you can use the white balance (see “Glossary” p.198) setting to obtain more natural-looking colors. POINT • If the stored white balance setting is unsuitable, you can use presets to manually set the white balance. - Page 83 Overwriting Preset Data This procedure stores new preset data for the current light source. Select [PRESET] and use the jog dial to select [OVERWRITE DATA] from the menu that appears. Then press the OK button. A message is displayed. WHITE BALANCE OVERWRITE DATA USE DATA Position a white subject (a white dish or piece of paper) so...
-
Page 84: Changing The Sensitivity
Changing the Sensitivity This option sets the sensitivity used when you shoot images. When you are shooting in dark locations or anywhere flash use is forbidden, it is recommended that you increase the sensitivity. POINT • When you are shooting fast-moving subjects, increasing the sensitivity also increases the shutter speed and helps to reduce blurring of the subject. -
Page 85: Shooting With Image Stabilization
Shooting with Image Stabilization Image stabilization reduces the problem of camera shake when you are shooting video. POINT • Image stabilization is particularly useful when you are using the zoom. ATTENTION • Image stabilization may be ineffective with excessive camera shake or when you are tracking a moving subject. -
Page 86: Wind Noise Reduction
Wind Noise Reduction This function reduces wind noise in the recorded sound when you are shooting video. ATTENTION • This function is not effective if you shoot with the microphone subjected directly to wind. From the recording menu, use the jog dial to select [WIND NOISE REDUCTION] and press the OK button. -
Page 87: Changing The Microphone Sensitivity
Changing the Microphone Sensitivity Use this procedure to set the microphone sensitivity during video recording. From the recording menu, use the jog dial to select [MICROPHONE SENSITIVITY] and press the OK button. ■ RECORDING MENU IMAGE STABILIZATION WIND NOISE REDUCTION MICROPHONE SENSITIVITY STANDARD DIGITAL ZOOM... -
Page 88: Digital Zooming
Digital Zooming Digital zooming using digital processing to further enlarge the central portion of the screen. Pixel interpolation technology ensures that the specified number of image pixels are still recorded when digital zooming is used. ATTENTION • Using the digital zoom lowers the image quality. This is particularly so when you use the 20✕... -
Page 89: Selecting The Metering Mode
Selecting the Metering Mode Use this procedure to specify the metering mode used for exposure calculation. POINT • Using the [SPOT] setting for backlit subjects enables you to match the exposure for a specific subject. ATTENTION • If the metering point is too bright, the photographed image will be dark. •... -
Page 90: Selecting The Focus Area (Af Mode)
Selecting the Focus Area (AF Mode) Use this procedure to specify the area used to set the focus. POINT • In shots such as group photos where there are many subjects, or where the subject is not in the center of the shot, use the [MULTI] setting to reduce the likelihood of the shot being incorrectly focused. -
Page 91: Changing Image Colors
Changing Image Colors Use this procedure to select the colors used in images you shoot. This also allows you to shoot images in black and white or in sepia tone. From the recording menu, use the jog dial to select [COLOR] and press the OK button. -
Page 92: Changing The Image Contrast
Changing the Image Contrast Use this procedure to set the degree of difference between light and dark in images you shoot. You can use this function to heighten or soften the contrast and change the tone of your images. From the recording menu, use the jog dial to select [CONTRAST] and press the OK button. -
Page 93: Changing The Image Sharpness
Changing the Image Sharpness Use this procedure to sharpen or soften the image outlines. You can use this function to make the outlines of objects crisper or make them less clearly defined, altering the tone of the image. From the recording menu, use the jog dial to select [SHARPNESS] and press the OK button. -
Page 94: Previewing Images
Previewing Images This function displays the photographed image on the camera’s LCD monitor immediately after you take the picture. Previewing is useful for checking the composition and brightness of photographed images. From the recording menu, use the jog dial to select [PREVIEW] and press the OK button. -
Page 95: Pausing Video Recording
Pausing Video Recording Using the REC PAUSE function enables you to pause during video recording. When you resume shooting after a pause, a chapter (see “Glossary” p.197) is inserted. POINT • While video recording is paused, you can shoot still images with the flash, set the focus by pressing the REC button halfway and use the self-timer to take pictures. -
Page 96: Changing The Lcd Brightness
Changing the LCD Brightness POINT • Making the LCD brighter makes it easier to see when you are outdoors or in other bright conditions. ATTENTION • If you reduce the LCD brightness and then move to a bright location, there may appear to be no image on the LCD monitor. - Page 97 Changing the LCD Brightness during Video Recording While recording video, press the MENU button. The LCD brightness icon appears on the screen. STOP Use the jog dial to adjust the brightness and press the OK button. The LCD brightness is set. STOP...
-
Page 98: Advanced Playback
Advanced Playback Changing Levels Selecting the Video Playback Method Capturing Single Video Frames as Still Images Selecting the Starting Point for Video Playback Using Zoomed Playback Viewing Rotated Still Images Switching the Playback Display Changing Playback Settings Setting up and Running Auto Play Protecting Images Copying Images Moving Images... -
Page 99: Changing Levels
Changing Levels When you are searching for a particular image, you can use the zoom lever to select “list view”, “album” or “drive”. Single-image display Thumbnail display 101-0007 THUMBNAIL Towards W Towards T DISPLAY Towards T Towards W DRIVE ALBUM Towards T 2006_04_03_101 MEMORY USED... - Page 100 Selecting Albums and Drives for Playback Select thumbnail display. Slide the zoom lever towards W. The screen changes to album display. ALBUM Use the jog dial to select the album to want to play back. Slide the zoom lever towards T to display the thumbnails for the images in the selected album.
-
Page 101: Selecting The Video Playback Method
Selecting the Video Playback Method You can choose from 2 video playback methods: CONTINUOUS PLAY Plays through to the end of the videos in the album in order. 1 FILE Plays just the selected video. Select playback mode. Use the jog dial to select the video you want to play. Move the OK button to The video playback icon appears. -
Page 102: Capturing Single Video Frames As Still Images
Capturing Single Video Frames as Still Images You can capture one frame from a video as a still image. The size of captured still images is 0.3MB. Select playback mode. Use the jog dial to select the video you want to play. Move the OK button to Video playback begins. -
Page 103: Video Playback
Selecting the Starting Point for Video Playback When playing a video, you can use this procedure to specify a chapter (see “Glossary” p.197) that was inserted when the video was paused during shooting and select the chapter as the starting point for playback. ATTENTION •... -
Page 104: Using Zoomed Playback
Using Zoomed Playback Use zoomed playback for detailed image checking. Zoomed Still Image Playback Select playback mode and use the jog dial to select the still image you want to view zoomed. Slide the zoom lever towards T. The image is enlarged. The pale blue frame displayed in the image shows the currently enlarged area. - Page 105 Zoomed Video Playback Select playback mode and use the jog dial to select the video you want to view zoomed. After video playback begins, press the MENU button. Slide the zoom lever towards T. The image is enlarged. The pale blue frame displayed in the image shows the currently enlarged area.
-
Page 106: Viewing Rotated Still Images
Viewing Rotated Still Images POINT • Still images shot with the camera rotated are initially played back rotated. • You can also zoom rotated images. ATTENTION • You cannot rotate videos. Select playback mode and use the jog dial to select the still image you want to rotate. -
Page 107: Switching The Playback Display
Switching the Playback Display Use this procedure to change the display mode for playback images. Select playback mode and use the jog dial to select the image. Press the OK button. Each time you press the OK button, the information display mode changes as shown below. -
Page 108: Changing Playback Settings
Changing Playback Settings As well as changing settings for playback, you can also use this procedure to specify settings for image protection and printing. In playback mode, press the MENU button. The play menu appears. PLAY MENU ERASE AUTO PLAY PROTECT COPY EXIT... - Page 109 Button Operations during Play Menu Setting Screen Menu displayed Setting displayed Button/lever Confirms the selected setting OK button Selects a menu setting Selects a setting OK button Selects a menu setting Selects a setting OK button Confirms the selected setting Returns to the previous OK button –...
-
Page 110: Setting Up And Running Auto Play
Setting up and Running Auto Play Auto play automatically plays back images sequentially. Setting up Auto Play From the play menu, use the jog dial to select [AUTO PLAY] and then press the OK button. The Auto play menu screen appears. PLAY MENU ERASE AUTO PLAY... - Page 111 Use the jog dial to select the desired setting and press the OK button. The selected setting is set and the Auto play menu screen reappears. TARGET IMAGES STILL IMAGE : Plays only still images. VIDEO : Plays only videos. STILL &...
-
Page 112: Protecting Images
Protecting Images To prevent images from being inadvertently erased, you can make them read-only files. Images with this status are referred to as “protected” images. ATTENTION • Formatting erases all your images, including protected images. Erased images cannot be restored. Selecting and Protecting Images From the play menu, use the jog dial to select [PROTECT] and press the OK button. - Page 113 Protecting Albums You can use this procedure to protect all the images in an album. From the play menu, select [PROTECT] and press the OK button. Slide the zoom lever towards W. Use the jog dial to select the album to be protected and press the OK button.
- Page 114 Removing Protection From the play menu, select [PROTECT] and press the OK button. Use the jog dial to select the image to be unprotected and press the OK button. The [ ] icon (black) below the protected image 101-0001 PROTECT disappears.
-
Page 115: Copying Images
Copying Images ATTENTION • You should connect the AC adapter when copying images. If the battery runs flat while images are being copied, copying stops and the camera automatically turns off. If this happens, connect the AC adapter or ensure that the battery is fully charged before copying the images again. - Page 116 Use the jog dial to select the drive to which the images are to be copied and press the OK button. COPY SELECTED FILE 1270 MEMORY REMAINING CANCEL Use the jog dial to select the album to which the images are to be copied and press the OK button.
-
Page 117: Moving Images
Moving Images Use this procedure to move photographed images to another album. ATTENTION • You should connect the AC adapter when moving images. If the battery runs flat while images are being moved, moving stops and the camera automatically turns off. If this happens, connect the AC adapter or ensure that the battery is fully charged before moving the images again. - Page 118 Use the jog dial to select the drive to which the images are to be moved and press the OK button. If the images are being moved to a different drive, the MOVE sizes of the files selected for moving are displayed. E.g.
-
Page 119: Writing Print Information (Dpof Settings)
Writing Print Information (DPOF Settings) Use this procedure to specify the settings for date display and the number of prints of images you want to print in DPOF-format (see “Glossary” p.197). POINT • DPOF settings allow you print images simply by taking an SD card to a retail store. •... - Page 120 When you have finished setting the number of prints, press the OK button. Use the jog dial to select [OK] and press the OK button. A file creation confirmation message is displayed. Use the jog dial to select [YES] and press the OK button. A date printing confirmation message is displayed.
- Page 121 Clearing DPOF Settings From the play menu, use the jog dial to select [DPOF] and press the OK button. If the hard disk drive is set as the playback drive, a message appears saying [ONLY STILL IMAGES ON SD CARDS ARE DPOF TARGET IMAGES.]. Use the jog dial to select [TO SD] and press the OK button.
-
Page 122: Pictbridge
Printing Directly from the Camera Using PictBridge By using a PictBridge (see “Glossary” p.198) -compatible printer, you can print directly from the camera without using a PC. ATTENTION • You should connect the AC adapter when printing still images. If the battery runs flat while images are being printed, printing stops and the camera automatically turns off. - Page 123 Use the jog dial to select a setting and press the OK button. PAPER SIZE PictBridge : Selects the paper size for printing. PAPER SIZE PRINTER SETTINGS LAYOUT LAYOUT PRINTER SETTINGS PAPER TYPE PRINTER SETTINGS : Selects the printing layout. PRINT DATE PRINTER SETTINGS PAPER TYPE...
-
Page 124: Editing Videos
Editing Videos You can use this function to delete the portion of the video before or after a specified point (position). ATTENTION • You should connect the AC adapter when editing a video. If the battery runs flat while a video is being edited, editing stops and the camera automatically turns off. - Page 125 Use the jog dial to select the editing details and press the OK button. An editing details confirmation message is displayed. VIDEO EDITING DELETING THE PREVIOUS PART DELETING THE PREVIOUS PART DELETING THE REMAINDER : Deletes the section prior to the specified point. SPECIFY THUMBNAIL IMAGES DELETING THE REMAINDER RETURN...
-
Page 126: Thumbnail Screen
Thumbnail Screen • In video editing when [SPECIFY THUMBNAIL IMAGES] is not selected for the video, the opening scene of the video automatically becomes the thumbnail screen. • By specifying a distinctive scene from the video as the thumbnail screen, you can make it easier to find a desired video when thumbnails are displayed. -
Page 127: Creating Image Lists For Recording To Dvd
Creating Image Lists for Recording to DVD This function allows you to pre-select some of the images saved on the hard disk drive for recording onto a DVD. Using a PC and the bundled application software, you can quickly and easily burn a DVD with the created list of images. - Page 128 Use the jog dial to select the image to be recorded onto the DVD and press the OK button. The [ ] icon is displayed below the selected image. 100-0021 DVD CREATION LIST Repeat this procedure to select the images to be recorded onto the DVD.
-
Page 129: Advanced Deletion
Advanced Deletion Erasing Selected Images Erasing Albums Erasing all the Files on a Drive... -
Page 130: Erasing Selected Images
Erasing Selected Images Use this procedure to select multiple images to be erased. ATTENTION • Deleted images cannot be recovered. • Protected images cannot be erased. See “Protecting Images” p.112. Press the MENU button. Use the jog dial to select [ERASE] and press the OK button. - Page 131 Move the OK button to to select [OK] and press the OK button. An erase confirmation message is displayed. Use the jog dial to select [YES] and press the OK button. When erasing ends, the menu reappears. ERASE If you do not want to erase the images, select [NO] and press the OK button.
-
Page 132: Erasing Albums
Erasing Albums Use this procedure to erase multiple albums. ATTENTION • Erased images cannot be recovered. • Protected images cannot be erased. See “Protecting Images” p.112. From the erase menu, use the jog dial to select [ERASE SELECTION] and press the OK button. Use the jog dial to select the album to be deleted and press the OK button. -
Page 133: Erasing All The Files On A Drive
Erasing all the Files on a Drive Use this procedure to erase the entire contents of the selected drive. ATTENTION • Erased images cannot be recovered. • Protected images cannot be erased. See “Protecting Images” p.112. From the erase menu, use the jog dial to select [ERASE ALL IMAGES] and press the OK button. -
Page 134: Basic Camera Settings
Basic Camera Settings Changing the Basic Camera Settings Sound Setting the LEDs Auto Power Off LCD-linked Power Video Output LANGUAGE System... -
Page 135: Changing The Basic Camera Settings
Changing the Basic Camera Settings This procedure specifies the underlying settings that apply when you use the camera, and is referred to as Setup. These settings are retained when the camera is turned off or Auto power off is activated. Press the MENU button. -
Page 136: Setup Menu
Button Operations during Setup Menu Setting Screen Menu displayed Setting displayed Button/lever Confirms the selected setting OK button Selects a menu setting Selects a setting OK button Selects a menu setting Selects a setting OK button Confirms the selected setting –... -
Page 137: Sound
Sound This option sets the sounds the camera emits while it is being used (when the camera starts up, when keys are pressed and when a picture is taken). From the setup menu, use the jog dial to select [SOUND] and press the OK button. -
Page 138: Setting The Leds
Setting the LEDs This option specifies whether the camera LEDs light during shooting. From the setup menu, use the jog dial to select [LED] and press the OK button. ■ SETUP SOUND AUTO POWER OFF LCD-LINKED POWER EXIT Use the jog dial to select [AF ASSIST LIGHT] or [RECORDING LED] and press the OK button. -
Page 139: Auto Power Off
Auto Power Off This option sets the delay after which the camera automatically turns itself off when it has not been used for a set time. From the setup menu, use the jog dial to select [AUTO POWER OFF] and press the OK button. ■... -
Page 140: Lcd-Linked Power
LCD-linked Power Turning the power On/Off is done by opening or closing the LCD monitor. From the setup menu, use the jog dial to select [LCD- LINKED POWER] and press the OK button. ■ SETUP AUTO POWER OFF LCD-LINKED POWER LAN SETTINGS VIDEO OUTPUT EXIT... -
Page 141: Video Output
Video Output This option sets the video format to match that used on the video equipment connected to the camera. From the setup menu, use the jog dial to select [VIDEO OUTPUT] and press the OK button. ■ SETUP LCD-LINKED POWER LAN SETTINGS VIDEO OUTPUT NTSC... -
Page 142: Language
LANGUAGE This option sets the language used in the screen displays. From the setup menu, use the jog dial to select [LANGUAGE] and press the OK button. ■ SETUP LAN SETTINGS VIDEO OUTPUT LANGUAGE ENGLISH DATE AND TIME SETTING SYSTEM EXIT Use the jog dial to select the language and press the OK button. -
Page 143: System
System Using the Hard Disk Drive Protection Function This is a hard disk drive protection function that operates when the camera is dropped in any way. A sensor detects the fact that the camera has been dropped and stops any data writing to the hard disk drive. -
Page 144: Resetting The System
IMPORTANT • Even when hard disk drive protection is enabled, mishandling the camera can result in damage to the hard disk drive and/or the loss of saved data. Hard disk drive protection does not guarantee the safety of the hard disk drive or the data stored on it. -
Page 145: Formatting Drives
Formatting Drives Formatting initializes the hard disk drive or an SD card. Formatting (see “Glossary” p.197) completely erases all the images and albums created on the hard disk drive or SD card. ATTENTION • You should connect the AC adapter when formatting the hard disk drive or an SD card. -
Page 146: Displaying The Version Information
Use the jog dial to select [YES] and press the OK button. A message is displayed. FORMAT FORMATTING THE HARD DISK DRIVE WILL DELETE ALL THE ALBUMS AND FILES ON THE DISK. MEMO • You cannot format an SD card that is locked. See “Write-protection”... -
Page 147: Connecting To Other Devices
Connecting to Other Devices Connecting to a TV Connecting to a PC Connecting to a DVD Recorder with DVR... -
Page 148: Connecting To A Tv
Connecting to a TV You can connect the camera to a TV and use the TV for viewing and shooting images. The remote control provides a simply way to control the camera when it is connected to a TV. MEMO •... - Page 149 Check that the camera is turned off. When connecting the camera to a TV using the cradle, connect the AC adapter to the cradle before setting the camera in the cradle p.30). When connecting the camera directly to the TV, connect the AC adapter to the camera.
-
Page 150: Connecting To A Pc
When connecting the camera directly to the PC, connect the AC adapter to the camera. The connection between the camera and the PC is monitored by the “Toshiba Device Detector”. If any other connection monitoring tool is running, it may interfere with the correct operation of the “Toshiba Device Detector”. - Page 151 Connect the USB terminal on the cradle to the USB port on the PC with the bundled USB cable. <For GSC-R30> The cradle is not included with the GSC-R30. Connect the bundled USB cable directly to the connection terminal on the base of the camera. Press the USB button on the cradle.
- Page 152 Disconnecting the Camera from the PC Click the “ ” icon in the task tray in the bottom right corner of the PC desktop. Follow the disconnection procedure as directed by the on-screen messages. After completing the procedure, disconnect the USB cable from the PC and camera.
-
Page 153: Connecting To A Dvd Recorder With Dvr
See “Transferring Videos to a DVD Recorder with DVR” ( p.177). ATTENTION • You can only connect DVD recorders equipped with the Toshiba “Net Dubbing” function. • The customer should provide the appropriate LAN cable for the type of connection. - Page 154 You must specify the LAN settings before connecting the camera to the DVD recorder with DVR. See “LAN Settings for Connecting to a DVD Recorder with DVR” ( p.173). Check that the camera is turned off. Connect the AC adapter to the cradle before setting the camera in the cradle p.30).
-
Page 155: Working With Images On Your Pc
Working with Images on Your PC About the Software Supported PCs Installing the Software Viewing Camera Images on a PC Backing up Camera Data Printing Still Images Resizing Images Copying Still Images from a PC to the Camera Writing Print Information on a PC Recording Images onto DVDs... -
Page 156: About The Software
This attests to the fact that the created DVDs conform to the DVD-Video standard. For more information on using PowerProducer 3, contact a Toshiba Customer Service Department (for U.S.A.), Toshiba Customer Support Department (for Canada) or ACD Systems online suport. -
Page 157: Supported Pcs
: DVD-R/-RW, DVD+R/+RW/+R DL, DVD-RAM, CD-R For information on recommended drives, refer to the PowerProducer 3 “Readme” file. Supported drives For the latest drive information, contact a Toshiba Customer Service Department or Toshiba Customer Support Department. Other Microsoft Internet Explorer 5.5 or later , Microsoft Direct-X 9 or later *1: In each case, only PCs with pre-installed operating systems are supported. - Page 158 When you connect the camera to a PC, images shot using the camera appear as follows: [XXXTOSHI] Example This denotes that the images in the folder were shot using a Toshiba camera. A folder number between 100 and 999 is allocated according to the circumstances. Still images File names are in the GSC_XXXX.jpg format...
-
Page 159: Installing The Software
Installing the Software Install ACDSee and PowerProducer from the supplied CD-ROM. The supported operating systems are Windows XP and Windows 2000. ATTENTION • Any loss of power to the camera while images are transferring may corrupt the data. When you connect the camera to PC, it is recommended that you use the AC adapter. -
Page 160: Viewing Camera Images On A Pc
• You can also launch the gigashot backup tool by clicking “gigashot Backup Tool” from the “Acquire” icon in ACDSee. • The gigashot backup tool can be started up if the “Toshiba Device Detector” is displayed in the Windows taskbar. If the “Toshiba Device Detector” is not displayed, click the “Toshiba Device Detector”... - Page 161 ACDSee Main Window The left side of the window shows the folder view while the right side shows the contents of the folder currently being browsed. icon is displayed for still images and the icon for videos. Shows a preview of the image selected in the top-right of the screen.
-
Page 162: Backing Up Camera Data
Backing up Camera Data Backing up all the Data on the Camera to a CD or DVD This function backs up (copies) all the data on the camera’s hard disk drive to a CD or DVD. Because you cannot select the data to be backed up, note the capacity of the CD or DVD on which the data will be saved. - Page 163 The gigashot backup tool starts up. See “Connecting to a PC” p.150. Click [Backup data to PC using synchronization]. The “Toshiba Synchronization Wizard” window opens. Click the [Next] button. Specify a save folder other than the folder shown, click the [Browse] button.
- Page 164 Using a DVD Creation List to Create DVDs You can use a DVD creation list ( p.127) to quickly and easily author your own DVDs. Select USB mode. The gigashot backup tool starts up. See “Connecting to a PC” p.150. Click [Create a DVD-Video using DVD creation list].
- Page 165 Using the Import Wizard to Back Up Data to a PC Use this procedure to back up selected data from the camera’s hard disk drive and SD cards onto a PC. Select USB mode. The gigashot backup tool starts up. See “Connecting to a PC”...
-
Page 166: Printing Still Images
Printing Still Images You can use this procedure to do things such as inserting the date on your prints or to print multiple images on a single page. If your printer supports PictBridge, you can also print directly from the camera to the printer. Printing With your images open in ACDSee, select the image to be printed and click [Print] in the [File] menu. -
Page 167: Resizing Images
Resizing Images You can use this procedure to make image smaller so that you can attach them to e-mail messages, etc. With your images open in ACDSee, click the image to be resized to select it. Click [Resize Images] in the [Tools] menu. The image resize window opens. -
Page 168: Copying Still Images From A Pc To The Camera
Copying Still Images from a PC to the Camera Use this procedure to copy images saved on a PC to the camera’s hard disk drive. IMPORTANT • With a “FULL SPEED MODE” connection, this function cannot be used because the camera is protected. Check the connection settings and your PC. Turn on the PC and the camera. -
Page 169: Writing Print Information On A Pc
Writing Print Information on a PC This function allows you to write print information for photographed images from a PC and then save the information on an SD card in the camera. IMPORTANT • With a “FULL SPEED MODE” connection, this function cannot be used because the camera is protected. -
Page 170: Recording Images Onto Dvds
Recording Images onto DVDs Use this procedure to record still images and videos onto a DVD. Still images are recorded onto a DVD as a slideshow. With your images open in ACDSee, select the images and videos you want to record onto DVD. Click [PowerProducer] in the toolbar. - Page 171 MEMO • You can specify up to 256 images in each slideshow. If you selected more than 256 images in step 1, the 257th and subsequent images are used to create a separate slideshow. • To edit a slideshow, launch PowerProducer and then select [Photo Slide Show] in the [Edit] menu.
-
Page 172: Connecting To A Dvd Recorder With Dvr
Connecting to a DVD Recorder with DVR LAN Settings for Connecting to a DVD Recorder with DVR Transferring Videos to a DVD Recorder with DVR... -
Page 173: Dvd Recorder With Dvr
LAN settings on the camera. Note that the settings differ depending on the connection method used. Supported DVD Recorders with DVR You can only connect DVD recorders equipped with the Toshiba “Net Dubbing” function. Settings for Connecting the Camera to a DVD Recorder with DVR via an Existing Network CAMERA NAME : Enter the name used to identify the camera on the network. - Page 174 If you continue to use the default settings on a Toshiba DVD recorder with DVR, (you can also set “TOSHIBA” as the group name and password for the camera),...
- Page 175 SELECT When you have finished entering text, press the OK button. LAN SETTINGS CAMERA NAME GSC-R GSC-R GROUP NAME TOSHIBA PASSWORD IP CONFIG DHCP CHARACTER TYPE DELETE SELECT When you have completed all the settings, use the jog dial to select [OK] and press the OK button.
- Page 176 Use the jog dial to select the setting to be changed and press the OK button. IP CONFIG IP ADDRESS 192. 168. 1. 20 255. 255. 255. NETMASK 192. 168. ROUTER 00 08 0 D 59 D 3 3 E MAC ADDRESS CANCEL SELECT...
-
Page 177: Dvd Recorder With Dvr
DVD recorder with DVR. Supported DVD Recorders with DVR You can only connect DVD recorders equipped with the Toshiba “Net Dubbing” function. Transferring Videos to a DVD Recorder with DVR Connect the AC adapter to the cradle before setting the camera in the cradle p.30). - Page 178 Select an image you want to transfer to the DVD recorder with DVR and press the OK button. The [ ] icon appears below the selected image. 101-0001 To cancel transferring of the image, press the OK button again. PREVIOUS ALBUM To transfer multiple images, simply repeat this SELECT ALL CLEAR ALL...
- Page 179 Confirming Images in Enlarged View In step 4, slide the zoom lever towards T. Sliding towards W in enlarged view will return to the select images to transfer screen. Transferring all Images in an Album In step 4, move the OK button to to select [SELECT ALL], then press the OK button.
-
Page 180: Appendix
Appendix Specifications Troubleshooting Error Messages Glossary Index... -
Page 181: Specifications
Cradle: Connection terminal, LAN terminal, USB terminal, A/V OUT terminal, DC IN 10 V terminal Dedicated rechargeable lithium-ion battery, AC adapter Power supply (SQPH20W10P-02) Hard disk drive: 60GB (GSC-R60) or 30GB (GSC-R30) Recording media SD Memory Cards: 128MB, 256MB, 512MB, 1GB or 2GB supported... - Page 182 GSC-R30: 1.9 inches ✕ 4.7 inches ✕ 2.8 inches (47.7 mm ✕ 119.0 mm ✕ 70.5 mm) (W ✕ H ✕ D) (excluding attachments) GSC-R60: Approx. 14.5 oz (410 g) (excluding battery and SD card) Weight GSC-R30: Approx. 13.8 oz (390 g) (excluding battery and SD...
-
Page 183: Troubleshooting
Troubleshooting If an error or fault occurs, first check the error message displayed on the screen ( p.195) and the status of the LEDs ( p.25). Then refer to the information given below. Problem Cause Solution Page Power/Preparation I can’t charge The battery is not loaded in the Reload the battery correctly. - Page 184 Problem Cause Solution Page The date and The camera was left for a long Reset the date and time. time are period with the battery removed wrong. or the AC adapter disconnected. The camera was not started up Reset the date and time. or shut down correctly.
- Page 185 Problem Cause Solution Page Operation None of the A system error has occurred. Slide the POWER switch across buttons work. and hold it in place for at least 5 seconds. Note that this may result in the loss of any files that are being created.
- Page 186 The recording destination drive Use another SD card. is damaged. Change the destination drive. If the hard disk drive is – damaged, consult the Toshiba Customer Service Department or Toshiba Customer Support Department. You tried to shoot while the Wait until preparation is...
- Page 187 Problem Cause Solution Page The flash does The flash is set to Set the flash to a different not fire. [SUPPRESSED FLASH]. setting. The flash is set to [AUTO] or Set the flash to [FORCED [RED-EYE REDUCTION], but FLASH]. In the [AUTO] and the flash does not fire because [RED-EYE REDUCTION] the surroundings are too bright.
- Page 188 Problem Cause Solution Page Photographed The lens is dirty. Clean the lens. images are The image is not focused. Select the correct focus setting blurred. for the distance to the subject. The camera was moved during Hold the camera correctly. shooting (still image).
- Page 189 Problem Cause Solution Page The quality of The shots were taken using a Set the digital zoom to [4✕] or photographed high-magnification digital zoom [OFF]. images is setting. poor. The shots were taken at a high Set the correct ISO sensitivity. sensitivity such as [ISO200] (still image).
- Page 190 Problem Cause Solution Page I can’t DPOF settings are specified for Clear the DPOF settings. unprotect an the image. image. The SD card is locked. Unlock the SD card. I can’t select a The total size of the images to Reselect the images to be drive as the be copied exceeds the amount...
- Page 191 Problem Cause Solution Page I can’t specify There is no SD card inserted. Insert an SD card. DPOF There are no still images on the Copy the images for which you settings. SD card. want to specify DPOF settings onto the SD card. The SD card is locked.
- Page 192 Problem Cause Solution Page Erase, Setup I can’t erase The image is protected. Remove the protection. an image. DPOF settings are specified for Clear the DPOF settings. the image. The SD card is locked. Unlock the SD card. I can’t erase The album contains protected Remove the protection.
- Page 193 Problem Cause Solution Page Device connection Nothing Double-click “Setup.exe” on the appears when CD-ROM. – I insert the CD-ROM. I can’t connect The AC adapter is not Connect the AC adapter. to a PC. connected to the cradle. The USB cable is not Connect the USB cable.
- Page 194 Problem Cause Solution Page I can’t connect The AC adapter is not Connect the AC adapter. the camera to connected to the cradle. a DVD The LAN cable is not Connect the LAN cable. recorder with connected. DVR. The LAN cable is incorrect. When connecting the camera directly to a DVD recorder with DVR with a LAN cable, use a...
-
Page 195: Error Messages
Error Messages The messages listed below indicating an error or status may be displayed on the screen. Message Explanation NO CARD There is no SD card inserted. NO AVAILABLE There is no available space on the specified drive. MEMORY NO IMAGE There are no images on the specified drive or album. - Page 196 Message Explanation NO INK The printer is out of ink. NO PAPER The printer is out of paper. PAPER ERROR An error occurred with paper during printing. AN ERROR OCCURRED. An error occurred during USB connection. DISCONNECT USB CABLE. STORING The media stopped for a set time during recording and INTERRUPTED recording was interrupted.
-
Page 197: Glossary
Glossary ● Backlight compensation Exposure compensation to prevent a backlight phenomenon. Backlight refers to the effect of a subject becoming dark when a large amount of light enters the lens. ● Chapter A unit used for segments of recorded content. By inserting chapters in each scene, the user can quickly move to the beginning of a desired scene. - Page 198 ● JPEG A file format used for compressing and saving color images. The compression ratio can be selected, but the higher the compression ratio, the poorer the quality of the expanded image. Widely used on the Internet and by painting applications for PCs. ●...
-
Page 199: Index
Index AC adapter..........18, 30 Metering mode..........89 ACDSee..........156, 160 Microphone sensitivity ......... 87 AEB.............. 76 Move ............117 AF assist light ..........138 AF mode ............90 NTSC ..........141, 198 Album..........36, 72, 99 Assist light..........24, 66 One-touch replay ......... - Page 200 Complete and mail the enclosed product registration card or register your gigashot Digital Camcorder online at www.tacp.toshiba.com/service as soon as possible. By registering your gigashot Digital Camcorder you will enable TACP to bring you new products specifically designed to meet your needs and help us to contact you in the unlikely event a safety notification is required under the U.S.
- Page 201 Digital Camcorder to the Depot Warranty Repair Center specified by the TACP Consumer Solutions Center. For additional information, visit TACP's website: www.tacp.toshiba.com ALL WARRANTIES IMPLIED BY THE LAW OF ANY STATE OF THEU.S.A., INCLUDING THE IMPLIED WARRANTIES OF MERCHANTABILITY AND FITNESS FOR A PARTICULAR...
- Page 202 Limited Canadian Warranty For Toshiba Brand GSC-R30/60 SERIES HDD (HARD DISC DRIVE) CAMCORDERS Toshiba of Canada Limited (“TCL”) makes the following limited warranties to original consumers in Canada. THESE LIMITED WARRANTIES EXTEND TO THE ORIGINAL CONSUMER PURCHASER OR ANY PERSON RECEIVING THIS GSC-R30/60 SERIES HDD (Hard Disc Drive) CAMCORDER (the “CAMCORDER(S)”...
- Page 203 Modifications to the Camcorder not approved in writing by TCL, and service made necessary by the use or installation of non-Toshiba modifications to the Camcorder; j. Service of a Camcorder on which the TOSHIBA label or logo, rating label or serial number have been defaced or removed;...
- Page 204 If, after following all of the operating instructions in this manual and checking the “Troubleshooting” section, you find that service is needed: To find the nearest TCL Authorized Service Provider, visit TCL's web site at www.toshiba.ca, or call toll free 1-800-268-3404 Present your bill of sale or other proof of purchase to the Authorized Service Provider.