D-Link SECURICAM Network DCS-950 User Manual
Product manual
Hide thumbs
Also See for SECURICAM Network DCS-950:
- Quick installation manual (12 pages) ,
- User manual (88 pages)
Table of Contents
Advertisement
Quick Links
Advertisement
Table of Contents

Related Manuals for D-Link SECURICAM Network DCS-950


Summary of Contents for D-Link SECURICAM Network DCS-950
-
Page 2: Table Of Contents
PPPoE .....................31 DDNS ......................32 Tools......................33 Admin......................33 System ....................34 Default.....................35 Firmware ....................36 Recording....................37 Trigger.....................38 Motion Detection..................39 Port ......................40 Status ......................41 Device Info ....................41 Help ......................42 Installing the DCS-950 Behind a Router ............ 43 Single Camera Installation..................43 Multiple Camera Installation................43 D-Link Systems, Inc. - Page 3 Scheduled Recording ................64 Motion Trigger Recording ...............65 Menu Bar......................66 File ........................66 View......................67 Columns....................67 List View ....................68 Camera ......................69 Enable Function..................69 Tools......................69 Account....................70 System Configuration................70 About ......................71 IPView Lite Icon Description ................72 Context Sensitive Menu..................73 Uninstall IPView Application ..............74 D-Link Systems, Inc.
- Page 4 Internet Camera Features ...................76 Internet Camera Installation ................78 How to Ping Your IP Address ................80 Time Zone Table................82 Adjusting the Camera Focus..............84 Technical Specifications ..............85 Contacting Technical Support ..............87 Warranty ..................88 Registration ..................92 D-Link Systems, Inc.
-
Page 5: Package Contents
Package Contents DCS-950 User’s Manual Package Contents D-Link SECURICAM Network DCS-950 Internet Camera Cat5 Ethernet Cable Power Adapter (5.0V, 2.5A) Camera Stand with Mounting Bracket and Screws CD-ROM with Software and Manual Quick Installation Guide ... -
Page 6: Introduction
PC/Notebook over the Intranet or Internet via a web browser. The simple installation procedure and intuitive web-based interface offer easy integration with your Ethernet or Fast Ethernet network. The DCS-950 also comes with remote monitoring capability for a complete and cost-effective solution. D-Link Systems, Inc. -
Page 7: Features And Benefits
Web browser for live image viewing and allows the administrator to manage and control the Internet Camera at anytime, from anywhere in the world. Many applications exist, including industrial and public monitoring of homes, offices, banks, hospitals, child-care centers, and amusement parks. D-Link Systems, Inc. -
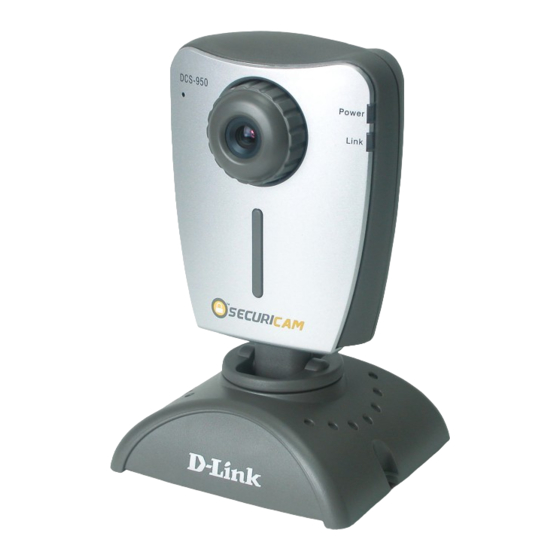
Page 8: Hardware Overview
Category 5 UTP cable). The port supports the NWay protocol, allowing the DCS-950 to automatically detect or negotiate the transmission speed of the network.The port also supports MDI/X, which allows the use of either straight through or cross-over cables. D-Link Systems, Inc. -
Page 9: Leds
DCS-950’s lens. It is located below the Power LED. Steady green confirms a good connection to the LAN. Depending on the data traffic, the LED will begin to flash to indicate that the DCS-950 is receiving/transceiving from/to the LAN network. D-Link Systems, Inc. -
Page 10: Hardware Installation
Connect the included Ethernet cable to the network cable connector located on the back panel of the DCS-950 and attach it to the network. Network Connectivity is confirmed when the green LED Indicator on the DCS-950 located below the Power LED is illuminated. D-Link Systems, Inc. -
Page 11: Attach The Mounting Bracket
If you would like to mount the camera on a wall, locate the necessary screws and continue with securing the bracket to the wall. To attach the mounting bracket to the Camera, simply attach the Camera’s base to the bracket (see illustration below). D-Link Systems, Inc. -
Page 12: Security
DCS-950 since the Default settings for the Admin ID and Admin Password are both “admin.” Once the ID and Password are defined, only the Administrator has access to the management of the DCS-950. This procedure should be done as soon as possible. D-Link Systems, Inc. -
Page 13: Using The Setup Wizard
Using the Setup Wizard Follow the simple steps below to run the Setup Wizard to guide you quickly through the installation process. Insert the D-Link DCS-950 CD into your CD-ROM drive. Click Install Software. Click Installation Wizard. D-Link Systems, Inc. - Page 14 Using the Setup Wizard DCS-950 User’s Manual Click Next. Click Yes. D-Link Systems, Inc.
- Page 15 Using the Setup Wizard DCS-950 User’s Manual Click Next. Click Finish. D-Link Systems, Inc.
- Page 16 Using the Setup Wizard DCS-950 User’s Manual Select a language and click OK. Click Next. D-Link Systems, Inc.
- Page 17 Using the Setup Wizard DCS-950 User’s Manual Click I Agree. Click Next. D-Link Systems, Inc.
- Page 18 Using the Setup Wizard DCS-950 User’s Manual Click Install. Click Next. D-Link Systems, Inc.
- Page 19 Using the Setup Wizard DCS-950 User’s Manual Click Finish. To run the Setup Wizard, click on Start->Programs->DCS-950 Series Setup Wizard. Your camera’s default IP Address will be displayed on the screen. Click Wizard to begin. D-Link Systems, Inc.
- Page 20 The IP Address, Subnet Mask of your camera, Gateway, and DNS addresses must correspond with your network settings for you to access the camera. If you are unsure of what these settings should be, please check with your network administrator. Click Next. D-Link Systems, Inc.
- Page 21 Restart to save and apply your settings. This may take a few minutes. Your setup is now complete! Wait until the Link LED on the camera begins to flash. Click Link to launch your Web browser and view your images. D-Link Systems, Inc.
- Page 22 Using the Setup Wizard DCS-950 User’s Manual Your camera is now displayed in the Web browser. D-Link Systems, Inc.
-
Page 23: Using The Configuration Menu
When you click on “Link”, the DCS-950 Home screen will appear. Use the following displayed options to set up and view your Internet Camera: Wizard Setup Audio On Upside Down Mirrored Snap Shot Logout D-Link Systems, Inc. - Page 24 Snapshot: Click to capture a snapshot image. The image will pop up in a new window. This image can be saved to a local hard drive. D-Link Systems, Inc.
- Page 25 PC that is viewing it. This path can be specified (for example, c:\dcs950\myrecording). Start Video Clicking this button will start recording video and audio Recording: immediately to the file path specified above. D-Link Systems, Inc.
-
Page 26: Configuration
There will be several options in the Configuration page to choose from to setup your DCS-950 and they are as follows: Advanced Video User PPPoE DDNS Tools Admin Time System Firmware Recording Trigger Status Device Info Help D-Link Systems, Inc. -
Page 27: Advanced
This is the size of the video display. By default the capture Resolution: resolution is set to VGA (640x480). Custom Level Capture This is the size of the video display. By default the capture Resolution: resolution is set to VGA (640x480). D-Link Systems, Inc. - Page 28 The camera name will display as the title of the window within the Windows operating system. This name will also appear on the log-in screen (once a password has been set). Motion Detection: Select to enable or disable motion detection. By default, motion detection is disabled. D-Link Systems, Inc.
-
Page 29: User
Username. The maximum password length is 16 characters (Printable ASCII). User List: The User List displays all the user names that have access to the DCS-950. To delete a user, click on the corresponding trash can icon. D-Link Systems, Inc. -
Page 30: Lan
If you are using a LAN connection, select either Static IP or LAN Settings: DHCP Client. If manually assigning a Static IP, enter your IP Address, IP Subnet Mask, Gateway IP Address, and DNS into the fields provided. D-Link Systems, Inc. -
Page 31: Pppoe
Using the Configuration Menu DCS-950 User’s Manual PPPoE Advanced > PPPoE PPPoE: If you are using a PPPoE connection, click the Yes button and enter the User Name and Password for your PPPoE account. D-Link Systems, Inc. -
Page 32: Ddns
DDNS server every time it receives a different IP address. Depending on the service, this update may take a few hours. If you are using a DDNS connection, click the Yes button and enter in your User Name, Password, and Domain Name. D-Link Systems, Inc. -
Page 33: Tools
Enter the administrator user name (admin). Password: Enter the current password. New Password: Enter the new administrator password with a maximum length of 8 (printable ASCII) characters. Confirm Password: Confirm the new password by entering it again. D-Link Systems, Inc. -
Page 34: System
Manually set the time by selecting the Year, Month, Day, Hour, Minute, and Second. Time Zone: Used to adjust the hour of time servers for local settings. Daylight Saving Used to adjust for Daylight Saving Time if applicable in your Time: region. D-Link Systems, Inc. -
Page 35: Default
Click the Restart button to restart the camera system. Default: Click the Restore button to restore factory default settings.This means that any changes made will be lost and the system will be reset to the initial status when shipped from the factory. D-Link Systems, Inc. -
Page 36: Firmware
Firmware Tools > Firmware You can upgrade the firmware by using this tool. First, check the D-Link support site for firmware updates at http://support.dlink.com. Make sure that the firmware you want to use is saved on the local hard drive of your computer. Click on Browse to search the local hard drive for the firmware that you downloaded from the D-Link Website to... -
Page 37: Recording
Allows you to only save files in which movement is detected. After the set Save Time, only one frame will be recorded when no movement is detected. Click Skip Empty File if you do not want to save the single frame files when no motion is D-Link Systems, Inc. -
Page 38: Trigger
The e-mail address of recipients for snapshots or a system address: log file. SMTP Port: This is the port number for your SMTP server, the default is 25. If you use ports other than 25 you can change it here. D-Link Systems, Inc. -
Page 39: Motion Detection
Note: Setting a higher sensitivity and a lower percentage makes any motion more easily detected. Zone 1-3: Click to open the corresponding motion window. To assign a name to the window, enter the desired name in the entry field next to the zone button. D-Link Systems, Inc. -
Page 40: Port
Tools > Port Web Port: This is the port that allows the user to connect to the camera’s user interface. By default the port is set to 80.You may change the port number if using multiple cameras. D-Link Systems, Inc. -
Page 41: Status
This is the port used to stream video. By default the port is AV Streaming Port: set to 5001. You may change the port number if using multiple cameras. Status The Status tab provides the following configuration option: Device Info. Device Info Status > Device Info D-Link Systems, Inc. -
Page 42: Help
Help Click on the Help tab to access descriptions of the particular function you need help with. The help screen is organized in the order of the tabs and then each menu item under that tab. Help D-Link Systems, Inc. -
Page 43: Installing The Dcs-950 Behind A Router
2) Assign a Local IP Address for Your Camera 3) Open a Second Port on the Camera 4) Determine Your Router’s WAN IP Address (Enable Remote Viewing) 5) Open Virtual Server Ports for Your Router (Enable Remote Viewing) D-Link Systems, Inc. -
Page 44: Identify Your Camera On The Network
If you wish to use a different IP Address, be sure that the camera settings correspond to your network settings. The Default Gateway will be the IP Address of your router’s Local IP Address (i.e.192.168.0.1 if you are using a D-Link router) D-Link Systems, Inc. -
Page 45: Assigning And Opening The Http Port On The Dcs-950
80 to something else, like 800. If you are behind a residential gateway, you will need to open a corresponding port on your gateway as well. Not all gateways are the same, please refer to your gateway’s user’s manual for specific instructions on how to forward ports. D-Link Systems, Inc. -
Page 46: Router Setup And Installation
Router Setup and Installation The following steps generally apply to any router that you have on your network. The D-Link DI-624 is used as an example to clarify the configuration process. Your WAN Ip Address information will be listed on following window. -
Page 47: Assigning And Opening Virtual Server Ports
ONE Web port per additional camera installed: port 81, 82, etc. for Web server. The AV Control Port and AV Streaming Port also need to be open. These ports are 5000 and 5001. Each camera will also require different control and streaming ports (5002, 5003,...etc). D-Link Systems, Inc. -
Page 48: Viewing Your Camera
(home) network, simply enter the local IP Address of your camera (i.e. 192.168.0.35). If using a port other than port 80, you must enter the IP address followed by a colon and the assigned port number. http://205.163.122.96:83 D-Link Systems, Inc. -
Page 49: Ipview Lite Application Installation
IPView Lite is a complete software management tool for the DCS-950 and includes all configurable settings available in the Web configuration utility. Insert the CD-ROM into the CD-ROM drive. A menu screen will appear as shown on below. Click Install Software. Click Install IPView Lite. D-Link Systems, Inc. - Page 50 IPView Lite Application Installation DCS-950 User’s Manual Click Next. Click Yes. Click Next. D-Link Systems, Inc.
- Page 51 If your sound card or video card has not passed Windows Logo testing, this window will appear. Click Continue Anyway. If there are previously installed target files that are newer than the source files, do NOT overwrite them. Click No. D-Link Systems, Inc.
- Page 52 \Programs\IPViewLite Directory. To start running the IPView Lite click on Windows Start > Programs > IPViewLite > IPViewLite. Enter the default User Name: admin into the respective field and click on OK to log into the application. D-Link Systems, Inc.
- Page 53 IPView Lite Application Installation DCS-950 User’s Manual Once logged in, the IPView Lite application is executed and the IPView Lite interface will appear in the default List View format: D-Link Systems, Inc.
-
Page 54: Ipview Lite
To change the administrator User Name and Password, select Tools > Options. The Options dialog box will appear (see below). Enter a User Name and enter the Password twice. Once all the new details are entered click OK. D-Link Systems, Inc. -
Page 55: How To Add A Camera
68.2.34.156:800, where 68.2.34.156 is your router’s WAN IP and :800 is the port that your camera is using. For more detailed information, please refer to the section titled “Installing theDCS-950 Behind a Router Configuration” on page 43. D-Link Systems, Inc. - Page 56 Username and Password are entered incorrectly, the camera will not be added into IPView Lite. The Login Camera dialog box will appear regardless of password settings on the camera. If you have not created a password yet, leave both fields blank and press enter. D-Link Systems, Inc.
-
Page 57: How To Delete A Camera
Lite list view format. From the menu bar select Camera > Delete. A Delete Camera dialog box will appear. Click Yes to delete the camera, or click No if you do not wish to delete the camera. List view Click Yes. D-Link Systems, Inc. -
Page 58: How To Change The Ip Address
(see below). Click on Browse. The Browse Camera dialog box will appear with a blank screen (see below). Click Search. IPView Lite will detect and search for all available cameras installed on the local area network (example below.) D-Link Systems, Inc. -
Page 59: How To Format The Camera View
Enter the new IP Address, the Subnet Mask, and the Default gateway into the respective fields and click OK. IPView Lite will apply the new IP Address to the camera. How to Format the Camera View From the menu bar select View > 4 Cameras. (See below.) D-Link Systems, Inc. -
Page 60: How To Rotate The Video View
In View Mode format, click on the icon located on the upper left corner of the screen and a pop-up menu will appear. Once you click Rotate Right or Rotate Left in the menu, the video will rotate 90 degrees to the right or left. D-Link Systems, Inc. -
Page 61: How To Take A Snap-Shot With The Camera
The other alternative is to click the icon located on the upper left corner of the screen under the viewing mode of either 1 or 4 cameras; a case-sensitive menu will appear. Select Stop. The recording will now cease. D-Link Systems, Inc. -
Page 62: Camera Property Settings
Web Configuration settings and upgrading firmware. Select the desired options from the tab selections to configure the camera. General Click the Web config button on the General tab to launch the Web configuration menu in a Web browser. D-Link Systems, Inc. -
Page 63: Recording
The Recording tab provides options for manual recording, schedule recording, or motion trigger recording. Manual Recording If the Manual Recording option is chosen, you must manually start recording in the List view of the DCS-950 in the Menu Bar or by clicking on the Record Icon. D-Link Systems, Inc. -
Page 64: Scheduled Recording
Schedule Setting to set the time and date for recording your files. Select By Date and enter in the dates, Start, and Stop Times. The camera will start to record according to the specified date and time period entered. Select By Weekday to indicate specific days to record and the time period. D-Link Systems, Inc. -
Page 65: Motion Trigger Recording
When this option is selected and the camera detects motion within the range of the viewing window, recording will be triggered. Recording will continue until no motion is detected. Click on Sensitivity Setting to set the sensitivity levels for the DCS-950. D-Link Systems, Inc. -
Page 66: Menu Bar
New : Opens a new camera list. Cameras must then be added to the list for configuration. Open: Opens saved camera lists. Save/Save As: Saves your current list of cameras and configurations. Exit: Exits the IPView Lite Application. D-Link Systems, Inc. -
Page 67: View
Camera and Refresh.You can view the Camera in 1 Camera or 4 Camera mode. The View menu bar is pictured below. Columns When Columns is launched, a dialog box will appear displaying the Column Settings. Select the columns that you wish to appear in the List View as illustrated below. D-Link Systems, Inc. -
Page 68: List View
Right click on any camera to bring up a menu of actions you can apply to the selected camera. Double-clicking on the desired camera will bring up the Property dialog box. You can click the Refresh icon to update the camera list view. D-Link Systems, Inc. -
Page 69: Camera
Enable function is working. To disable the real-time image select Camera > Enable and the real-time video image will stop and shutdown. Tools Tools on the menu bar allows you to change account information and system configuration. From the menu bar, select Tools > Options. D-Link Systems, Inc. -
Page 70: Account
files. Check the Load Last Configuration When Program Starts to load all your configured settings each time you run IPView Lite. It is highly recommended that you select this option to save your camera settings in IPView Lite. D-Link Systems, Inc. -
Page 71: About
(1-240 hours) has been reached. Note: Selecting the Recycle option will disable the Recording File Path Settings in the Recording menu. About Under About on the menu bar, click About for camera details such as software version. D-Link Systems, Inc. -
Page 72: Ipview Lite Icon Description
Snap shot to capture a single still image. The hot key is F5. Start recording video image. The hot key is F7. Stop recording the image. The hot key is F9. Option to modify the User Name and Password for IPView Lite. The hot key is F10. D-Link Systems, Inc. -
Page 73: Context Sensitive Menu
In View mode format click on the icon located on the upper left corner of the screen and a case sensitive menu will appear (see below). These features will be available: Enable, Rotate Right, Rotate Left, Snap Shot, Start, List, 1 Camera or 4 Cameras, Previous Page and Next Page. D-Link Systems, Inc. -
Page 74: Uninstall Ipview Application
Next to continue the process or click on Cancel to reject the uninstall process. After you click on Next, a Confirm Uninstall dialog box will appear. Click OK to continue the process. D-Link Systems, Inc. - Page 75 Uninstall IPView Application DCS-950 User’s Manual The InstallShield Wizard prompt will appear. Click Finish to complete the uninstallation procedure. D-Link Systems, Inc.
-
Page 76: Frequently Asked Questions
Lite application supplied with the Internet Camera CD-ROM. You may also record snapshots using the snapshot feature on the Home page. When viewing this page, press the “snapshot” button on your Web browser to capture the image and save to your hard drive. D-Link Systems, Inc. - Page 77 No, the Internet Camera is used only on Ethernet and Fast Ethernet network or supported by wireless transmission. The D-Link DSB-C110, DSB-C310 can be used as a PC Camera (Webcam). 8 Can the Internet Camera be connected on the network if it consists of only private IP Addresses? Yes, the Internet Camera can be connected to a LAN with private IP Addresses.
-
Page 78: Internet Camera Installation
It could be that the CMOS sensor (a square panel situated behind the lens that measures the light signals and changes it into a digital format so your computer can present it into D-Link Systems, Inc. -
Page 79: Image Quality
If you are using Internet Explorer with a version number of lower than 5, then you will need to upgrade your Web browser software in order to view the streaming video transmitted by the Internet Camera. D-Link Systems, Inc. -
Page 80: How To Ping Your Ip Address
Follow the step-by-step procedure below to utilize the PING command. Start a DOS window Start>Program>Accessories>Command Prompt Type ping x.x.x.x, where x.x.x.x is the IP Address of the Internet Camera. A successful connection to the camera will be indicated by 4 reply statements (below). D-Link Systems, Inc. - Page 81 How to Ping Your IP Address DCS-950 User’s Manual If you fail to connect to your camera you will see the following: Check to see if you have entered your camera’s IP Address correctly or reassign your camera’s IP Address. D-Link Systems, Inc.
-
Page 82: Time Zone Table
Time Zone Table DCS-950 User’s Manual Time Zone Table GMT stands for Greenwich Mean Time, which is the global time that all time zones are measured from. D-Link Systems, Inc. - Page 83 Time Zone Table DCS-950 User’s Manual D-Link Systems, Inc.
-
Page 84: Adjusting The Camera Focus
Therefore do not expose the Internet Camera’s lens directly to sunlight. The Internet Camera is designed for indoor usage and if your application requires prolonged exposure to sunlight, a sun visor is recommended to protect the Internet Camera. D-Link Systems, Inc. -
Page 85: Technical Specifications
System Hardware LAN Connector: One RJ-45 port to connect to 10/100Mbps Ethernet, auto- sensed, auto MDI/X LED Indicator: Power LED (Orange) LAN Activity LED (Green) Power Supply: DC 5V/2.5A, switching type Power Communication: 4.5 Watt (900mA x 5V) D-Link Systems, Inc. - Page 86 ActiveX Control requires IE6.0 or above (Windows) PC Requirements for IPView Lite: Windows XP, Windows 2000, Windows Me, Windows 98SE Pentium III, 850 MHz CPU or above 128 MB (256 MB Recommended) EMI & Safety: FCC, CE, VCCI D-Link Systems, Inc.
-
Page 87: Contacting Technical Support
Contacting Technical Support You can find software updates and user documentation on the D-Link website. D-Link provides free technical support for customers within the United States and within Canada for the duration of the warranty period on this product. U.S. and Canadian customers can contact D-Link technical support through our web site, or by phone. -
Page 88: Warranty
D-Link at an Authorized D-Link Service Office. The replacement Hardware need not be new or have an identical make, model or part. D-Link may in its sole discretion replace the defective Hardware (or any part thereof) with any reconditioned product that D-Link reasonably determines is substantially equivalent (or superior) in all material respects to the defective Hardware. - Page 89 Non-Applicability of Warranty: The Limited Warranty provided hereunder for hardware and software of D-Link’s products will not be applied to and does not cover any refurbished product and any product purchased through the inventory clearance or liquidation sale or other sales in which D-Link, the sellers, or the liquidators expressly disclaim their warranty obligation pertaining to the product and in that case, the product is being sold “As-Is”...
- Page 90 THE LIMITED WARRANTY PROVIDED HEREIN, THE ENTIRE RISK AS TO THE QUALITY, SELECTION AND PERFORMANCE OF THE PRODUCT IS WITH THE PURCHASER OF THE PRODUCT. Limitation of Liability: TO THE MAXIMUM EXTENT PERMITTED BY LAW, D-LINK IS NOT LIABLE UNDER ANY CONTRACT, NEGLIGENCE, STRICT LIABILITY OR OTHER LEGAL OR EQUITABLE...
- Page 91 Consult the dealer or an experienced radio/TV technician for help. For detailed warranty outside the United States, please contact corresponding local D-Link office. FCC Caution: The manufacturer is not responsible for any radio or TV interference caused by unauthorized modifications to this equipment;...
-
Page 92: Registration
Registration DCS-950 User’s Manual Registration Product registration is entirely voluntary and failure to complete or return this form will not diminish your warranty rights. 05/06/05 D-Link Systems, Inc.