Table of Contents
Advertisement
As an ENERGY STAR
determined that this product meets the ENERGY
®
STAR
guidelines for energy effi ciency.
Table of contents
IMPORTANT SAFETY INSTRUCTIONS ...............3
Product Service ....................................................3
Listening caution ..................................................3
Handling of the disc trays and discs ..................4
Placement of speakers .........................................4
Getting started ......................................................5
Preparing the remote control ..............................6
DEMO function ......................................................6
Overview of controls ............................................7
Discs ......................................................................8
Cassette tape - Play and record .......................11
FM/AM radio ........................................................12
Microphone mixing .............................................13
Timer ....................................................................13
Sound adjustment .............................................14
External unit ........................................................15
Troubleshooting guide .......................................17
Maintenance ........................................................18
When moving the unit ........................................18
Specifi cations .....................................................19
Limited Warranty .................................................20
Español
Español
Preparativos iniciales .........................................21
Colocación de los altavoces..............................22
Controles .............................................................23
Discos ..................................................................24
grabación ........................................................25
Radio FM/AM .......................................................26
Temporizador ......................................................27
Equipo externo .............................................BACK
P
RQTX0169-P.indd 1
RQTX0169-P.indd 1
®
Partner, Panasonic has
Please check and identify the supplied accessories.
Use numbers indicated in parentheses when asking for replacement
parts. (As of July 2008)
To order accessories, refer to "Accessory Purchases" on
page 20.
Before connecting, operating or adjusting this product, please read the
instructions completely.
Please keep this manual for future reference.
Operations in these instructions are described mainly using remote
control, but you can perform the operations on the main unit if the
controls are the same.
Your unit may not look exactly the same as illustrated.
La guía rápida en español se encuentra en la página 21 - 28.
If you have any questions contact
In the U.S.A.: 1-800-211-PANA (7262)
Operating Instructions
CD Stereo System
Model No.
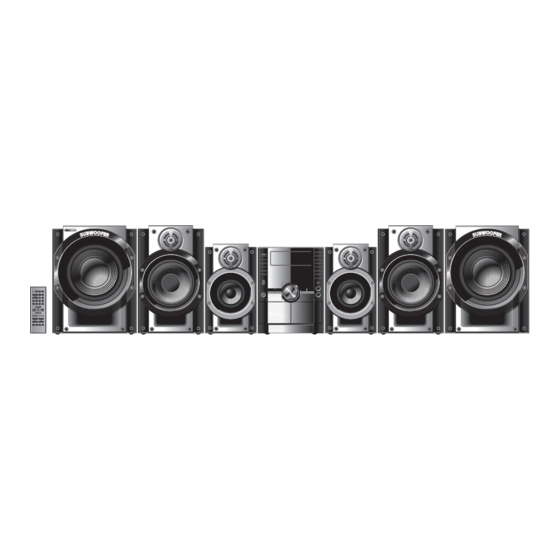
SUPPLIED ACCESSORIES
SUPPLIED ACCESSORIES
1 x AC power supply cord
(K2CB2CB00021)
1 x Remote Control
(N2QAYB000189)
2 x Remote control batteries
SC-AK960
1 x AM loop antenna
(N1DAAAA00001)
1 x FM indoor antenna
(RSA0007-L1)
RQTX0169-P
7/18/08 9:23:55 AM
7/18/08 9:23:55 AM
Advertisement
Table of Contents

Related Manuals for Panasonic SAAK960 - CD STEREO SYSTEM


Summary of Contents for Panasonic SAAK960 - CD STEREO SYSTEM
-
Page 1: Table Of Contents
Operating Instructions As an ENERGY STAR ® Partner, Panasonic has determined that this product meets the ENERGY CD Stereo System ® STAR guidelines for energy effi ciency. SC-AK960 Table of contents Model No. IMPORTANT SAFETY INSTRUCTIONS ....3 Product Service ............3 Listening caution ..........3... - Page 2 Model No: SC-AK960 OVERHEATING, ENSURE THAT CURTAINS AND Responsible Party: ANY OTHER MATERIALS DO NOT OBSTRUCT THE Panasonic Corporation of North America VENTILATION VENTS. One Panasonic Way Secaucus, NJ 07094 The socket outlet shall be installed near the equipment and easily accessible.
-
Page 3: Important Safety Instructions
IMPORTANT SAFETY INSTRUCTIONS Read these operating instructions carefully before using the unit. Follow the safety instructions on the unit and the applicable safety instructions listed below. Keep these operating instructions handy for future reference. Read these instructions. 10) Protect the power cord from being walked on or pinched particularly at plugs, convenience receptacles, and the point Keep these instructions. -
Page 4: Handling Of The Disc Trays And Discs
Handling of the disc trays and discs Not doing the following will cause damage to the unit. Inserting a disc Removing the power plug • Press [y/I, POWER] to turn off the unit and remove the power plug only after all the displays have disappeared. Tray caution •... -
Page 5: Getting Started
Getting started Making the connections Connect the subwoofer to the Connect the FM indoor antenna. main unit. Adhesive tape Tape the antenna where reception is best. (SB-WAK860) Please refer to “Boosting the subwoofer” on page 15 for more information on subwoofer operation. Connect the AM loop antenna. -
Page 6: Preparing The Remote Control
Getting started (continued) Optional antenna connections Optional antenna connections Use outdoor antenna if radio reception is poor. Note: Disconnect the outdoor antenna when the unit is not in use. Do not use the outdoor antenna during a lightning storm. FM outdoor antenna AM outdoor antenna Rear panel of this unit... -
Page 7: Overview Of Controls
Overview of controls Main unit Main unit Refer to the numbers in parentheses for page reference. Display panel Remote control signal sensor Disc trays AC supply indicator [AC IN] Disc tray open/close (4, 8) This indicator lights when the unit is connected Multiple discs change (8) to the AC power supply. -
Page 8: Discs
Discs Play Mode function Basic play Basic play You can listen to specifi c discs and tracks. Press [0, OPEN/CLOSE] on the main unit to open the tray. The unit turns on, load a disc in the current tray with the label Preparation facing up. - Page 9 Changing a single disc (SINGLE CHANGE) Press [DISC] and then [1] ~ [5] to select the disc. By main unit only While one disc is playing, you can change the discs in other trays. Press [7, CLEAR]. Press [0, SINGLE CHANGE]. Press [PROGRAM].
- Page 10 Discs (continued) Press [ENTER]. Repeat play Press [4, / REW] or [¢, / FF] to search for previous or next match. The matched title is displayed. You can repeat program play or other selected play mode. Album title search Press [REPEAT]. Blinks to indicate album title search mode “...
-
Page 11: Cassette Tape - Play And Record
Cassette tape – Play and record The buttons described for “Cassette tape - Play and record” are Action mainly for the main unit unless indicated otherwise. record programmed Perform steps 2 to 4 in “Program play” tracks Basic play Basic play (\ page 9). -
Page 12: Fm/Am Radio
FM/AM radio Manual tuning Manual tuning Memory preset Memory preset 20 FM and 15 AM stations can be preset. Press [TUNER / BAND] to select “FM” or “AM”. Preparation Press [TUNER / BAND] to select “FM” or “AM”. Press [PLAY MODE] to select “MANUAL”. Press [4, / REW] or [¢, / FF ] to select the frequency... -
Page 13: Microphone Mixing
Microphone mixing Timer The buttons described for “Microphone mixing” are mainly for the main unit unless indicated otherwise. Setting the clock Setting the clock Enjoying the microphone mixing Enjoying the microphone mixing This is a 12-hour clock. Press and hold [– CLOCK / TIMER] to select “CLOCK”. You can enjoy microphone mixing from various music sources (cas- Each time you press and hold the button: sette, disc, radio or other external equipments). -
Page 14: Sound Adjustment
Timer (continued) Sound adjustment To activate the timer Selecting sound effects Selecting sound effects Press and hold [– ˚PLAY/REC] to turn on your desired timer. ˚ PLAY ˚ REC Preset EQ no display (off) Press [PRESET EQ] repeatedly to select your desired setting. Press [y] to turn off the unit. -
Page 15: External Unit
External unit Preparation • All peripheral components and cables are sold separately. Boosting the subwoofer Boosting the subwoofer • Turn off all equipment and read the appropriate operating instruc- tions. Connecting to a portable audio equipment Connecting to a portable audio equipment ON/OFF LEVEL This feature enables you to enjoy music from a portable audio equip-... - Page 16 Press [7, CLEAR]. “RESUME” is displayed. The position is memorized. Press [6, USB] to resume. Other Panasonic audio or video equipment may start functioning Press [7, CLEAR] again to clear the position. when you operate the unit using the supplied remote control.
-
Page 17: Troubleshooting Guide
Troubleshooting guide Before requesting service, make the following checks. If you can’t fi x the system as described below, or if something not listed here occurs, refer to the enclosed directory to locate an Authorized Service Center convenient to you or contact your dealer. Reference pages are shown as black circled numbers 4. -
Page 18: Maintenance
Troubleshooting guide (continued) Disc trays Disc tray(s) cannot open. Press [y/I, POWER] to release the jammed tray(s) as the unit will switch off. Switch it on again “CHGR ERR ” is displayed. and the tray(s) will initialize to the previous tray(s) condition. If this still does not fi... -
Page 19: Specifi Cations
Specifi cations AMPLIFIER SECTION SPEAKER SECTION RMS output power Front speakers ( SB-PF960 ) 200 W per channel (7 Ω), 1 kHz, 10% THD Front Ch Rating with low-cut fi lter equipped amplifi er 240 W per channel (7 Ω), 100 Hz, 10% THD Subwoofer Ch Type 2 way, 2 speaker system (Bass refl... -
Page 20: Limited Warranty
Monday-Friday 9 am-9 pm; Saturday-Sunday 10 am-7 pm, EST. For hearing or speech impaired TTY users, TTY: 1-877-833-8855 Accessory Purchases Accessory Purchases Purchase Parts, Accessories and Instruction Books online for all Panasonic Products by visiting our Web Site at: http://www.pstc.panasonic.com or, send your request by E-mail to: npcparts@us.panasonic.com You may also contact us directly at: 1-800-332-5368 (Phone) 1-800-237-9080 (Fax Only) (Monday-Friday 9 am to 8 pm, EST.) -
Page 21: Preparativos Iniciales
Preparativos iniciales Conexiones Conecte el altavoz de subgraves Conecte la antena interior de FM. a la unidad principal. Adhesive tape Fije la antena donde la recepción sea mejor. (SB-WAK860) Por favor consulte “Refuerzo de subgraves” en la pá- gina 15 para más información sobre el funcionamiento de los altavoces de subgraves. -
Page 22: Colocación De Los Altavoces
Colocación de los altavoces Aparato principal Altavoz delantero (izquierdo) Altavoz delantero (derecha) Altavoz de Altavoz de subgraves subgraves (derecha) (izquierdo) Altavoz Altavoz envolvente envolvente (izquierdo) (derecha) Altavoces delanteros Nota: Los altavoces han sido diseñados identicamente por lo que no es •... -
Page 23: Controles
Controles Aparato principal Aparato principal Los números entre paréntesis indican la página de referencia. Visualizador Bandeja de discos Sensor de señal del mando a distancia Abrir/cerrar bandeja Indicador de alimentación de CA [AC IN] de disco (3 ~ 8) Este indicador se encenderá cuando la Cambiar múltiples discos (8) unidad esté... -
Page 24: Discos
Discos Función de modo de reproducción Reproducción básica Reproducción básica Puede escuchar discos específi cos y pistas. Pulse [0, OPEN/CLOSE] en la unidad principal para abrir la bandeja. Preparación El aparato se enciende, carga un disco en la bandeja actual con Seleccione y reproduzca sus discos deseados. -
Page 25: Cintas De Casete - Reproducción Y Grabación
Cintas de casete – reproducción y grabación Los botones descritos para “Cintas de casete – Para Acción reproducción y grabación” son principalmente para la unidad a grabar las no ser que se indique lo contrario. pistas progra- Ejecutar los pasos de 2 a 4 en “Reproducción madas programada”... -
Page 26: Radio Fm/Am
Radio FM/AM Sintonización manual Sintonización manual Grabación de emisoras en memoria Grabación de emisoras en memoria Se pueden presintonizar 20 emisoras FM y 15 AM. Pulse [TUNER / BAND] para seleccionar “FM” o “AM”. Preparación Pulse [PLAY MODE] para seleccionar “MANUAL”. Pulse [TUNER / BAND] para seleccionar “FM”... -
Page 27: Temporizador
Temporizador Para activar el temporizador Puesta en hora Puesta en hora Mantenga pulsado [– ˚PLAY/REC] para encender el tempori- zador deseado. ˚ PLAY ˚ REC Éste es un reloj de sistema de 24 horas. Ninguna visualización (desactivado) Mantenga pulsado [– CLOCK/TIMER] para seleccionar Pulse [y] para apagar el aparato. -
Page 28: Equipo Externo
1.) Para otras funciones de operación, son similares a aquellos descritos en “Discos” (\ página 8 ~ 10). Panasonic Consumer Electronics Panasonic Puerto Rico, Inc. Company, Division of Panasonic Ave. 65 de Infantería, Km. 9.5 Corporation of North America...