Table of Contents
Advertisement
Available languages
Available languages
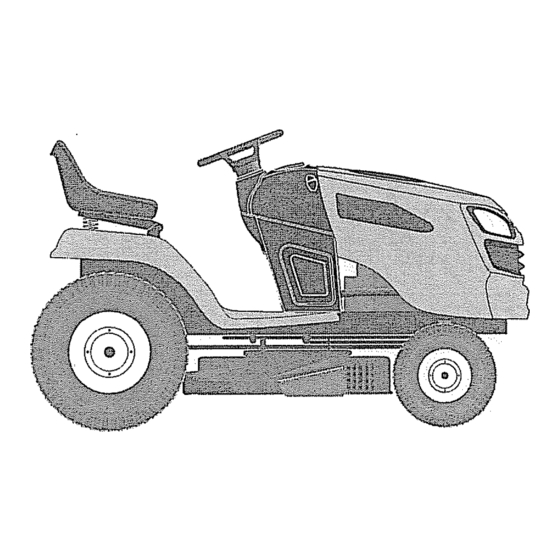
Operator's
Manual
®
GARDE
TRACTOR
28.0 HP,* 54" Mower
Electric Start
Automatic
Transmission
Model No.
917.28974
o EspaSol,
p. 36
This product
has a low emission
engine
which
operates
differently
from
previously
built
engines.
Before
you
start
the
engine,
read and understand
this Owner's
Manual.
IMPORTANT:
Read and follow all Safety
Rules and Instructions before
operating this equipment.
For answers
to your questions
about this product,
Call:
! =800-659-5917
Sears Craftsman
Help Line
5 am - 5 pm, Mon - Sat
SEARS,
ROEBUCK
AND CO., HOFFMAN
ESTATES,
IL 60179
U.S,A.
Visit our Craftsman website:www.sears.com/craftsman
*As raled by the engine manulacturer
Advertisement
Table of Contents

Related Manuals for Craftsman 28974 - Professional PGT 9000 28 HP/54" Garden Tractor


Summary of Contents for Craftsman 28974 - Professional PGT 9000 28 HP/54" Garden Tractor
- Page 1 ! =800-659-5917 Rules and Instructions before Sears Craftsman Help Line operating this equipment. 5 am - 5 pm, Mon - Sat SEARS, ROEBUCK AND CO., HOFFMAN ESTATES, IL 60179 U.S,A. Visit our Craftsman website:www.sears.com/craftsman *As raled by the engine manulacturer...
- Page 2 ......Storage ..........AssemblyiPre-Operation ....... Troubleshooting ........Operation ..........Sears Service ......Back Cover Maintenance Schedule ......CRAFTSMAN PROFESSIONAL LIMITED WARRANTY TWO YEARS ON TRACTOR When operated and maintained according to all supplied instructions, if this tractor fails due to a defect...
- Page 3 _DANGER: This cutting machine is capable of amputating hands and feet and throwing objects. Failure to observe the following safety instructions could result in serious injury or death. • Never direct discharged material toward _WARNING: in order to prevent anyone. Avoid discharging material cidental...
- Page 4 II. SLOPE OPERATION , Never carry children, even with the blades shut off. They may fall off and Slopes are a major factor related to loss of be seriously injured or interfere with control and tip-over accidents, which can safe machine operation.
- Page 5 • Keep machine free of grass, leaves, or , Remove gas-powered equipment from other debris build-up. Clean oil or fuel the truck or trailer and refuel it on the spillage and remove any fuel-soaked ground, if this is not possible, then debris.
- Page 6 Champion: RC12YC AGREEMENTS (Gap: .040") Congratulations on making a smart pur- Ground Speed Forward: 0-5.5 chase. Your new Craftsman® product is Reverse: 0-2.4 designed and manufactured for years of Charging System: I6 Amps @ 3600 RPM dependable operation. But like all products,...
- Page 7 (1) Locknut 3/8-16 (1) 1-1/40.D. Washer Mower (1) Front Link (5) Large Retainer Springs - 7/16 (!) 3/40.D. Washers (-1) Anti-Swat (2) Small Retainer Springs - 5/!6 (2) Rear Lift Link Assemblies (5) I-3/16 O.D. Washers Mower Install Slope Sheet (2) Keys (1) Oil Drain Tube For Future Use...
- Page 8 lnmediatamen Your new tractor has been assembled at the factory with the exception of those parts left almacenamier unassembled for shipping purposes. tractor no se v TOOLS REQUIRED FOR ASSEMBLY _ADVERTEr A socket wrench set will make assembly tor con gasolir edificio en don easier.
- Page 9 INSTALL MOWER DRIVE BELT iCONTROLDE See MOWER AND DRIVE BELT AS- SEMBEY Supplement Sheet for additional :)preajustado en ajustes. Revise guidance on this assembly. _tinuaci6n, antes Be sure tractor is on level surface neoesario, yea engage parking brake. Lower attachment lift lever to it's lowest )NTROL position.
- Page 10 PARA REMO_ 8. AI-FACH REAR LIFT LINKS (C) - Insert HACER REp/3 rod end of link assembly into hole in trac- 1. Bloquee el tor lift shaft suspension arm (L) and pivot Remueva link down to mower. Lift rear corner of retenci6n mower and position slot in link assembly remoci6n €...
- Page 11 CHECK TIRE PRESSURE v'CHECKLIST The tires on your tractor were overinflated Before you operate your new tractor, we at the factory for shipping purposes. Cor- wish to assure that you receive the best performance and satisfaction from this rect tire pressure is important for best Quality...
- Page 12 These symbols may appear on your tractor or in literature supplied with the product. Learn and understand their meaning. U ,R @ REVERSE NEUTRAL HIGH CHOKE FAST SLOW IGNITION SWITCH MOWER LIFT ENGINE OFF REVERSE ENGINE ON ENGINE START PARKING BRAKE MOWER HEIGHT OPERATION SYSTEM(ROS)
- Page 13 KNOW YOUR TRACTOR READ THIS OWNER'S MANUAL AND SAFETY RULES BEFORE OPERATING YOUR TRACTOR Compare the illustrations with your tractor to familiarize yourself with the locations various controls and adjustments. Save this manual for future reference. _alizarun ajuste, ]strucciones de cen mAs arriba.
- Page 14 The operation of any tractor result in foreign objects thrown into the eyes, which can result in severe eye damage. Always wear safety glasses or eye shields while operating your tractor or performing any adjustments ADVEF or repairs. We recommend standard safety glasses or a wide vision safety...
- Page 15 tel tractor(en- TO USE CRUISE CONTROL TO ADJUST GAUGE WHEELS _ici6n O FRGire The cruise control feature can be used for ci6nSTOP pare Gauge wheels are properly adjusted ierrelallave del forward travel only. when they are slightly off the ground when mower is at the desired cutting height in...
- Page 16 FILTRO DEL REVERSE OPERATION SYSTEM (ROS) TO TRANSPORT Su motor pue( Your tractor is equipped with a Reverse When pushing or towing your tractor, be manera incorn Operation System (ROS). Any attempt sure to disengage transmission by placing D_le servicio the operator to travel in the reverse direction freewheel...
- Page 17 terantesdear- ADD GASOLINE 1. Be sure freewheel control is in the eocho(8)horas " Fill fuel tank to bottom of filler neck. Do not transmission engaged position. _padel retleno! overlie Use fresh, clean, regular unleaded Sit on seat in operating position, depress _ceite en forma _ivel d elaceite.
- Page 18 TRACTOR Shutoff engine and set parking brake. o The attachments can be used during the Siempre obs_ 6+ Engagetransmissionbyplacingfreewheel engine warm-up period after the transmis- ando d_ mant sion has been warmed up and may require control in engaged position (See "TO OPERACION the choke...
- Page 19 EVERY EV'ERY EVERY BEFORE ....MAINTENANCE BEFORE EVERY EVERY SEASON STORAGE t',U,'I,.\C Et,_At4 tS t.,rio SCHEDULE EACH HOURS HOURS HOURS HOURS Check Brake OPeration Check Tire Pressure ..To,,oo,, o,,+,,,,,,+.,,+.,o.o,, Ro++'+ v" v" A Check for Loose Fasteners ....... ChecI'JRep tace Mower Blades Lubrication...
- Page 20 ROS "ON" Position Engine "ON" Position ij_kPRECAUCl TRACTOR (Normal Operating) puede que de Always observe safety rules when performing las ruedas, any maintenance. Apretar el BRAKE OPERATION el rondo, rr soltar el pe If tractor requires more than five (5) feet to atr&s hast_ stop at highest speed...
- Page 21 ANSMISION TO CLEAN BATTERY AND TERMINALS SAt_ VISCOSITY GRADES ..Corrosion and dirt on the battery and termi- n tiempo frio, nals can cause the battery to "leak" power. ,'!!!!,!!!! ..como las 1. Disconnect BLACK battery cable first then RED battery cable and remove ;...
- Page 22 AIR FILTER MUFFLER REMOLQUE [ Yourenginewill not run properlyusing ACCESORIO, € Inspect and replace corroded muffler a dirtyair filter.Serviceair cleanermore Remoique sol_ spark arrester (if equipped) as it could cre- dos y especific often underdusty conditions.See Engine ate a fire hazard and/or damage.
- Page 23 DECK WASHOUT PORT Move the tractor to a dry area, prefer- tc;6n"ON" ably a concrete or paved area. Engage Your tractor's deck is equipped with the mower deck PTO to remove excess washout port on its surface as part of its water and to help dry before putting the deck wash system.
- Page 24 MOVERSE HI ATRAS La direcci6n y est&n controta, WARNING: TO AVOID SERIOUS INJURY, BEFORE PERFORMING ANY SER- adelante y atr_ VICE OR ADJUSTMENTS: Poneren r 1, Depress brake pedal fully and set parking brake. de mano. Place attachment clutch in "DISENGAGED" position.
-
Page 25: To Level Mower
TO LEVEL MOWER Ifadjustmentis necessary, see steps 2 and afros dentro 3 in Visual Adjustment instructions above. Make sure tires are properly inflated to se anteojos the PSI shown on tires. If tires are over Recheck measurements, adjust if nec- cuando na m_tscara essary until both sides are equal. -
Page 26: To Replace Mower/Motion Drive Belt
MOWER DRIVE BELT INSTALLATION FAMILIARlC NOTE: Each full turn of the adjustment LEA ESTE M, nut will change mower height about 1/8". install belt around both mandrel pul- , Recheck measurements, adjust if nec- SU TRACTOt leys (R) and around idler pulleys (S) as essary until front tip of blade is 1/8"... - Page 27 The rear wheels must lock and skid 1_ ¸ when you try to manually push the tractor forward. If the rear wheels rotate, then the n el producto. brake needs to be serviced. Contact a Sears or other qualified service center.
- Page 28 REVIStON Negative iMPORTANT: Your tractor is equipped LLANTAS (Black) with a 12 volt system. The other vehicle Las llantas en must also be a 12 volt system. Do not use Cable masiado en la your tractor battery to start other vehicles. presi6n de las para obtener e TO ATTACH JUMPER...
- Page 29 Ia pieza de ENGINE encuentra ADJUST THROTTLE CONTROL ,ra (H), y fijeto un resorte de CABLE throttle control been preset la correa (K) de the factory and adjustment should not be 3r encima de la necessary Check adjustment as described r (M).
- Page 30 INSTALE DE TRANSIV Para obtener n a este procedi[ acids during storage. Acidic gas can dam- immediately prepare your tractor for stor- MONTAJE DE age the fuel system of an engine while in age at the end of the season or if the trac- REA DE TRAI_ storage.
- Page 31 TROUBLESHOOTING CHART: See appropriate section in manual unless directed to Sears service center que no se han PRO B LEM CAUSE CORRECTION Will not start Out of fuel. Fill fuel tank, Engine not "CHOKED" properfy, See "TO START ENGINE" in Operation section.
- Page 32 TROUBLESHOOTING CHART: See appropriate section in manual unless directed to Sears service center PROBLEM CAUSE CORRECTION Weak or dead battery. Recharge or replace battery. Engine clicks but will not start Corroded batteryterminats. Clean battery terminals, (1) Rued Loose or damaged wiring. Check aflwiring, Faul[y solenoid or starter.
- Page 33 _)N PARA LA TROUBLESHOOTING CHART: See appropriate section in manual unless directed to Sears service center ornpra. :stY.dise_ado PROBLEM CAUSE CORRECTION do fiable por 3s productos, Poor cut- uneven Worn, bent or loose blade. Replace blade. Tighten blade bolt _nde tanto cutting Mower deck not level.
- Page 34 TROUBLESHOOTING CHART: See appropriate section in manual unless directed to Sears service center ........,,,,,,, ..PROBLEM CAUSE CORRECTION • Mantener t u otros res .... ,,,,,,,, ..Loss of drive Freewheel control in "disengaged" I Place freewheel control in satpicadur_ position.
- Page 35 •as personas molcar. uipo remolcado tcci6n y la stancia para LA GASOLINA da5os alas a la hora de _aes extrema- _onexplosivos. garros, pipas y _lasolina apro- solina o aSadir _rcha. dejar Itecimiento de tl interior de un _1 contenedor a llama abierta, un calentador ,'al interior de mmmm...
- Page 36 _,DVERTE Si usted transporta el tractor a un lugar de entrega autorizado de Craftsman, estos gastos se motor, alguno cancetar&n. Para loca]izar el lugar autorizado m_,s cercano, comuniquese al 1-800-4-MY-HOME®.
- Page 37 ...._,_PELIGRO; Esta Maqutna cortadora es capaz de amputar las manosy los ples y de lanzar ....58 objetos, si no se observan ias instrucciones de seguridad sigutentes se pueden producir lesiones graves o la muerte. *_o°.,_o.,.* ..... 66 _DVERTENClA;...
- Page 38 • Escoger u navelocidad d emarcha bajade • Nunca permitir que nirios u otras personas modoquenoseanecesario p ararse o cam- est6n dentro del equipo pot remolcar. biarestando enunapendiente. • En pendientes, el peso del equipo remolcado , Nocortarlahierba mojada. Lasruedas puede causar la p6rdida de tracci6n y la pueden perder t racci6n.
- Page 39 rvice center l.as cuchillas del cortac_sped son afiladas. Mantener la m&quina libre de hierba, hojas " Envolver la cuchilla, ponerse guantes y poner u otros residuos acumulados. Limpiar las la m&xima atenci6n cuando se hacen opera- ontrol in salpicaduras de aceite o carburante y quitar clones en elias.
- Page 40 4 Gatones (15,IL) Congratulaciones per su buena compra. de gasolina: Regular Sin Ploma Su nuevo producto Craftsman,, estb, diseflado PROBLEM y fabricado para funcionar de modo liable par T'ipo de Aceite: SAE 30 (Sabre 32°F/010: muchos aSos. Pero coma todos los productos,...
- Page 41 rvice center ,ce battery, Rueda delantera de la segadore tinals, (1) Rueda enoid or starter. ht/reduce (1) Tuerca de Seguridad 3/8-16 ,trol. 1) Perno con Resalto ff mower filter. (1) 1-1/40.D. Arandefa _nge oil. )r change spark (t_) Barra Segadora td refill tank with ine.
- Page 42 TROUBLE, € See approl Su tractor nuevo ha sido montado en Ia fAbrica con la excepci6n de aqueHas partes que no se han PROBLEM montado pot razones de envio. Cuando en este manual se mencionan los Will not sta t6rminos "mano derecha" o "mano izquierda" se refiera a cuando usted se encuentra en la posici6n de operaci6n (sentadoia detr&s del volante de direcci6n).
- Page 43 - Por el lado derecho de la cortadora de INSTALE LA SEGADORA Y LA CORREA DE TRANSr_ISI6N c_sped, introduzca la barra anti-balanceo en el orificio de la barra de transmisi6n (T). Para obtener m_s indicaciones con respecto - Haga girar fa barra hacia usted e introduz- _ascan dam- a este procedimiento, ver el Apendice sobre ca el otto extrerno de Ia barra en el orificio...
- Page 44 12. lntroduzca el otto extremo de la pieza de ENGINE uni6n (E) en el orificio que se encuentra en ADJUE la barra anterior de la cortadora (H), y fijelo por medio de una arandeia y un resorte de CABLE contenci6n (J). throttle 13.
- Page 45 v"LISTA DE REVISION REVISION DE LA PRESION DE LAS ) Negative LLANTAS Antes de operar y de disfrutar de su trac- (Black) Las Itantas en su unidad fueron infladas de- tor nuevo, le deseamos qua reciba el mejor Cable masiado en la f&brica por razones de env{o, La rendimiento y ia mayor satisfaccion de este presi6n de las llantas correctas es importante producto de calidad.
- Page 46 Estos simbolos pueden aparecer sobre su tractor o en ta lfferatura proporcionada con el producto. Aprenda y comprenda sus significados. MARCHA ATRAS NEUTRO ALTO 8AJO ESTRANGU- R_PIDO LENTO LACION IGN1C16N ® MOTOR MOTOR MOTOR FRENO DE FRENO DE ABIERTA EN MARCHA ESTACIONAMIENTO ESTACIONAMIENTO APAGADO...
- Page 47 kLLATION FAiVIILIARICESE CON SU TRACTOR LEA ESTE MANUAL DEL DUEigO Y LAS REGLAS DE SEGURIDAD ANTES DE OPERAR andrel pul- SU TRACTOR pulleys (S) as Compare tas itustraciones con su tractor para familiarizarse con las ubicaciones de los diversos controles y ajustes. Guarde este manual para referencia en el futuro, tch pulley (M).
- Page 48 TO LEVEL La operaciSn de cualquier tractor puede hacer que salten objetos extrar_os dentro Make sure tit de sus ojos, lo que puede producir daSos graves en estos. Siempre use anteojos the PSI sho_ de seguridad o protecciones para los ojos mientras opere su tractor o cuando or under infi_ haga ajustes o reparaciones.
- Page 49 MOVERSE HAClA ADELANTE Y HAClA La gama de la altura de corte es de aproxima- ATRAS damente 1 a 4 pulgadas. Las alturas se miden desde el suelo a la punta de la cuchilla cuando La direcci6n y la velocidad de movimientos 3 ANY SER- el motor no est,.
- Page 50 PARA OPERAR LA SEGADORA DECK WASI Posici6n ROS "ON" Motor en posici6n "ON" Su tractor viene equipada con un interruptor Your tractor' sensor que exige la presencia del operador. Si washout el motor est#, funcionando y el embrague del deck wash s, accesorio est,, enganchado y el operador trata ter each use, de bajarse det asiento, se apagar#, el motor.
- Page 51 AGREGUE GASOLINA REMOLQUE DE CARRETILLAS O OTROS mufflerand • Llene el estanque de combustible. Llene has- ACCESORIOS s it could cre- ta la parte inferior del cuello de relleno del Remolque solamente los accesorios recomenda- estanque de gasotina. No Io Ilene demasiado. dos y especificados por el fabricante del tractor.
- Page 52 TO CLEAN CALENTAMIENTO PARA LA TRANSMISION PARA HACER ARRANCAR EL MOTOR AUTOMATICA AI hacer arrancar el motor por la primera vez o Corrosion si se ha acabado el combustible del motor, se Antes de conducir la unidad en un tiempo frio, nals can cau ta transmisi6n debe ser calentada como las necesitar&...
- Page 53 'ON" Position _PRECAUCI6N: En el transcurso del paso 4, Operating) puede que de pronto se pongan en movimiento tas ruedas. 4. Apretar el pedal de marcha adelante hasta el rondo, mantener pot cinco (5) segundos y soltar et pedal. Apretar el pedal de marcha arras hasta el fondo, mantener por cinco (5) segundos y soltar e! pedal.
- Page 54 MAIN PROGRAMA ANTES DE CADA CADA CADA CADA CADA {AL},I,',,C E I_A|AtE t,l"_ O TE}APORADA MANTENIMIENTO CADA USO HORA_ HORA£ HORAS HORAS Check Br_ 9evI_,_r I_ opomci#_n dol {m_o v" T }Check Tir{ V_riliO_ |mcorc, m_r, de do p_e_enco d'0P_'_lfful'_'t 10=q!s{°mnd ROS AlCheck for Alilar/camb_ar I,'_scuchi{l_s d_ la sega_of_ T ILubricatio_...
- Page 55 Cuando el motor estA en marcha con TRACTOR .rking brake. el interruptor de Itave del sistema de Siempre observe las reglas de seguridad cu- cingfreewheel ando d_ mantenimiento. funcionamiento arras (ROS) en la posici6n ion (See "TO "ON" y el embrague del accesorio conectado, OPERAClON DEL FRENO on of manual), cualquier tentativa del operador de viajar...
- Page 56 ADD GASOi Revise el nivel dei aceite del c_rter antes de ar- 4. Limpie losterminales y losextremes d el cable de labateria conuncepilto dealam- rancar el motor y despu6s de cada echo (8) horas . Fill fueltan brehastaquequeden brillantes. de use continuado. Apriete la tapa det retteno/ overfill.
- Page 57 SILENCiADOR FILTRO DEL AIRE Inspeccione y cambie el silenciador corroido y el Su motor puede sufrir averias y funcionar de "tractor, amortiguador de chispas (si viene equipado) pues manera incorrecta con un filtro del aire sucio. on by placing pueden crear un peligro de incendio y/o daSos. D61e servicio at filtro de aire m&s a menudo :ling position.
- Page 58 B. Ponga la tome de fuerza del tractor (en- PUERTO DE LAVADO DE LA CUBIERTA TO USE CR! granaje de la hoja) en la posici6n OFR Gire La cubierta de su tractor est& equipada con un The cruise c( la llave de encendido ala posici6n STOP pare puerto de lavado sobre la superficie que forma forward traw...
- Page 59 vn into the dety glasses ,djustments ADVERTENCIA:PARA EVITAR LESIONES SERIAS, ANTES DE DAR CUALQUIER vision safety SERVIClO O DE HACER AJUSTES: 1, Presione el pedal de freno comptetamente y aplique el freno de estacionamiento. :tie control Ponga el embrague del accesorio en la posici6n desenganchado (DISENGAGED), Ponga la Ilave de ignici6n en la posici6n de apagado (STOP) y remu6vala.
- Page 60 KNOW YOI PARA NIVELAR LA SEGADORA Asegt_rese de que los neum#,ticos est6n infla- READ THIS dos a la PSI que se indica en estos. Si est&n TRACTOR dernasiado inflados o poco inflados, el c6sped Compare no le quedar& bien cortado, Io cual podr_. various contr Ilevarlo a pensar que la SEGADORA no est#,...
- Page 61 PARA REEMPLAZAR LA CORREA DE LA CUCHILLA DE LA SEGADORA DESMONTAJE DE LA CORREA DE TRANS- product. MISI6N DE LA SEGADORA 1. Estacione ettractor en una superficie nive- lada. Ponga et freno de mano. Baje ]a palanca elevadora a la posici6n de m&s abajo.
- Page 62 CHECK PARA CAMBIAR LA CORREA DE iMPUL- SION DE MOVIIvllENTO The tires on Estacione el tractor en una superficie nivelada. at the factory Ponga el freno de mane. Si necesita asistencia, rect tire pres,, del lade de abajo del apoyapi6s izquierdo hay cutting per-for una guia pr_ctica para el montaje de fa correa...
- Page 63 PARA REMOVER LAS RUEDAS PARA PARA REMOVER LOS CABLES, INVIERTA EL HACER REPARAClONES ORDEN Bloquee el eje en forma segura. 1. El cable NEGRO primero del chasis y iuego Remueva la cubierta del eje, el anillo de de la bateria completamente cargada, retenci6n y las arandelas para permitir la 2, El cable ROJO al filtimo de ambas baterias,...
- Page 64 PARA CAMBIAR LA BOMBILLA DE LA LUZ INSTALL MOTOR DELANTERA BELT PARA AJUSTAR EL CABLE DE CONTROL DE 1. Levante el cap6. LA ACELERAClON See MOWEI Tire el sujetador de la bombilla fuera del SEMBLY El control de la aceleraci6n ha sido preajustado en agujero en la parle trasera del enrejado.
- Page 65 gasolina acidica puede dafter el sistema de Inmediatamente prepare su tractor para el _ose parts left combustible de un motor durante el periodo de almacenamiento al final de la temporada o si el almacenamiento, tractor no se va a usar por 30 dies o m&s. , Vaciar el dep6sito del carburante poniendo ,_ADVERTENCIA: Nunca almacene el trac-...
- Page 66 IDENTIFlCACION DE PROBLEMAS: Vea la secci6n apropiada en el manual a menos que est6 dtrigido a un centro de servicto Sears...." ..r ..CORRECClON CAUSA PROBLEMA ,, ,,,,, ,,, ,,,,,,,,,,,,,,,,,,, ..No arranca 1. Sin combustible. 1. Llene el estanque de combustible, 2.
- Page 67 _bove is re- IDENTIFICACION DE PROBLEMAS: )f the Califor- Vea la secci6n apropiada en el manual a menos que est6 dirigido a un centre de servicio Otherstates Sears. ral lawsapply PROBLEMA CAUSA CORRECClON esterfor the 3ur nearest 4. Filtro de aire sucio. 4, Umpie/cambie e! fiftro de aire, EPAIR PARTS 5.
- Page 68 IDENTIFICACION DE PROBLEMAS: Vea la secci6n apropiada en el manual a menos que est6 dirtgido a un centro de servicio Sears, PROBLEMA CAUSA CORRECC,ON ........Remove the truck o i Las cuchiltas 3. Polea de guia atascada. 3, Cambie la polea de gula. segadoras no rotan 4.
- Page 69 with the fall off and rfere with hildren who _e past may wing area for er or backed ._rate the ¢) )aching blind _ther objects f a child. ¢) _at has a 30 not attach "o t the hitch recommenda- Jed equip- ers in or on _i E."...
- Page 70 SERVnCE NOTES _DANGER throwing in serious _WARNINI cidental start porting, adju= always disco place wire wl lug. WARNIN_ neutral, you1 d_WARNIN_ that are reco specification_ tractor. Use c Operate only when on a sl while on ash Iose traction you to lose c _WARNIN_ its constituer ponents...
- Page 71 NOTAS SERVIClO .............Back Cover is tractor fails , or purchase, :ractor is ever in your home. • the first year transport "ized location, this tractor trge), it will be I NOT pay for: not limited _uch as nails, ,t, or improper ._d to damage g objects...
- Page 72 Opera NESD MORE HELP? _iili You't[ find the answe_ alld more on managemyhome.com - for free! _i!i:L • Find this and all your other product manuals online. i!iiiil , Get answers from our team of home experts. _zj_,_ • Get a personalized maintenance plan for your home, i;i:ii!i! •...