
Related Manuals for Kenwood KDC-1018


Summary of Contents for Kenwood KDC-1018
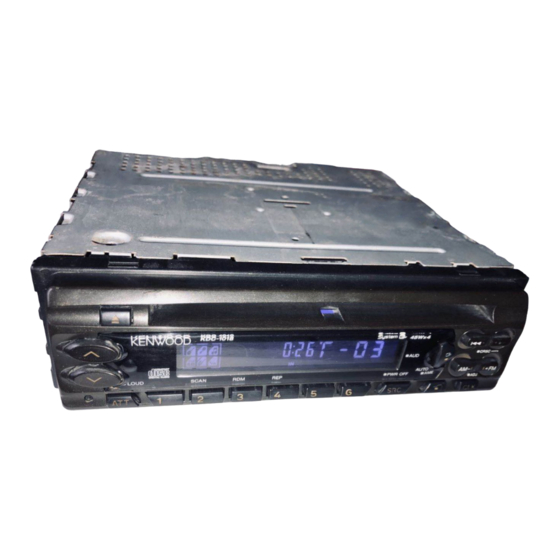
- Page 1 KDC-4018 CD-RECEIVER INSTRUCTION MANUAL KDC-4018G KDC-2018 KDC-1018 COMPACT DIGITAL AUDIO © B64-1831-00 (MW)
-
Page 2: Table Of Contents
Contents Safety precautions..........3 CD/External disc control features Playing CDs.................15 Handling Compact discs ........5 Playing Other Disc mode ............16 Fast Forwarding and Reversing Disc Play ........16 General features Track Search ................16 Power....................7 Disc Search .................16 Volume ..................7 Track / Disc Repeat..............17 Attenuator ..................7 Track Scan...................17 Switching Modes ................8... -
Page 3: Safety Precautions
Note that none of the KDC-C100, KDC-C302, tools) inside the unit. avoid places with too much dust or the C205, C705, and non-Kenwood CD changers • If the unit starts to emit smoke or strange possibility of water splashing. can be connected. - Page 4 • If you experience problems during dirty, wipe them with a dry, soft cloth. clean it every once in a while. Your CDs can installation, consult your Kenwood dealer. get scratched if you put them in a dusty CD slot.
-
Page 5: Handling Compact Discs
Handling Compact discs Playing a CD that is dirty, scratched Storing CDs Checking New CDs for Burrs or warped can cause the sound to • Do not store CDs in areas exposed to direct When playing a new CD for the first time, skip and the unit to operate sunlight (such as a car seat or the check that there are not any burrs stuck to... - Page 6 Handling Compact discs Do Not Load CD Accessories Do Not Use Special Shape CDs Do Not Use CDs with Sticker on the Labeled Side Do not use commercially available CD • Be sure to use round shape CDs only for accessories that can be loaded into the CD this unit and do not use any special shape Do not use the CD with the label sticker...
-
Page 7: General Features
General features Power Release button 4/¢ Q/AUD Turning on the power: Press the SRC (source) button. NOTE Turn the power on before carrying out the following procedures. Turning off the power: Press the PWR OFF button for at least one second. SRC/ ATT/ CLK/... -
Page 8: Switching Modes
General features Switching Modes Loudness This function amplifies low and high tones when the volume is Switching Modes: turned down. Each time you press the SRC (source) button, the mode The LOUD indicator lights up when the loudness function is switches as follows: ▼... -
Page 9: System Q
Flat ("SQ-1") Easy ("SQ-6") Rock ("SQ-2") Jazz ("SQ-5") Top 40 ("SQ-3") Pops ("SQ-4") Press either the 4 or ¢ button to select the type of System Q speaker. The setting switches as follows. You can recall the best audio setting preset for different types Off ("SP OFF/ SP-F") / For the OEM speaker ("SP OEM/ SP-O") of the music. -
Page 10: Audio Control Setting
General features Audio Control Setting Adjustment Operation of Audio control button mode Adjust various parameters of sound quality. 4 button ¢ button (Display) Press the AUD button for at least one second to enter the Bass ("BAS") Bass decreased. Bass increased. control mode. -
Page 11: Disabled System Indicator (Dsi)
Tuner features in its special storage case while detached. • Do not expose the faceplate or its storage case to direct 4/¢ CRSC sunlight or excessive heat or humidity. Also avoid places with too much dust or the possibility of water splashing. Reattaching the Faceplate: Align the projections on the unit with the grooves on the faceplate. -
Page 12: Tuner Features Tuning
Tuner features Tuning NOTE The ST indicator lights up when stereo broadcasts are being You can choose from three tuning modes: auto seek, preset received. station seek, and manual. The AUTO 1 indicator lights up when auto seek tuning is selected, and the AUTO 2 indicator lights when preset station seek tuning is selected. -
Page 13: Station Name Preset (Snps)
Recalling a Preset Station: Also, if you make no input for 10 seconds, the name will be Press the preset station button (#1-6) for the desired station. stored up to the point that you have entered, and the mode The number of the recalled station is displayed. ends. -
Page 14: Station Name Preset Play (Snpp)
Tuner features Function of the KDC-4018/KDC-4018G Function of the KDC-4018/KDC-4018G Switching Display for Tuner Station Name Preset Play (SNPP) You can change the display used when listening to the radio. (Function of Remote) You can search for the station for any station if its name has Changing the Display: been preset using Station Name Preset. -
Page 15: Cd/External Disc Control Features
CD/External disc control features Playing CDs 4/¢ Playing CDs: If no CDs are inserted, insert one in the slot with the label facing up. If a CD is already inserted, press the SRC button repeatedly to select the CD mode. "CD"... -
Page 16: Playing Other Disc Mode
CD/External disc control features Function of the KDC-4018/KDC-4018G Track Search Playing Other Disc mode Search forward or backward through the tracks on the disc This function permits the connection of optional players and until you reach the one that you want to listen to. the playing of discs other than the loaded CD (in the current Making a Reverse Track Search: unit). -
Page 17: Track / Disc Repeat
Starting the Track Scan: NOTE Press the SCAN button. The SCN indicator lights up and the “LOAD” is displayed when discs are being exchanged on the first 10 seconds of each track will be played, in order. (KDC- disc changer. 2018/1018) "SCAN/TSCN ON"... -
Page 18: Magazine Random Play
CD/External disc control features The cursor blinks in the position where character input can be Function of the KDC-4018/KDC-4018G made. Magazine Random Play Function of disc changers) Press either the 4 or ¢ button to move the cursor to the Play the tracks on all the discs in the disc changer in random desired position. -
Page 19: Disc Name Preset Play (Dnpp)
To cancel DNPP mode: Function of the KDC-4018/KDC-4018G Press the DNPP button. Disc Name Preset Play (DNPP) The disc name preset play (DNPP) mode will be canceled. (Function of Remote) If you have preset the name of a disc that you want to listen to in the disc changer, you can look for it by name and start playing it. -
Page 20: Text Scroll
Menu settings CD/External disc control features Function of the KDC-4018/KDC-4018G Function of the KDC-4018/KDC-4018G Text Scroll Function of disc changers) 4/¢ This function permits the text to be scrolled and the entire text to be displayed. The scrolling method differs depending on the setting of scrolling in the menu. -
Page 21: Menu System
Display and setting: Menu System “BEEP ON” : Beep setting is on. (Default setting) You can set the defaults for additional functions in the menu "BEEP OFF" : Beep setting is off. mode. Make a setting for each function, referring to the NOTE following operations. -
Page 22: Disabled System Indicator (Dsi)
Menu settings Function of the KDC-4018/KDC-4018G Disabled System Indicator (DSI) Name Preset A red indicator will blink on the unit after the faceplate is This function allows you to assign the name to be displayed removed, warning potential thieves. for the currently receiving radio station or currently playing disc. -
Page 23: Basic Operations Of Remote
Basic Operations of remote Accessory of the KDC-4018/KDC-4018G NOTE The supplied remote control unit is in its storage case. 2CAUTION Do not set the remote on hot places such as above the dashboard. Loading and Replacing the Batteries: Use two "AAA"-size batteries. Slide the cover while pressing downwards to remove it as illustrated. - Page 24 Basic Operations of remote Accessory of the KDC-4018/KDC-4018G Basic operations Tuner features • 4/¢ (TUNE) buttons • VOLUME buttons Press the 4 button to decrease the frequency. Press the button to turn the volume up. – Press the ¢ button to increase the frequency. Press the button to turn the volume down.
- Page 25 • DNPP button (for disc changers) Enters and cancels the Disc Name Preset Play mode. — 25 —...
-
Page 26: Accessories
Accessories Installation Procedure 1. To prevent a short circuit, remove the key from the ignition and External view Number of items disconnect the - battery. 2. Make the proper input and output wire connections for each unit...........1 3. Connect the speaker wires of the wiring harness. 4. -
Page 27: Connecting Wires To Terminals
Fuse (10A) FM/AM antenna input If no connections are made, do not let the Wiring harness wire come out from the tab. KENWOOD disc changer control input (Accessory1) (KDC-4018/4018G only) When using the optional power amplifier, NOTE connect to its power control terminal. -
Page 28: Installation
Installation ■ ■ Installing in Japanese-Made Cars Installation Firewall or metal support Refer to the section “Removing the hard rubber frame (P. 29)” and then remove the hard rubber frame. Align the holes in the unit (two locations on each side) with the vehicle mounting bracket and secure the unit with the Accessory4 accessory screws. - Page 29 Installation ■ ■ Removing the hard rubber frame Removing the Unit Refer to the section "Removing the hard rubber frame" and Engage the catch pins on the removal tool and remove the then remove the hard rubber frame. two locks on the lower level. Lower the frame and pull it forward as shown in the figure.
- Page 30 Installation ■ Screwing the Faceplate on the Unit Function of the KDC-4018/4018G/2018 If you want to fasten the faceplate to the main unit so that it does not fall off, screw in the provided screw (ø4 × 16 mm) in the hole shown below.
-
Page 31: Troubleshooting Guide
Troubleshooting Guide What might seem to be a malfunction in your unit may just be the result of slight misoperation or miswiring. Before calling service, first check the following table for possible problems. PROBLEM POSSIBLE CAUSE SOLUTION The power does not turn on. The fuse has blown. - Page 32 Troubleshooting Guide PROBLEM POSSIBLE CAUSE SOLUTION Can’t remove disc. The cause is that more than 10 minutes has elapsed The disc can only be removed within 10 minutes of the since the vehicle ACC switch was turned OFF. ACC switch being turned OFF. If more than 10 minutes has elapsed, turn the ACC switch ON again and press the Eject button.
- Page 33 Troubleshooting Guide The following messages are displayed when certain problems are occurring in your system. Take the recommended actions. No disc magazine has been loaded in the changer. The disc magazine is not completely loaded. EJECT ] Load the disc magazine properly. No CD in the unit.
-
Page 34: Specifications
Specifications Specifications subject to change without notice. FM tuner section Audio section Maximum output power..........45 W × 4 Frequency range Full Bandwidth Power (at less than 1% THD) ....22 W × 4 (200 kHz space) ..87.9 MHz – 107.9 MHz (50 kHz space) ....87.5 MHz –...