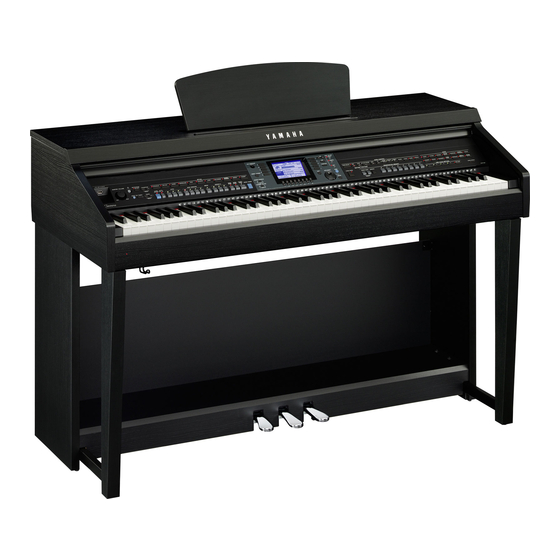
Yamaha Clavinova CVP-601 Owner's Manual
Owner's manual
Hide thumbs
Also See for Clavinova CVP-601:
- Data list (40 pages) ,
- Reference manual (98 pages) ,
- Reference (49 pages)
Table of Contents
Advertisement
CV P - 601
Owner's Manual
Mode d'emploi
Manual de instrucciones
Thank you for purchasing this Yamaha Clavinova!
We recommend that you read this manual carefully so that you can fully take advantage of the advanced and
convenient functions of the instrument. We also recommend that you keep this manual in a safe and handy place for
future reference.
Before using the instrument, be sure to read "PRECAUTIONS" on pages 4-5.
For information on assembling the keyboard stand, refer to the instructions on page 98.
Nous vous remercions d'avoir choisi le Clavinova de Yamaha !
Nous vous conseillons de lire attentivement ce mode d'emploi afin de tirer pleinement profit des fonctions avancées
et pratiques de votre instrument.
Nous vous recommandons également de garder ce manuel à portée de main pour toute référence ultérieure.
Avant d'utiliser l'instrument, lisez attentivement la section « PRÉCAUTIONS D'USAGE » aux pages 4 et 5.
Pour plus d'informations sur l'assemblage du pupitre de clavier, reportez-vous aux instructions figurant à la page 98.
Gracias por adquirir el Yamaha Clavinova
La lectura detenida de este manual le permitirá disfrutar de las útiles y avanzadas funciones del instrumento.
Recomendamos guardar el manual en un lugar seguro y accesible, para futuras consultas.
Antes de utilizar el instrumento, lea las "PRECAUCIONES", en las páginas 4-5.
Para obtener más información sobre el montaje del soporte del teclado, consulte las instrucciones en la página 98.
ENGLISH
FRANÇAIS
ESPAÑOL
EN FR ES
Advertisement
Table of Contents

Related Manuals for Yamaha Clavinova CVP-601


Summary of Contents for Yamaha Clavinova CVP-601
- Page 1 For information on assembling the keyboard stand, refer to the instructions on page 98. Nous vous remercions d'avoir choisi le Clavinova de Yamaha ! Nous vous conseillons de lire attentivement ce mode d'emploi afin de tirer pleinement profit des fonctions avancées et pratiques de votre instrument.
-
Page 2: Special Message Section
Implied warranties may also be affected. SPECIFICATIONS SUBJECT TO CHANGE: The information contained in this manual is believed to be correct at the time of printing. However, Yamaha reserves the right to change or modify any of the specifications without notice or obligation to update existing units. -
Page 3: Important Safety Instructions
IMPORTANT NOTICE FOR THE UNITED KINGDOM Connecting the Plug and Cord (DECLARATION OF CONFORMITY PROCEDURE) Responsible Party : Yamaha Corporation of America IMPORTANT. The wires in this mains lead are coloured in accordance with the following code: Address : 6600 Orangethorpe Ave., Buena Park,... -
Page 4: Precautions
If it should appear to be malfunctioning, discontinue use immediately and have it inspected by qualified Yamaha service personnel. Water warning • Do not expose the instrument to rain, use it near water or in damp or wet conditions, place on it any containers (such as vases, bottles or glasses) containing liquids which might spill into any openings. - Page 5 AC outlet. Yamaha cannot be held responsible for damage caused by improper use or modifications to the instrument, or data that is lost or destroyed.
-
Page 6: Notice
• This product incorporates and bundles computer programs and contents in which Yamaha owns copyrights or with respect to which it has license to use others’ copyrights. Such copyrighted materials include, without limitation, all computer software, style files, MIDI files, WAVE data, musical scores and sound recordings. -
Page 7: Included Accessories
Voice selection, expanded Voice parameters, and integrated effect processing. XG is a major enhancement of the GM System Level 1 format, and was developed by Yamaha specifically to provide more Voices and variations, as well as greater expressive control over Voices and effects, and to ensure compatibility of data well into the future. -
Page 8: Welcome To Clavinova
Playing a chord with your left hand automatically plays the auto accompaniment backing (Style function). Select an accompaniment style — such as pop, jazz, Latin, and various other music genres in the world — and let the Clavinova be your complete backing band! CVP-601 Owner’s Manual... - Page 9 Connect to an iPhone/iPad Chapter 10 Connections You can connect your smart device such as iPhone and iPad to the MIDI terminals of this instrument via Yamaha i-MX1 (optional). With appropriate applications on your iPhone/iPad, you can take advantage of convenient features and get more enjoyment out of this instrument.
-
Page 10: About The Manuals
The above materials are available for downloading from the Yamaha Manual Library. Access the Yamaha Manual Library, then enter your model name (CVP-601, for example) in the Model Name area to search the manuals. Yamaha Manual Library http://www.yamaha.co.jp/manual/... -
Page 11: Table Of Contents
(Style Recommender) ............55 Specifications Turning Style Parts On/Off and Changing Voices ... 56 Adjusting the Volume Balance Between Style and Index Keyboard ................. 57 4 Song Playback – Playing and Practice Songs – Playback of Songs ..............58 CVP-601 Owner’s Manual... -
Page 12: Panel Controls
These apply various effects to the keyboard performance. [CHANNEL ON/OFF] button ....pages 56, 62 Drum Kit icons..........page 41 Calls up settings for turning Style/Song channels on or These indicate drum instruments assigned to each key off. when the Standard Kit 1 is selected. CVP-601 Owner’s Manual... - Page 13 F3 G3 A3 B3 C4 D4 E4 F4 G4 A4 B4 C5 D5 E5 F5 G5 A5 B5 C6 D6 E6 F6 G6 A6 B6 C7 Music rest page 17 Guide lamps Key cover page 62 page 14 ] (Standby/On) switch page 14 I/O connectors pages 17 and 89 Pedals page 34 CVP-601 Owner’s Manual...
-
Page 14: Starting Up
Press the [ ] (Standby/On) switch to turn the power on. serious damage to the instrument. The display located in the center of the front panel and the power indicator located below the left end of the keyboard lights up. The power indicator lights up. CVP-601 Owner’s Manual... - Page 15 NOTICE If you force-quit the instrument during recording or editing, the data might be lost, and the instrument and external devices might be damaged. CAUTION Be careful to avoid catching your fingers when closing the cover. CVP-601 Owner’s Manual...
-
Page 16: Auto Power Off
Turn the power on while holding down the lowest key on the keyboard. An “Auto power off disabled” message appears briefly and Auto Power Off is disabled. The setting is retained even if the power is turned off. CVP-601 Owner’s Manual... -
Page 17: Using The Music Rest
Install the headphone hanger using included two screws (4 x 10mm) as shown in the figure. NOTICE Do not hang anything other than the headphones on the hanger. Otherwise, the instrument or the hanger may be damaged. CVP-601 Owner’s Manual... -
Page 18: Changing The Display Language
TAB [ ][ ] OWNER Use the [4]/[5] buttons to select the desired language. Adjusting the Contrast of the Display You can adjust the contrast of the display by turning the [LCD CONTRAST] knob located to the left of the display. CVP-601 Owner’s Manual... -
Page 19: Showing The Owner Name In The Opening Display
Display the version number To check the version number of this instrument, press the [7]/[8] (VERSION) buttons in the display in step 1 above. Press the [EXIT] button or the [8] button to return to the original display. CVP-601 Owner’s Manual... -
Page 20: Playing The Demos
The sub menus are shown at the bottom of the display. Press one of the [1] [8] buttons corresponding to the sub menu. NOTE To return to the next higher level menu, press the [EXIT] button. Press the [EXIT] button repeatedly if necessary to exit from the Demos. CVP-601 Owner’s Manual... -
Page 21: Display-Based Controls
Example 2 The [A] and [B] buttons are used to move the cursor up or down. The [C], [D], [H] and [I] buttons are used to select the corresponding parameter. CVP-601 Owner’s Manual... - Page 22 [1] – [8] buttons to adjust the value. Changing the page If multiple pages exist in the display, the page numbers (P1, P2 ...) are shown at the bottom of the display. Pressing the corresponding [1] – [5] button changes the display page. CVP-601 Owner’s Manual...
- Page 23 (ex., TEMPO [+]), then rotate the [DATA ENTRY] dial and press [ENTER] to close the window. [EXIT] button Pressing the [EXIT] button returns you to the previously indicated display. Pressing the [EXIT] button repeatedly returns to the default Main display (page 25). CVP-601 Owner’s Manual...
-
Page 24: The Messages Shown In The Display
For example, pressing the [GUIDE] button calls up the display in which the Guide mode can be set. Refer to the separate Data List for a list of the displays that can be called up with the Direct Access function. CVP-601 Owner’s Manual... -
Page 25: Main Display Configuration
Adjust the volume balance among the parts by using the button to show the Volume Balance display. [1] – [7] buttons. Transpose Displays the amount of transposition in semitone units (page 42). TEMPO/BAR/BEAT Displays the current position (tempo/bar/beat) in Style playback or Song playback. CVP-601 Owner’s Manual... - Page 26 Indicates the sequence order of the Registration Memory (if programmed; page 85) numbers, which can be called up via the TAB [ ][ ] buttons or the pedal. For instructions on programming the sequence, refer to the Reference Manual on the website. CVP-601 Owner’s Manual...
-
Page 27: File Selection Display Configuration
The PRESET Voice files are categorized and contained in appropriate folders. The next highest level — in this case, folder — is shown. Each folder shown in this display contains appropriately categorized Voices. This display shows the Voice files in a folder. CVP-601 Owner’s Manual... -
Page 28: Entering Characters
To cancel the character-entering For details on entering characters, refer to “Other character-entry operations” operation, press the [8] below. (CANCEL) button. Press the [8] (OK) button to actually enter the new name and return to the previous display. CVP-601 Owner’s Manual... -
Page 29: Restoring The Factory-Programmed Settings
You can also restore a specified setting to the factory default value, or save/load your own reset settings. Call up the operation display: [FUNCTION]→ [J] UTILITY → TAB [ ][ ] SYSTEM RESET. For details, refer to the Reference Manual on the website. CVP-601 Owner’s Manual... -
Page 30: Data Backup
This procedure backs up all data stored in USER drive (except Protected Songs) and all Before using a USB flash settings. For maximum data security Yamaha recommends that you copy or save your memory, be sure to read important data to a USB storage device. This provides a convenient backup if the “Connecting a USB Storage... -
Page 31: Performing Piano Songs On The Clavinova
This operation calls up the Piano Room display and the panel settings for the Piano performance. NOTE While the Piano Room display is shown, only the pedal, metronome and metronome tempo function can be used, and all the settings made on the other displays cannot be applied. CVP-601 Owner’s Manual... -
Page 32: Creating The Desired Setup In The Piano Room
“Soft” produces high volume with moderate playing strength. “Medium” is the standard touch response. “Hard” requires moderately strong playing for high volume. • TUNE [3–4] Determines the pitch of this instrument in 1Hz steps. CVP-601 Owner’s Manual... -
Page 33: Piano Lock Function
Press the [G] (LOCK) button to call up the Piano Lock display. The panel settings will be locked in the Piano Room settings you made. To disable Piano Lock, press and hold the [PIANO ROOM] button for two seconds or longer again. CVP-601 Owner’s Manual... -
Page 34: Using The Pedals
Making settings for the pedals You can assign one of the various functions to the three pedals or an optional foot controller/footswitch, doing things like controlling the Super Articulation Voices or starting and stopping the Song (page 90). CVP-601 Owner’s Manual... -
Page 35: Using The Metronome
You can also change the time signature and volume of the metronome sound: [FUNCTION] → [J] UTILITY → TAB [ ][ ] CONFIG 1 → [B] 2 METRONOME For details, refer to the Reference Manual on the website. CVP-601 Owner’s Manual... -
Page 36: Maintenance
Transport the keyboard horizontally. Do not lean it up against a wall or stand it up on its side. Do not subject the instrument to excessive vibration or shock. When transporting the assembled instrument, make sure all screws are properly tightened and have not been loosened by moving the instrument. CVP-601 Owner’s Manual... -
Page 37: Voices – Playing The Keyboard
NOTE For more information on the category selection buttons on the panel correspond to the categories of the preset VOICE buttons, refer to page 41. Voices. For example, press the [STRINGS] button to display various strings Voices. CVP-601 Owner’s Manual... - Page 38 41 and the Reference Manual. To listen to the demo phrases for each Voice Press the [8] (DEMO) button to start the Demo for the selected Voice. To stop the demo, press the [8] button again. Play the keyboard. CVP-601 Owner’s Manual...
-
Page 39: Playing Two Voices Simultaneously
Press and hold one Voice button, then press another. The Voice of the first pressed button is automatically set for the Right 1 part, while the Voice of the second pressed button is set for the Right 2 part. CVP-601 Owner’s Manual... -
Page 40: Playing Different Voices With The Left And Right Hands
FINGERING → TAB [ ][ ] SPLIT POINT. For more information, and left sections) lights. refer to the Reference Manual on the website. If you want to select or edit a Voice, confirm the current keyboard part on the Main display. CVP-601 Owner’s Manual... -
Page 41: Voice Types
You can also use the pedals to add articulations to the SA Voices (page 42). For details on how to best play each SA Voice, call up the information window (pressing the [7] (INFO) button in the Voice Selection display). CVP-601 Owner’s Manual... -
Page 42: Transposing The Pitch Of The Keyboard
Pedal functions are automatically changed depending on the selected Voice. However, if you need to, you can lock the pedal function so that it does not change automatically. [FUNCTION] → [D] CONTROLLER → [H] DEPENDS ON R1 VOICE. CVP-601 Owner’s Manual... -
Page 43: Applying Voice Effects
Call up the operation display. [DIRECT ACCESS] → [EXIT] Select the desired part for which you want to add effects. Press the [VOICE EFFECT] button to call up the VOICE EFFECT display. CVP-601 Owner’s Manual... - Page 44 Voices ECHO type, harmony will be applied regardless of the chord played depending on the chord played with your left with your left hand. hand. For details, refer to the Reference Manual on the website. CVP-601 Owner’s Manual...
-
Page 45: Creating Original Organ Flutes Voices
1 (low), 2 (mid), or 3 (high). DEPTH NOTE About the VOLUME/ATTACK PRESETS Opens the File Selection display of the Organ Page and EFFECT/EQ Page, see Flute Voices for selecting a preset Organ the Reference Manual on the website. Flutes Voice. CVP-601 Owner’s Manual... -
Page 46: Setting The Touch Sensitivity Of The Keyboard
• MEDIUM ..Standard touch response. • SOFT 1 ... Produces high volume with moderate playing strength. • SOFT 2 ... Produces relatively high volume even with light playing strength. Best for players with a light touch. CVP-601 Owner’s Manual... - Page 47 Voice Selection display → [6] (VOICE SET) [FUNCTION] → [E] REGIST SEQUENCE/ Disabling automatic selection of Voice Sets (effects, etc.): FREEZE/VOICE SET → TAB [ ][ ] VOICE Editing Organ Flutes parameters: [ORGAN FLUTES] → TAB [ ][ ] VOLUME/ ATTACK or EFFECT/EQ CVP-601 Owner’s Manual...
-
Page 48: Styles – Playing Rhythm And Accompaniment
Press one of the [A] – [J] buttons to select the desired Style. Pressing one of the [1] – [4] buttons or pressing the same STYLE button again calls up other display pages (when available). Confirm that the [ACMP ON/OFF] button is off. CVP-601 Owner’s Manual... -
Page 49: Playing A Style With The Auto Accompaniment
For information on chords, see starts. page 51. Try playing chords with your left hand and play melody with your right hand. NOTE Press the [START/STOP] button to stop Style playback. You can transpose the Style (accompaniment). See page 42. CVP-601 Owner’s Manual... -
Page 50: Style Characteristics
SFF files, but they will be saved in the SFF GE format when the file is saved (or pasted) in this instrument. Please keep in mind that the saved file can only be played back on instruments that are compatible with the SFF GE format. CVP-601 Owner’s Manual... -
Page 51: Chords
You don’t have to worry about specifying the chords. (Depending on the song arrangement, AI Full Keyboard may not always produce appropriate accompaniment.) For other types, refer to the Reference Manual on the website. CVP-601 Owner’s Manual... -
Page 52: Operating Style Playback
• Red (flashing): The section will be played next, following the currently selected section. *The Main [A] – [D] buttons also flash red during fill-in playback. • Green: The section contains data but not currently selected. • Off: The section contains no data and cannot be played. CVP-601 Owner’s Manual... -
Page 53: Adjusting The Tempo
During Style playback, you can change the tempo by tapping the [TAP TEMPO] button twice at the desired tempo. When the Style is stopped, tapping the [TAP TEMPO] button (four times for a 4/4 time signature) starts Style playback at the tempo you tapped. CVP-601 Owner’s Manual... -
Page 54: Appropriate Panel Settings For The Selected Style (One Touch Setting)
Main section (A – D). The Main sections A, B, C and D correspond to One Touch Settings 1, 2, 3 and 4 respectively. To use the OTS Link function, turn the [OTS LINK] button on. CVP-601 Owner’s Manual... -
Page 55: Calling Up Optimum Styles For Your Performance (Style Recommender)
Piano section and adjusting the tempo (page 53). If the Style called up doesn’t match to song you want to play, press the [J] (RETRY) button to return to step 2-2, then repeat steps 2-2 to 3. CVP-601 Owner’s Manual... -
Page 56: Turning Style Parts On/Off And Changing Voices
83. corresponding channel. The Voice Selection display is called up from which you can select the Voice to be used for the channel. See page 37. Press the [EXIT] button to close the CHANNEL ON/OFF display. CVP-601 Owner’s Manual... -
Page 57: Adjusting The Volume Balance Between Style And Keyboard
→ TAB [ ][ ] ASSEMBLY • Editing the rhythmic feel: → TAB [ ][ ] GROOVE • Editing data for each channel: → TAB [ ][ ] CHANNEL • Making Style File Format settings: → TAB [ ][ ] PARAMETER CVP-601 Owner’s Manual... -
Page 58: Song Playback – Playing And Practice Songs
You can instantly jump back to You can also select a Song by using the [DATA ENTRY] dial, then press the [ENTER] the Main display by “double- button to execute. clicking” on one of the [A] – [J] buttons. CVP-601 Owner’s Manual... -
Page 59: Operations During Playback
SONG [STOP] button and press the [PLAY/PAUSE] button. To cancel the Synchro Start function, hold down the SONG [STOP] button and press the [PLAY/PAUSE] button once again. Pause Press the [PLAY/PAUSE] button. Pressing it again resumes Song playback from the current position. CVP-601 Owner’s Manual... - Page 60 You can transpose the Song • Prot. 2 Orig: playback. See page 42 Indicates Yamaha-protection-formatted Songs. These cannot be copied. These can be moved/saved only to the User drive and USB flash memory devices with ID. • Prot. 2 Edit: Indicates edited “Prot.
-
Page 61: Displaying Music Notation (Score)
When the Song data contains lyrics data, the lyrics are shown on the display. You can look through the entire lyrics by using the TAB [ ][ ] buttons when the Song playback is stopped. As Song playback starts, the color of the lyrics changes, indicating the current position. CVP-601 Owner’s Manual... -
Page 62: Turning Song Channels On/Off
The indicator of the [TRACK 1 (R)] button goes out. You can now play that part by [TRACK 1 (R)] button, CH 2 is yourself. assigned to [TRACK 2 (L)] button, and CH 3 – 16 are assigned to the [EXTRA TRACKS] button. CVP-601 Owner’s Manual... -
Page 63: Repeat Playback
Press the [REPEAT] button again at the ending point (B). Top of the Song End of the Song NOTE Specifying only Point A results in repeat playback between Point A and the end of the Song. CVP-601 Owner’s Manual... - Page 64 START] → SONG [STOP] + [PLAY/PAUSE] → STYLE CONTROL [START/STOP] [FUNCTION] → [B] SONG SETTING Song playback related parameters: • Keyboard and vocal practice using → [A]/[B] GUIDE MODE the Guide function: • Playing backing parts with → [8] P.A.T. Performance Assistant Technology: CVP-601 Owner’s Manual...
-
Page 65: Performance Via Midi
Pressing the [EXTRA TRACKS] button while holding the [REC] button – 3 Style parts: Ch. 9 – 16 enables recording of only Style playback. Start recording. Recording begins automatically as soon as you play a note on the keyboard or start Style playback. CVP-601 Owner’s Manual... - Page 66 Press the [SONG SELECT] button to call up the Song Selection display. The if you change to another Song or you turn the power off recorded performance will be saved as a file in the Song Selection display. For without executing the Save details, see next section. operation. CVP-601 Owner’s Manual...
-
Page 67: Saving Files
Press the [8] (OK) button to save the file. NOTE The saved file will be automatically located at the appropriate position among the If you want to cancel the Save files in alphabetical order. operation, press the [8] (CANCEL) button. CVP-601 Owner’s Manual... -
Page 68: Multi Track Recording
Press the SONG [STOP] button to stop recording. A message prompting you to save the recorded performance appears. To close the message, press the [EXIT] button. Press the SONG [PLAY/PAUSE] button to play back the recorded performance. CVP-601 Owner’s Manual... -
Page 69: File Management
Press the [7] (FOLDER) button to call up the naming display for a new folder. Input the name of the new folder (see page 28). NOTE The following marks cannot be entered for a file/folder name. ¥ / : * ? " < > | CVP-601 Owner’s Manual... - Page 70 MIDI data and/ or audio data is strictly prohibited except for your personal use. Commercially available Song data may be copy protected to prevent illegal copying or accidental erasure. Copy CVP-601 Owner’s Manual...
- Page 71 [8] (CANCEL) button. Follow the on-display instructions. • YES ....Delete the file/folder • YES ALL ..Delete all selected files/folders • NO ....Leave the file/folder as is without deleting • CANCEL..Cancel the Delete operation CVP-601 Owner’s Manual...
- Page 72 → TAB [ ][ ] REC MODE Punch In/Out: • Editing channel events: → TAB [ ][ ] CHANNEL • Editing chord events, notes, System → TAB [ ][ ] CHORD, 1-16, SYS/EX. or Exclusive events and Lyrics: LYRICS CVP-601 Owner’s Manual...
-
Page 73: Playing Back Audio Files
[USB] button then the [B] (AUDIO) button. NOTE To confirm the information of the currently selected audio file, press the [7] button to call up the Information display. To exit from the Information display, press the [F] (OK) button. CVP-601 Owner’s Manual... - Page 74 SINGLE ..Plays through the selected file repeatedly. • ALL ....Continues playback through all the files in the folder containing the current file repeatedly. • RANDOM ...Randomly and repeatedly plays back all files in the folder containing the current file. CVP-601 Owner’s Manual...
-
Page 75: Recording Your Performance As Audio
Set the desired Voice, etc. which you want to use for your instrument. performance. (For information setting the Voice, see page 37; for setting the Style, see page 48; for using the AUX IN jack, see page 90.) CVP-601 Owner’s Manual... - Page 76 Even if you make a mistake in your The file name is automatically named, and a message indicating the file name is performance, you cannot overwrite an existing file. Delete displayed. the recorded file on the File Selection display, then record your performance again. CVP-601 Owner’s Manual...
-
Page 77: Style, Etc.) For Each Song
Connect the USB flash memory which contains the panel settings file to the [USB TO DEVICE] terminal of the instrument. Press the [MUSIC FINDER] button to call up the MUSIC FINDER display. Press the [7] (FILES) button to call up the File Selection display. CVP-601 Owner’s Manual... - Page 78 Press the [F] (YES) button in the message display (indicating completion of the replace operation) to call up the MUSIC FINDER display. By checking the number of records in the MUSIC FINDER display, you can confirm the record has been replaced. The number of records CVP-601 Owner’s Manual...
- Page 79 • Song (SONG) Song data which is registered to the Music Finder from the Song Selection display (page 58) • Audio (AUDIO) Audio data which is registered to the Music Finder from the USB Audio Selection display (page 73) CVP-601 Owner’s Manual...
-
Page 80: Selecting Desired Panel Settings From The Records
Style Tempo function to LOCK or HOLD by pressing the [I] (STYLE TEMPO) button in the Music Finder display. Setting to LOCK can also avoid inadvertent changing of the Tempo while Style playback is stopped and another record is selected. CVP-601 Owner’s Manual... -
Page 81: Searching For The Panel Settings
If you wish to search with other The Search 1 display appears, showing the results of the search. criteria, press the [6] (SEARCH 2) button in the Music Finder display. The search result is displayed in the SEARCH 2 display. CVP-601 Owner’s Manual... - Page 82 [MUSIC FINDER] → TAB [ ][ ] ALL → Creating a set of favorite Records: [H] (ADD TO FAVORITE) Editing Records: [MUSIC FINDER] → [8] (RECORD EDIT) Saving the Record as a single file: [MUSIC FINDER] → [7] (FILES) CVP-601 Owner’s Manual...
-
Page 83: Custom Panel Setups
The memorized button becomes red, which indicates the number button contains data and its number is selected. CVP-601 Owner’s Manual... -
Page 84: Saving The Registration Memory As A Bank File
CVP-609/605/ 601. However, the data may not be perfectly compatible, depending on the specifications of each model. Press the [6] (SAVE) button to save the Bank file. For instructions on saving, refer to page 67. CVP-601 Owner’s Manual... -
Page 85: Recalling A Registered Panel Setup
Disabling recall of specific items: [FUNCTION] → [E] REGIST SEQUENCE/ FREEZE/ VOICE SET → TAB [ ][ ] FREEZE Calling up Registration Memory [FUNCTION] → [E] REGIST SEQUENCE/ numbers in order: FREEZE/ VOICE SET → TAB [ ][ ] REGISTRATION SEQUENCE CVP-601 Owner’s Manual... -
Page 86: Balance
Use this display when you want to adjust the balance between all the parts of the Song. Pressing the [A] (PART) button will alternates the display between SONG CH 1 – 8 and SONG CH 9 – 16. CVP-601 Owner’s Manual... - Page 87 Use the TAB [ ][ ] buttons to select the CHANNEL Page. Use the [A]/[B] buttons to select “SETUP. ” Press the [D] (EXECUTE) button. Press the [I] button to call up the Song Selection display for saving your data, then save it (page 67). CVP-601 Owner’s Manual...
- Page 88 Editing TUNE parameters: [MIXING CONSOLE] → TAB [ ][ ] TUNE Changing an Effect type: [MIXING CONSOLE] → TAB [ ][ ] EFFECT → [F] TYPE Editing EQ parameters: [MIXING CONSOLE] → TAB [ ][ ] EQ CVP-601 Owner’s Manual...
-
Page 89: Devices
[AUX IN] jack is output from the [AUX OUT] jacks. These connections could result in a feedback loop that will make normal performance impossible, and may even damage both pieces of equipment. CVP-601 Owner’s Manual... -
Page 90: Connecting A Footswitch/Foot Controller
Audio cable Connecting a Footswitch/Foot Controller Optional footswitches (Yamaha FC4 or FC5) and an optional Foot controller (Yamaha FC7) can be connected to the [AUX PEDAL] jack. A footswitch can be used for switching functions on and off, while a foot controller controls continuous parameter such as volume. -
Page 91: Connecting A Usb Flash Memory
The instrument does not necessarily support all device, you can save data you’ve created to the connected commercially available USB devices. Yamaha cannot device, as well as read data from the connected device. guarantee operation of USB devices that you purchase. -
Page 92: Formatting A Usb Flash Memory
Press the [H] (FORMAT) button to execute the Format operation. Confirming the remaining memory You can check the remaining memory of the connected USB flash memory by pressing the [F] (PROPERTY) button in step 4 above. CVP-601 Owner’s Manual... -
Page 93: Connecting To A Computer
NOTE Operations” on the website. Access the Yamaha Manual Library, then enter your model • The instrument will begin name (CVP-601, for example) in the Model Name area to search the manual. transmission a short time after http://www.yamaha.co.jp/manual/ the USB connection is made. - Page 94 • Never put anything else on the music rest together with the iPad, such as a Song booklet or another iPad. Doing so may make the music rest unstable. • Never place the iPad in an unstable position. CVP-601 Owner’s Manual...
-
Page 95: Connecting External Midi Devices
If you want to know more about MIDI and how to use it, refer to this introductory book. MIDI Basics is available for downloading from the Yamaha Manual Library. Access the Yamaha Manual Library, then enter your model name (CVP-601, for example) in the Model Name area to search the manuals. -
Page 96: Basic Procedure
OWNER Settings of Owner name (page 19) and Message language (page 18). Parameter setting backup/restore operations (page 30) can also be done in this page. SYSTEM RESET Resets the settings of the instrument. CVP-601 Owner’s Manual... - Page 97 If necessary, use the [A]/[B] buttons to select the desired parameter. Change the settings by using the [1] – [8] buttons or execute the operation by using the [A] – [J] buttons. For details of the Utility settings, refer to the Reference Manual on the website. CVP-601 Owner’s Manual...
-
Page 98: Assembly
Do not discard the vinyl tie. You will need it later in step 5. Attach D and E to C by tightening four long Foamed styrol pads screws (6 x 20 mm). Back panel Pedal Box Bundled pedal cord inside Side panel (left) Side panel(right) CVP-601 Owner’s Manual... - Page 99 Adjust the position of A so that the left and right ends of A will project beyond D and E equally (as seen from the front). Secure A by tightening six short screws (6 x 16 mm) from the front. CVP-601 Owner’s Manual...
- Page 100 • Are the pedal and power cords inserted securely into the sockets? → Check the connection. If the unit creaks or is otherwise unsteady when you play on the keyboard, refer to the assembly diagrams and retighten all screws. CVP-601 Owner’s Manual...
-
Page 101: Troubleshooting
Main display. To avoid this, turn the power on after disconnecting the USB flash memory. Some characters of the file/folder name are The language settings have been changed. Set the appropriate language garbled. for the file/folder name (page 18). CVP-601 Owner’s Manual... - Page 102 Song playback stops before the Song is The Guide function is turned on. (In this case, playback is “waiting” for the finished. correct key to be played.) Press the [GUIDE] button to turn off the guide function. CVP-601 Owner’s Manual...
- Page 103 The output volume of the external device connected to this instrument is too low. Increase the output volume of the external device. The volume level reproduced via this instrument’s speakers can be adjusted by using the [MASTER VOLUME] control. CVP-601 Owner’s Manual...
-
Page 104: Panel Button Chart
ENDING/rit. [I] – [III] [SYNC STOP] [SYNC START] [START/STOP] [MUSIC FINDER] MUSIC FINDER display FAVORITE SEARCH 1 SEARCH 2 [LCD CONTRAST] knob [MIXING CONSOLE] MIXING VOL/VOICE CONSOLE display FILTER TUNE EFFECT [CHANNEL ON/OFF] CHANNEL ON/ SONG OFF (SONG) STYLE (pop-up) CVP-601 Owner’s Manual... - Page 105 18, 30, SYSTEM RESET PART ON/OFF [RIGHT1]/[RIGHT2]/[LEFT] [AUDIO] USB AUDIO PLAYER display SONG [SONG SELECT] Song Selection display CONTROL [REC] CHANNEL ON/OFF (pop-up) [STOP] [PLAY/PAUSE] [REW]/[FF] SONG POSITION (pop-up) [EXTRA TRACKS] [TRACK 2 (L)] [TRACK 1 (R)] CVP-601 Owner’s Manual...
- Page 106 [1] – [8] VOICE [PIANO] – [PERC. & DRUM Voice Selection display CONTROL KIT] [ORGAN FLUTES] Organ Flutes FOOTAGE VOICE SET display VOLUME/ATTACK EFFECT/EQ ONE TOUCH [1] – [4] SETTING [OTS LINK] [VOICE EFFECT] VOICE EFFECT display CVP-601 Owner’s Manual...
-
Page 107: Specifications
387 Voices + 22 Drum/SFX Kits + 480 XG Voices + GM2 + GS (for GS Song Playback) Featured Voices 12 S. Articulation Voices, 9 Mega Voices, 6 Natural! Voices, 12 Sweet! Voices, 24 Cool! Voices, 25 Live! Voices, 10 Organ Flutes! Custom Voice Set CVP-601 Owner’s Manual... - Page 108 Length of Recording (max.) 80 minutes per song Compatible Data Playback .wav Format Recording .wav Functions Registration Memory Number of Buttons Control Regist. Sequence, Freeze Lesson/Guide Lesson/Guide Follow Lights, Any Key, Karao-Key, Your Tempo Guide Lamp Performance Assistant CVP-601 Owner’s Manual...
- Page 109 * Specifications and descriptions in this owner’s manual are for information purposes only. Yamaha Corp. reserves the right to change or modify products or specifications at any time without prior notice. Since specifications, equipment or options may not be the same in every locale, please check with your Yamaha dealer.
-
Page 110: Index
Guide Lamps ............... 13, 62 Copying ................70 Cord holders ..............98 CUT ..................70 Half-pedal ................. 34 HARMONY ..............44 Harmony/Echo type ............47 Damper pedal ..............34 Headphone Hanger ........... 17, 98 Damper Resonance ............33 CVP-601 Owner’s Manual... - Page 111 MUSIC ................81 Reference Manual ............10 Music Finder ..............77 Registration Memory ............83 Music Notation ..............61 Registration Memory Bank name ........25 Music Rest ..............17, 94 Registration Sequence ............. 26 Renaming ................70 CVP-601 Owner’s Manual...
- Page 112 Style Recommender ............55 XG ..................7 Super Articulation Voices ..........42 SYNC START ..............52 SYNC STOP ..............52 Synchro Start ..............59 System Exclusive events ..........72 SYSTEM RESET ............... 96 TAB ..................22 TAP TEMPO .............. 12, 53 CVP-601 Owner’s Manual...
- Page 113 CVP-601 Owner’s Manual...
- Page 114 Compliance with FCC regulations * This applies only to products distributed by YAMAHA CORPORATION OF AMERICA. (class B) Le numéro de modèle, le numéro de série, El número de modelo, el número de serie, los l'alimentation requise, etc., se trouvent sur ou près de...
- Page 115 [Información sobre la Disposición en otros países fuera de la Unión Europea] Este símbolo sólo es válido en la Unión Europea. Si desea deshacerse de estos artículos, por favor contacte a sus autoridades locales y pregunte por el método correcto de disposición. (weee_eu) CVP-601 Owner’s Manual...
- Page 116 Niederlassung und bei Yamaha Vertragshändlern in den jeweiligen Bestimmungsländern erhältlich. Pour plus de détails sur les produits, veuillez-vous adresser à Yamaha ou au distributeur le plus proche de vous figurant dans la liste suivante. Para detalles sobre productos, contacte su tienda Yamaha más cercana o el distribuidor autorizado que se lista debajo.
- Page 117 Yamaha Global Site http://www.yamaha.com/ Yamaha Downloads http://download.yamaha.com/ Yamaha Manual Library http://www.yamaha.co.jp/manual/ U.R.G., Digital Musical Instruments Division © 2012 Yamaha Corporation ZA83660 211MWZC*.*-01B0 Printed in Indonesia...