AEG 66300KF-an Operating And Installation Instructions
Electrolux ceramic glass cooking surface model 66300kf-an operating and installation instructions
Hide thumbs
Also See for 66300KF-an:
- Installation and operating instructions manual (34 pages) ,
- Installation and operating instructions manual (88 pages) ,
- Installation and operating instructions manual (108 pages)
Table of Contents
Advertisement
Quick Links
Advertisement
Table of Contents

Related Manuals for AEG 66300KF-an


Summary of Contents for AEG 66300KF-an
- Page 1 66300KF−an Ceramic Glass Cooking Surface Operating and Installation Instructions...
- Page 2 Dear customer, Please read these operating instructions carefully. Pay particular attention to the section Safety information" on the first few pages. Please retain these operating instructions for later reference. Pass them on to possible new owners of the appliance. The following symbols are used in the text: Safety instructions Warning: Information concerning your personal safety.
-
Page 3: Table Of Contents
CONTENTS OPERATING INSTRUCTIONS Safety ..........Disposal . - Page 4 Cleaning and care ........Ceramic Glass .
-
Page 5: Operating Instructions
OPERATING INSTRUCTIONS Safety The safety aspects of this appliance comply with accepted technical stan− dards and the German Appliance Safety Law. However, as manufacturers we also believe it is our responsibility to familiarise you with the following sa− fety instructions. Electrical Safety •... -
Page 6: Safety When Cleaning
• Take care when plugging electric appliances into mains sockets near the hob. Connection leads must not come into contact with the hot surface. • Overheated fats and oils catch fire quickly. You should supervise cooking when preparing foods in fat or oil (e.g. chips). •... -
Page 7: Disposal
Disposal Disposing of the packaging material All materials used can be fully recycled. Plastics are marked as follows: • >PE< for polyethylene, as used for the outer wrapping and the bags inside. • >PS< for polystyrene foam, e.g., as used for the padding materials. They are completely free of CFCs. -
Page 8: The Key Features Of Your Appliance
The Key Features of Your Appliance • Ceramic glass cooking surface: The appliance has a ceramic glass cooking sur− face and 4 rapid response cooking zones. The particularly powerful radiant heater elements significantly shorten the amount of time taken for the zones to heat up. -
Page 9: Description Of The Appliance
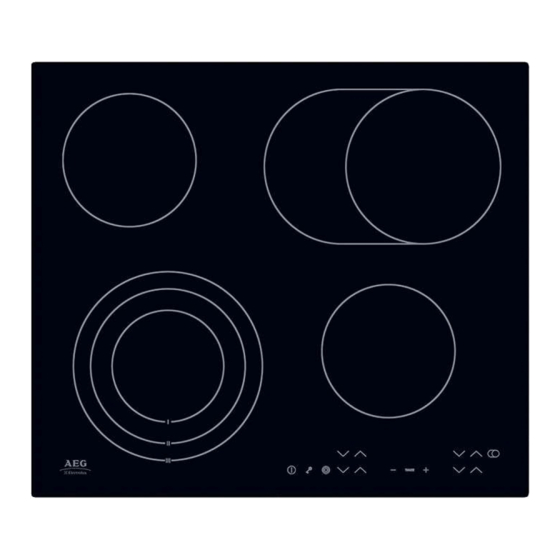
Description of the Appliance Cooking zones and control panel Single ring cooking zone 1200W Triple ring cooking zone 2300W Three−ring sensor panel Sensor panel Three−ring control lamps Stop+Go" Sensor panel Cooking setting On/Off" selector Control panel Browning zone control lamp Timer"... -
Page 10: Digital Displays
Digital displays The four display panels that belong to the four cooking zones indicate: − after having been switched on, − when a keep warm setting has been selected, − , depending on the cooking setting selected, − (with decimal point) for intermediate cooking settings, −... -
Page 11: Before Using For The First Time
Before Using for the First Time Initial Cleaning Wipe the ceramic glass cooking surface with a damp cloth to remove any traces left from manufacturing. Important: Do not use any caustic or abrasive cleaners! The surface could be damaged. Operation of the cooking surface Touch control sensor panels To operate the touch control sensor panels, touch the desired panel with the tip of your pointed finger until the relevant displays illuminate or go... -
Page 12: Switching Off The Appliance
Switching off the appliance To completely switch off the appliance, actuate the On/Off" sensor panel Touch the On/Off sensor panel for approx. one second. After switching off a single cooking zone or the entire cooking surface, the existing residual warmth will be displayed in the digital displays of the cor− responding cooking zones in the form of Selecting cooking settings For setting and changing the cooking setting (... -
Page 13: Keep Warm Setting
Keep warm setting Each of the 4 cooking zones has a keep warm setting Use the cooking setting selector sensor panel setting Switching the browning zone on and off 1. Set the desired cooking setting. 2. To switch the browning zone on or off, place your finger flat on the brow− ning zone"... -
Page 14: Switching The Triple Ring Zone On And Off
Switching the triple ring zone on and off According to the size of the saucepan or frying pan, when using the triple ring cooking zone you can switch from a smaller cooking zone to a larger cooking zone using the triple ring zone" sensor panel. You can only switch to the next size if a cooking setting has already been set for the smaller heating ring. -
Page 15: Stop+Go Function
3. Touch the triple ring" sensor panel to activate the outer heating ring. The upper control lamp will illuminate. 4. To switch off the outer heating ring, touch the triple ring" sensor panel, and the heating ring that is outermost at the time will switch off. STOP+GO function When the Stop+Go"... -
Page 16: Switching Off A Cooking Zone
Switching off a cooking zone 1. To switch off a cooking zone touch the cooking setting selector sensor pa− simultaneously, or return the setting to zero using the coo− king setting selector sensor panel Residual Heat Indicator When an individual cooking zone or the entire hob is switched off, any residual heat is shown with an Hot") in the digital display for the appropriate cooking zones. -
Page 17: Cooking Using The Automatic Warm Up Function
Cooking using the automatic warm up function All of the cooking surface’s four cooking zones can be adjusted to any of nine settings, and are equipped with an automatic warm up function: − , lowest cooking setting − , highest cooking setting −... -
Page 18: Cooking Without The Automatic Warm Up Function
Cooking without the automatic warm up function If you wish to use the cooking zones without the automatic warm up function, select the desired cooking setting using the cooking setting selector sensor panel 1. Touch the cooking setting selector sensor panel desired cooking setting from You can change the setting at any time using the cooking setting selector sensor panels... -
Page 19: Child Safety Lock
Child safety lock You can use the child safety lock to safeguard against unwanted use of the cooking surface. Switching on the child safety lock To be able to switch on the child safety lock the appliance must be swit− ched on, but all the cooking zones must be switched off. - Page 20 Overriding the child safety lock The child safety lock can be overridden in order to use the appliance (until the appliance is switched off again). When the appliance is switched on again the child safety device is activated once again. 1.
- Page 21 Switching off the child safety lock 1. Switch on the appliance. When the child safety device has been activated, 2. Touch the sensor field for approx. three seconds. An acoustic signal will sound as confirmation. 3. Touch any heat setting sensor field The displays will become dark, and the child safety device is switched off.
-
Page 22: Timer
Timer There are two ways to use the timer: − as a safety cut−out function. Set a cooking period for a cooking zone, and after this time has elapsed the cooking zone will automatically switch itself off. This function can be used for more than one cooking zone simultaneously. - Page 23 2. While the control lamp is flashing rapidly, use the sensor panels to set the desired period of time for this cooking zone up un− til the point where it automatically switches itself off (e.g. 15 minutes). The safety cut−out function will be activated after several minutes. The control lamp will now flash more slowly and the remaining cooking time will be shown in the display as it elapses.
-
Page 24: Switching Off The Safety Cut−Out Function Before It Has Come To An End
Switching off the safety cut−out function before it has come to an end There are two ways to switch off the safety cut−out function before it has come to an end. Switch off the cooking zone and timer simultaneously 1. Using the cooking setting selector sensor panel, reset the desired coo−... -
Page 25: Uses, Tables And Tips
Uses, Tables and Tips Pans The better the pan, the better the results. • You can recognise good pans by their bases. The base should be as thick and flat as possible. • Pay particular attention when buying new pans to the diameter of the base. -
Page 26: Advice On Cooking With And Without Automatic Warm Up
• Switch off the cooking zones before the end of the cooking time to use the residual heat such as to keep foods warm or for melting. • The base of the pan should be the same size as the cooking zone. •... -
Page 27: Reference Values For Your Cooking
Reference values for your cooking The figures in the following table are benchmark figures. The switch setting required for a certain cooking method depends on the quality of the pans and the type and amount of food. Automatic Switch warm up setting function*) (min.) -
Page 28: Cleaning And Care
Cleaning and care Ceramic Glass Important: Cleaners must not come into contact with the ceramic glass when hot! All cleaners must be removed with plenty of clean water after cleaning as they may have a caustic effect when the rings are next heated! Do not use any aggressive cleaners, such as e.g. -
Page 29: Burnt On Soilage
Burnt on Soilage 1. Remove burnt on sugar, melted plastic, aluminium foil or other melted ma− terials immediately, while the hob is still hot, using a glass scraper. Important: When using the glass scraper on the hot cooking zone, there is a risk of burns! 2. -
Page 30: What To Do If
What to do if ... Rectifying faults It is possible that faults have been caused by a minor error, which you can correct yourself with the help of the following instructions. Do not attempt any further repairs if the following instructions do not help in each specific case. - Page 31 ... after having switched off the cooking zones, no for residual warmth is indicated in the display. Check whether − the cooking zone was only briefly used and therefore did not become hot enough. If the cooking zone is hot, please call customer service..
-
Page 32: Installation Instructions
INSTALLATION INSTRUCTIONS Important! This appliance must be installed by qualified personnel, accor− ding to the manufacturer’s instructions and to the relevant country stan− dards. Technical Data Appliance Dimensions Width Depth Height Cut−Out Dimensions Width Depth Corner radius Power Consumption Triple cooking zone front left Single cooking zone rear left Casserole zone rear right Single cooking zone front right... -
Page 33: Legal Stipulations, Standards, Directives
Legal stipulations, standards, directives This appliance meets the following standards: • EN 60 335−1 and EN 60 335−2−6 in respect of the safety of electrical appliances for household use and similar purposes and • DIN 44546 / 44547 / 44548 in respect of properties of electrical cookers for the household. -
Page 34: Safety Instructions For The Installer
Safety Instructions for the Installer • The mains connection must be with a cable with a plug or there must be a disconnecting device with at least 3 mm contact opening in the existing domestic electrical installation, which disconnects the dishwasher comple− tely from the mains supply in accordance with NIN 2000. -
Page 35: Installing Into A Kitchen Worksurface
Installing into a kitchen worksurface Make a note of the serial number on the appliance rating plate prior to installation. This number will be required in the case of requests for service and is no longer accessible after installation, as it is on the original rating plate on the underside of the appliance. - Page 36 Catch spring Screws Worktop Frame Glass ceramic plate...
-
Page 37: Electrical Connection
Electrical connection THIS HOB MUST BE EARTHED The manufacturer declines any liability should these safety measures not be observed. The hob is designed to be connected to 230−240V 50Hz AC electrical sup− ply. The switch must not break the yellow and green earth cable at any point. Important! Make the electrical connection in accordance with the wiring diagram. -
Page 38: Service & Spare Parts
SERVICE & SPARE PARTS If you wish to purchase spare parts or require an engineer, contact your local AEG Service Force Centre by telephoning: 08705 929929 Your telephone call will be automatically routed to the Service Centre co− vering your post code area. When you contact the Service Centre they will need the following informa−... - Page 40 From The Electrolux Group. The world’s No. 1 choice. The Electrolux Group is the world’s largest producer of powered appliances for kitchen, cleaning and outdoor use. More than 55 million Electrolux Group products (such as refrigerations, cookers, washing machines, vaccum cleaners, chain saws and lawn mowers) are sold each year for a value of approx.