
Related Manuals for Haier HLTD7


Summary of Contents for Haier HLTD7
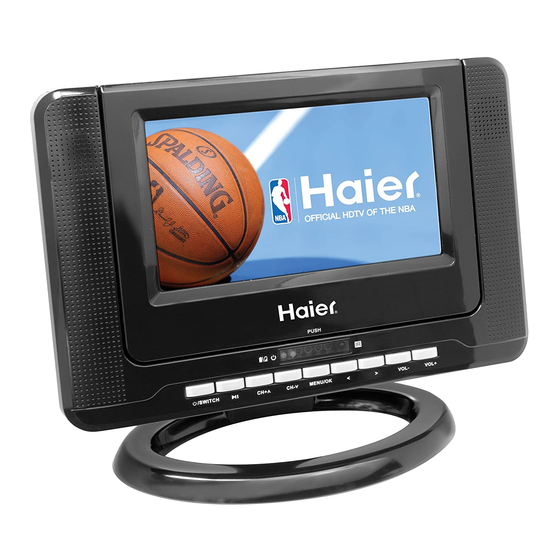
- Page 1 Instruction Manual 7〞LCD TV & DVD PLAYER COMBO MODEL NO.: HLTD7 BEFORE USING THIS PRODUCT, READ, UNDERSTAND, AND FOLLOW THESE INSTRUCTIONS. Save this booklet for future reference.
-
Page 2: Safety Instructions
IMPORTANT INSTRUCTIONS SAFETY INSTRUCTIONS CAUTION: TO REDUCE THE RISK OF ELECTRIC SHOCK. DO NOT REMOVE COVER (OR BACK). NO USER SERVICEABLE PARTS INSIDE. USE THE RECOMMENDED ACCESSORIES ONLY. REFER SERVICING TO QUALIFIED SERVICE PERSONNEL. The graphic symbols on the back cover of the set mean the following: The lighting flash with arrowhead symbol within an equilateral triangle is intended to alert the user to the presence of uninsulated dangerous voltage. -
Page 3: Features
PRECAUTIONS - TO PROLONG USE TIME, PLEASE MAKE SURE THE INTERVAL OF SWITCHING ON AND OFF IS NOT LESS THAN 5 SECONDS. - PROTECT THE POWER CORD FROM BEING WALKED ON OR PINCHED, PARTICULARLY AT PLUGS, CONVENIENCE RECEPTACLES, AND THE POINT WHERE THEY EXIT THE PRODUCT. -
Page 4: Accessories
USB/ CARD READER FUNCTION This player can play USB/SD/MMC/MS card containing files in DVD/MP3/MP4/JPEG/CD format. (NOTE: The USB port of this unit cannot be connected with the removable HDD.) SLIDE SHOW IN 17 MODES MULTI TV SYSTEM SUPPORT The player can play discs with signal system of PAL and NTSC. GRAPHICAL USER INTERFACE SCREEN Simply by pressing the OSD button on the remote control, information on the player and disc can be displayed on the screen for easy identification, the player's operations and settings can... -
Page 5: Table Of Contents
TABLE OF CONTENTS GETTING STARTED: SAFETY INSTRUCTIONS..................1-2 FEATURES......................2-3 ACCESSORIES……………………………..............3 PARTS AND CONTROLS..................5-7 MAIN UNIT......................5-6 REMOTE CONTROL....................6-7 BASIC CONNECTION…………………..............7-9 REMOTE CONTROL PREPARATION……………………........10 OPERATIONS: DVD........................11-19 TV........................20-27 FOR REFERENCE: SPECIFICATIONS....................28 MAINTENANCE.......................29 TROUBLESHOOTING..................29-30 REGION CODE SETTING..................31... -
Page 6: Parts And Controls
PARTS AND CONTROLS MAIN UNIT FRONT VIEW SIDE VIEW NOTE: Press “PUSH” will open the disc port, press the cover again to close it. 1. TFT DISPLAY WINDOW 2. BUILT-IN SPEAKERS /SWITCH BUTTON-To switch the mode among TV/ DVD/AV IN mode, or press and hold it to set the unit to STANDBY/ON mode. -
Page 7: Back View
BACK VIEW 20. Stand Holder NOTE: You must connect external antenna to the unit before TV receiver is operation. REMOTE CONTROL 1. STANDBY-To set the unit in standby mode or switch the unit on. 2. USB/CARD/DVD BUTTON-To switch the mode from USB/CARD/DISC mode. -
Page 8: Basic Connection
23. PLAY/PAUSE button-Press this button to start or pause playing the disc. 24. PREV button-Press this button to play the previous chapter (for DVD) or track (for CD). 25. NEXT button-Press this button to play the next chapter (for DVD) or track (for CD). 26. - Page 9 Rechargeable Battery Use The player is with a built-in rechargeable battery. 1. Charge the battery - Connect the adaptor to the DC 9-12V IN jack, then set the unit in POWER ON mode (THE PLAYING MODE) for fully charge. - Set in POWER ON mode but press the STANDBY button (THE STANDBY MODE) or set in POWER OFF mode for fully charge.
- Page 10 3. CONNECTING TO A TV SET To video input/output connector (yellow) Video/audio cable To audio input/output connectors (red, white) 4. CONNECTING TO AUDIO EQUIPMENT 5. Connecting to external signal sources 6. CONNECT HEADPHONE 1. Connect the headphone. Adjust the volume to minimize the volume by your remote control. Connect the headphone to phone jack.
-
Page 11: Remote Control Preparation
REMOTE CONTROL PREPARATION BATTERY INSTALLATION Install the battery as the follow picture. Be sure negative and positive terminals are positioned as indicated in the battery compartment. (Fig1) SERVICE LIFE OF BATTERY - The battery normally last for about one year although this depends on how often remote control is used. -
Page 12: Operations
MAKE SURE ALL THE EQUIPMENTS AND AC ADAPTOR ARE CONNECTED PROPERLY AND THE UNIT IS SET IN CORRECT MODE BEFORE BEING OPERATED. (THE DEFAULT SETTING ON THE UNIT IS TV MODE) OPERATIONS Press SWITCH button to switch the mode in DVD mode. 1. -
Page 13: Skipping Ahead Or Back
3. Skipping ahead or back Skipping ahead Press NEXT button during play a chapter (DVD) or a track (CD) is skipped each time the button is pressed. Skipping back Press PREV button during play a chapter (DVD) or a track (CD) is skipped each time the button is pressed. - Page 14 4. Press NEXT or PREV button, the player will play the next or previous file. 5. Press REPEAT button to change play mode. - REPEAT 1: repeat one file. - REPEAT DIR: all the files in the folder will be played repeatedly. - REPEAT ALL: repeat all tracks on the disc.
-
Page 15: Slide Show Effects
Picture Shrink/Zoom Press ZOOM button to enter the zoom mode Press FF or FR button to enlarge or shrink picture to max. to X 4 or to shrink picture size, min. to X1/4. If the picture is enlarged, you may press the navigation buttons to pan across other portions of the picture. -
Page 16: On Screen Display Information
5. The files in this folder are displayed on the right side of the screen and select the desired file by navigation buttons, then press the OK button to start to play. 6. Press REPEAT button to set repeat playing mode. -
Page 17: Program Play
12. Program play CD disc The player plays the files in desired order. 1. Press PROGRAM button and the screen will display the program menu. 2. Press navigation buttons to choose memory index and start input. Enter desired title/chapter numbers by using the numeric buttons. The DVD disc selected titles/chapters are stored into the memory. -
Page 18: Initial Settings
15. Changing subtitle language (DVD only) It is possible to change the subtitle language to CHANGING SUBTITLE LANGUAGE a different language from the one selected at the initial settings. (This operation works only with discs on which multiple subtitle languages are recorded) Press SUBTITLE button repeatedly NOTE: Pressing this button will not... -
Page 19: Language Setup
1.1 TV SYSTEM - it is for selecting the TV system according to the colour system of the TV. Options: PAL NTSC AUTO 1.2 SCREEN SAVER - when the player is not in use for 5 minutes, a running DVD logo will move across the screen to protect the TV panel. -
Page 20: Speaker Setup
3. VIDEO SETUP 3.1 BRIGHTNESS - to set the brightness for the display. Options: 0/2/4/6/8/10/12 3.2 CONTRAST - to set the contrast effect for display. Options: 0/2/4/6/8/10/12 3.3 HUE - to set the colour impression for display. Options: -6/-4/-2/0/+2/+4/+6 3.4 SATURATION - to set the saturation level for display. Options: 0/2/4/6/8/10/12 4. -
Page 21: Basic Operation
Press SWITCH button to switch the mode in TV mode 1. SCAN SIGNAL - Make sure that all connections are perfectly connected. - Switch the unit to ON. - Later the screen will display as below: - Press left or right button to select YES to start to scan channel signal. - Effective channel will be memorized automatically. - Page 22 INFO (INFORMATION) It is used to display current program information. - Press INFO button, the screen will display as below: CC (CLOSED CAPTION) It is used to set the caption mode. - Press CC button, the screen will display as below: - Keep pressing this button to select different item as desired.
- Page 23 3. MAIN MENU The unit contains different setting menus. Once the initial programming is entered it is retained in memory until changed, the TV can always be operated under the same conditions. The settings will be retained in the memory until the settings are changed. Common procedure for initial settings 1.
- Page 24 2. AUDIO SETUP Press left or right button to enter audio setup page: Balance - Press up or down button to select it and then press left or right button to adjust. - The Balance can be adjusted from -50 to 50. Audio Language - Press up or down button to select Audio Language and then press left or right button to select ENGLISH or other languages.
- Page 25 Time Zone - Press up or down button to select it and press left or right button to set the time zone according to the zone that you are in. - Options: Eastern/ Central/ Mountain/ Pacific/ Alaska/ Hawaii Daylight Saving Time - it is used to set daylight saving time (summer time) Press up or down button to select it and press left or right button to switch this function on or off.
-
Page 26: Channel Setup
CC Mode-Press up or down button to select it and press left or right button to set the caption mode as Off ,On, CC on mute. Basic Selection-Press up or down button to select it and press left or right button to set as desired. - Page 27 - Press up or down button to select it and then press left or right button to set. - Options: Air /CATV. Auto Scan Before normal watching you must search effective channel first. - Press up or down button to select it and press OK to get in scanning setup page: - Press up or down button to select Start to Scan and press OK button to start to scan programs.
- Page 28 Favorite - Press up or down button to select it and press OK button to set your favorite channel. - You can edit more than one programs as favorite programs by this option. Once a program is chosen, a mark will appear in its favorite blank. Channel NO.
-
Page 29: Specifications
Specifications 1. EARPHONE OUTPUT :≥250mV (MAX) 2. Display device: Colour TFT LCD 3. Display Screen Size: 7 inches 4. Input Resistance : 75Ω 5. Power Consumption: ≤18W 6. Standby Power Consumption: ≤0.3W 7. Resolution: 480 (RGB)X234 8. Dot Pitch: 0.107(H) X 0.372(V)mm 9. -
Page 30: Maintenance
MAINTENANCE 1. Be sure to press POWER to set the player to the standby mode and disconnect the AC adaptor. 2. Wipe the player with a dry, soft cloth. 3. If the surfaces are extremely dirty ,wipe clean with a cloth which has been dipped in a weak soap-and-water solution and wrung out thoroughly, and then wipe again with a dry cloth. - Page 31 Symptom (Common) Remedy No power. Insert the AC adaptor securely into the power outlet. - Play fails to start even when - Condensation has formed: wait about 1 to 2 hours PLAY is pressed. to allow the player to dry out. - Play starts but then stops - This player cannot play a disc other than DVD and CD.
-
Page 32: Region Code Setting
Region code setting Region coding: All DVD discs are coded by the sales territory. Please note the player is set to region 1 coding by the factory which cannot be changed. This is in compliance with the DVD patent requirements. The region number for this DVD player is...