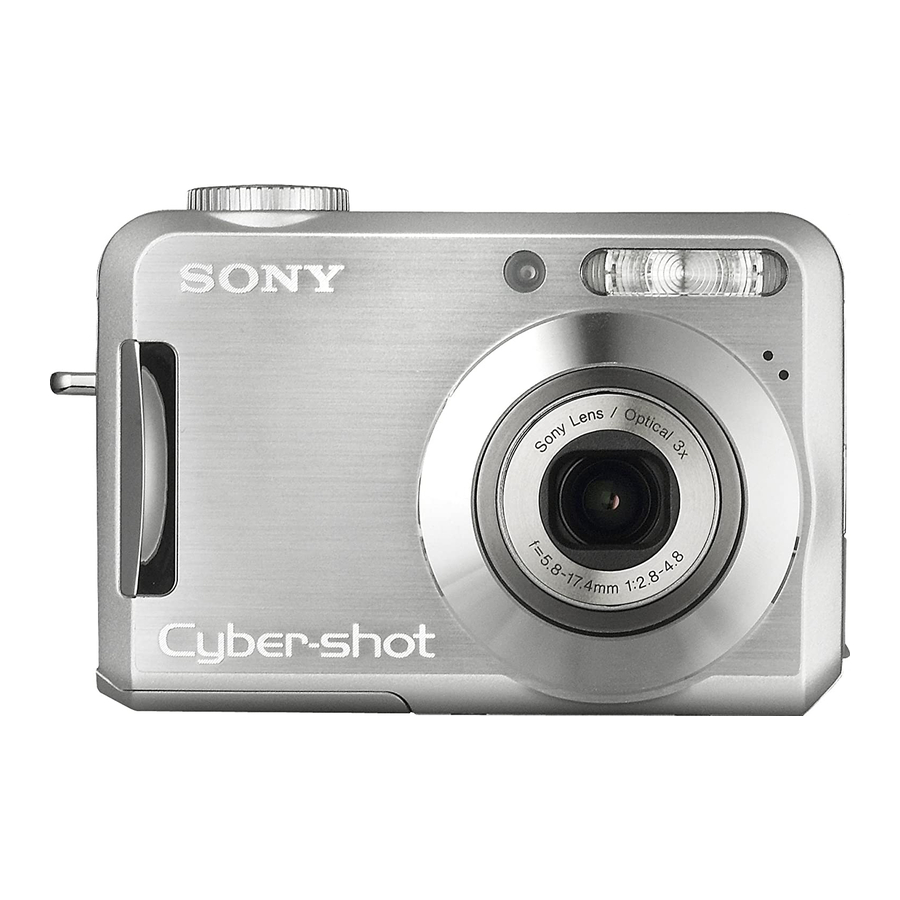
Sony DSC S700 - Cyber-shot Digital Camera Service Manual
Digital still camera
Hide thumbs
Also See for DSC S700 - Cyber-shot Digital Camera:
- Manual de instrucciones (56 pages) ,
- Handbook (101 pages) ,
- Instruction manual (64 pages)
Table of Contents
Advertisement
Quick Links
SERVICE MANUAL
Ver. 1.3 2008.07
Revision History
Revision History
How to use
How to use
Acrobat Reader
Acrobat Reader
Internal memory
Internal memory
ON BOARD
ON BOARD
Revised-3
Replace the previously issued SERVICE MANUAL
9-852-183-13 with this Manual.
Link
Link
SPECIFICATIONS
SERVICE NOTE
The components identified by
mark 0 or dotted line with
mark 0 are critical for safety.
Replace only with part num-
ber specified.
In case of the main board, or main frame assembly failure,
contact your local Sony Service Headquarter for the measures.
DSC-S700
9-852-183-14
DISASSEMBLY
BLOCK DIAGRAMS
Les composants identifiés par une
marque 0 sont critiques pour la
sécurité.
Ne les remplacer que par une pièce
portant le numéro spécifié.
Sony EMCS Co.
DSC-S700
REPAIR PARTS LIST
DIGITAL STILL CAMERA
US Model
Canadian Model
AEP Model
UK Model
E Model
Australian Model
Chinese Model
Korea Model
2008G0800-1
© 2008.07
Published by Kohda TEC
Advertisement
Table of Contents

Related Manuals for Sony DSC S700 - Cyber-shot Digital Camera


Summary of Contents for Sony DSC S700 - Cyber-shot Digital Camera
- Page 1 Ne les remplacer que par une pièce ber specified. portant le numéro spécifié. In case of the main board, or main frame assembly failure, contact your local Sony Service Headquarter for the measures. DIGITAL STILL CAMERA 2008G0800-1 DSC-S700 © 2008.07 Sony EMCS Co.
-
Page 2: Specifications
SPECIFICATIONS [System] [LCD screen] Image device: 7.20 mm (1/2.5 type) color CCD, LCD panel: 6.0 cm (2.4 type) TFT drive Primary color filter Total number of dots: 112 320 (480×234) dots Total pixel number of camera: Approx. 7 410 000 pixels [Power, general] Effective pixel number of camera: Power: LR6 (size AA) Alkaline batteries (2), 3 V... - Page 3 CRITIQUES POUR LA SÉCURITÉ DE FONCTIONNEMENT. NE COMPONENTS WITH SONY PARTS WHOSE PART NUMBERS REMPLACER CES COMPOSANTS QUE PAR DES PIÈSES SONY APPEAR AS SHOWN IN THIS MANUAL OR IN SUPPLEMENTS DONT LES NUMÉROS SONT DONNÉS DANS CE MANUEL OU PUBLISHED BY SONY.
-
Page 4: Table Of Contents
Ver. 1.2 2008.06 The changed portions from Ver. 1.1 are shown in blue. TABLE OF CONTENTS Section Title Page SERVICE NOTE 1-1. Process After Fixing Flash Error ····································· 1-1 1-2. Method for Copying or Erasing the Data in Internal Memory ··········································································· 1-1 DISASSEMBLY 2-1. -
Page 5: Service Note
1. SERVICE NOTE 1-1. PROCESS AFTER FIXING FLASH ERROR Method for Initializing the Flash Error Initialize Initializes the setting to the default setting. 1 Select [OK] with v on the control button, then press z. The message “Initialize all settings Ready?” appears. 2 Select [OK] with v, then press z. -
Page 6: Disassembly
2. DISASSEMBLY The following flow chart shows the disassembly procedure. 2-1. DISASSEMBLY Battery case lid removal 1 Pull out the battery case slowly until stop 2 Put a nail into a slot 3 Pull the battery case in the direction of arrow A Push middle cover (right) as shown to reveal the gap. - Page 7 2. DISASSEMBLY (From 2-1 Page) 1 Middle Cover (Left) × 1 Screw TP1.7 2 Cabinet (Rear) Assy 3 Button Assy Insert the plastic tweezers into the gap between middle cover (left) and DC door to prize the middle cover (left). (See Page 2-3) 1 Cabinet (Bottom) 1 Cabinet (Front) Assy...
- Page 8 2. DISASSEMBLY (From 2-2 Page) Shorting jig Ω / 1W) Caution × 1 Screw TP1.7 × 1 Screw TP1.7 2 LCD Holder 2 Cabinet (Upper) Block Assy 3 LCD (See Page 2-4) 1 SW Frame Assy × 1 Screw TP1.7 2 ST Board Complate DSC-S700...
- Page 9 Ver. 1.3 2008.07 The changed portions from Ver. 1.2 are shown in blue. 2. DISASSEMBLY (From 2-3 Page) × 1 Screw TP1.4 2 Lens Assy × 3 Screw TP1.7 4 Strap Bracket × 1 Screw TP1.7 2 MCU Block Assy HELP01 HELP02 HELP01...
- Page 10 Ver. 1.3 2008.07 The changed portions from Ver. 1.2 are shown in blue. HELP HELP01 Be careful about the Lens Assy. Don't press the Barrier part. Don't press the Sensor holder Don't press the AF Motor HELP02 Keep clean these Pins. HELP03 Attach the Block assy protection sheet as shown.
-
Page 11: Block Diagrams
Ver. 1.2 2008.06 The changed portions from Ver. 1.1 are shown in blue. 3. BLOCK DIAGRAMS 3-1. OVERALL BLOCK DIAGRAM +5VM +5VM LCD 2.0 +3.3V PXCLK +3.3V PXCLK PXCLK LCD_EN INCH LCD_EN LCD_EN LCD_MCLK CDS_EN +3.3V LCD_MCLK LCD_MCLK CDS_EN CDS_EN +3.3V LCD_VD SCLK... -
Page 12: Power Block Diagram
Ver. 1.2 2008.06 The changed portions from Ver. 1.1 are shown in blue. 3. BLOCK DIAGRAMS 3-2. POWER BLOCK DIAGRAM BATT+ BATT+ +13.4V BATT- BATT- MCU BOARD 1.6A/36V AO8803 AO8803 STROBE BOARD G2013-0081-00 G2013-0081-00 +5VM SOP8_0.65_9 SOP8_0.65_9 FLASH_VP P1,P2 P1,P2 CCD BOARD R131 R131... -
Page 13: Repair Parts List
4. REPAIR PARTS LIST 4-1. EXPLODED VIEWS 4-1-1. OVERALL SECTION ns: not supplied Main Frame Block (See 4-1-2) Ref. No. Part No. Description Ref. No. Part No. Description 3-210-010-01 SCREW TP1.7*3 3-197-605-01 LID, JK 3-209-036-01 SCREW TP1.7*3 3-197-602-01 MIDDLE COVER (RIGHT) X-2177-832-1 CABINET (FRONT) ASSY A-1254-905-A CABINET (UPPER) BLOCK ASSY 3-197-606-01 LID, BT... -
Page 14: Main Frame Block
Lens Block (See 4-3) (Note 1) In case of the main board, or main frame assembly failure, contact your local Sony Service Headquarter for the measures. (Note 2) The adjustment is not required after replacing the ST block assembly or LCD. -
Page 15: Lens Block
4-1-3. LENS BLOCK ns: not supplied (CCD Assy) × (TP1.4 (Note) (Note) In case of the CCD Assy failure, contact your local Sony Service Headquarter for the measures. Ref. No. Part No. Description 4-110-079-01 FILTER SET, LOW PASS 4-110-076-01 SHEET, LENS BLOCK PROTECTION... -
Page 16: Accessories
Owner’s Record The model and serial numbers are located on the bottom. Record the serial number in the space provided below. Refer to these numbers whenever you call upon your Sony dealer regarding this product. Model No. DSC-S650 Serial No. ___________________________ Wrist strap ©... - Page 17 Ver. 1.3 2008.07 The changed portions from Ver. 1.2 are shown in blue. [Regarding Fuse] • MCU BOARD Ref. No. : Part No. : 1-576-913-11 Description : FUSE, MICRO (1068 TYPE) (1.6A/36V) Ref. No. : Part No. : 1-576-363-11 Description : FUSE, MICRO (1005 TYPE) (1A/30V)
- Page 18 [Description of main button functions on toolbar of the Adobe Acrobat Reader Ver5.0 (for Windows)] Toolbar Printing a text Reversing the screens displayed once • To reverse the previous screens (operation) one by one, click 1. Click the Print button 2.
-
Page 19: Revision History
Reverse 985218314.pdf Revision History S.M. Rev. Ver. Date History Contents issued 2007.02 Official Release — — 2007.10 Revised-1 • Change of Supplied accessories S.M. Revised : Page 4-4 2008.06 Revised-2 • Addition of DISASSEMBLY for Lens Assy (DI08-133) • Addition of HELP •...