
Related Manuals for Motorola L704CM


Summary of Contents for Motorola L704CM
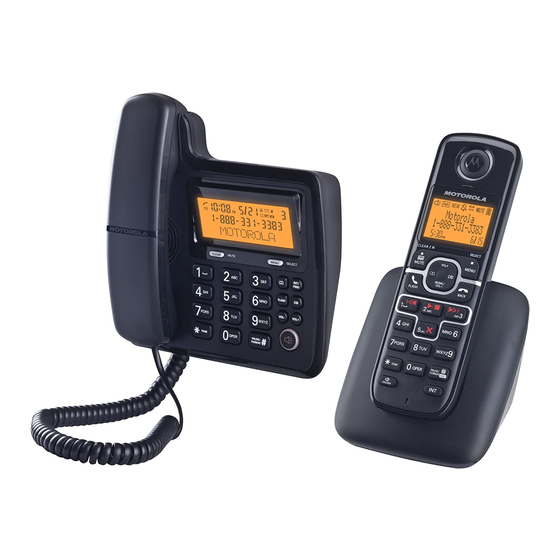
- Page 1 User’s Guide L702C / L703C / L704C / L705C / L706C L702CM / L703CM / L704CM / L705CM / L706CM DECT 6.0 Cordless / Corded Phones with Answering System Warning Use only the adapter and telephone line cord provided in the box.
- Page 2 Motorola Phone! Please retain your original dated sales receipt for your records. For warranty service of your Motorola product, you will need to provide a copy of your dated sales receipt to confirm warranty status. Registration is not required for warranty coverage.
- Page 3 This User's Guide provides you with all the information you need to get the most from your phone. Before you make your first call you will need to set up your phone. Follow the simple instructions in 'Getting Started', on the next few pages.
-
Page 4: Table Of Contents
1. Getting Started......... 6 3.12 Caller ID............. 20 3.12.1 Calls list ......... 20 1.1 Installing and charging the cordless 3.12.2 Viewing the calls list ...... 20 handset battery pack ........7 3.12.3 Saving a number for the 1.2 Assembling the rubber band of cordless calls list to the phonebook ..... - Page 5 3.19.7 Remote access ......27 4.14.1 Calling another handset ....33 3.19.8 Setting the security code ....28 4.14.2 Transferring a call to another handset ......33 Enjoy Your Cordless Handset ....29 4.14.3 Three-party conference call ..33 4. Using the phone ........29 4.15 Setting the dial mode.........
-
Page 6: Getting Started
1. Getting Started HANDSET RANGE Optimal range is reached when there are no other WARNING electrical appliances working within the range area. • Do not place your phone in the bathroom or other Any obstruction between the base and handset will also humid areas. -
Page 7: Installing And Charging The Cordless Handset Battery Pack
Installing and charging the 4. Put the handset on the charger to charge for at cordless handset battery pack least 24 hours. Once charged, the will indicate that the handset is fully charged. 5. Use only the rechargeable battery pack provided. Assembling the rubber band of cordless handset (Not applicable for L70xCM models) -
Page 8: Installing The Cordless Charger
Installing the cordless charger 2. Press and smooth out the rubber band to enwrap the handset firmly. 1. Plug the power adapter with the bigger pin plug into the cordless charger. 2. Plug the other end of the power adapter into the wall jack. -
Page 9: Connecting The Corded Base
Connecting the corded base Wall mounting on corded base This phone can be mounted on any standard wall plate. 1. Plug the power adapter with the smaller pin plug & telephone line cord into the corded base. 2. Snap the wall-mount bracket into the notches on the corded base’s back. -
Page 10: Setting The Display Language
Setting the display language 3. Press MENU (Base) and then VOL+ (Base) or VOL- to change the date setting. Repeat to set the On the corded base: time continuously. 1. Press MENU (Base) and then VOL+ (base) or SETTINGS 4. Press MENU (Base) to save the settings. VOL- to select On the cordless handset: 2. -
Page 11: Getting To Know Your Phone
2. Getting to know your phone CLEAR/MUTE/BACK a) In menu/phonebook/redial list/calls list mode: Press to return to previous level. Press and hold to Overview of your corded base return to standby mode. b) In pre-dial/editing mode: Press to delete one digit/ character. - Page 12 FLASH 10 #/PAUSE/FORMAT a) During a call: Press to insert a flash. a) In idle/pre-dial/number editing mode/during a call: Press to insert a #, press and hold to insert a CALLS LIST pause (P). a) In idle mode/pre-dial/during a call: Press to b) In calls list entry: Press to toggle between 7, 8, 10 access calls list.
-
Page 13: Corded Base Lcd Display
Corded Base LCD Display On when there is new voice mail not yet listened to. Off when new voice mail has been listened to. Indicates together with the sequential number of the calls list or redial list entry. On when you are in the phonebook menu. On when there are repeat calls from the same number. - Page 14 Overview of your cordless handset SCROLL UP/VOLUME UP a) In menu mode: Press to scroll up. b) In editing mode: Press to move the cursor to the left. c) During a call: Press to increase the volume. d) Calls list/phonebook/redial list entry: Press to scroll up the list.
- Page 15 ALPHANUMERIC KEYPAD 10 */ TONE a) In idle/pre-dial/editing mode/during a call: Press a) In idle/pre-dial/editing mode: Press to insert a *. to enter characters/numbers. Press and hold to b) During a call: Press to switch from pulse to tone activate speed dial. dialing temporarily if pulse mode was selected before.
- Page 16 Cordless Handset LCD display 13 LEFT/PHONEBOOK a) In idle mode/during a call: Press to access the phonebook. b) In editing mode: Press to move the cursor to the left. 14 ANSWERING MACHINE/MUTE/CLEAR/X a) In idle mode: Press to play the voice prompt of answering machine main menu.
- Page 17 On when ringer volume is turned off. In idle mode, the current time is displayed. In Caller ID mode, the time of call is displayed. On when there is received new voice mail not yet listened to. On when the line is in use. Off when new voice mail has been listened to.
-
Page 18: Enjoy Your Corded Base Phone
Enjoy Your Corded Base Phone 3. Using the phone Ending a call 1. During a call, put the corded handset on the corded Making a call base cradle. 1. Pick up the corded handset or press on the corded base. Then enter the phone number. If you are using the speakerphone, press to end the call. -
Page 19: Dialing From The Calls List
Dialing from the calls list 3.10 Storing a phonebook entry as a one touch number 1. Press CID (Base) and then scroll VOL+ (Base) or VOL- to the entry you want to dial. 1. Press MENU (Base) and then VOL+ (Base) or 2. -
Page 20: Caller Id
3.12 Caller ID • If you receive more than one call from the same number, only the most recent call is kept in the calls If you have subscribed to Caller ID, and provided the list. When you have missed calls (incoming calls identity of the caller is not withheld, the number of the that you haven't answered) the icon will be... -
Page 21: Saving A Number For The Calls List To The Phonebook
3.12.3 Saving a number for the calls list to the 3.12.5 Deleting the entire calls list phonebook 1. Press CID (Base) to enter the calls list. 1. Press CID (Base) to enter the calls list 2. Press MENU (Base) and then VOL+ (Base) or 2. -
Page 22: Personal Settings
3.13 Personal Settings Menu map MAIN MENU DATE & PHONEBOOK RINGER SETTINGS ANS. MACHINE RESET TIME SETUP SETTINGS SUB MENU YEAR MELODY DIAL MODE ANSWERER ON CLEAR VMAIL (if answering machine is off) DATE VIEW VOLUME FLASH TIME ALL SETTINGS TIME EDIT KEY TONE... -
Page 23: Intercom
1. Press MENU (Base). During an intercom call, you will hear an alert tone if there 2. Press VOL+ (Base) or VOL- to scroll through the menu. is an incoming external call. You need to hang up the 3. Press MENU (Base) to open a sub-menu or intercom call before answering the incoming external call. -
Page 24: Setting The Dial Mode
3.16 Setting the flash time 5. Press on the corded base or put the corded handset on the base cradle to hang up and leave The default flash time is 600ms. It is unlikely that you should need to change this setting unless advised to do so. the cordless handset engaged with the caller. -
Page 25: Resetting All Settings
3.18 Resetting all settings 3.19.2 Setting the answer mode 1. Press MENU (Base) and then VOL+ (Base) or 1. Press MENU (Base) and then VOL+ (Base) or ANS. MACHINE VOL- to select RESET VOL- to select 2. Press MENU (Base) and then VOL+ (Base) or 2. -
Page 26: Announcement
3.19.4 Announcement 3.19.4.2 Playing the announcement This is the message your callers hear on the answering 1. Press MENU (Base) and then VOL+ (Base) or machine. There are two pre-recorded outgoing ANS. MACHINE VOL- to select messages, or you can record your own. 2. -
Page 27: Deleting All Old Messages
This can be turned off if you want, as follows: 3.19.7 Remote access Remote access allows you to operate your answering 1. Press MENU (Base) and then VOL+ (Base) or machine and listen to your messages by calling your ANS. MACHINE VOL- to select phone from another phone. -
Page 28: Setting The Security Code
After entering the remote access mode, press the 3.19.8 Setting the security code This is used to change the remote access PIN if following keys to carry out your desired function. necessary. Press... To... 1. Press MENU (Base) and then VOL+ (Base) or Repeat the message ANS. -
Page 29: Enjoy Your Cordless Handset
Enjoy Your Cordless Handset 4. Using the phone Muting a call 1. During a call, press /MUTE to mute the Making a call microphone, so that you can talk to someone else 1. Enter the phone number and then press /FLASH in the room without your caller hearing you. -
Page 30: Storing A Phonebook Entry As A One Touch Number
3. Press MENU and then enter the name. TIPS Instead of scrolling to browse the phonebook entries, 4. Press MENU and then enter the number. press the numeric key corresponding to the first letter of 5. Press MENU to save. the entry you wish to locate. -
Page 31: Viewing The Calls List
NOTE You may choose the desired number format for • When the calls list is full, a new call replaces the local and long distance numbers before dialing or oldest one in the list. saving it into the phonebook. • icon is removed once the new call has •... -
Page 32: Personal Settings
4.13 Personal Settings Menu map MAIN DATE & PHONEBOOK SETUP HS ‘ SETUP BS ANS MACHINE RESET MENU TIME SETTINGS YEAR VIEW RINGER TONE DIAL MODE ANSWERER ON CLR VOICE MAIL MENU (if answering machine DATE RINGER VOLUME FLASH TIME ALL SETTINGS is off) TIME... -
Page 33: Intercom
1. Press MENU. NOTE If the handset is not within the valid operation range, this 2. Press VOL+ or REDIAL/VOL- to scroll through the function may not be available. During an intercom call, menu. you will hear an alert tone if there is an incoming 3. -
Page 34: Setting The Dial Mode
4.16 Setting the flash time 4. When the other handset answers the intercom call, press MENU on the calling handset to set up the The default flash time is 600MS. It is unlikely that you should conference call. need to change this setting unless advised to do so. 5. -
Page 35: Registration
4.18 Registration 4. To register an originally unregistered handset, follow steps 1 through 3 above. 4.18.1 Registering a cordless handset Up to 5 cordless handsets can be registered to a corded 4.19 Resetting all settings base. The original cordless handset is pre-registered to use. -
Page 36: Turning On Or Off The Answering Machine
2. During the message playback, press the keys below displayed. If the answering machine is turned off ANSWERER ON on the handset to perform the following functions: originally, will be displayed. Press to repeat the current message 3. Press MENU to confirm. from the beginning. -
Page 37: Announcement
NOTE 4.20.5.2 Playing the announcement If the Toll Saver setting is selected, the answering 1. Press MENU and then VOL+ or REDIAL/VOL- to machine will pick up after two rings if there are new ANSWER MACHINE select messages, and after four rings if there is no message. 2. -
Page 38: Call Screening On / Off
NOTE NOTE When playing the message, pressing /MUTE will When the answering machine is full, will flash if ERASE SOME ANSWERER MSG delete it permanently. there are new messages. will MEMORY FULL toggle within 2 seconds with . At this point, 4.20.7 Call screening on / off delete some messages to free up memory. -
Page 39: Setting The Security Code
After entering the remote access mode, press the 4.20.10 Setting the security code This is used to change the remote access PIN if following keys to carry out your desired function. necessary. Press... To... 1. Press MENU and then VOL+ or REDIAL/VOL- to Repeat the message ANSWER MACHINE select... -
Page 40: Help
5. Help No ring tone • The ringer may be off. icon is not scrolling when the cordless • The volume may need to be increased. handset is placed on the charger Caller ID does not work • Incomplete battery contact - adjust the cordless •... -
Page 41: General Information
1. Read this User's Guide. • Check that the power adapter is connected properly 2. Visit our website: www.motorola.com into the electrical outlet. 3. Contact Customer Service in the US and Canada at • Move the cordless handset closer to the corded 1-888-331-3383. -
Page 42: Installation Guidelines
6. Unplug this product from the electrical outlet before • The product exhibits a distinct change in cleaning. Do not use liquid cleaners or aerosol performance. cleaners. Use a damp cloth for cleaning. Installation Guidelines 7. Do not disassemble this product. If service or repair 1. -
Page 43: Battery Safety Instructions
Consumer Products and Accessories microwave oven, or VCR. Limited Warranty ("Warranty") CAUTION Thank you for purchasing this Motorola branded To maintain compliance with the FCC's RF exposure product manufactured under license by Binatone guidelines, place the base unit at least 20 cm from Electronics International LTD ("BINATONE"). - Page 44 CONSUMER, AND IS PROVIDED IN LIEU OF ALL products original purchase by OTHER WARRANTIES, EXPRESS OF IMPLIED. IN NO the first consumer purchaser of EVENT SHALL MOTOROLA OR BINATONE BE LIABLE, the product. WHETHER IN CONTRACT OR TORT (INCLUDING Consumer...
- Page 45 Accessories for commercial purposes or subjecting the Product or Accessory to abnormal usage or conditions; How to Obtain Warranty Service or Other or (d) other acts which are not the fault of MOTOROLA Information? or BINATONE, are excluded from coverage.
- Page 46 which includes the date, place and seller of the Product; instructions, may cause harmful interference to radio (c) if a warranty card was included in your box, a communications. However, there is no guarantee that completed warranty card showing the serial number of interference will not occur in a particular installation.
-
Page 47: Fcc Part 68 And Acta
To ensure safety of users, the FCC has established modular plug is provided with this product. It is designed criteria for the amount of radio frequency energy that to be connected to a compatible modular jack that is also can be safely absorbed by a user or bystander compliant. - Page 48 agents. For repair procedures, follow the instructions • Perform such activities in off-peak hours, such as outlined under the Limited Warranty. early morning or late evening. Industry Canada If this equipment is causing harm to the telephone Operation is subject to the following two conditions: (1) network, the telephone company may temporarily this device may not cause harmful interference, and (2) discontinue your telephone service.
-
Page 49: Technical Specifications
Technical Specifications RF frequency band 1921.536 MHz — 1928.448 MHz Channels Operating temperature 5ºC to 45ºC Corded base voltage 96 — 130 Vms (AC voltage, 60Hz) Corded base voltage 6V DC, 400mA (Adapter output) Cordless Handset 2.4V 500mAh Ni-MH voltage battery pack Charger voltage 6V AC, 300mA... - Page 50 Manufactured, distributed or sold by Binatone Electronics International LTD., official licensee for this product. MOTOROLA and the Stylized M Logo are trademarks or registered trademarks of Motorola Trademark Holdings, LLC. and are used under license. All other trademarks are the property of their respective owners.