Panasonic HXDC2 Owner's Manual
Dual camera
Hide thumbs
Also See for HXDC2:
- Operating instructions manual (212 pages) ,
- Basic operating instructions manual (40 pages) ,
- Owner's manual (224 pages)
Table of Contents
Advertisement
Quick Links
Before connecting, operating or adjusting this product, please read
the instructions completely.
For USA and Puerto Rico assistance, please call: 1-800-211-PANA(7262) or,
contact us via the web at: http://www.panasonic.com/contactinfo
For Canadian assistance, please call: 1-800-561-5505 or visit us at www.panasonic.ca
Owner's Manual
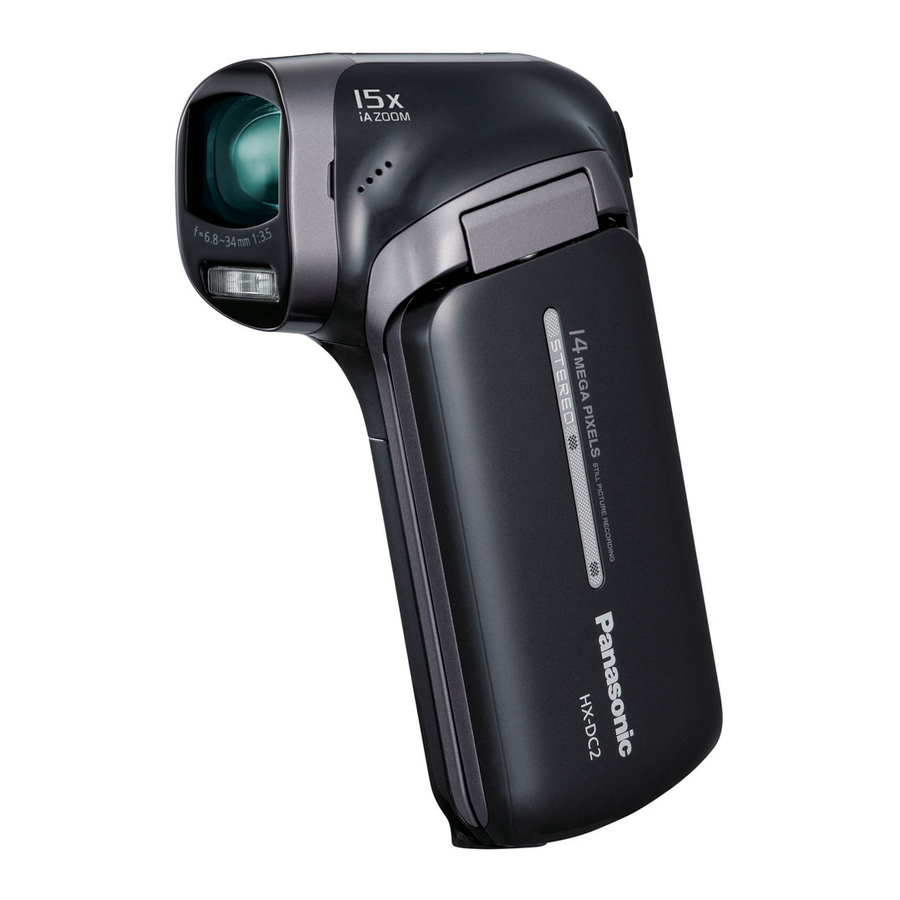
Dual Camera
HX-DC2
Model No.
Preparation
Basic
Advanced
(Recording)
Advanced
(Playback)
Copy/
Dubbing
With a PC
Others
VQT4D14
1AG6P1P6457--(S)
Advertisement
Table of Contents

Related Manuals for Panasonic HXDC2


Summary of Contents for Panasonic HXDC2
- Page 1 Before connecting, operating or adjusting this product, please read Others the instructions completely. For USA and Puerto Rico assistance, please call: 1-800-211-PANA(7262) or, contact us via the web at: http://www.panasonic.com/contactinfo For Canadian assistance, please call: 1-800-561-5505 or visit us at www.panasonic.ca VQT4D14 1AG6P1P6457--(S)
-
Page 2: Safety Precautions
Dear Customer, Date of Purchase Thank you for choosing Panasonic! Dealer Purchased From You have purchased one of Dealer Address the most sophisticated and reliable products on the Dealer Phone No. market today. Used properly, we’re sure it will bring you Model No. - Page 3 Panasonic Corporation of North America One Panasonic Way, Secaucus, NJ 07094 Support Contact: Panasonic Consumer Marketing Company of North America 1-800-211-PANA (7262) This device complies with Part 15 of the FCC Rules. Operation is subject to the following two conditions: (1) This device may not cause harmful interference, and (2) this device must accept any interference received, including interference that may cause undesired operation.
- Page 4 The socket outlet shall be installed near the equipment and shall be easily accessible. THE FOLLOWING APPLIES ONLY IN THE U.S.A. AND CANADA. AC adaptor This AC adaptor operates on AC between 100 V and 240 V. ≥ In the U.S.A. and Canada, the AC adaptor must be connected to a 120 V AC power supply only.
- Page 5 Warning Risk of fire, explosion and burns. Do not disassemble, heat above 60 oC (140 oF) or incinerate. CAUTION ≥ Danger of explosion if battery is incorrectly replaced. Replace only with the type recommended by the manufacturer. ≥ When disposing the batteries, please contact your local authorities or dealer and ask for the correct method of disposal.
- Page 6 Precautions USE & LOCATION WARNING ≥ TO AVOID SHOCK HAZARD ... Your camera and power supply should not be exposed to rain or moisture. Do not connect the power supply or operate your camera if it gets wet. Your camera has been designed for outdoor use, however it is not designed to sustain direct exposure to water, rain, sleet, snow, sand, dust, or a direct splashing from a pool or even a cup of coffee.
- Page 7 ≥ STORAGE OF YOUR CAMERA ... Store and handle your camera in a manner that will not subject it to unnecessary movement (avoid shaking and striking). Your camera contains a sensitive pick-up device which could be damaged by improper handling or storage. CARE ≥...
- Page 8 ∫ Indemnity about recorded content Panasonic does not accept any responsibility for damages directly or indirectly due to any type of problems that result in loss of recording or edited content, and does not guarantee any content if recording or editing does not work properly.
- Page 9 ∫ Cards that you can use with this unit SD Memory Card, SDHC Memory Card and SDXC Memory Card ≥ 4 GB or more Memory Cards that do not have the SDHC logo or 48 GB or more Memory Cards that do not have the SDXC logo are not based on SD Memory Card Specifications.
-
Page 10: Table Of Contents
Contents Accessories..................13 Preparation Names and Functions of Main Parts ..........14 Power supply..................17 Inserting/removing the battery............. 17 Charging the battery ..............19 Charging and recording time............21 Recording to a card ................. 23 Cards that you can use with this unit .......... 23 Inserting/removing an SD card............ - Page 11 Advanced (Recording) Using the zoom ................59 Double range zoom..............60 Zoom mode ................. 61 Image stabilizer ................62 Burst recording ................63 Recording panorama still pictures ..........65 Recording functions of menus ............68 RECORDING MENU 1..............68 RECORDING MENU 2..............73 RECORDING MENU 3..............
- Page 12 Copy/Dubbing Copying from Built-in Memory to SD card ........115 Dubbing images onto other video devices........116 With a PC What you can do with a PC ............118 End User License Agreement ........... 121 Operating environment ..............123 Installation ..................127 Connecting to a PC................
-
Page 13: Accessories
Accessories Check the accessories before using this unit. Keep the accessories out of reach of children to prevent swallowing. Product numbers correct as of Dec. 2011. These may be subject to change. Battery pack VW-VBX070 AC adaptor VSK0750 AV cable VFA0543 USB cable VFA0554... -
Page 14: Preparation
Preparation Names and Functions of Main Parts LCD monitor (l 34) Due to limitations in LCD production technology, there may be some tiny bright or dark spots on the LCD monitor screen. However, this is not a malfunction and does not affect the recorded picture. - Page 15 Hand strap fixture Zoom range button [ ] (l 60) Photoshot button [ ] (l 38) SET button [SET] (l 47, 51, 79, 88) ≥ Use the SET button to select the recording functions and playback operations, and to operate the menu screen. ≥...
- Page 16 16 Lens ≥ When not using the unit, be sure to fit the lens cap to protect the lens. ≥ Keep the lens cap out of reach of children to prevent swallowing. 17 Speaker 18 Status indicator (l 8, 19, 25) 19 Internal stereo microphones 20 Built-in flash (l 73) ≥...
-
Page 17: Power Supply
To ensure that safe products are used we would recommend that a genuine Panasonic battery pack is used. Inserting/removing the battery ≥... -
Page 18: Removing The Battery
Insert the battery, taking care to match up the terminal markings. A terminal markings ≥ It is possible to mistakenly insert the battery upside down, so be sure to check the orientation carefully. Close the battery/card cover. ≥ Securely close it until it clicks. Removing the battery Press and hold down the power button to turn off the unit, then pull up and remove the battery. -
Page 19: Charging The Battery
Charging the battery When this unit is purchased, the battery is not charged. Charge the battery fully before using this unit for the first time. The unit is in the standby condition when the AC adaptor is connected. The primary circuit is always “live” as long as the AC adaptor is connected to an electrical outlet. - Page 20 ≥ Do not use any other AC adaptors except the supplied one. ≥ Do not use any other USB cables except the supplied one. ≥ We recommend using Panasonic batteries (l 13, 21, 172). ≥ If you use other batteries, we cannot guarantee the quality of this product.
-
Page 21: Charging And Recording Time
Charging and recording time ∫ Charging/Recording time ≥ Temperature: 25 oC (77 oF)/humidity: 60%RH (When using AC adaptor) Battery model Maximum Actual number Charging Recording continuously recordable [Voltage/Capacity time mode recordable time (minimum)] time 50 min 30 min 55 min 35 min Supplied battery/ 50 min... - Page 22 Recording time Approx. 105 min Playback time Approx. 210 min Recording conditions by CIPA standard ≥ CIPA is an abbreviation of Camera & Imaging Products Association. ≥ Use of supplied battery ≥ Using a Panasonic SD Memory Card (2 GB) VQT4D14...
-
Page 23: Recording To A Card
≥ Please confirm the latest information about SD Memory Cards/SDHC Memory Cards/SDXC Memory Cards that can be used for motion picture recording on the following website. http://panasonic.jp/support/global/cs/e_cam (This website is in English only.) ≥ To use the Eye-Fi transfer feature (l 139), an Eye-Fi X2 series SD card is required. - Page 24 ≥ 4 GB or more Memory Cards that do not have the SDHC logo or 48 GB or more Memory Cards that do not have the SDXC logo are not based on SD Memory Card Specifications. ≥ The operation of Memory cards exceeding 64 GB cannot be guaranteed.
-
Page 25: Inserting/Removing An Sd Card
Inserting/removing an SD card When using an SD card not from Panasonic, or one previously used on other equipment, for the first time on this unit, format the SD card. (l 55) When the SD card is formatted, all of the recorded data is deleted. - Page 26 Close the battery/card cover. ≥ Securely close it until it clicks. ≥ Do not touch the terminals on the back of the SD card. ≥ Do not shock, bend, or drop the SD card. ≥ Electrical noise, static electricity or the failure of this unit or the SD card may damage or erase the data stored on the SD card.
-
Page 27: Turning The Unit On/Off
Preparation Turning the unit on/off Open the LCD monitor and press the power button to turn on the unit. The LCD monitor turns on. To turn off the unit Hold down the power button until the LCD monitor goes off. ≥... -
Page 28: About Economy Function
≥ If you open the LCD monitor when in standby mode, the unit enters recording mode. ≥ In the following cases, opening the LCD monitor does not turn on the unit. Press the power button to turn on the unit. j When the unit is originally purchased j When you have turned off the unit using the power button About economy function... -
Page 29: About The High Temperature Warning Icon
About the high temperature warning icon If the battery temperature or unit internal temperature (excluding battery) rises, the high temperature warning icon will provide warning as indicated below. Battery/unit Screen internal Unit operation display temperature Although it is possible to record/play back, please stop (ON) using the unit as soon as... -
Page 30: Selecting A Mode
Preparation Selecting a mode Change the mode to recording or playback. Press the REC/ button. ≥ Each press of the REC/ button changes the mode. For recording motion pictures, Recording Mode (l 35, 38, 42) still pictures and audio For playing back motion Playback Mode (l 47, 88) pictures, still pictures and audio VQT4D14... -
Page 31: Setting Date And Time
Preparation Setting date and time If the screen to set the date and time appears when you turn on the unit, skip to step 2 and follow the steps to set the date and time. Select the menu. (l 51) # [CLOCK SET] [MENU]: Select an item (DATE/TIME/DISP) using the SET... - Page 32 (When [DISP] is selected) Select the year/month/day display method using the SET button. Press the SET button. Select [SAVE DATE AND TIME] using the SET button and then press the SET button. ≥ To return to the recording screen or playback screen, press the MENU button.
-
Page 33: Basic
Basic Before recording ∫ Basic camera positioning Example 1: Example 2: Grip the unit with the forefinger of Grip the unit with the forefinger to your right hand above the lens and little finger of your right hand the middle finger to little finger surrounding the body. -
Page 34: Recording Yourself
∫ Recording yourself Rotate the LCD monitor towards the lens side. ≥ The image is horizontally flipped as if you see a mirror image. (However the image recorded is the same as a normal recording.) ∫ If the surface of the unit gets hot Due to the characteristics of the unit, the outer surface may become warm during use, but this does not indicate a malfunction. -
Page 35: Recording Motion Pictures
Basic Recording motion pictures ≥ Before turning on the unit, remove the lens cap. ≥ Motion pictures are recorded to the SD card if one is inserted. If no SD card is inserted, the motion pictures are recorded to the built-in memory. Open the LCD monitor. - Page 36 ∫ About the screen indications in the motion picture recording 000:00:15 000:00:15 000:00:15 Recording mode Motion picture operation indicator (l 144) During motion picture recording μ (Red) When the remaining recordable time drops to approximately 30 seconds or less, μ flashes. During recording: Recording time elapsed Each time the unit is put into recording pause, the...
- Page 37 ≥ The images recorded between pressing the recording start/stop button to start recording and pressing it again to pause recording become one scene. ≥ If the file size exceeds 4 GB during recording, the unit saves the file and saves the continuation in a new file. (A new file is created automatically every 4 GB (l 165)) ≥...
-
Page 38: Recording Still Pictures
Basic Recording still pictures ≥ Before turning on the unit, remove the lens cap. ≥ Still pictures are recorded to SD card if one is inserted. If no SD card is inserted, the still pictures are recorded to the built-in memory. Open the LCD monitor. - Page 39 ∫ About the recording standby screen display The field of view of the image displayed on the LCD monitor differs for motion picture recording and still picture recording. At time of purchase, the recording standby screen displays video view. Press the button halfway to change to photo view.
- Page 40 ∫ About the focusing area ≥ When [FOCUS MODE] (l 75) is set to [9-PT AUTOFOCUS], (focusing area A) 14 14 is displayed at the position where focus is achieved. The unit automatically determines the position where focus is achieved from nine focus points within the recording area.
-
Page 41: About Recording Still Pictures During Motion Picture Recording And Audio Recording
About recording still pictures during motion picture recording and audio recording You can record still pictures while recording a motion picture or while recording audio. (simultaneous recording) Press the button fully (press to the bottom) to take the picture. ≥ When the recordable time drops to approximately 30 seconds or less, the unit can no longer record still pictures while recording a motion picture or while recording audio. -
Page 42: Recording Audio
Basic Recording audio ≥ Audio is recorded to the SD card if one is inserted. If no SD card is inserted, the audio is recorded to the built-in memory. Open the LCD monitor. Select the menu. (l 51) # [REC MODE] # [ [MENU]: (VOICE RECORD)] Start recording by pressing the recording start/stop... - Page 43 ∫ About the screen display for audio recording 000:00:15 000:00:15 000:00:15 Audio operation indicator (l 143) During audio recording (Red) When the remaining recordable time drops to approximately 30 seconds or less, μ flashes. During audio recording: Recording time elapsed Every time recording is stopped, the indicator 000:00:15 returns to 000:00:00.
-
Page 44: Intelligent Auto Mode
Basic Intelligent Auto Mode The following modes (appropriate for the condition) are set just by pointing the unit to what you want to record. Select the menu. (l 51) # [INTELLIGENT AUTO] # [ [MENU]: (ON)] MENU ≥ Please refer to page 85 for details about Manual Mode. Mode Effect Portrait... - Page 45 *1 Mode for motion picture recording only *2 Mode for still picture recording only ≥ Depending on the recording conditions, the unit may not enter the desired mode. ≥ We recommend using a tripod in Night portrait/Night scenery/Low light. ≥ Faces cannot be detected depending on the recording conditions, such as when faces are of certain sizes or at certain tilts or when digital zoom is used.
-
Page 46: Intelligent Auto Mode
∫ Intelligent Auto Mode When switching to Intelligent Auto Mode, the Auto White Balance and Auto Focus operate and automatically adjust the color balance and focusing. Depending on the brightness of the subject etc., the aperture and shutter speed are automatically adjusted for an optimum brightness. ≥... -
Page 47: Motion Picture/Still Picture/Audio Playback
Basic Motion picture/Still picture/Audio playback Press the REC/ button to change to playback mode. Select the file to play back using the SET button and press the SET button. Thumbnail display A The information for the file in the yellow frame is displayed. ≥... -
Page 48: Play Back Using The Set Button
Play back using the SET button. Motion picture/audio playback Playback/Pause Rewind playback Fast forward playback Stops the playback and shows the thumbnails. B Operation icon* * If the operation icon disappears, perform a SET button operation to display it. Still picture playback Deletes still picture (l 103) Displays previous file Displays next file... - Page 49 ∫ Change the thumbnail display While the thumbnail is displayed, the thumbnail display changes in the following order if the zoom lever is operated to side or side. 21 files () 8 files () 1 file ≥ If you move the zoom lever to the side from the 21 files display mode, the unit goes to the playback folder selection screen.
-
Page 50: Motion Picture Compatibility
Motion picture compatibility ≥ The unit conforms to the MP4 format (MPEG-4 AVC file standard). ≥ Motion pictures recorded on other MP4-compatible equipment may not play back normally or may not play back at all on this unit. Similarly, motion pictures recorded on this unit may not play back normally or may not play back at all on other MP4-compatible equipment. -
Page 51: Using The Menu Screen
Basic Using the menu screen Press the MENU button. Tilt the SET button to the left. Select tab A or option tab B using the SET button, and press down the right side of the SET button or press the SET button. Select from menu items C using the SET button, and tilt the SET button to the right, or press the SET button. - Page 52 Select the setting content using the SET button and press the SET button to set. ∫ About applicable mode indicator In the recording menu, the recording mode that reflects the currently displayed setting is displayed. D Applicable mode indicator : Setting is applied to still picture and motion picture recording. : Setting is applied to still picture recording.
-
Page 53: Using Option Menu
Basic Using Option Menu ≥ The displayed items change depending on the mode setting (recording mode, playback mode). Select the menu. # desired setting [MENU]: OPTION MENU 1 [CLOCK SET] Please refer to page 31. [ALERT SOUND] Set the type and volume of operation sounds for the unit. [TURN ON/OFF]: Sets the sound emitted when the unit is turned on/off. -
Page 54: Option Menu 2
[DISPLAY] Turns screen display [ON] (display) or [OFF] (not-display). [ECONOMY] Sets the time until the unit goes into sleep mode to save on battery consumption. (l 28) [BATTERY:REC]: Sets the time for which the unit is in the recording mode using the battery, before it goes into sleep mode. - Page 55 [TV OUTPUT] [TV SYSTEM]: Please refer to page 111. [TV ASPECT]: Please refer to page 110. [HDMI]: Please refer to page 111. [VIERA Link]: Please refer to page 112. [INITIAL SET] Returns the menu to the settings at the time of purchase. ≥...
-
Page 56: Option Menu 3
≥ Do not turn this unit off or remove the SD card, while formatting. Do not expose the unit to vibrations or shock. Use this unit to format media. Formatting built-in memory is only available with this unit. Do not format an SD card using any other equipment such as a PC. - Page 57 [PLAYBACK FOLDER] When the SD card or built-in memory contains multiple folders, you can select a folder for playback. ≥ Set to Playback mode. (l 30) Select [PLAYBACK FOLDER] using the SET button and press the SET button. Select the folder to play back using the SET button and press the SET button.
- Page 58 When [FILE NO. CONT’D] is set to [ON] and there are files remaining on the newly inserted card, the files subsequently recorded on the card will be numbered as described below. When the newly inserted card contains file numbers which are smaller than the file numbers recorded before changing the cards The numbering continues from the file currently being recorded.
-
Page 59: Advanced (Recording)
Advanced (Recording) Using the zoom ≥ Set to Recording mode. (l 30) Zoom lever T side: Close-up recording (zoom in) W side: Wide-angle recording (zoom out) A Zoom bar ≥ i.Zoom and digital zoom can be set in [ZOOM MODE]. (l 61) ∫... -
Page 60: Double Range Zoom
When the zoom magnification is 1k, this unit can focus on a subject approx. 10 cm (3.9q) away from the lens. (When [INTELLIGENT AUTO] is set to [ON], or [FOCUS] is set to (MACRO), you can record from as close as 1 cm (0.39q) with the zoom magnification at 1 times and from 80 cm (2.6 feet) with the zoom magnification at its maximum.) Double range zoom The enlarged size will be approximately double size (double range... -
Page 61: Zoom Mode
Zoom mode Set the digital zoom and i.Zoom. ≥ Select the menu. # [ZOOM MODE] # desired setting [MENU]: (DIGITAL ZOOM): Digital zoom (i.ZOOM): This zoom function allows you to maintain high-definition picture quality. (OFF): Optical zoom only ≥ The larger the digital zoom magnification, the more the image quality is degraded. -
Page 62: Image Stabilizer
Advanced (Recording) Image stabilizer Use the Image stabilizer to reduce the effects of shake during recording. ≥ Set to Recording mode. (l 30) ∫ Image stabilizer for motion pictures Select the menu. # [E.I.S.(VIDEO)] # desired setting [MENU]: (ACTIVE MODE): This setting gives more stabilization and is suitable for recording when moving. -
Page 63: Burst Recording
Advanced (Recording) Burst recording Records a sequence of still pictures at a rate of 10 per second or 1 per second. Use this function to record fast-moving subject. ≥ Set to Recording mode. (l 30) Select the menu. # [BURST] # desired setting [MENU]: (14M BURST): Records approximately 1 still picture every 1 second. - Page 64 Press the button fully. ≥ During recording, lights up in red. ≥ The auto focus works to fix the focus when the button is pressed halfway. ∫ Maximum number of pictures in the burst Maximum number of pictures [BURST] setting in the burst ≥...
-
Page 65: Recording Panorama Still Pictures
Advanced (Recording) Recording panorama still pictures By recording while panning the unit vertically or horizontally you can record a 180e or 360e panorama still picture. ≥ Set to Recording mode. (l 30) Select the menu. # [PANORAMA] # [MENU]: (360e PANORAMA)] or [ (180e PANORAMA)] ≥... - Page 66 ∫ Recording technique Move the camera toward the direction of recording taking care not to shake. (Correct recording is not possible when the shake is too big) ∫ About size of still pictures The sizes of panorama still pictures are as follows. Picture size Horizontal Vertical...
- Page 67 ≥ Focus and white balance will be fixed to the optimal values for the still picture for first frame. Therefore, it may not record with focus or brightness optimal for the whole panorama still picture when focus or brightness changes drastically during the recording. ≥...
-
Page 68: Recording Functions Of Menus
Advanced (Recording) Recording functions of menus ≥ Set to Recording mode. (l 30) ≥ Select the menu. (l 51) # desired setting [MENU]: RECORDING MENU 1 [REC MODE] You can switch between motion picture recording and audio recording, and switch the image quality of the motion picture to record. # [REC MODE] # desired setting [MENU]: Records with 1920k1080 pixels. - Page 69 [PICTURE SIZE] The higher the number of pixels, the higher the clarity of the picture when printing. # [PICTURE SIZE] # desired setting [MENU]: Picture size Aspect ratio 4352k3264 3744k2808 2560k1920 2048k1536 640k480 4352k2448 16:9 3744 k 2106 16:9 2560k1440 16:9 1920k1080 16:9...
- Page 70 (OFF): Cancel the setting 5 (SPORTS): To make fast moving scenes less shaky with slow playback and pause of playback (PORTRAIT): To make people stand out against the background (SPOT LIGHT): Improved quality when subject is brightly illuminated (SNOW): Improved image quality when shooting in snowy locations (BEACH): To make blue in the sea or sky vibrant (SUNSET):...
- Page 71 ≥ (FIREWORKS) j The shutter speed is 1/30. (Motion picture recording) j Image may get washed out when recorded in bright surrounding. (the camera shake icon) is displayed constantly when recording still pictures, but this does not indicate a fault. ≥...
- Page 72 Setting Limitations (LANDSCAPE) PANORAMA: Fixed to (OFF). COLOR MODE: Fixed to FOCUS: Fixed to FACE CHASER: Fixed to (OFF). (NIGHT SCENERY) PANORAMA: Fixed to (OFF). COLOR MODE: Fixed to FOCUS: Fixed to FLASH: Fixed to FACE CHASER: Fixed to (OFF). (NIGHT PORTRAIT) PANORAMA: Fixed to (OFF).
-
Page 73: Recording Menu 2
RECORDING MENU 2 [FLASH] When the button is pressed, the flash is activated and the picture will be recorded. Use the built-in flash in order to record still pictures in dark places. # [FLASH] # desired setting [MENU]: ßA (AUTO): The unit determines the brightness of the subject and emits a flash if necessary. - Page 74 When Ø2 (2sec) is selected When you press the button or the recording start/stop button, the status indicator flashes red for approximately 2 seconds, then recording begins. On the LCD monitor, an indication of ( ) appears to notify you of the recording timing. When Ø10 (10sec) is selected When you press the button or the recording start/stop button, the...
- Page 75 [FOCUS MODE] You can select the focusing method according to the position of the subject. # [FOCUS MODE] # desired setting [MENU]: (9-PT AUTOFOCUS): The unit determines the focus automatically from 9 focus points ( in the recording range. (SPOT FOCUS): The unit focuses on the subject over the focus mark ( ) displayed at the...
- Page 76 [COLOR MODE] You record in different colors and add effects such as skin smoothing. ] # desired setting COLOR MODE [MENU]: (OFF): Cancel the setting. (HDR (Paint)) Records still pictures with picture effects. (SOFT SKIN): Records with skin softening effects. (MONOCHROME): Records in monochrome.
-
Page 77: Recording Menu 3
RECORDING MENU 3 [ISO] Although, with the default settings, the ISO sensitivity is set automatically in accordance with the brightness of the subject, the ISO sensitivity can be fixed. # [ISO] # desired setting [MENU]: AUTO: ISO sensitivity is set automatically. Sets the sensitivity to ISO 50. - Page 78 [FACE CHASER] The detected face is displayed in the frame. # [FACE CHASER] # [ [MENU]: (ON)] ∫ About prioritized face framing The prioritized face frame is displayed in yellow. When the unit is set to Portrait mode in Intelligent Auto Mode, the unit will focus on the prioritized face frame and adjust the brightness accordingly.
- Page 79 [E.I.S.(VIDEO)] Please refer to page 62. [E.I.S.(PICTURE)] Please refer to page 62. [SHORTCUTS] This setting registers the functions (shortcut functions) performed when the SET button is tipped up, down, left and right with the recording screen displayed. # [SHORTCUTS] [MENU]: Select the destination (up, down, left or right on the SET button) for the function using the SET button and press the SET button.
- Page 80 Select the function to register using the SET button, and press the SET button. (AF LOCK): Locks the focus. (l 81) (AE LOCK): Locks the exposure. (l 81) (FOCUS): Sets the focus. (l 87) (Can be registered to only) (FLASH): Sets the flash operation.
- Page 81 ∫ AF lock If you register AF lock as a shortcut function (l 79), you can record with the focus locked. ≥ Register the shortcut function. (l 79) Tilt the SET button in the direction to which you registered AF lock. ≥...
-
Page 82: Exposure Compensation
∫ Exposure compensation If you register exposure compensation as a shortcut function (l 79), you can record with altered brightness. ≥ Register the shortcut function (l 79) Tilt the SET button in the direction to which you registered the exposure compensation. ≥... -
Page 83: Recording Menu 4
RECORDING MENU 4 [PHOTO VIEW] Selects the desired field of view (photo view or video view) for the recording standby screen display. When photo view is selected, a frame to show the field of view during video recording appears. # [PHOTO VIEW] # desired setting [MENU]: (ON): Photo view (OFF): Video view... - Page 84 [AUTO REVIEW] Sets the period for which the recorded image appears on the LCD monitor after the button is pressed. # [AUTO REVIEW] # desired setting [MENU]: (1sec): Still pictures are displayed for approximately 1 second after being recorded. (2sec): Still pictures are displayed for approximately 2 seconds after being recorded.
-
Page 85: Manual Recording
Advanced (Recording) Manual recording White Balance Automatic White Balance function may not reproduce natural colors depending on the scenes or lighting conditions. If so, you can adjust the White Balance manually. Select the menu. # [WHITE BALANCE] [MENU]: Select the white balance using the SET button, and press the SET button. -
Page 86: To Set The White Balance Manually
∫ To set the White Balance manually Point the unit at a white subject that fills the screen. Select the (WHITE SET) and press the SET button. ≥ The LCD monitor display will go dark for a moment and then return to the recording menu. -
Page 87: Setting The Focus And Recording
Setting the focus and recording Set the focus in accordance with the distance to the subject. Select the menu. # [FOCUS] # desired setting [MENU]: Select the item to set using the SET button and press the SET button. (AUTO): The focus is set automatically. -
Page 88: Advanced (Playback)
Advanced (Playback) Playback Operations Playback using operation icon For details on the basic playback operations, refer to page 47. SET button/ Playback Playback Operating steps operation display Tilt the SET button to the right during playback for fast-forward During playback (tilt to the left for rewind Playback playback). - Page 89 SET button/ Playback Playback Operating steps operation display With the playback paused, tilt and hold the SET button to the right for slow motion playback until release Slow- (tilt and hold to the left for reverse motion slow motion playback). playback ≥...
-
Page 90: Creating Still Picture From Motion Picture
Creating still picture from motion picture A single frame from the recorded motion picture can be saved as a still picture. The picture size of the still picture to be created will differ depending on the recording mode of the recorded motion picture. Pause at the location to be saved as a still picture during the playback. -
Page 91: Cutting Out A Section Of A Panorama Still Picture
Cutting out a section of a panorama still picture You can cut out and save a section of a panorama still picture you have recorded. Display the panorama still picture. Press the SET button to start scroll playback of the panorama still picture. -
Page 92: Zooming In On A Still Picture During Playback (Playback Zoom)
Zooming in on a still picture during playback (Playback zoom) You can zoom in on still pictures during playback. Move the zoom lever to side. ≥ You can zoom in to a maximum of 68k (6800%). (The maximum zoom magnification differs according to the size of the still picture.) ≥... -
Page 93: Various Playback Functions
Advanced (Playback) Various playback functions Changing the playback settings and playing back the slide show ≥ Set to Playback mode. (l 30) # [SLIDESHOW] # desired setting [MENU]: Select the item to set using the SET button and press the SET button. [MODE]: Select the type ([ALL]/[VIDEO]/[PICTURE]) of the file to play back. - Page 94 [SHORT]: approx. 1 second [NORMAL]: approx. 5 seconds [LONG]: approx. 15 seconds (On selecting [EFFECT SETUP]) Select the desired effect using the SET button and press the SET button. ≥ [EFFECT SETUP] is disabled for the playback of panorama still pictures.
-
Page 95: Displaying File Information
Displaying file information You can display the information of files recorded with the unit. ≥ Set to Playback mode. (l 30) Using the SET button, select file for which to display information. Press and hold down the MENU button for 1 second or more. - Page 96 1 Recording mode Recording format 2 Recording start time and date 3 File number 4 Protection setting 5 File size 6 Recording time 7 Recording media VQT4D14...
-
Page 97: Using The Playback Menu
Advanced (Playback) Using the playback menu ≥ Set to Playback mode. (l 30) ≥ Select the menu. (l 51) # desired setting [MENU]: PLAYBACK MENU 1 [SLIDESHOW] Please refer to page 93. [PLAY VOLUME] Sets the playback volume for scene and audio files. Tilt the SET button right or left and press the SET button. - Page 98 Select the menu. # [ROTATE] # [RIGHT] or [LEFT] [MENU]: ≥ To rotate another still picture, tilt the SET button left and right to select a still picture, select [RIGHT] or [LEFT], and press the SET button. Press the MENU button to complete the settings. ≥...
-
Page 99: Playback Menu 2
PLAYBACK MENU 2 [RED-EYE CORRECT.] Corrects eye color when they appear red in still pictures (red-eye phenomenon). When [SAVE AS NEW] is set, the still picture is saved with a new image number. Select the still picture to undergo red-eye correction using the thumbnail screen. - Page 100 Select the menu. # [EDIT VIDEO] # [ [MENU]: (SPLIT)] Specify the starting position for the scene. ≥ Play back to near the position where you wish the scene to start, then pause playback and specify the starting position precisely using frame-by-frame playback. The pause position will be the starting position of the scene.
- Page 101 Select a saving method using the SET button and press the SET button. [SAVE AS NEW]: The split scene is saved as a new scene. [OVERWRITE]: The original scene is deleted and only the split scene is saved. [REVIEW CLIP]: The scene is played back in the split state.
-
Page 102: Upload Set
[SAVE AS NEW]: The spliced scenes are saved as a new scene. [OVERWRITE]: The spliced scene is saved by writing over the file you initially selected. [REVIEW CLIP]: The scene resulting from the splicing is played back. ≥ Do not turn off the unit during motion picture editing process. If the unit is turned off, there is a risk that the edited files and original files will be lost. -
Page 103: Deleting Scenes/Still Pictures/Audio Files
Advanced (Playback) Deleting scenes/still pictures/ audio files When an SD card is inserted, the files and folder on the SD card are deleted. When not inserted, the files and folders in the built-in memory are deleted. Deleted scenes/still pictures/audio files cannot be restored, so perform appropriate confirmation of the contents before proceeding with deletion. -
Page 104: Deleting Selected Files
Using the SET button, select [DELETE SELECTED], [DELETE ALL] or [DELETE FOLDER] and press the SET button. ∫ Deleting selected files (When [DELETE SELECTED] is selected in Step 2) Select the file to delete using the SET button and press the SET button. ≥... -
Page 105: Deleting A Folder
∫ Deleting a folder (When [DELETE FOLDER] is selected in Step 2) Select the folder to delete using the SET button and press the SET button. ≥ A delete confirmation screen appears. Select [YES] using the SET button and press the SET button. -
Page 106: Protecting A File
Protecting a file Files can be protected so that they are not deleted by mistake. (Even if you protect some files, formatting the media will delete them.) ≥ Set to Playback mode. (l 30) Select the menu. # [PROTECT] [MENU]: * When you are using an Eye-Fi card which has already been set to selective forwarding with a PC, [TRANSFER/PROTECT] is displayed. -
Page 107: Watching Video/Pictures On Your Tv
Advanced (Playback) Watching Video/Pictures on your Confirm the terminals on your TV and use a cable compatible with the terminals. Image quality may vary with the connected terminals. A High quality 1 HDMI terminal 2 Video terminal ≥ Always use the supplied AV cable. ≥... - Page 108 HDMI mini cable or remove the battery. ≥ Check that the plugs are inserted as far as they go. ≥ Always use a genuine Panasonic HDMI mini cable (RP-CDHM15, RP-CDHM30: optional). ≥ Do not use any other AV cables except the supplied one.
- Page 109 ≥ If the HDMI mini cable and AV cable are connected at the same time, output will be prioritized in order of the HDMI mini cable, AV cable. ≥ About the video output The video output destination varies depending on the status of the unit.
- Page 110 ≥ If a wide-screen TV is connected, adjust the aspect setting on the TV. (Refer to the operating instructions of the TV for details.) Refer to the following support site for information about Panasonic TVs with an SD card slot for playing back your pictures. http://panasonic.net/ ≥...
-
Page 111: Connecting With An Hdmi Mini Cable
Connecting with an HDMI mini cable Select the desired method of HDMI output. # [TV OUTPUT] # [HDMI] # [MENU]: [AUTO]/[720p]/[1080i]/[480p] ≥ [AUTO] determines the output resolution automatically based on information from the connected TV. If the images are not output on the TV when the setting is [AUTO], switch to the method [720p], [1080i] or [480p] which enables the images to be displayed on your TV. -
Page 112: Playback Using Viera Link
(optional) for automatic linked operations. (Not all operations are possible.) ≥ VIERA Link is a unique Panasonic function built on an HDMI control function using the standard HDMI CEC (Consumer Electronics Control) specification. Linked operations with HDMI CEC compatible devices made by other companies are not guaranteed. - Page 113 HDMI1 if there are 2 or more HDMI input terminals on the TV. ≥ VIERA Link must be activated on the connected TV. (Read the operating instructions for setting the TV etc.) ≥ Always use a genuine Panasonic HDMI mini cable (RP-CDHM15, RP-CDHM30: optional). Operate with the remote control for the TV.
- Page 114 VIERA Link, read the operating instructions for the devices. ≥ Available linked operations between this unit and a Panasonic TV is different depending on the types of Panasonic TVs even if they are compatible with VIERA Link. Refer to the operating instructions of the TV for the operations that support on the TV.
-
Page 115: Copy/Dubbing
Copy/Dubbing Copying from Built-in Memory to SD card Files recorded using the unit can be copied from the built-in memory to an SD card inserted into the unit. Copying Set to Playback mode. (l 30) ≥ Be sure to use a sufficiently charged battery or the AC adaptor. Select the menu. -
Page 116: Dubbing Images Onto Other Video Devices
If you intend to delete the original file when the copying has finished, always play back the copied file before deletion to confirm that the original has been copied normally. ≥ You cannot change the order of the files that are to be copied. Copy/Dubbing Dubbing images onto other video devices... - Page 117 ≥ If the unit is connected to a video device using an AV cable, the screen of the unit will not display images when in playback mode. Check on the TV screen instead. Start recording on the connected device. ≥ To stop recording (dubbing), stop playback on this unit after stopping recording on the recorder.
-
Page 118: With A Pc
With a PC What you can do with a PC HD Writer VE 2.0 You can copy the motion/still picture data to the HDD of PCs or write to media such as Blu-ray discs, DVD discs or SD cards using HD Writer VE 2.0, which is the software installed in the supplied CD-ROM. -
Page 119: Important Notice
Important Notice ≥ When using an SDXC Memory Card, check the following support site. http://panasonic.net/avc/sdcard/information/SDXC.html ≥ When inserting a disc containing recorded motion pictures into other devices, a message prompting you to format the disc may be displayed. Do not format the disc, since deleted data cannot be restored later. - Page 120 ≥ Data cannot be written to the unit from a PC. ≥ Motion pictures that have been recorded on another device cannot be written to the software supplied with this unit. ≥ Audio files cannot be handled. ≥ When motion picture data is written to and read from the SD card, correct operation cannot be guaranteed with software other than that supplied with the unit.
-
Page 121: End User License Agreement
Licensee may not reverse engineer, decompile, or disassemble the Software, except to the extent either of them is permitted under law or regulation of the country where Licensee resides. Panasonic, or its distributors will not be responsible for any defects in the Software or damage to Licensee caused by Licensee’s reverse engineering,... - Page 122 Further, Panasonic does not warrant that the operation of the Software will be uninterrupted or error free. Panasonic or any of its distributors will not be liable for any damage suffered by Licensee arising from or in connection with Licensee’s use of the Software.
-
Page 123: Operating Environment
With a PC Operating environment ≥ Even if the system requirements mentioned in this owner’s manual are fulfilled, some PCs cannot be used. ≥ A CD-ROM drive is necessary to install the supplied software applications. (A compatible Blu-ray disc/DVD writer drive and media are necessary for writing to a Blu-ray disc/DVD.) ≥... - Page 124 Windows 7: 1 GB or more (32 bit)/2 GB or more (64 bit) Windows Vista: 1 GB or more Windows XP: 512 MB or more (1 GB or more recommended) Display High Color (16 bit) or more (32 bit or more recommended) Desktop resolution of 1024k768 pixels or more (1920k1080 pixels or more recommended)
- Page 125 ≥ If using Windows XP, only an administrative account user can use this software. If using Windows Vista/Windows 7, only administrative and standard account users can use this software. (An administrative account user should install and uninstall this software.) ∫ To use the HD Writer VE 2.0 You will need a high performance PC depending on the functions to be used.
-
Page 126: Mass Storage
∫ Operating environment for the card reader function (mass storage) IBM PC/AT compatible PC Windows 7 (32 bit/64 bit) or SP1 Windows Vista (32 bit) (SP2) Windows XP (32 bit) (SP3) Windows 7/Windows Vista: 1 GHz or higher 32-bit (k86) or 64-bit (k64) processor (including compatible CPU) Windows XP: Intel Pentium 450 MHz or higher or... -
Page 127: Installation
≥ If Windows 7 is in use, or the [AutoPlay] screen is not displayed automatically, select [Start] # [Computer] (or double-click on [Computer] on the desktop), and then double-click [Panasonic]. Click [Yes]. ≥ Operate following the instruction on the screen. -
Page 128: Connecting To A Pc
The unit works as a web camera. (Web camera mode) (l 132) ∫ To disconnect USB cable safely Select the icon in task tray displayed on the PC, and then click [Eject Panasonic Camcorder]. ≥ Depending on your PC’s settings, this icon may not be displayed. VQT4D14... -
Page 129: Use As A Card Reader
SDHC Memory Card or SDXC Memory Card. ≥ When using an SDXC Memory Card, check the following support site. http://panasonic.net/avc/sdcard/information/SDXC.html Use as a card reader Connect the unit to a PC and set the unit to card reader mode. -
Page 130: About The Pc Display
∫ About the PC display When the unit is connected to a PC, it is recognized as an external drive. ≥ Removable disk (Example: ) is displayed in [Computer]. We recommend using HD Writer VE 2.0 to copy motion picture data. Using Windows Explorer or other programs on the PC to copy, move or rename files and folders recorded with this unit will result in them being unusable with HD Writer VE 2.0. - Page 131 ≥ Always use this unit to format SD cards. ∫ Charging the battery by connecting it to different devices If you turn off the unit and connect it to a PC, Panasonic Blu-ray disc recorder or Panasonic DVD recorder using a USB cable, the battery will charge.
-
Page 132: Using The Unit As A Web Camera
Using the unit as a web camera When the unit is connected to a PC that is connected to the Internet, the unit can be used as a web camera. IBM PC/AT compatible PC Necessary Windows Live Messenger iChat software Windows 7 (32 bit/64 bit) or SP1 Mac OS X Windows Vista (32 bit) (SP2) - Page 133 Connect the unit to a PC and set the unit to web camera mode. (l 128) ≥ The LCD monitor will turn off. ≥ If you touch anything other than [WEB CAMERA], remove and then reconnect the USB cable. (On the PC) Start Windows Live Messenger or iChat.
-
Page 134: Starting Hd Writer Ve 2.0
The software cannot be used with the user name for a guest account. (On the PC) Select [Start] # [All Programs] # [Panasonic] # [HD Writer VE 2.0] # [HD Writer VE]. ≥ For details on how to use the software applications, read the PDF operating instructions of the software. -
Page 135: If Using Mac
With a PC If using Mac ≥ HD Writer VE 2.0 is not available for Mac. ≥ iMovie’11 supported. For details about iMovie’11, please contact Apple Inc. ∫ Operating environment Mac OS X 10.7.2 Intel Core 2 Duo or better 2 GB or more Interface USB port... -
Page 136: To Disconnect Usb Cable Safely
Using a drag-and-drop operation, move the pictures you want to acquire or the folder storing those pictures to any different folder on the PC. ∫ To disconnect USB cable safely Drag [CAM_SD] or [CAM_MEM] disk icon to the [Trash], and then disconnect the USB cable. -
Page 137: Uploading Files To A Web Service
With a PC Uploading files to a web service When you connect the unit to a PC that is connected to the Internet, you can easily upload files recorded on the SD card to YouTube or Facebook. ≥ Insert the SD card. ≥... - Page 138 Connect the unit to the PC using the USB cable. A USB cable (supplied) ≥ Insert the plugs as far as they will go. ≥ Do not use any other USB cables except the supplied one. (Operation is not guaranteed with any other USB cables.) ≥...
-
Page 139: Using The Eye-Fi ™ Transfer Feature
With a PC ™ Using the Eye-Fi transfer feature By using the Eye-Fi card, you can save files recorded on a card to a PC or file-sharing site via a wireless network. ≥ The functions of the Eye-Fi card (including wireless transmission) are not guaranteed to work on this product. -
Page 140: Selecting Files To Transfer
∫ Using Direct Mode The files can be transferred directly from the Eye-Fi card to a smartphone or tablet without going through the access point when necessary setting is performed in a PC in advance. ≥ Install the software supplied with the Eye-Fi card on your PC, and configure the Direct Mode settings. - Page 141 ≥ When the write protect switch on the Eye-Fi card is on the LOCK side, [PROTECT] is displayed and selected transfer setting is disabled. Please unlock the write protect switch. ≥ The protect setting is also applied to the files for which [TRANSFER/ PROTECT] is set.
-
Page 142: Indications
Others Indications ∫ Recording indications 3000 3000 3000 000:00:15 000:00:15 000:00:15 ISO400 ISO400 ISO400 F3.5 F3.5 F3.5 1/30 1/30 1/30 (White) Still picture recording icon (Red) Recording still picture During burst recording (l 63) Number of recording pixels for still pictures (l 69, 90) In Playback Mode, the picture size is not displayed for still pictures recorded with other products that have different picture sizes from the sizes shown above. - Page 143 Scene Mode (l 69) Color mode (l 76) ISO50/ISO100/ISO200/ISO400/ISO800/ISO1600 ISO sensitivity (l 77) Intelligent Auto Mode (l 44) F3.5 Iris value (l 39) 1/30 Shutter Speed (l 39) Zoom/Double range zoom (l 60) Eye-Fi settings (l 141) (Gray) Audio recording icon (Red) Recording audio Focus mark (l 75)
-
Page 144: Playback Indications
Recording Mode (l 68) (White) Motion picture recording icon (Red) Recording motion picture μ (Red) Recording motion picture (l 36) Recording audio (l 43) 000:00:15 Recording time elapsed (l 36, 43) Approximate remaining recordable time (l 36, AF Lock (l 81) AE Lock (l 81) Ø10/Ø2 Self-timer Recording (l 73) - Page 145 Files for which selected transfer/protect is set (l 106, 140) Face detection (l 78) Panorama still picture (l 65) Eye-Fi transfer status (l 139) Files exceeding 4 GB in size (l 49) Remaining battery power (l 22) Files which cannot be played back ∫...
-
Page 146: Messages
Others Messages Major confirmation/error messages to be indicated on the screen in text. CHECK CARD. This card is not compatible or it cannot be recognized by the unit. If this indication appears despite motion pictures, still pictures and audio being recorded on the SD card, the SD card may be in an unstable state. - Page 147 ≥ If you take a White round spots like soap bubbles picture with the appear on the flash in a dark recorded picture. place or indoors, white round spots may appear on the picture caused by the flash reflecting of particles of dust in the air.
- Page 148 Power Problem Check points ≥ To prevent battery consumption caused by This unit is turned off automatically. forgetting to turn the unit off etc., the economy mode function works to send the unit into sleep mode if the unit has been on for approximately 5 minutes (default setting) without an operation being performed.
- Page 149 Power Problem Check points ≥ Check each of the following items. “ERROR j Remove the SD card from the device and OCCURRED. PLEASE TURN reinsert. j Remove the battery and then put it in UNIT OFF, THEN TURN ON AGAIN.” again.
- Page 150 Recording Problem Check points ≥ The battery temperature or unit internal The high temperature temperature (excluding battery) rises. Wait warning icon for the temperature to drop before using the is displayed and unit again. recording is not possible. ≥ The field of view of the image displayed on When recording still pictures, the the LCD monitor differs for motion picture...
- Page 151 Recording Problem Check points ≥ In a place with multiple light sources, such Color balance of images is strange as a gymnasium or a hall, set the White when recording in Balance setting to (INDOOR 2). If you a place such as a cannot record clearly with the gymnasium.
- Page 152 Playback Problem Check points ≥ Release the protect setting. (When using Editing such as rotation of the files the Eye-Fi card, the protect setting is is not possible. simultaneously set for files for which selected transfer is set.) (l 106, 140) ≥...
- Page 153 With other products Problem Check points VIERA Link does (Setting on this unit) ≥ Connect with an HDMI mini cable (optional). not work. (l 112) ≥ Set [VIERA Link] to [ON]. (l 112) ≥ Turn the unit off and then back on again. (Setting on other devices) ≥...
- Page 154 With a PC Problem Check points ≥ To disconnect the USB cable safely, double- When the USB cable is click the icon in the task tray and follow disconnected, an the instructions on the screen. error message will appear on the PC. ≥...
-
Page 155: Cautions For Use
Others Cautions for use About this unit The unit and the SD card become warm during use. This is not a malfunction. Keep this unit as far away as possible from electromagnetic equipment (such as microwave ovens, TVs, video games etc.). ≥... - Page 156 When you use the unit in a sandy or dusty place such as a beach, do not let sand or fine dust get into the body and terminals of the unit. Also, keep the unit away from sea water. ≥ Sand or dust may damage the unit. (Care should be taken when inserting and removing a card.) ≥...
- Page 157 [FORMAT] # [DELETE DATA] from the option menu 2 and follow the on- screen instructions. ≥ Please look after the data in your built-in memory carefully. Panasonic will not be held responsible in the unlikely case that private data is divulged.
-
Page 158: About The Battery
About the battery The battery used in this unit is a rechargeable lithium-ion battery. It is susceptible to humidity and temperature and the effect increases the more the temperature rises or falls. In cold areas, the full charge indication may not appear or the low battery indication may appear about 5 minutes after starting use. -
Page 159: About The Ac Adaptor
If you drop the battery accidentally, check to see if the terminals are damaged. ≥ Inserting a battery with damaged terminals can damage the unit. Do not throw old battery into fire. ≥ Heating a battery or throwing it into a fire may result in an explosion. If the operating time is very short even after the battery has been recharged, the battery has worn out. -
Page 160: Lcd Monitor
≥ The battery is not charged. Remove the battery from the unit, and try charging again. ≥ Check that the terminals of the unit or battery are not dirty or covered with a foreign object, and connect the battery correctly once again. If a foreign object or dirt is present, turn off the unit before removing. -
Page 161: About Condensation
≥ When the unit has become very cold, for example due to storage in a cold area, its LCD monitor will be slightly darker than usual immediately after the unit is turned on. The normal brightness will be restored when the unit’s internal temperature rises. Extremely high precision technology is employed to produce the LCD Monitor screen featuring a total of approximately 230,000 dots. -
Page 162: About Copyright
≥ HDMI, the HDMI Logo, and High-Definition Multimedia Interface are trademarks or registered trademarks of HDMI Licensing LLC in the United States and other countries. ™ ≥ VIERA Link is a trademark of Panasonic Corporation. ™ ≥ EZ Sync is a trademark of Panasonic Corporation. ™... - Page 163 This product is licensed under the AVC patent portfolio license for the personal and non-commercial use of a consumer to (i) encode video in compliance with the AVC Standard (“AVC Video”) and/or (ii) decode AVC Video that was encoded by a consumer engaged in a personal and non- commercial activity and/or was obtained from a video provider licensed to provide AVC Video.
-
Page 164: Recording Modes/Approximate Recordable Time
Others Recording modes/approximate recordable time ≥ SD cards are only mentioned with their main memory size. The stated times are the approximate recordable times for continuous recording. Recording mode Picture size 1920k1080 1920k1080 1280k720 1280k720 640k480 4 GB 20 min 30 min 30 min 50 min... - Page 165 Recording mode Picture size 960k540 VOICE RECORD 4 GB 20 min 31 h SD card 16 GB 1 h 20 min 128 h 64 GB 5 h 20 min 512 h Built-in Approx. 10 s 30 min memory 64 MB *3 Please use when playing back/editing on a Mac.
-
Page 166: Approximate Number Of Recordable Pictures
Others Approximate number of recordable pictures ≥ SD cards are only mentioned with their main memory size. The stated number is the approximate number of recordable pictures. Picture size 4352k3264 3744k2808 2560k1920 Aspect ratio 4 GB 1400 SD card 16 GB 2100 2900 6000... - Page 167 Picture size 4352k2448 3744k2106 2560k1440 1920k1080 Aspect ratio 16:9 16:9 16:9 16:9 4 GB 1900 3400 16 GB 2800 3800 7500 13500 card 64 GB 11000 15000 31000 52000 Built-in Approx. memory 64 MB (360e PANORAMA) (180e PANORAMA) Picture size 14400k720 1280k14400 7200k720 1280k7200 Aspect ratio 4 GB...
-
Page 168: Specifications
Others Specifications Dual Camera Information for your safety Power source: DC 5.0 V (When using AC adaptor) DC 3.7 V (When using battery) Power consumption: 4.0 W Signal system: 1080/60i, 1080/30p, 720/60p, 720/30p, 540/30p, 480/30p Recording format: MPEG-4 AVC file format standard (.MP4) Motion picture compression: MPEG-4 AVC/H.264, iFrame Audio compression:... - Page 169 Recording media: SD Memory Card (FAT12 and FAT16 system compliant) SDHC Memory Card (FAT32 system compliant) SDXC Memory Card (exFAT system compliant) Refer to page 23 for details on SD cards usable in this unit. Built-in memory; Approx. 64 MB Image sensor: 1/2.33z 1MOS image sensor Total;...
- Page 170 Speaker: 1 round speaker, dynamic type White balance adjustment: Auto tracking white balance system Standard illumination: 1,400 lx Minimum required illumination: Approx. 4 lx (1/15 with Low Light mode in the Scene Mode) Approx. 12 lx (Scene mode off 1/30) USB/AV connector video output level: 1.0 Vp-p, 75 h HDMI mini connector video output level:...
- Page 171 Operating temperature: 0 oC to 35 oC (32 °F to 95 °F) Operating humidity: 10%RH to 80%RH Battery operation time: See page 21 AC adaptor Information for your safety Power source: AC 100 V to 240 V, 50/60 Hz Power consumption: DC output: DC 5.0 V, 1.0 A...
-
Page 172: Optional Accessories
Others Optional accessories Accessory No. Figure Description VW-VBX070 Rechargeable Lithium Ion Battery Pack RP-CDHM15 HDMI mini cable RP-CDHM30 * Please refer to page 21, concerning the battery charging time and available recording time. VQT4D14... - Page 173 Accessory No. Figure Description RP-SDL16GU1K Class 4 16 GB SDHC Memory Card RP-SDL08GU1K Class 4 8 GB SDHC Memory Card RP-SDL04GU1K Class 4 4 GB SDHC Memory Card RP-SDL02GU1K Class 4 2 GB SD Memory Card RP-SDU64GE1K Class 10 64 GB SDXC Memory Card RP-SDU32GU1K Class 10 32 GB SDHC...
-
Page 174: Accessory Order Form (For Usa And Puerto Rico Customers)
CALL PANASONIC’S ACCESSORY ORDER LINE AT 1-800-332-5368 [6 AM-6 PM M-F, PACIFIC TIME] MAIL THIS ORDER TO: PANASONIC NATIONAL PARTS CENTER 20421 84th Ave. S., Kent, WA 98032 In CANADA, please contact your local Panasonic dealer for more information on Accessories. VQT4D14... -
Page 175: Limited Warranty (Only For U.s.a. And Puerto Rico)
Lithium Ion batteries please visit our Web Site at www.panasonic.com/BatteryHandling as Panasonic is committed to providing the most up to date information. Include a letter detailing the complaint, a return address and provide a daytime phone number where you can be reached. - Page 176 Monday-Friday 9am-9pm, Saturday-Sunday 10am-7pm EST For hearing or speech impaired TTY users, TTY: 1-877-833-8855 Accessory Purchases (United States and Puerto Rico) Purchase Parts, Accessories and Instruction Books online for all Panasonic Products by visiting our Web Site at: http://www.pstc.panasonic.com Or, send your request by E-mail to: npcparts@us.panasonic.com...
-
Page 177: Warranty (For Canadian Customers)
Camcorder Products - One (1) year, parts and labour This warranty is given only to the original purchaser, or the person for whom it was purchased as a gift, of a Panasonic brand product mentioned above sold by an authorized Panasonic dealer in Canada and purchased and used in Canada, which product was not sold “as is”, and which product was delivered to you in new condition in the original packaging. -
Page 178: Useful Information (Only For Latin American Countries)
Service Center; buy spare parts and accessories by our web site to Latin American: http://www.lar.panasonic.com Also you may contact us directly by our Contact Center: Panama 800-PANA (800-7262) Colombia 01-8000-94PANA (01-8000-947262) Ecuador 1800-PANASONIC (1800-726276) Costa Rica 800-PANA737 (800-7262737) El Salvador 800-PANA (800-7262) Guatemala 1-801-811-PANA (1-801-811-7262) Chile... -
Page 179: Index
Index ∫ A ∫ F AC adaptor ..19, 159 File No. continued ..57 Alert sound ....53 Flash . - Page 180 Play volume ... . . 97 TV aspect ... . . 110 Playback folder ..57 TV format .
-
Page 181: Spanish Quick Use Guide/Guía Española Para El Uso Rápido
Spanish Quick Use Guide/Guía española para el uso rápido ∫ Insertar la batería Abra la tapa de la batería/tarjeta. 1 Deslice mientras empuja la tapa de la batería/tarjeta. 2 Abra la tapa de la batería/ tarjeta. Inserte la batería, tenga cuidado y vea que coincidan las marcas del terminal. - Page 182 Cierre la tapa de la batería/tarjeta. ≥ Cierre de forma segura, escuche un sonido de clic. Retirar la batería Mantenga presionado el botón de alimentación para apagar la unidad, luego tire hacia arriba y retire la batería. ≥ Siempre revise que el monitor LCD y la lámpara del indicador de estado estén apagados.
- Page 183 Enchufe el adaptador de CA en un tomacorriente de Conecte el cable USB a la unidad. ≥ El indicador de estado parpadea en rojo durante un período de aproximadamente 2 segundos (aproximadamente 1 segundo encendido, aproximadamente 1 segundo apagado), y comienza la carga. Se apagará...
- Page 184 Cierre la tapa de la batería/tarjeta. ≥ Cierre de forma segura hasta que haga clic. ∫ Encender/apagar el dispositivo Encender y apagar el dispositivo con el botón de alimentación Pulse el botón de alimentación para encender la unidad. Para apagar la unidad Mantenga presionado el botón de encendido hasta que se apague el monitor LCD.
- Page 185 ∫ Selección del modo Cambie el modo a grabación o a reproducción. Pulse el botón REC/ ≥ Cada vez que presiona el botón REC/ cambia el modo. Modo de Grabación Para grabar imágenes en movimiento, imágenes fijas y audio Modo de reproducción Para reproducir imágenes en movimiento, imágenes fijas y audio ∫...
- Page 186 ∫ Grabación de películas 1) Cambie al modo de grabación. 2) Abra el monitor LCD. 3) Pulse el botón de inicio/parada de grabación para iniciar la grabación. 000:00:00 000:00:00 000:00:00 A Cuando comienza a grabar, aparece ¥. ∫ Grabación de fotografía 1) Cambie al modo de grabación.
- Page 187 ∫ Reproducción de película/fotografía 1) Cambie al modo de reproducción. 2) Seleccione el archivo a reproducir usando el botón SET y pulse el botón SET. 3) Seleccione el icono de operación con el botón SET. Reproducción de imágenes en movimiento Reproducción/Pausa Reproducción de rebobinado...
- Page 188 Panasonic Consumer Marketing Company of North America, Division of Panasonic Corporation of North America One Panasonic Way, Secaucus, NJ 07094 Panasonic Canada Inc. 5770 Ambler Drive, Mississauga, Ontario, L4W 2T3 VQT4D14 © Panasonic Corporation 2011 1AG6P1P6457--(S) Printed in Indonesia F1211SA0...