Table of Contents
Advertisement
Quick Links
Advertisement
Table of Contents

Related Manuals for Electrolux EHD90LLUM


Summary of Contents for Electrolux EHD90LLUM
-
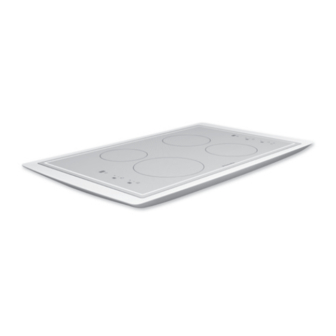
Page 1: Induction Cooktop
user manual induction cooktop EHD90LLUM... -
Page 2: Table Of Contents
Congratulations Contents Thank you for choosing the new • Important safety instructions Electrolux induction cooktop – the most • Displays beautiful cooktop in the world. • Operating the appliance • Locking/unlocking the control panel 5 This product combines beauty and style •... -
Page 3: Cooking Surface Layout
Cooking surface layout Induction cooking zone 1400W Induction cooking zone 1800W with power boost function 2500W with power boost function 2800W Corian frame ® Decorative lighting strip Control panel Control panel Induction cooking zone 2200W... -
Page 4: Control Panel Layout
Control panel layout Cooking zone indicators Timer display Timer function Timer Heat setting selector Display Power boost function On/Off with power indicator Lock Touch control sensor fields The appliance is operated using Touch Control sensor fields. Functions are controlled by touching sensor fields and confirmed by displays and acoustic signals. -
Page 5: Important Safety Instructions
1 Important safety instructions Please comply with these instructions. If you do not, any damage resulting is not covered by the warranty. Children’s safety • C hildren should be supervised to ensure This appliance conforms with the they do not play with the appliance. - Page 6 2 important safety instructions electrolux induction cooktop Safety during use How to avoid damage to the appliance • R emove stickers and film from the glass • The glass ceramic and surrounding ceramic. Corian frame can be damaged by ® • T here is the risk of burns from the objects falling onto them. appliance if used carelessly.
-
Page 7: Displays
3 Displays Display Description Cooking zone is switched off Heat settings Heat setting is set Fault Malfunction has occurred Pan detection Cookware is unsuitable or too small or no cookware has been placed on the cooking zone Residual heat Cooking zone is still hot Child safety device... -
Page 8: Operating The Appliance
4 operating the appliance electrolux induction cooktop Operating the appliance Use the induction cooking zones with suitable cookware. Switching the appliance on and off Control panel Display Pilot light Perimeter lighting strip Switch on lights up lights up Touch for 2 seconds Switch off goes out goes out... -
Page 9: Locking/Unlocking The Control Panel
5 Locking/unlocking the control panel The control panel, with the exception of the “On/Off” sensor field, can be locked at any time in order to prevent the settings being changed e.g. by wiping over the panel with a cloth. Control panel Display Switch on Touch (for 5 seconds) -
Page 10: Using The Child Safety Device
6 using the child safety device electrolux induction cooktop Using the child safety device The child safety device prevents unintentional use of the appliance. Setting the child safety device Step Control panel Display/Signal Switch on the appliance (Do not set the heat setting) Acoustic signal Touch until the signal sounds Touch Appliance switches off. The child safety device is engaged. -
Page 11: Switching The Power Boost Function On And Off
7 Switching the power boost function on and off The power boost function makes more for 2 minutes for the rear left cooking zone power available to the induction cooking and for 5 minutes for the right cooking zones, e.g. to bring a large quantity of zones. After these times, the induction water to the boil quickly. cooking zones automatically switch back The power boost function is activated for to heat setting 9. -
Page 12: Using The Timer
8 using the timer electrolux induction cooktop Using the timer All cooking zones can use one of the timer functions at the same time. Function Condition Outcome after the time has elapsed Automatic cut-out a heat setting is set acoustic signal flashes Cooking zone switches off Countdown timer cooking zones not in use acoustic signal flashes If a cooking zone is switched off, the timer function set is also switched off. - Page 13 9 Selecting a cooking zone on left control panel Control panel Display Pilot light of the front cooking Touch once zone flashes Pilot light of the rear cooking Touch once zone flashes Selecting a cooking zone on right...
- Page 14 10 using the timer electrolux induction cooktop Setting time Step Control panel Display Pilot light of cooking zone selected flashes Selecting cooking zone 01 to 99 minutes Touch from the selected cooking zone ... 05...10...15... 20 or... 95... 90... 85... 80... Touch from the (5-minute steps for easy setting) selected cooking zone for more than 4 seconds After a few seconds the power indicator flashes more slowly.
-
Page 15: Automatic Switch Off
11 Switching off the acoustic signal Step Control panel field Display Acoustic signal to acknowledge. Touch Acoustic signal stops. Automatic switch off Cooking surface • I f after switching on the cooking surface, a heat setting is not set for a cooking zone within approximately 10 seconds, the cooking surface automatically switches itself off. -
Page 16: Tips On Cooking And Frying
12 tips on cooking and frying electrolux induction cooktop Tips on cooking and frying Information on acrylamides. According to the latest scientific knowledge, intensive browning of food, especially in products containing starch, can constitute a health risk due to acrylamides. Therefore we recommend cooking at the lowest possible temperatures and not browning foods too much. - Page 17 13 Pan size Induction cooking zones adapt automatically to the size of the bottom of the cookware up to a certain limit. However the magnetic part of the bottom of the cookware must have a minimum diameter depending upon the size of the cooking zone. Diameter of cooking zone Minimum diameter of dish base...
-
Page 18: Examples Of Cooking Applications
14 examples of cooking applications electrolux induction cooktop Examples of cooking applications The information given in the following table is for guidance only. Heat Cooking Cooking Suitable for Tips/Hints setting process time Off position Keeping Keeping cooked foods warm as required Cover food warm Hollandaise sauce, Melting melting butter, chocolate, 5-25 mins. -
Page 19: Cleaning And Care
15 Cleaning and care Ceramic glass Cleaning the ceramic after each use 1. Wipe the appliance with a damp cloth and a little washing up liquid 2. R ub the appliance dry using a clean cloth. Take care! Risk of burns from residual heat. - Page 20 16 cleaning and care electrolux induction cooktop Corian frame ® Cleaning the Corian after each use ® Although liquids cannot penetrate Corian ® it is best to wipe up spills as they occur. 1. Wipe the appliance with a damp cloth and a little washing up liquid.
-
Page 21: Troubleshooting
17 Troubleshooting Problem Possible cause Remedy The appliance cannot More than 10 seconds have Switch the appliance on again be switched on or is not passed since the appliance operating was switched on The lock is switched on Switch off the lock (See the section “Locking/unlocking the control panel”) The child safety device is Deactivate child safety device switched on (See the section “Child safety... - Page 22 18 troubleshooting electrolux induction cooktop Problem Possible cause Remedy is lit Overheating protection for Switch off the cooking zone the cooking zone has been then switch the cooking zone triggered on again Automatic switch off has been Switch off the cooking zone triggered then switch the cooking zone on again and number are displayed Electronics fault Disconnect the appliance from the electrical supply for a few minutes (take the fuse out of the house’s wiring system).
-
Page 23: Disposal
19 Disposal Packaging material Environmentally friendly packaging materials can be recycled. Plastic components that are identified by markings >PE<, >PS< etc can be recycled. If the symbol appears on either the product and or packaging, then it cannot be treated as household waste. -
Page 24: Installation Instructions
20 installation instructions electrolux induction cooktop Installation instructions Cutting the benchtop out • T he bench cutout needs to be sized by using the supplied template. • A cutting accuracy of 1.5mm either side of the marked area needs to be maintained. Pull down clamps • T hese are supplied in a parts bag consisting of 4 clamps and 4 screws. -
Page 25: Safety Instructions
21 dangerous voltage Safety instructions • The electrical mains terminal is live. The laws, ordinances, directives and • O bserve connection schematic as standards in force in the country of use illustrated on base of product. are to be followed (safety regulations, • Observe electrical safety rules. proper recycling in accordance with the • E nsure anti-shock protection through... -
Page 26: Assembly
22 assembly electrolux induction cooktop Assembly To aid correct positioning, remove front support timber piece and discard. min. 50mm min. 5mm... - Page 27 23 Assembly min. 20mm min. 35mm min. 5mm min. 20mm min. 35mm min. 5mm...
-
Page 28: Warranty
Electrolux which cannot be excluded, 3. Electrolux warrants that, when dispatched from an restricted or modified. To the extent permitted by law, the Electrolux warehouse, the Appliance is free from defects in liability of Electrolux (if any) arising out of or in relation to materials and workmanship for the Warranty Period. the Appliance or any services supplied by Electrolux shall 4. D uring the Warranty Period Electrolux or its Authorised... -
Page 29: Information Label
25 Important Notice Before calling a Service Technician please check carefully the operating instructions, service booklet and the warranty terms and conditions. FOR SERVICE SERVICE AUSTRALIA FOR SPARE PARTS or to find the address of your nearest... - Page 30 Do you remember the last time you opened a gift that made you say “Oh! How did you know? That’s exactly what I wanted!” That’s the kind of feeling that the designers at Electrolux seek to evoke in everyone who chooses or uses one of our products. We devote time, knowledge, and a great deal of thought to anticipating and creating the kind of appliances that our customers really need and want.