Epson Stylus Photo R380 Printer Basics Manual
Epson photo printer user manual
Hide thumbs
Also See for Stylus Photo R380:
- Manual (13 pages) ,
- Start here manual (8 pages) ,
- Service manual (150 pages)
Table of Contents
Advertisement
Advertisement
Table of Contents

Related Manuals for Epson Stylus Photo R380


Summary of Contents for Epson Stylus Photo R380
- Page 1 Printer Basics...
-
Page 2: Copyright Notice
(excluding the U.S.) failure to strictly comply with Seiko Epson Corporation’s operating and maintenance instructions. Seiko Epson Corporation shall not be liable for any damages or problems arising from the use of any options or any consumable products other than those designated as Original Epson Products or Epson Approved Products by Seiko Epson Corporation. -
Page 3: Table Of Contents
Contents Introduction ......... . . 5 Using the Printer’s Control Panel . - Page 4 Maintaining Your Printer ......48 Checking the Print Head Nozzles ......48 Cleaning the Print Head .
-
Page 5: Introduction
® Windows or Macintosh on-screen User’s Guide by selecting the icon for it on your desktop. Please follow these guidelines as you read your Epson Stylus Photo R380 instructions: Warning: Warnings must be followed carefully to avoid bodily injury. Caution: Cautions must be observed to avoid damage to your equipment. -
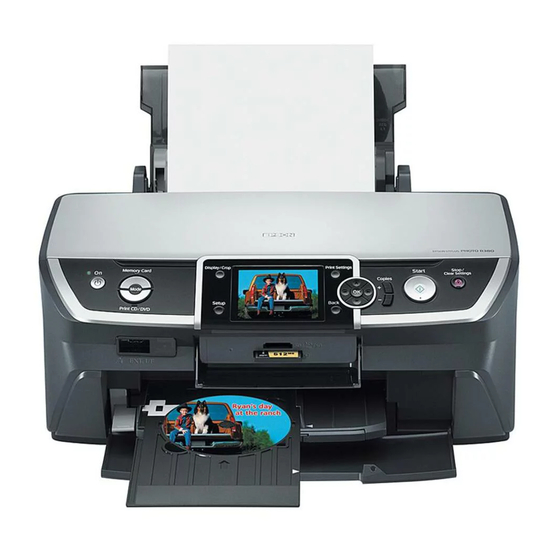
Page 6: Using The Printer's Control Panel
Using the Printer’s Control Panel View and print photos and videos on card Print on CD/DVDs To save energy, the screen goes dark after the printer has been idle for a while. You also see the lights flash back and forth. Mode Press any button to reactivate the printer. -
Page 7: Loading Paper
If you are just printing a rough draft, plain paper is fine. However, for the best results, use one of Epson’s special ink jet papers designed for ® your printer. For example, photos look great printed on Epson Ultra Premium Photo Paper Glossy. - Page 8 Note: Make sure the front tray is in the paper (lower) position. If it is not, push in the front tray extensions and lift up the tray lever to reposition the front tray. Then slide out the front tray extensions. 3.
- Page 9 5. Slide the left edge guide against the left edge of the paper (but not too tightly). 4 × 6-inch, 5 × 7-inch Letter-size, 8 × 10-inch For additional information and instructions on loading envelopes, see your on-screen User’s Guide. Loading Paper...
-
Page 10: Using Special Papers
Using Special Papers You can purchase genuine Epson ink and paper from an authorized Epson reseller. To find the nearest reseller, call 800-GO-EPSON (800-463-7766). Or you can also purchase online at www.epsonstore.com (U.S. sales) or www.epson.ca (Canadian sales). Paper name*... -
Page 11: Storing And Displaying Your Prints
* The availability of paper types and sizes varies by location. Storing and Displaying Your Prints With proper care, photographs from your Epson Stylus Photo R380 will last for many years. The special Epson Claria™ inks designed for your printer provide the ultimate combination of photo quality and longevity when used with Epson papers for prints that are properly displayed or stored. -
Page 12: Printing From A Memory Card
Printing From a Memory Card The R380 lets you print color photos directly from your digital camera’s memory card; just insert it into one of the memory card slots on the printer and you’re ready to print. You can follow the same steps to print from a USB flash drive. -
Page 13: Compatible Cards And Image Formats
Compatible Cards and Image Formats You can use the following types of cards with your printer: Top slot Bottom slot The printer supports image files that meet the following requirements: Media format DCF version 1.0 or 2.0 compliant* File format JPEG, DOS FAT (FAT 12 or 16, one partition) taken with a DCF version 1.0 or 2.0 compliant digital camera Supports Exif version 2.21... -
Page 14: Inserting The Card
Inserting the Card 1. Make sure the printer is turned on. 2. Open the memory card cover. Caution: If your card requires an adapter, make sure you insert it into the adapter before you insert it in the slot. Otherwise, the card may get stuck in the slot. Do not insert more than one card at a time, and do not force the card into the slot. -
Page 15: Printing From A Usb Flash Drive
Caution: Do not remove the card or turn off the printer while the memory card access light is flashing; you may lose data on the card. If your printer is connected to a computer running Windows 2000 or XP , never turn off the printer or unplug the USB cable when the memory card light is flashing;... -
Page 16: Viewing Photos
Viewing Photos You can view each photo individually, play a slide show of your photos, or display sixteen photos at once. First, insert your memory card or USB flash drive as described above. 1. Press the Memory Card 2. Press l or r to select You see your first photo, with information as shown: ■... -
Page 17: Printing All The Photos On A Memory Card
4. Repeat steps 2 and 3 for each photo you want to print. 5. Press the Print Settings If you loaded 4 × 6 Premium Photo Paper Glossy, skip to step 7. 6. Press to confirm your print settings and selections. 7. - Page 18 Printing Photos from Specific Dates The Print by Date option lets you print all the photos on your memory card that were taken on a specific date. Before you start, make sure you press the mode button. Card 1. Press l or r to choose to display a list of dates.
- Page 19 4. Press l or r to choose press 5. Press the Print Settings print settings (see page 21), then press 6. Press the x button to print the proof sheet(s). Start This may take a few minutes. For multiple proof sheets, the pages containing the oldest images are printed first.
- Page 20 Note: Depending on the movie resolution and the transfer rate of your memory card or storage device, the video may not play smoothly. 8. While the movie is playing, do one of the following: ■ Print 1 frame: ■ Print N frames: print, press want to print, press Note:...
-
Page 21: Choosing Print Settings
For this paper Epson Premium Photo Paper Glossy Epson Premium Glossy Photo Paper Epson Ultra Premium Photo Paper Glossy Epson Ultra Premium Glossy Photo Paper Epson Photo Paper Glossy Epson Glossy Photo Paper Plain paper... - Page 22 4. Press d to highlight 5. Press u or d to choose your paper size, then press 6. Press d to highlight 7. Press u or d to select one of the following layout options, then press Borderless Border Upper Half Photo ID Wallet 2-up...
- Page 23 9. Press u or d to highlight the settings shown in the following table, then press r to display the list of options. Press u or d to select the option you want, then press Setting Description Filter Select Sepia to print your photo in a brown tone for an old-fashioned look.
-
Page 24: Touching Up Your Photos
Touching Up Your Photos Your printer lets you correct the color and improve your photos without using a computer. PhotoEnhance automatically corrects under- or over-exposure, enhances skin tones, and sharpens scenery. For example, if the subject of your photo is too dark because of a bright background (backlighting), PhotoEnhance™... -
Page 25: Manually Adjusting Your Photos
3. Select from these options, then press ■ PhotoEnhance photos. For example, if you have a photo with a subject that is too dark because of a bright background (backlighting), PhotoEnhance might be able to improve the brightness levels so that the person’s face is brighter in the printout. -
Page 26: Cropping Your Photos
Note: These settings remain in effect until you change them. To reset all settings to the defaults, see page 27. 4. Press again, then press the x Cropping Your Photos Your printer lets you decide how your photos fit on the page with cropping, expansion for borderless prints, and fit to frame. -
Page 27: Restoring Default Settings
Borderless Expansion When you print borderless photos, your image is slightly expanded and cropped to fill the sheet of paper. If too much of your photo edges are cut off, you can adjust the expansion setting as described below. 1. Press the Print Settings 2. -
Page 28: Printing From A Camera Or Phone
■ Using the optional Epson Bluetooth Photo Print Adapter, you can also print wirelessly from a Bluetooth-enabled PDA, mobile phone, or computer. For more information, see the on-screen User’s Guide. - Page 29 Note: If your camera is not compatible with PictBridge or USB Direct Print, you see a message saying the connected device cannot be used. Epson cannot guarantee the compatibility of any cameras. Depending on the printer settings and your digital camera settings, some combinations of paper type, size, and layout may not be supported.
-
Page 30: Printing From A Mobile Phone
Printing From a Mobile Phone If your mobile phone or PDA has a camera and an infrared port, you can send your photos to the printer and print them directly from your phone or PDA. 1. Make sure the printer is not printing. 2. -
Page 31: Printing On Cds And Dvds
Your printer includes a special tray that lets you print your photos directly on ink jet-printable CDs or DVDs—without using a computer. You can also use the Epson Print CD software that came with your printer to add text and modify your designs with a variety of special effects. For instructions on using Epson Print CD on your computer, see your on-screen User’s Guide. -
Page 32: Inserting A Cd Or Dvd
Inserting a CD or DVD Make sure the data, music, or video is burned on your ink jet-printable CDs or DVDs before you print. Otherwise, dirt or scratches on the surface may cause errors when you burn the data. If you plan to print large numbers of CDs or DVDs, it’s a good idea to print a small sample, then wait a day and check the quality to make sure it is satisfactory. - Page 33 Note: If you want to add text and modify your designs with a variety of special effects, you can use the Epson Print CD software on your computer. See your on-screen User’s Guide for instructions. Inserting a CD or DVD...
-
Page 34: Printing Memory Card Photos On A Cd Or Dvd
Printing Memory Card Photos on a CD or 1. Insert a CD or DVD for printing, as described on page 32. 2. Press the Print CD/DVD 3. Press the Print Settings select the following: ■ Media Type ■ Paper Type ■... -
Page 35: Adjusting The Print Position
6. Press x to print on your CD or DVD. Start Note: If you need to cancel printing, press the y Stop/Clear Settings button. 7. When you are finished printing, remove the CD/DVD tray from the printer. To return the output tray to the paper position, see page 36. Note: After you print, handle the CD or DVD carefully. -
Page 36: Returning The Output Tray To The Paper Position
Returning the Output Tray to the Paper Position 1. Pull up the lever to lower the output tray to the paper position. 2. Pull out the front tray extensions. Printing on CDs and DVDs... -
Page 37: Printing A Jewel Case Insert
Printing a Jewel Case Insert You can print a photo or an index of photos and have it automatically formatted with lines for cutting and folding to fit a CD or DVD jewel case. If you choose to print an index, up to 24 photos will be printed on the insert. If you select more than 24 photos, multiple inserts will be printed. -
Page 38: Printing From Your Computer
2. Open the photo or document in your application program. 3. Open the menu and select File Select EPSON Stylus Photo R380 Series Printing From Your Computer . You see a window like this one: Print Click here to open your... - Page 39 4. Make sure EPSON Stylus Photo R380 Series Preferences Properties (If you see a Setup Preferences Properties 5. On the Main tab, select the basic print settings: Click here for borderless photos, after choosing paper Type Select your paper Type...
- Page 40 6. For more printing options, click the following settings as necessary: Select Paper & Quality Options as necessary Select Print Options as necessary Note: For the highest quality on selected papers, you can select Photo RPM (5760 × 1440) from the quality option pop-up menu (as shown above). When you select Photo RPM, printing will take longer.
-
Page 41: Printing From A Macintosh
X-compatible application, follow the steps below to . Make the following settings: Page Setup to start printing. This Print Click to cancel printing Click to buy ink Select Stylus Photo R380 Select your Paper Size* Select your document or image orientation Printing From a Macintosh... - Page 42 (Mac OS X 10.2.8 or 10.3.9 only): save your print job : schedule your print job to print at a later time. : select page printing options, such as Select Stylus Photo R380 Select Print Settings Select your Media Type (see page 44)
- Page 43 10. To monitor the progress of your print job, click the appears in the dock on the bottom of your desktop. If you’re using Mac OS X 10.2.8, click the double-click Stylus Photo R380 : select ColorSync button to change additional settings. in the Printer List window.
-
Page 44: Selecting The Correct Paper Type
For this paper . . . Plain paper Epson Bright White Paper Epson Iron-on Cool Peel Transfer paper Epson Ultra Premium Photo Paper Glossy Epson Ultra Premium Glossy Photo Paper Epson Premium Photo Paper Glossy Epson Premium Glossy Photo Paper... - Page 45 For this paper . . . Epson Premium Presentation Paper Matte Epson Matte Paper Heavyweight Epson Premium Presentation Paper Matte Double-Sided Epson Double-Sided Matte Paper Epson Presentation Paper Matte Epson Photo Quality Ink Jet Paper Epson Photo Quality Self Adhesive Sheets...
-
Page 46: Backing Up Your Photos
To save your files to a USB flash drive or other device, such as an external CD-R/RW drive or Iomega Note: Epson cannot guarantee the compatibility of any drives. For more information, contact Epson as described on page 62. 1. If the printer is connected to your computer, unplug the USB cable or turn off your computer. - Page 47 4. Press the button. Setup 5. Press l or r to select to display the message shown below on the right: 6. Press to confirm, then press All the photos on your memory card are copied to your connected storage device.
-
Page 48: Maintaining Your Printer
Maintaining Your Printer If you notice a decline in print quality or your ink is expended, follow the instructions in this chapter for: ■ “Checking the Print Head Nozzles” (see below) ■ “Cleaning the Print Head” on page 49 ■ “Aligning the Print Head”... -
Page 49: Cleaning The Print Head
7. If there are no gaps in the pattern, the print head doesn’t need to be cleaned. Press to return to the Maintenance menu. If there are gaps in the pattern, clean the print head as described below. Note: You can also check the nozzles with software when connected to a computer; see your on-screen User’s Guide for details. -
Page 50: Aligning The Print Head
8. If there are no gaps in the pattern, press menu. If there are gaps in the pattern, press x If you don’t see any improvement after cleaning four or five times, see page 57. You can also turn the printer off and wait at least 6 hours or overnight. This lets any dried ink soften. -
Page 51: Replacing Ink Cartridges
7. Look at pattern #1 and find the square that is most even, with no noticeable streaks or lines. 8. Press r, then press u or d to select the number for that square. 9. Press 10. Press d to select the next pattern, then repeat steps 7 through 9. -
Page 52: Purchasing Ink Cartridges
Purchasing Ink Cartridges Epson offers two different capacity cartridges for each color in your printer. Use these Epson ink cartridges within six months of installing them and before the expiration date on the package. Color Black Cyan Magenta Yellow Light cyan... -
Page 53: Removing And Installing Ink Cartridges
Leave the expended cartridge installed until you have obtained a replacement, or the ink remaining in the print head nozzles may dry out. To ensure good results, use genuine Epson ink cartridges and do not refill them. Other products may cause damage to your printer not covered by Epson’s warranty. - Page 54 4. Squeeze the tab at the back of the cartridge and lift it straight out. Dispose of it carefully. Do not take the used cartridge apart or try to refill it. Warning: If ink gets on your hands, wash them thoroughly with soap and water. If ink gets into your eyes, flush them immediately with water.
- Page 55 6. Remove the yellow tape from the bottom of the ink cartridge. Caution: You must remove the yellow tape from the cartridge before you install it; otherwise, print quality may decline or you may not be able to print. If you have installed an ink cartridge without removing the yellow tape, take the cartridge out of the printer, remove the yellow tape, and then reinstall it.
- Page 56 9. Close the ink cartridge cover and press it until it clicks into place. 10. Close the printer cover, then press the charging ink. This takes about one minute. Caution: Never turn off the printer while ink is charging or you’ll waste ink. Note: You cannot continue printing with one ink cartridge expended, even if the other cartridges still contain ink.
-
Page 57: Solving Problems
Then turn the printer back on. If you still see this error message, contact Epson as described on page 62. Contact Epson as described on page 62. Make sure the ink cartridges are installed correctly. See page 53 for details. - Page 58 Try cleaning the print head again. If the error message reoccurs, contact Epson as described on page 62. A problem occurred and backup was cancelled. Make a note of the error code and contact Epson as described on page 62.
-
Page 59: Problems And Solutions
Problems and Solutions Check the solutions below if you’re having trouble using your printer. Noise Problems ■ The first time you install ink cartridges, the printer must charge its print head for about 2 minutes. Wait until charging finishes (when you see the message “Initialization is complete”) before you turn off the printer, or it may charge improperly and use excess ink the next time you turn it on. -
Page 60: Paper Feeding Problems
Paper Feeding Problems ■ If paper doesn’t feed, remove it from the sheet feeder. Flip through the stack to separate the sheets a little. Then reload the paper against the right edge, and slide the left edge guide against the paper (but not too tightly). ■... -
Page 61: Print Quality Problems
Make sure the type of paper you loaded matches the paper size and paper type settings on the control panel or in your printer software (see page 44). ■ For the best print quality, use Epson special paper (see page 44) and genuine Epson ink cartridges (see page 51). ■... -
Page 62: Where To Get Help
Canada: (905) 709-2567, 6 Toll or long distance charges may apply. Purchase Supplies and Accessories You can purchase genuine Epson ink and paper from an Epson authorized reseller. To find the nearest reseller, call 800-GO-EPSON (800-463-7766). Or you can purchase online at www.epsonstore.com... -
Page 63: Notices
Notices Important Safety Instructions Before using your printer, read and follow these safety instructions: ■ Be sure to follow all warnings and instructions marked on the printer. ■ Use only the type of power source indicated on the printer label. ■... -
Page 64: Ink Cartridge Safety Instructions
■ If the LCD panel is damaged, contact Epson as described on page 62. If the liquid crystal solution gets on your hands, wash them thoroughly with soap and water. If the liquid crystal solution gets into your eyes, flush them immediately with water. If discomfort or vision problems remain after a thorough flushing, see a doctor immediately. -
Page 65: Fcc Compliance Statement
FCC Compliance Statement For United States Users This equipment has been tested and found to comply with the limits for a Class B digital device, pursuant to Part 15 of the FCC Rules. These limits are designed to provide reasonable protection against harmful interference in a residential installation. This equipment generates, uses, and can radiate radio frequency energy and, if not installed and used in accordance with the instructions, may cause harmful interference to radio or television reception. -
Page 66: Declaration Of Conformity
Declaration of Conformity According to 47CFR, Part 2 and 15 for: Class B Personal Computers and Peripherals; and/or CPU Boards and Power Supplies used with Class B Personal Computers: Epson America, Inc. Located at: MS 3-13 3840 Kilroy Airport Way... - Page 67 Epson product after its shipment from Epson, e.g., dealer or user- added boards or components. Epson is not responsible for warranty service should the Epson label or logo or the rating label or serial number be removed or should the product Notices...
- Page 68 Epson products, or service other than by an Epson Authorized Servicer. If a claimed defect cannot be identified or reproduced, you will be held responsible for the costs incurred.
-
Page 69: Index
Digital camera, printing from, 28 to 29 Display/Crop button, 6 Displaying prints, 11 DPOF, 20 DVDs, see also CDs Enhancing photos, 25 Epson Help, 62 ink, 52, 62 paper, 10 to 11, 62 Epson Print CD, 31 Exif Print, 25 Expansion, borderless printing, 27 Index... - Page 70 FCC statement, 65 File formats, 13 Fit to Frame, 27 Front tray CD/DVD position, 32 paper position, 36 Help, Epson, 62 Image formats, 13 Image quality problems, 61 Image quality settings, 25 Infrared printing, 30 Ink cartridges replacing, 51 to 56...
- Page 71 Sepia, 25 Setup button, 6 Sharpness, 25 Sizing photos, 26 to 27 Software ArcSoft PhotoImpression, 62 Epson Print CD, 31 Stop/Clear Settings button, 6 Stopping printing, 17, 41, 44 Storing prints, 11 Technical support, 62 Touching up photos, 24 to 26...
- Page 72 Ultra Premium photo papers, 10 USB Device printing from, 15 USB device backing up photos, 46 to 47 Viewing photos, 16 Warranty, 67 to 68 Windows color management settings, 40 page layout settings, 39 Paper Type setting, 44 to 45 printing with, 38 to 41 Type setting, 39 Zip drive, backing up photos, 46 to 47...