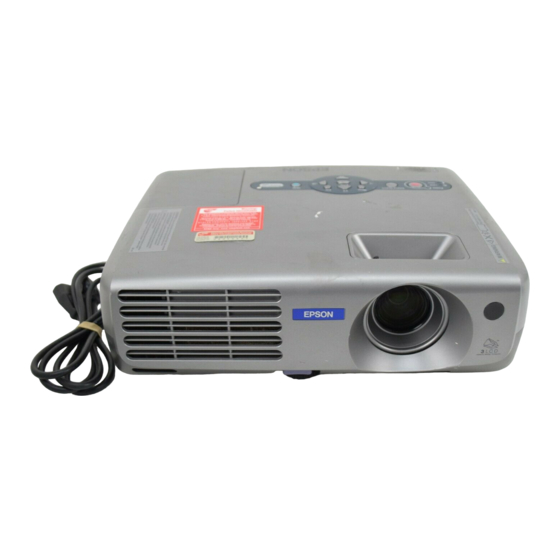
Epson EMP EMP-81 User Manual
Epson emp-821,emp-81,emp-61 multi-media projector user's guide
Hide thumbs
Also See for EMP EMP-81:
- User manual (28 pages) ,
- Quick reference manual (4 pages) ,
- User manual (25 pages)
Table of Contents
Advertisement
Quick Links
Advertisement
Chapters
Table of Contents

Related Manuals for Epson EMP EMP-81


Summary of Contents for Epson EMP EMP-81
- Page 1 User’s Guide...
-
Page 2: Notations Used In This User's Guide
Indicates configuration menu items. " (Menu Name) " Example: "Image"-"Brightness" When "unit" or "projector" appears in the text of this User’s Guide, it may refer to items which are accessories or optional equipment in addition to the main projector unit itself. sp.94... -
Page 3: Features Of The Projector
• Reduction in operating noise of approximately 17% • Approximately 1.5 times longer lamp life sp.59 Automatic keystone correction function The vertical angle of the projector is detected, so that any vertical keystone distortion in the projected images can be automatically corrected. sp.37... - Page 4 Password protection function allows you to limit using and changing the settings of the projector. This means that the projector cannot be used if it is taken without authorisation, and thus serves as a theft-prevention feature. sp.27...
-
Page 5: Table Of Contents
Before Using the Remote Control ...12 Inserting the Batteries ... 12 Using the Remote Control and Remote Operating Range ... 13 Installation ...15 Setting Up the Projector... 15 Screen Size and Projection Distance... 16 Connecting to a Computer ...18 Eligible Computers ... 18 Projecting Images from the Computer... - Page 6 Contents Troubleshooting Using the Help...69 Problems Solving ...71 Reading the Indicators ... 71 When the Indicators Provide No Help ... 74 Appendices Maintenance...84 Cleaning ... 84 Replacing Consumables... 85 Saving a User's Logo ...90 Optional Accessories and Consumables...93 Glossary ...94 List of ESC/VP21 Commands ...96 Command List...
- Page 7 Before Using the Projector This chapter describes the procedures for setting up the projector before use. Part Names and Functions... 7 • Front/Top ...7 • Control Panel ...8 • Rear ...9 • Base...10 • Remote Control ...11 Before Using the Remote Control ... 12 •...
-
Page 8: Part Names And Functions
• • • • sp.38 Front adjustable foot Extend and retract to adjust the projection angle when the projector is placed on a surface such as a shelf. • • • • Lens cover Attach when not using the projector to prevent the lens from becoming dirty or damaged. -
Page 9: Control Panel
Displays and hides the configuration menu. • • • • [Power] button sp.32, p.34 Turns the projector power on and off. • • • • sp.33 [Source Search] button The next input source is searched for automatically in the following order and the image input from the connected equipment is projected each time this button is pressed. -
Page 10: Rear
Air intake vent Clean the air intake vent periodically. • • • • sp.97 [Control (RS-232C)] port Connects the projector to a computer using an RS- 232C cable. This port is for control use and should not normally be used. -
Page 11: Base
Foot adjust lever • • • • Suspension bracket fixing points (4 points) sp.15, p.93 Install the optional ceiling mount here when suspending the projector from a ceiling. sp.38 • • • • sp.84 Air intake vent Clean the air intake vent periodically. -
Page 12: Remote Control
Part Names and Functions Remote Control If you position the over the button icon or button name, a description of that button will appear. • • • • sp.20 [Page down] [Page up] buttons • • • • sp.48 [E-Zoom] button ( ) ( ) •... -
Page 13: Before Using The Remote Control
Inserting the Batteries The batteries are not already inserted into the remote control at the time the projector is purchased. You will need to insert the batteries that are provided with the projector before the remote control can be used. -
Page 14: Using The Remote Control And Remote Operating Range
Using the Remote Control The remote control is used in the following way. PROCEDURE Point the remote control light-emitting area toward one of the remote control light-receiving areas on the projector and operate the remote control buttons. Remote control Remote control... -
Page 15: Remote Operating Range
Before Using the Remote Control Remote Operating Range Use the remote control within the ranges indicated below. If the distance or angle between the remote control and the remote control light-receiving area is outside the normal operating range, the remote control may not work. -
Page 16: Installation
The projector supports the following four different projection methods, allowing you to choose the best method for displaying your images. CAUTION Before setting up the projector, be sure to first read the separate Safety Instructions/World-Wide Warranty Terms. • Front projection (Front projection) •... -
Page 17: Screen Size And Projection Distance
While referring to the following table, position the projector so that the images are projected onto the screen at the optimum size. The values should be used as a guide for setting up the projector. The actual values will vary depending on projection conditions and the zoom setting. - Page 18 Installation * When installing against a wall, leave a space of about 20 cm (7.9 in.) between the projector and the wall. • The lens allows a zoom ratio of up to the following ratio. EMP-821 :Approx. × 1.6 EMP-81/61 :Approx. × 1.2 The projected images can be enlarged up to the following ratio.
-
Page 19: Connecting To A Computer
Refer to the documentation provided with the computer for further details. • If the computer and projector are too far away from each other for the accessory computer cable to reach, use the optional VGA-HD15 PC cable. -
Page 20: Projecting Images From The Computer
If this happens, set the input source to sp.55 "Computer1" or "Computer2". • If more than one input source is connected to the projector at the same time, you can use button operations to select the signals to be sp.33... -
Page 21: Using The Remote Control To Operate The Mouse Pointer
You can use the remote control as a wireless mouse to control the mouse pointer on the computer screen. To do this, you must use the accessory USBg cable to connect the USB port of the computer to the [USB] port at the rear of the projector. Computer Mouse used Windows 98/2000/Me/... - Page 22 Connecting to a Computer Once the connection has been made, the mouse pointer can be operated as follows. Moving the mouse pointer Left click If you tilt the [ ] button on the remote Press the [Enter] button. control, the mouse pointer will move in If you press the [Enter] button twice in the direction of tilt.
-
Page 23: Connecting To An External Monitor
[Computer1/Component Video1] port can be viewed on an external computer monitor at the same time they are being projected by the projector, so that the images can be checked at times such as when giving presentations. -
Page 24: Connecting To A Video Source
When connecting the projector to video equipments, take the following precautions. • Turn off the power for both the projector and the video equipments before connecting them. If the power for either device is on at the time of connection, damage may result. -
Page 25: Projecting S-Video Images
If this happens, set the input source to "Component Video1" or "Component Video2". • If more than one input source is connected to the projector at the same time, you can use button operations to select the signals to be sp.33... -
Page 26: Projecting Rgb Video Images
If this happens, set the input source to sp.55 "Computer1" or "Computer2". • If more than one input source is connected to the projector at the same time, you can use button operations to select the signals to be sp.33... -
Page 27: Playing Sound From Video Equipment
Playing Sound from Video Equipment The projector has a built-in speaker with a maximum output of 5 W. You can output sound from connected video equipment (such as a computer or video deck) through the projector's built-in speaker if the video equipment has an audio output port. -
Page 28: Preventing Theft (Password Protect)
Preventing theft (Password Protect) When the Password Protect function is activated, people who do not know the password cannot use the projector to project images when the power is turned on. Furthermore, the user's logo that is displayed on the background of the screen cannot be changed. -
Page 29: Setting Password Protect
Password Protect is enabled" • If Password Protect is set to "ON", attach the accessory Password Protect sticker to your preferred position on the projector as a theft- prevention measure. Turn "Power ON Protect" on. - Page 30 Preventing theft (Password Protect) Enter the setting time as a number of up to 4 digits. While holding down the [Num] button, use the numeric keypad buttons to enter the setting time within the range of 0 to 9999 hours and then press the [Enter] button. If you make a mistake entering the time, press the [Esc] button and re-enter the time.
-
Page 31: Basic Operations
Basic Operations This chapter describes basic operations such as turning the projector on and off and adjusting the projected images. Turning the Projector On... 31 • Connecting the Power Cable ...31 • Turning the Power On and Projecting Images ...32 Turning the Projector Off... -
Page 32: Turning The Projector On
The power for the equipment that is connected to the projector should be turned on beforehand. PROCEDURE Check that the power is turned off for the projector and all components connected to the projector. -
Page 33: Turning The Power On And Projecting Images
A beep will sound to indicate that the projector is starting up. The Power indicator starts to flash green as the projector warms up, and an image begins to appear. - Page 34 • If the "No Signal." message does not disappear, check the connections again. • If a laptop computer or a computer with an LCD screen has been connected to the projector, the images may not be projected straight Projector away. After starting projection, check that the computer has been set up to output signals externally.
-
Page 35: Turning The Projector Off
Turning the Projector Off Follow the procedure below to turn off the power of the projector. PROCEDURE Turn off the power for the signal sources that are connected to the projector. Check that the power for all connected components has been turned off. - Page 36 Attach the lens cover. Attach the lens cover to the lens when not using the projector, in order to prevent the lens from getting dusty or dirty. Lens cover...
-
Page 37: Adjusting The Screen Image
The maximum zoom ratio of the EMP-821 is × 1.6, and that of the EMP-81/61 is × 1.2. Turn to "W" (wide) to enlarge the images. If you would like to enlarge the image further, move the projector sp.16 further away from the screen. Focusing the Screen Image PROCEDURE Turn the focus ring to adjust the image focus. -
Page 38: Adjusting The Image Angle And Automatic Keystone Correction Function
Seen from above If it is not possible to set up the projector so that it is perpendicular to the screen, it can be set up at a slight vertical angle instead. You can adjust the upward projection angle of the projector to a maximum of 12° and the downward projection angle to a maximum of 4°... - Page 39 Foot adjust lever (Front) If the projector is tilted vertically or horizontally, turn the bases of the rear adjustable feet to make fine adjustments to the height of the projector. When the projector is tilted horizontally, the correction may sp.38...
-
Page 40: Manually Correcting Keystone Distortion
If the top of the limit for keystone correction has been reached. Check that the image is elongated projector has not been set up at an angle which exceeds the proper limit. Projector p.53... -
Page 41: Adjusting The Image Quality
· Freeze function · Help menu display If you press the [Enter] button on the projector's control panel while any of the following functions are in use, the function in use will be cancelled and then the adjustment will be carried out. -
Page 42: Adjusting The Tracking
Menus". Tilt the [ ] button on the remote control or press the [ ] and [ ] buttons on the projector's control panel to adjust the tracking value until the vertical stripes disappear from the images. The tracking value increases or decreases each time a button is pressed. -
Page 43: Adjusting The Sync
Menus". Tilt the [ ] button on the remote control or press the [ ] and [ ] buttons on the projector's control panel to adjust the synchronisation value until the flickering, fuzziness or interference disappears from the images. -
Page 44: Selecting The Projection Quality (Colour Mode Selection)
TV images, etc. in bright rooms. sRGBg Images conform to the sRGB colour standard. If the connected source has a sRGB mode, set both the projector and the connected signal source to sRGB. Blackboard Images with natural tints can be obtained when projecting onto a blackboard (green). -
Page 45: Adjusting The Volume
Adjusting the Volume The volume of the projector's built-in speaker can be adjusted as follows. PROCEDURE Press the [Volume] buttons on the remote control or the [ ] and [ ] buttons on the projector's control panel to adjust the volume. -
Page 46: Advanced Operations
Advanced Operations This chapter describes functions for enhancing the projection of images, and how to use the configuration menus. Functions for Enhancing Projection ... 46 • A/V Mute...46 • Freeze ...47 • Wide-screen Projection of Images from Video Equipment (Changing the Aspect Ratio) ...47 •... -
Page 47: Functions For Enhancing Projection
Solid black Solid blue Default setting • The default user's logo is the EPSON logo. To change the user's sp.90 logo, you need to record your own logo. • When the A/V Mute function is being used, the "Brightness Control"... -
Page 48: Freeze
Functions for Enhancing Projection Freeze This function pauses only the projected images. The sound keeps playing without pausing. The image source will still be playing back the images even while projection is paused, and so it will not be possible to resume projection from the point where it was paused. -
Page 49: E-Zoom
Functions for Enhancing Projection E-Zoom This function lets you enlarge and reduce a part of projected images such as graphs and tables. PROCEDURE Press the [E-Zoom ] button. A cursor (cross) indicating the centre point for the area to be enlarged will appear on the screen. -
Page 50: Pointer Function
Functions for Enhancing Projection Pointer function This function lets you use the remote control to move a pointer icon around on the images being projected. This function can be used to emphasise parts of an image that you want to draw attention to. -
Page 51: Using The Configuration Menu Functions
Using the Configuration Menu Functions The configuration menus can be used to carry out a variety of settings and adjustments. The menus have a hierarchical structure, with a main menu that is divided into sub-menus, which are further divided into other sub-menus. sp.66 Refer to "Using the Configuration Menus"... -
Page 52: List Of Functions
Using the Configuration Menu Functions List of Functions "Image" Menu • None of the settings can be adjusted if no signals are being input. • The commands displayed in the "Image" menu change depending on the input sinal that is being projected. Menu commands that do not apply to the current input signal cannot be adjusted. - Page 53 Resets all adjustment values for the "Image" menu functions to their default settings. •Press the [Enter] button on the remote control or on the projector's control panel. •To return all settings such as the "Image" and "Signal" menu settings to their default values, select "Reset All"...
- Page 54 Using the Configuration Menu Functions Component videog/ Composite videog/ S-Videog Sub-menu Function Color Corrects the vividness of the image colour. The settings can Mode be saved separately for each type of source (computer or video source). You can select from six different quality settings depending on the surroundings.
- Page 55 Resets all adjustment values for the "Image" menu functions to their default settings. •Press the [Enter] button on the remote control or on the projector's control panel. •To return all settings such as the "Image" and "Signal" menu settings to their default values, select "Reset All"...
-
Page 56: Signal" Menu
Position Moves the image display position vertically and horizontally. •Press the [Enter] button on the remote control or on the projector's control panel and then make the adjustment using the display position adjustment screen that appears. Computer1 Selects the input signal in accordance with the equipment... - Page 57 "Computer1 Input" and "Computer2 Input". •Press the [Enter] button on the remote control or on the projector's control panel. •To return all settings such as the "Image" and "Signal" menu settings to their default values, select "Reset All"...
- Page 58 Sets the video signal format. •Press the [Enter] button on the remote control or on the projector's control panel and then make the selection from the video signal format selection menu that appears. •When set to "Auto", the video signal format is set automatically.
- Page 59 Returns "Position", "Video Signal" and "Resize" in the "Signal" menu to their default setting. •Press the [Enter] button on the remote control or on the projector's control panel. •To return all settings such as the "Image" and "Signal" menu settings to their default values, select "Reset All"...
-
Page 60: Setting" Menu
Operation When set to "ON", the operation of all buttons on the Lock projector's control panel except for the [Power] button will be disabled. •When "Operation Lock" is set to "ON", the operation lock function can be cancelled by holding down the [Enter] button on the projector's control panel for approximately 7 seconds. - Page 61 Resets all adjustment values for the "Setting" menu functions to their default settings. •Press the [Enter] button on the remote control or on the projector's control panel. •To return all settings such as the "Image" and "Signal" menu settings to their default values, select"Reset All" from sp.65...
-
Page 62: Extended" Menu
• The "User’s Logo" setting can not be adjusted if no signals are being input. Sub-menu Function Display This lets you make settings related to the projector's display. Message: Sets whether display of the following messages is turned "ON" or "OFF". • Signal name when the video signal is switched •... - Page 63 • Front : Select when the projector is in front of the screen. • Front/Ceiling: Select when the projector is in front of the screen and suspended from the ceiling. • Rear : Select when the projector is behind the screen.
- Page 64 Language Sets the language for message displays. •Press the [Enter] button on the remote control or on the projector's control panel and then make the selection. Reset Returns "Display" and "Operation" settings in the "Extended" menu to their default settings.
-
Page 65: Info" Menu
Using the Configuration Menu Functions "Info" Menu • The "Info" menu shows the setting details for the current image source. • The "Lamp Hours" item appears as 0H for 0–10 hours, and after that, it appears in units of 1 hour. Computer/RGB Video/Component videog Composite... -
Page 66: Reset" Menu
Reset All Resets all items in all menus to their default settings. •Press the [Enter] button on the remote control or on the projector's control panel. •To reset settings such as "Image" or "Signal", select "Reset" from the respective sub menus. -
Page 67: Using The Configuration Menus
Select a menu item. Tilt the [ ] button on the remote control up and down or press the [ ] and [ ] buttons on the projector's control panel to move to the item to be set. Confirm the selection. - Page 68 Change the setting. •Tilt the [ ] button on the remote control or press the [ ], [ ], [ ] and [ ] buttons on the projector's control panel to change the setting. : Current setting value : Currently-selected setting item •If you press the [Enter] button when at items with a...
-
Page 69: Troubleshooting
Troubleshooting This chapter describes how to identify problems and what to do if a problem is found. Using the Help... 69 Problems Solving... 71 •Abnormal ... 71 • Reading the Indicators...71 •Power indicator lights red ... 71 •Warning... 72 •Lamp or Temp indicator flashes orange ... 72 •Normal ... -
Page 70: Using The Help
Using the Help If a problem occurs with the projector, the Help function uses on-screen displays to assist you in solving the problem. It uses a series of menus in a question and answer format. PROCEDURE Press the [Help] button. - Page 71 Using the Help Repeat the operations in steps 2 and 3 to proceed through the menu to more detailed items. The help menu is cleared when the [Help] button is pressed. If the Help function does not provide a solution to the problem, refer sp.71 to "Problem Solving"...
-
Page 72: Problems Solving
Problems Solving If you are having a problem with the projector, first check the projector's indicators and refer to "Reading the Indicators" below. If the indicators do not show clearly what the problem might be, refer to "When the Indicators Provide No Help". -
Page 73: Warning
5 minutes the projector will switch to standby mode, so check the following two points. After checking, press the [Power] button to turn the power back on. •Check that the air filter and air exhaust vent are clear, and that the projector is not positioned sp.17 against a wall. -
Page 74: Normal
Power Orenge • If the projector is not operating properly even though the indicators are all showing normal, refer to "When the Indicators Provide No Help" on the following page. • If an indicator is showing a status which does not appear in the previous tables, contact your dealer or the nearest address provided in the "International Warranty Conditions"... -
Page 75: When The Indicators Provide No Help
(Computer monitors and LCD screens have different colour reproduction performance, so that the colours projected by the projector and the colours appearing on the monitor may not necessarily match, but this is not a sign of a problem.) sp.81... -
Page 76: Problems Relating To Images
Reset all of the settings. "Reset" - "Reset All" Some input images, such as screen savers, may be completely black. composite videog S-Videog source is connected to the projector, use the "Video Signal" menu command to select the signal format. sp.57 "Signal" - "Video Signal"... - Page 77 "Extended" - "Operation" - "Sleep Mode" Remedy composite videog S-Videog source is connected to the projector, use the "Video Signal" menu command to select the signal format. sp.57 "Signal" - "Video Signal" Refer to the documentation provided with your computer for details on changing the resolution and frequency of the image signals being output from the computer.
- Page 78 Remove the lens cover. The recommended projection distance range of the EMP-821 is 86–1473 cm (2.8–48.3 ft.) and that of the EMP-81/61 is 87–1094 cm (2.9–35.9 ft.). Set the projector up so that it is within this range. sp.16 Decrease the projection angle to reduce the amount of keystone correction.
- Page 79 "List of Supported Monitor Displays" s Computer documentation Press the [Auto] button on the remote control or the [Enter] button on the projector's control panel to carry out automatic adjustment. If the images have not been adjusted correctly after using automatic adjustment, you can make the adjustments using the "Sync."...
- Page 80 Press the [Esc] button on the remote control to cancel the E-Zoom function. If analogue RGB images from a computer or RGB video images are being projected, press the [Auto] button on the remote control or the [Enter] button on the projector's control panel to carry out automatic adjustment.
- Page 81 "Signal" - "Computer1 Input", "Computer2 Input" sp.55, If a composite videog S-Videog source is connected to the projector, use the "Video Signal" menu command to select the video signal format. sp.57 "Signal" - "Video Signal" Use the "Brightness" menu command to adjust the brightness.
-
Page 82: Problems When Projection Starts
There is probably a poor contact in the power cable, or the power cable may be defective. Reinsert the power cable. If this does not solve the problem, stop using the projector, disconnect the power cable from the wall outlet and contact the nearest address provided in the "International Warranty Conditions"... -
Page 83: Other Problems
±15º vertically. The operating range for the remote control is approximately 6m. Set the projector up in a location where strong light will not shine onto the remote control light- receiving area. Insert new batteries, while making sure that they are inserted the correct way around. -
Page 84: Appendices
This chapter provides information on maintenance procedures to ensure the best level of performance from the projector. Maintenance ... 84 • Cleaning ...84 •Cleaning the Projector's Surface... 84 •Cleaning the Lens ... 84 •Cleaning the Air Filters and Air Intake Vent ... 84 • Replacing Consumables...85 •Lamp Replacement Period... -
Page 85: Maintenance
This section describes maintenance tasks such as cleaning the projector and replacing consumable parts. Cleaning You should clean the projector if it becomes dirty or if the quality of projected images starts to deteriorate. CAUTION Be sure to read the separate Safety Instructions/World-Wide Warranty Terms before cleaning. -
Page 86: Replacing Consumables
Maintenance Replacing Consumables This section describes how to replace the lamp and the air filters. Lamp Replacement Period It is time to replace the lamp when: • The message "Replace the Lamp." appears on the screen when projection starts. A message will be displayed. •... -
Page 87: Replacing The Lamp
• If you are replacing the lamp because it has stopped working, it is possible that the lamp is broken. If replacing the lamp of a projector which has been installed on a ceiling, you should always assume that the lamp is broken and be extremely careful when removing the lamp cover. - Page 88 Take out the lamp. Hold the lamp as shown in the illustration below and lift it up and out of the projector. If the lamp is broken replace it with a new lamp, or contact your local dealer for further advice. If replacing the lamp yourself, be careful to avoid pieces of broken glass.
-
Page 89: Resetting The Lamp Operating Time
Maintenance Resetting the Lamp Operating Time The projector has a built-in counter which keeps track of the lamp operating time. When the cumulative operating time reaches a certain point, it causes the replacement warning message to be displayed. Therefore, the counter needs to be reset after the lamp has been replaced with a new one. -
Page 90: Replacing The Air Filter
If the air filters are broken or if the warning message reappears after they have been cleaned, they should be replaced. The air filter can be replaced even if the projector is installed on a ceiling. PROCEDURE Turn off the projector's power, wait until the downg period has ended and a "pip-pip"... -
Page 91: Saving A User's Logo
Remote Control Select "User’s Logo" from the "Extended" menu, and then press the [Enter] button. Projector • If the "User’s Logo Protect" function of "Password Protect" is set to "ON", a message is displayed and the user's logo can not be recorded. - Page 92 Tilt the [ ] button on the remote control or press the [ ], [ ], [ ] and [ ] buttons on the projector's control panel to select the area of the image to use as the user's logo, and then press the [Enter] button.
- Page 93 "Completed." will be displayed. • Saving the user's logo may take a few moments (about 15 seconds). Do not use the projector or any other sources which are connected to the projector while the user's logo is being saved, otherwise it may result in errors in projector operation.
-
Page 94: Optional Accessories And Consumables
Pipe 370 (370 mm (14.57 in.)/silver)* ELPFP04 Pipe 570 (570 mm (22.44 in.)/silver)* ELPFP05 Pipe 770 (770 mm (30.31 in.)/silver)* ELPFP06 Use when installing the projector on a high ceiling or a ceiling with veneer panels. Image presentation camera ELPDC04 4:3) Use to project books, OHP films and slides. -
Page 95: Glossary
Cool-down This is the process by which the projector's lamp is cooled down after it has become hot through use. Cool-down is carried out automatically when the [Power] button is pressed to turn off the power. Do not disconnect the power cable while cool-down is in progress, otherwise the cool-down process will not work properly. - Page 96 Glossary Resize display This function is used to allow images that have a resolution more than or less than the projector's panel resolution to be projected so that they fill the whole of the projection area. SDTV An abbreviation for Standard Definition Television. It refers to standard television systems which do not satisfy the conditions for High-Definition Television.
-
Page 97: List Of Esc/Vp21 Commands
List of ESC/VP21 Commands Command List When a power on command is sent to the projector, the power will turn on and the projector will change to warm-up mode. When the power has turned on, a colon ":" (3Ah) will be returned. -
Page 98: Cable Layouts
: D-Sub 9 pin (male) • • • • Projector input connector : Control (RS-232C) • • • • <At projector> <At projector> (PC serial cable) <At computer> USB connection Connector shape • • • • <At projector> <At computer>... -
Page 99: Usb Connection Setup
List of ESC/VP21 Commands USB Connection Setup In order to control the projector using ESC/VP21 commands via a USB connection, the following preparations must be carried out. PROCEDURE Download the USB driver (USB-COM Driver) from the EPSON website to your computer. -
Page 100: List Of Supported Monitor Displays
List of Supported Monitor Displays Computer/RGB Video Refresh rateg Resolution Signal (Hz) (dots) VGAg 640×480 VGAEGA 640×350 VESA 60/72/75/85,iMac* 640×480 56/60/72/75/ SVGAg 800×600 85,iMac* XGAg 60/70/75/85,iMac* 1024×768 SXGAg 70/75/85 1152×864 SXGA 60/75/85 1280×960 SXGA 60/75/85 1280×1024 UXGAg 1600×1200 MAC13" 640×480 MAC16"... -
Page 101: Specifications
1 Stereo mini jack USB*: 1 USB connector (B series) Control (RS-232C) : 1 D-Sub 9-pin (male) Monitor Out : 1 Mini D-Sub 15-pin (female) Black Audio Out: 1 Stereo mini jack Pixelworks DNX ICs are used in this Projector. - Page 102 Specifications Safety UL60950 Third Edition Canada CSA C22.2 No.60950 (cUL) European Community The Low Voltage Directive (73/23/EEC) IEC60950 3 Edition FCC Part15B Class B (DoC) Canada ICES-003 Class B European Community The EMC Directive (89/336/EEC) EN55022, 1998 Class B EN55024, 1998 IEC/EN61000-3-2 IEC/EN61000-3-3 Australia/New Zealand...
-
Page 103: Appearance
Appearance 4-M4×9 Centre of lens 53.4* 41.2 72.9 187.1 *Distance from center of lens to suspension bracket fixing point Units: mm... -
Page 104: Index
Abs. Color Temp..52 Cleaning the Air Filter ...84 Air exhaust vent... 7 Cleaning the Lens...84 Air filter ... 10 Cleaning the Projector Surface... 84 Air intake vent ... 9 Color Intensity...53 Aspect ratio... 47 Color Mode ... 43 [Audio1] port ... - Page 105 Resolution ... 64 RGB Video ... 25 Screen size ... 16 Security lock ... 9 "Setting" Menu ... 59 Setting Up the Projector... 15 Sharpness ... 51 "Signal" Menu... 55 Sleep Mode ... 62 Source ... 64 Speaker ... 9 Specifications...
- Page 106 Index Wide-screen Projection ... 47 Wireless Mouse Function ... 20 Zoom ring ... 7...
- Page 107 According to 47CFR, Part 2 and 15 Class B Personal Computers and Peripherals; and/or CPU Boards and Power Supplies used with Class B Personal Computers :EPSON AMERICA, INC. Located at :3840 Kilroy Airport Way MS: 3-13 Long Beach, CA 90806...
- Page 108 Neither is any liability assumed for damages resulting from the use of the information contained herein. Neither SEIKO EPSON CORPORATION nor its affiliates shall be liable to the purchaser of this product or third parties for damages, losses,...
- Page 109 Outputs remote control signals. • • • • [Power] button s s p.32, p.34 Turns the projector power on and off. • • • • [ ] buttons s s p.21, p.66, p.69 When a configuration menu or help menu is displayed, these buttons select menu items and setting values.