Table of Contents
Advertisement
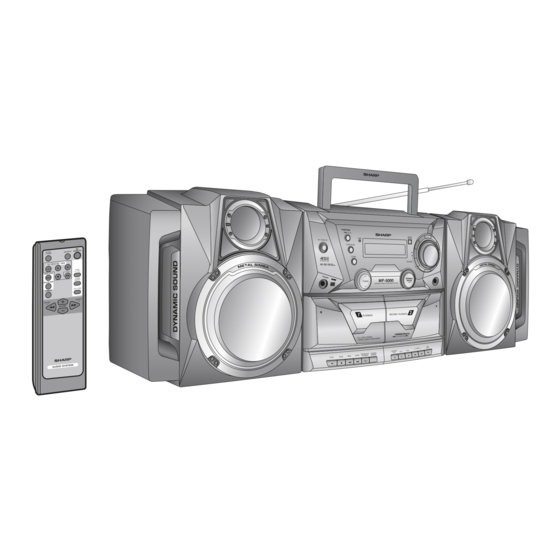
PORTABLE STEREO
COMPONENT SYSTEM
SYSTÈME STÉRÉO PORTABLE
SISTEMA COMPONENTE DEL
EQUIPO PORTÁTIL
便攜式立體聲組合系統
MODEL
MODÈLE
MODELO
WF-5000W
OPERATION MANUAL
MODE D'EMPLOI
MANUAL DE MANEJO
Thank you for purchasing this SHARP product. To obtain the best
performance from this product, please read this manual carefully. It will
guide you in operating your SHARP product.
Nous vous remercions d'avoir porté votre choix sur ce produit SHARP. Pour
en tirer le meilleur parti, veuillez lire ce mode d'emploi très attentivement.
Muchas gracias por haber adquirido este producto SHARP. Lea atentamente
este manual para conseguir el mejor rendimiento del aparato. Le servirá
también como guía operativa de este producto SHARP.
深 謝惠購夏普 ( SHARP )產品。為發揮本產 品的最佳性 能,請仔細閱讀本 手冊。
它是此夏普 ( SHARP )產品的操作指南。
SHARP CORPORATION
06/2/22
WF-5000W(U)_FRONT.fm
TINSEA095AWZZ
Advertisement
Table of Contents

Related Manuals for Sharp WF-5000W


Summary of Contents for Sharp WF-5000W
- Page 1 It will guide you in operating your SHARP product. Nous vous remercions d'avoir porté votre choix sur ce produit SHARP. Pour en tirer le meilleur parti, veuillez lire ce mode d'emploi très attentivement.
-
Page 2: Table Of Contents
ENGLISH WF-5000W Special notes Contents ENGLISH Page WARNINGS General Information When the ON/STAND-BY button is set at STAND-BY position, mains voltage is still present inside the unit. When the ON/STAND-BY button is set Precautions ..........2 at STAND-BY position, the unit may be brought into operation by the timer Controls and indicators . -
Page 3: Precautions
fire or other type of accident causing damage. SHARP will Caution: not be held responsible for any damage resulting from use of this unit with a Do not use chemicals for cleaning (petrol, paint thinner, etc.). -
Page 4: Controls And Indicators
Controls and indicators WF-5000W ENGLISH Front panel 3 4 5 6 7 8 9 10 11 12 Reference page 1. Headphone Socket ........20 2. - Page 5 WF-5000W ENGLISH Display Reference page 1 2 3 1. Tape Continuous Playback Indicator ......14 2. Extra Bass Indicator ........10 6 7 8 3.
-
Page 6: System Connections
System connections WF-5000W ENGLISH AM Loop aerial FM Rod aerial DC power connection (see page 8) AC power connection (see page 7) 06/2/23 WF-5000W(U)NEW1.fm TINSEA095AWZZ... - Page 7 WF-5000W ENGLISH Detachable speakers Caution: Connect the black wire to the minus (-) terminal, and the red wire to the plus (+) terminal. Do not mix the right channel and left channel wiring when connecting the speakers to the unit. Do not let the bare speaker wires touch each other as this may damage the amplifier and/or speakers.
- Page 8 System connections (continued) WF-5000W ENGLISH AC power connection After checking all the connections have been made correctly, plug the AC power lead of this unit into the wall socket. If you plug the unit first, the unit will enter the demonstration mode. Notes: The unit will start the tape initialisation when plugged in to the wall socket.
- Page 9 WF-5000W ENGLISH DC power connection Operation with batteries To the wall socket AC Adaptor To DC IN Disconnect the AC power lead, and remove the battery compartment Socket: 12VDC 12V socket cover. Connection of the AC or DC power lead to the unit disconnects the batteries.
-
Page 10: Remote Control
Remote control WF-5000W ENGLISH Battery installation Notes concerning use: Replace the batteries if the operating distance is reduced or if the operation Open the battery cover. becomes erratic. Purchase 2 "AA" size batteries (UM/SUM-3, R6, HP-7 or similar) Insert the batteries according to the direction indicated in the battery compartment (back of the battery cover). -
Page 11: General Control
General control WF-5000W ENGLISH Volume control Main unit operation: When the VOLUME control turned clockwise, the volume will increase. When it is turned anti-clockwise, the volume will decrease. 0 ..MAXIMUM Remote control operation: Press the VOLUME (+ or –) button to increase or decrease the volume. -
Page 12: Setting The Clock (Remote Control Only)
Setting the clock (Remote control only) WF-5000W ENGLISH Press the button to adjust the hour and then press the MEMORY button. Press the button once to advance the time by 1 hour. Hold it down to advance continuously. Press the button to adjust the minutes and then press the MEMORY button. -
Page 13: Listening To The Radio
Listening to the radio WF-5000W ENGLISH Tuning Press the ON/STAND-BY button to turn the power on. Press the TUNER (BAND) button repeatedly to select the desired frequency band (FM, SW-1, SW-2 or MW). Press the TUNING ( ) button to tune in to the desired station. Manual tuning: Press the TUNING button as many times as required to tune in to the desired station. -
Page 14: Setting The Fm/Mw Interval
Listening to the radio (continued) WF-5000W ENGLISH Memorising a station To erase entire preset memory You can store 40 (FM, SW-1, SW-2 and MW) stations in memory and recall Press the ON/STAND-BY button to enter the stand-by mode. them at the push of a button. (Preset tuning) Whilst pressing down the button and the CONTINUOUS PLAYBACK button, press the TUNER (BAND) button until "TUNER CL"... -
Page 15: Listening To A Cassette Tape (Tape 1 Or Tape 2)
Listening to a cassette tape (TAPE 1 or TAPE 2) WF-5000W ENGLISH Continuous playback (TAPE 1 to TAPE 2) Before playback: For playback, use normal or low-noise tapes for the best Press the area marked " " and load cassettes into the TAPE 1 and sound. -
Page 16: Recording To A Cassette Tape
Function Main unit Remote Operation SHARP is not liable for damage or loss of your recording arising from control malfunction of this unit. Fast forward/ Press in the playback or The volume and sound controls can be adjusted with no effect on the rewind stop mode. -
Page 17: Tape Record Pause Button
WF-5000W ENGLISH Recording from the radio Recording from the built in microphone Tune in to the desired station. (See page 12.) Press the TAPE (1 2) button until TAPE 2 appears on the display. Load a cassette into the TAPE 2 cassette compartment with the Load a cassette into the TAPE 2 cassette compartment. -
Page 18: Timer And Sleep Operation (Remote Control Only)
Timer and sleep operation (Remote Recording to a cassette tape (continued) WF-5000W control only) ENGLISH Dubbing from tape to tape You can record from TAPE 1 to TAPE 2. Timer playback: The unit turns on and plays the desired source (tuner, tape) at the preset time. Press the ON/STAND-BY button to turn the power on. -
Page 19: Timer Play Indicator
WF-5000W ENGLISH Timer playback or timer recording Switch input with the button, and then press the Before setting timer: MEMORY button. To select the timer playback source: TUNER, TAPE 1, TAPE 2 or CD/ 1 Check that the clock is set to the correct time (refer to page 11). LINE. -
Page 20: 10 5. Sleep Indicator
Timer and sleep operation (Remote control only) (continued) WF-5000W ENGLISH Checking the timer setting in the timer stand-by mode: To confirm the remaining sleep time: 1 Press the CLOCK/TIMER button. Whilst "SLEEP" is indicated, press the CLOCK/TIMER button. 2 Within 10 seconds, press the button to select "ONCE"... -
Page 21: Enhancing Your System
Enhancing your system WF-5000W ENGLISH The connection lead is not included. Purchase a commercially available lead To record on a tape from VCR etc. as shown below. Insert a cassette in the TAPE 2 cassette compartment. VCR, DVD, etc. Press the CD/LINE button. Press the button. -
Page 22: Troubleshooting Chart
Cassette deck vice technician. If something is wrong with this product, check the following before calling your Symptom Possible cause authorised SHARP dealer or service centre. Cannot record. Is the erase-prevention tab removed? General Cannot record tracks with Is it a normal tape? (You cannot proper sound quality. -
Page 23: Specifications
Specifications WF-5000W ENGLISH As part of our policy of continuous improvement, SHARP reserves the right to Radio make design and specification changes for product improvement without prior notice. The performance specification figures indicated are nominal values of Frequency range FM: 88 - 108 MHz production units. - Page 24 DOWN...