Epson PowerLite S5 Series User Manual
Epson user's guide multimedia projector powerlite s5 series, powerlite 77c series
Hide thumbs
Also See for PowerLite S5 Series:
- User manual (110 pages) ,
- Declaration of conformity (4 pages) ,
- Product specifications (2 pages)
Table of Contents
Advertisement
Advertisement
Table of Contents

Related Manuals for Epson PowerLite S5 Series


Summary of Contents for Epson PowerLite S5 Series
- Page 1 PowerLite S5 Series/77c ® Multimedia Projector User’ s Guide...
-
Page 2: Important Safety Information
Epson product. Epson is not responsible for any use of this information as applied to other products. Neither Seiko Epson Corporation nor its affiliates shall be liable to the purchaser of this product or third parties for damages, losses, costs, or expenses incurred by purchaser or third parties as a result of: accident, misuse, or abuse of this product or unauthorized modifications, repairs, or alterations to this product, or (excluding the U.S.) failure to... -
Page 3: Table Of Contents
Unpacking the Projector......10 Projector Parts ........11 Front . - Page 4 What To Do If You See a Blank Screen ... . . 34 Focusing and ZoomingYour Image (PowerLite S5 Series)......37 Focusing and ZoomingYour Image (PowerLite 77c).
- Page 5 Cleaning the Lens ....... . 74 Cleaning the Projector Case ......74 Cleaning and Replacing the Air Filter .
- Page 6 Solving Problems ......81 Using On-Screen Help ......82 What To Do When the Lights Flash .
-
Page 7: Welcome
Images are displayed at a native resolution of 800 × 600 pixels (PowerLite S5 Series) or 1024 × 768 pixels (PowerLite 77c). Epson 3LCD technology ensures accurate color and remarkable saturation, even in well-lit rooms. Support for S-Video contributes to theater-quality performance. -
Page 8: Getting The Most From Your Projector
For details, see Chapter 3. By connecting a USB cable to your projector, you can also use the remote control to click through computer-based presentations ®... -
Page 9: Using Your Documentation
Epson support. If you still need help after checking this User’s Guide and the sources listed above, you can use the Epson PrivateLine Support service to get help fast. Call (800) 637-7661 and enter the PIN on your PrivateLine Support card. -
Page 10: Registration And Warranty
In addition, Epson offers free Extra Care unlikely event of an equipment failure, you won’t have to wait for your unit to be repaired. Instead, Epson will ship you a replacement unit anywhere in the United States or Canada, usually via overnight delivery. -
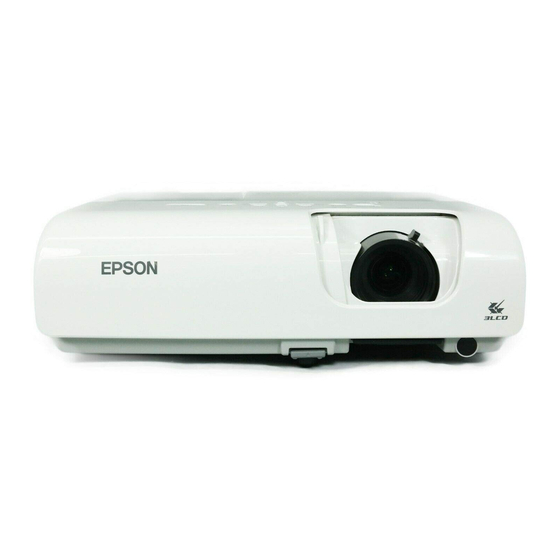
Page 11: Projector Parts
Save all packaging in case you need to ship the projector. Always use the original packaging (or equivalent) when you need to send the projector to another location. Projector Parts Front Control panel Air exhaust vent Front adjustable foot Back... -
Page 12: Bottom
Bottom Holes for attaching ceiling mount bracket PowerLite S5 Series Control Panel Lights indicate projector status PowerLite 77c Control Panel Lights indicate projector status Welcome Security lock slot Up and Down buttons correct keystone distortion button and select menu items... -
Page 13: Additional Components
■ To receive a component video signal from a VCR or other video device, you need a D-sub, 15-pin, VGA-to-component video cable, which is available from Epson. See page 14. Some older PowerBooks and Macintosh desktop models may ■ need a Macintosh video adapter; see your computer dealer. Older iMac systems may need a special adapter to provide a VGA output port;... -
Page 14: Optional Accessories
Optional Accessories To enhance your use of the projector, Epson provides the following optional accessories: note To purchase a replacement Product remote control, call Replacement lamp (562) 276-4394 (U.S.) or (905) 709-3839 (for dealer Air filter set (includes 2 filters) referral in Canada). -
Page 15: Setting Up The Projector
Setting Up the Projector his chapter tells you how to set up the projector and connect it to a computer or video source. You can connect up to three devices simultaneously: three video sources, or one computer and two video sources. -
Page 16: Positioning The Projector
This lets you stand in the front of the room, face the audience, and remain close enough to the equipment to be able to control it. Try to leave as much space as possible between the projector and the screen to get a good-size image. -
Page 17: Other Installations
■ electrical outlet or extension cord. Try to place the projector directly in front of the center of the screen, facing it toward the screen squarely. If the projector isn’t positioned this way, the image will be “keystone” shaped, instead of square or rectangular. -
Page 18: Connecting To A Computer
Connect the projector to your computer with a commercially available VGA–5BNC cable. Connect a USB cable to your projector so that you can use the remote control as a wireless mouse; see page 21 Connect a monitor to the projector so you can view your presentation close-up as well as on-screen (not necessary if you’re... -
Page 19: Connecting With The Vga Cable
Connecting with the VGA Cable Follow these instructions to connect to your computer with the VGA cable that came with your projector. Before you start, make sure your computer and the projector are turned off. 1. If you are connecting the projector to a desktop computer, disconnect the monitor cable from your computer. -
Page 20: Connecting With A Vga-5Bnc Cable
If you don’t need to make any other connections, you can plug in your projector and turn it on. See page 32 for instructions. If more than one device is connected to the projector, select the correct source after projection starts by pressing the button on the projector or remote control. -
Page 21: Connecting A Usb Cable For Remote Presentation Control
Windows Vista 1. If you are using a desktop computer, disconnect the mouse cable from your computer. 2. Connect the square end of the USB cable to the projector’s USB port. Connect USB cable 3. Connect the flat end of the cable to any available USB port on your computer. -
Page 22: Connecting An External Monitor
This lets you view images on your computer monitor while note the projector is in standby mode (plugged in but not turned on) and Some LCD monitors may not be able to display the check your presentation or switch between picture sources even if image correctly. -
Page 23: Playing Sound Through The Projector
Playing Sound Through the Projector You can connect a commercially available computer audio adapter cable to take advantage of the projector’s built-in speaker. You can obtain an audio adapter cable (3.5-mm stereo miniplug to two male RCA plugs) from a computer or electronics dealer. -
Page 24: Connecting To Video Sources
For composite video, use a commercially available RCA A/V cable. See page 25. For S-Video, use the S-Video cable supplied with your video device or order one from Epson. See page 26. For RGB video, use the VGA computer cable included with the projector. See page 27. -
Page 25: Connecting A Composite Video Source
If you don’t need to make any other connections, you can plug in your projector and turn it on. See page 32 for instructions. If more than one device is connected to the projector, select the correct source after projection starts by pressing the button on the projector or remote control. -
Page 26: Connecting An S-Video Source
You’ll need an S-Video cable, which is usually provided with your video source, or you can purchase one from Epson (part number ELPSV01). See page 14 for ordering information. Before starting, make sure the projector and your DVD player or other video source are turned off. -
Page 27: Connecting An Rgb Video Source
Connecting an RGB Video Source Follow these instructions to connect the projector to a video player or satellite receiver that has an RGB video output port using the VGA computer cable that came with the projector. Before starting, make sure the projector and your DVD player or other video source are turned off. -
Page 28: Connecting A Component Video Source
If your video source has component video connectors, you can use them to project a higher quality video image. You’ll need a component video cable, which can be purchased from Epson (part number ELPKC19). See page 14 for ordering information. -
Page 29: Playing Sound Through The Projector
Playing Sound Through the Projector The projector has a built-in speaker with a maximum output of 1 W. You can play sound from your video equipment through the projector’s speaker if your video device has an audio output port. For RCA-Style Audio Output Ports Most video devices have an RCA-style audio output port. - Page 30 2. Connect the other end of the audio adapter cable to your video If you don’t need to make any other connections, you can plug in your projector and turn it on. See page 32 for instructions. Setting Up the Projector jacks on the projector.
-
Page 31: Projecting
Projecting nce you’ve set up the projector, you’re ready to turn it on, adjust the image, and give your presentation. Although you can operate the projector without it, the remote control lets you use additional features. See Chapter 3 for instructions on using the remote. -
Page 32: Turning On Your Equipment
If you turn on your connected computer or video equipment before starting the projector, the projector automatically detects and displays the image source. If you turn on the projector first, or have multiple pieces of connected equipment, you may have to select the image source manually. - Page 33 3. Connect the other end to an electrical outlet. The power light on top of the projector turns orange, indicating that the projector is receiving power but not yet turned on. Wait until the light stops flashing but stays orange.
-
Page 34: Selecting The Image Source
Make sure the power light is green and not flashing and the slide is open. Mute Make sure you’ve selected the correct image source; see the previous section. Allow a few seconds for the projector to sync up after pressing the button. Projector control panel No Signal... - Page 35 Check your laptop’s manual or online help for details. On most systems, the between the LCD screen and the projector, or display on both at the same time. If you’re projecting from a laptop, and you don’t see the same ■...
- Page 36 If you’re using a Macintosh laptop with OS X: You may need to set up your system to display on the projector screen as well as the LCD screen. Follow these steps: 1. From the Apple menu, select 2. Select...
-
Page 37: Adjusting The Image
44. You can make many other adjustments to the image—such as changing the brightness, contrast, and aspect ratio—using the projector’s menu system. See Chapter 4 for more information. Focusing and ZoomingYour Image (PowerLite S5 Series) Rotate the focus ring to sharpen the image. -
Page 38: Focusing And Zoomingyour Image
Press the Tele You can also change the image size by moving the projector closer to or farther away from the screen. You can use the the remote control to zoom in on a portion of the image. See page 47 for instructions. -
Page 39: Adjusting The Height Of Your Image
Adjusting the Height of Your Image If the image is too low, you can raise it by extending the projector’s front adjustable foot. 1. Stand behind the projector. Press up on the blue foot release lever and lift the front of the projector to extend the front adjustable foot. -
Page 40: Adjusting The Brightness
■ Projecting If your image looks like keystone correction value. Press the projector to correct the shape of the image. After correction, your image will be slightly smaller. PowerLite S5 Series PowerLite 77c On the PowerLite 77c, you may need to turn on Auto Keystone. -
Page 41: Correcting Computer Images
Vol+ increase or decrease the volume for the projector’s built-in speaker. On the PowerLite 77c, you can also use the buttons on the projector to control the volume. Press the button to decrease it. A volume gauge appears on the screen while the volume is being adjusted. -
Page 42: Shutting Down The Projector
3. Press the P Turn off this product when not in use to prolong the life of the projector. 4. Press up on the blue foot release lever and lower the projector to caution 5. Close the To avoid damaging the 6. -
Page 43: Using The Remote Control
When using the remote control, stand within 20 feet of the projector. Point the remote control either at the front or back of the projector or at the screen (the projector’s front sensor can detect signals bounced off the screen). -
Page 44: Controlling The Picture And Sound
You can use the remote control to select your source, temporarily turn off the picture and sound, freeze the action, or zoom in on the picture. Make sure you have set up your projector and connected any equipment as described in Chapter 1. - Page 45 Blackboard Choose this fixed color mode when you need to project against a green chalkboard. You can also use the projector menu system to change the color mode in the Image menu (see page 56). Using the Remote Control...
-
Page 46: Turning Off The Picture And Sound
Using the Remote Control button on the remote control or use the A/V Mute slide on the projector to turn off the image and sound and To turn off the picture and sound, press the close the slide on the projector. The screen goes dark. -
Page 47: Zooming Your Image
Zooming Your Image Follow these steps to zoom in on a portion of the image: 1. Press the button on the remote control. E-Zoom + You see a crosshair indicating the center of the zoom-in area. 2. Use the four “arrow” buttons on the remote control to position the crosshair in the area you want to enlarge. -
Page 48: Changing The Image's Aspect Ratio
To change slides with the remote control, make sure you have connected your computer to the projector with a USB cable as described on page 21. To advance slides in a PowerPoint presentation in Slide Show mode,... -
Page 49: Replacing The Batteries
Replacing the Batteries The remote control uses two AA alkaline batteries. Follow these steps when you need to replace them: 1. Press in the tab to remove the battery cover. 2. Remove the old batteries, then insert the new ones as shown. 3. - Page 50 Using the Remote Control...
-
Page 51: Fine-Tuning The Projector
Fine-tuning the Projector ou can use the button on the projector or remote control to Menu access on-screen menus to adjust the image, sound, and other features. This chapter covers the following information: ■ Using the menu system Adjusting image colors and clarity ■... -
Page 52: Using The Projector's Menu System
Using the Projector’s Menu System The six projector menus let you adjust and customize the projector features: ■ ■ ■ ■ ■ ■ Fine-tuning the Projector menu lets you modify the colors of the projected Image image and fine-tune brightness, contrast, and sharpness. -
Page 53: Changing Menu Settings
Changing Menu Settings Use the buttons on the remote control or on the projector to access the menus and change settings. Follow these steps: 1. Press the button on the remote control or projector to Menu display the menu screen:... - Page 54 6. Press the Fine-tuning the Projector button on the remote control or left or right arrow buttons Vol+ on the projector to change the setting. In some cases, you may have to press the button to see a sub-screen for changing Enter the setting.
-
Page 55: Adjusting Colors And Clarity
Computer (analog-RGB) and RGB video Component, composite, and S-Video Follow these steps to adjust the appearance of your image: 1. Press the button. You see the main menu. Menu 2. Press to select the Image menu. Enter Fine-tuning the Projector... - Page 56 You can also select High brightness mode in the Settings menu. See page 62. Fine-tuning the Projector of the following options: ■ Color Mode Corrects the vividness of image color. You can select from the following settings, and save a different one for each computer...
- Page 57 (cooler tones). ■ Color Adjustment Adjusts the temperature and intensity of red, green, and blue. 4. When the image is set correctly, press are automatically saved. . Your settings Menu Fine-tuning the Projector...
-
Page 58: Adjusting The Input Signal
Adjusting the Input Signal Although the projector normally detects and optimizes the input signal automatically, you can use the Signal menu to make manual adjustments. In addition to changing the position of the projected image, you can correct tracking and sync for computer images, or change the aspect ratio to widescreen format for video images. - Page 59 (computer images) ■ Sync Corrects fuzziness or screen flicker by synchronizing the projector with the tracking signal sent from the computer. See page 90 for more information about adjusting the sync setting. ■ Position Use the arrow buttons to move the image on the screen left, right, up, or down.
- Page 60 4. When you’re finished adjusting the signal settings, press Fine-tuning the Projector (composite and S-Video) ■ Video Signal Leave this setting at unless you are using a 60-Hz PAL Auto system (select PAL60 ■ Aspect Sets the image’s aspect ratio (ratio of width to height) to for computer or letterbox video content and to widescreen video content.
-
Page 61: Customizing Projector Features
Customizing Projector Features The Settings menu lets you customize the way you use the projector, from adjusting lamp brightness and speaker volume to applying security controls. 1. Press the button. Menu 2. Select the menu. Settings PowerLite S5 Series PowerLite 77c... - Page 62 P setting take effect after you restart the projector. (After you turn off the projector, wait for the Ppower light to turn a steady orange before turning it on again.) See page 71 for more information.
-
Page 63: Selecting Projector Setup Options
Logo A/V Mute ■ User’s Logo Turn on to display the image or logo you have captured whenever the projector is turned on. See page 67 for more information. Sets the screen background to Black , or Black Blue button is pressed. - Page 64 EMP Link 21L software and the USB communication driver. This software can be downloaded from the Epson website at support.epson.com. (You must turn the projector off and then on again and connect a USB cable to use this setting.)
-
Page 65: Viewing Lamp Usage And Other Information
■ Language Select the language to be used for the projector menus. 4. When you’re finished, press Viewing Lamp Usage and Other Information Use the Info menu to view information about the display settings of your computer and the number of hours the lamp has been used. -
Page 66: Using The Projector's Security Features
30 times in a row, the projector is locked and you’ll need to password to proceed. 0000 contact Epson to unlock it. See “Where To Get Help” on page 93. When you enable the Operation Lock feature, all of the projector’s buttons are disabled except the P Fine-tuning the Projector ■... -
Page 67: Creating Your Own Screen Logo
Follow these steps to capture the image and transfer it to the projector: 1. Display the image you want to use on the projector. You can use an image from either a computer or video source, such as a DVD player. -
Page 68: Setting A Password
Save image as user’s logo? and press . Saving the logo takes a few moments. Do Enter not use the projector or other sources (computer, video, etc.) while the logo is being saved. Completed button is pressed, select the Extended... -
Page 69: Turning On The Password And User's Logo
3. To enable your screen logo, select . Select and press Enter When this feature is on the logo appears whenever the projector is turned on (if the Startup Screen menu; see page 63) and as the A/V Mute screen (if you selected... -
Page 70: Starting The Projector With A Password
When you see the Password Protect Release screen again, you can try to enter the correct password. If you have forgotten the password, contact Epson with the request code number that appears in the Password Protect Release screen for assistance. See “Where To Get Help” on page 93. -
Page 71: Disabling The Projector's Buttons
Installing Security Locks You can install two different types of security locks on the projector: ■ You can use the security slot on the side of the projector to install a Kensington Microsaver Security System. For details, see www.kensington.com. You can use a wire lock to secure the projector to a room fixture ■... -
Page 72: Restoring The Default Settings
Restoring the Default Settings The Reset menu lets you return most projector menu settings to their note default values. It also lets you reset the lamp hours to their initial The Computer Input, Zoom default value; see page 78 for instructions on resetting the lamp timer. -
Page 73: Maintenance And Transportation
■ personnel. ■ ■ ■ ■ our projector needs little maintenance. All you need to do on a Cleaning the lens Cleaning the projector case Cleaning and replacing the air filter Replacing the lamp Resetting the lamp timer Transporting the projector... -
Page 74: Cleaning The Lens
■ ■ caution Do not use glass cleaner to clean the lens. Cleaning the Projector Case Before you clean the case, first turn off the projector and unplug the power cord. ■ ■ ■ Maintenance and Transportation Use a canister of compressed air to remove dust. -
Page 75: Cleaning And Replacing The Air Filter
2. Turn the projector upside-down and clean the filter and air intake vent on the base of the projector. To clean the filter and air vent, Epson recommends using a small vacuum cleaner designed for computers and other office equipment. If you don’t have one, gently clean them using a very soft brush (such as an artist’s brush). -
Page 76: Replacing The Lamp
Turn off this product when ■ not in use to prolong the life of the projector. Contact your dealer or call Epson at (800) 463-7766 for a replacement lamp. Request part number V13H010L41. warning Follow these steps to replace the lamp: Let the lamp cool before replacing it. - Page 77 2. If the projector has been on, allow it to cool down for at least an hour (or until the lamp is cool). 3. Use the screwdriver included with the replacement lamp to loosen the screw holding the lamp cover (the lamp cover is located on top of the projector).
-
Page 78: Resetting The Lamp Timer
PUSH covered, and the top of the cover should be flush with the top of the projector.) Then slide the cover closed and tighten the screw. warning message. Follow these steps: button on the remote control or projector and... -
Page 79: Transporting The Projector
Transporting the Projector The projector contains many glass and precision parts. If you need to transport it, please follow these packing guidelines to prevent damage to the projector: When shipping the projector for repairs, use the original ■... - Page 80 Maintenance and Transportation...
-
Page 81: Solving Problems
Solving Problems his chapter helps you solve problems with your projector, and tells you how to contact technical support for problems you can’t solve yourself. This chapter explains the following: Using the projector’s on-screen help system ■ ■ What to do when the projector’s status lights flash ■... -
Page 82: Using On-Screen Help
Follow these steps to get help: 1. Press the 2. Use the up and down arrow buttons on the projector or remote Solving Problems button on the projector or remote ? Help button on the remote control or projector. You ? Help see the help menu. -
Page 83: What To Do When The Lights Flash
Lamp light Temperature light If the projector is not working correctly, first turn it off and unplug it. Then plug the power cord back in and turn on the projector. If this does not solve the problem, check the status lights on top of the projector and try the solutions recommended in the following table. - Page 84 Description There is an internal error in the projector. Turn the projector off and unplug it. Contact Epson for help. See page There is a problem with the fan or a sensor. Turn the projector off and unplug it. Contact Epson for help. See page 93.
-
Page 85: Solving Problems With The Image Or Sound
If the projector doesn’t turn on, the Operation Lock may be enabled. Press and hold the 7 seconds to release the lock. The projector may be in standby or sleep mode. If the projector ■ has not received any input signal for 30 minutes, it turns off the lamp to conserve the lamp life and save energy. - Page 86 Source Search projector or the remote control to select the correct source. Allow a few seconds for the projector to sync up after pressing the button. If you’ve connected a laptop computer, make sure it’s set to display on an external monitor.
- Page 87 Make sure your computer’s resolution doesn’t exceed XGA (for ■ the PowerLite 77c) or SVGA (for the PowerLite S5 Series) and the frequency is supported by the projector. See page 98. If necessary, change your computer’s resolution setting as described below.
- Page 88 Ideally, the resolution should be 1024 × 768 (for the PowerLite 77c) or 800 × 600 (for the PowerLite S5 Series) to match the projector’s native resolution. If this option isn’t available, select one of the other compatible video formats listed on page 98.
- Page 89 74. Make sure the lens is not fogged by condensation. You may need ■ to wait before using the projector after moving it from a cold environment. ■ Make sure the projection distance is within the range described on page 16.
- Page 90 ■ The colors of the image are not right. ■ note Because of the different technologies used, your ■ projected image may not exactly match the colors on ■ your laptop or computer monitor. ■ ■ ■ ■ Solving Problems If further adjustment is needed, you can fine-tune the settings manually using the Signal menu as described Sync...
-
Page 91: Solving Password Problems
You have forgotten the password. ■ Write down the request code that appears in the Password Protect Release screen and contact Epson. See “Where To Get Help” on page 93. If you turned on the password protect feature before setting the ■... -
Page 92: Solving Problems With The Remote Control
You have lost the remote control. You need the remote control to access many projector features. If you have lost it, you can order another from Epson. See page 94 for details. The Page Up and Down buttons on the remote control don’t work. -
Page 93: Where To Get Help
Speak to a Support Representative To use the Epson PrivateLine Support service, call (800) 637-7661 and enter the PIN on the included Epson PrivateLine Support card. This is the fastest way of speaking to a live representative, and it’s free. - Page 94 To purchase a replacement You can purchase screens, carrying cases, or other accessories from an remote control, call Epson authorized reseller. To find the nearest reseller, call (562) 276-4394 (U.S.) or 800-GO-EPSON (800-463-7766). Or you can purchase online at (905) 709-3839 (for dealer www.epsonstore.com (U.S.
-
Page 95: Technical Specifications
Technical Specifications General Type of display Poly-silicon TFT active matrix Lens PowerLite S5 series F=1.44, 16.6 mm Lens PowerLite 77c F=1.6 to 1.74, 18.4 to 22.12 mm Resolution PowerLite S5 Series 800 × 600 pixels (SVGA+) Resolution PowerLite 77c 1024 × 768 pixels (XGA) Color reproduction Full color, 16.77 million colors... -
Page 96: Projection Lamp
About 3000 hours (High brightness); 4000 hours (Low brightness) 20 feet (6 meters) Alkaline AAA Supports USB 4.25 inches (92 mm) 12.9 inches (327 mm) 9.6 inches (245 mm) 5.8 lb (2.6 kg) PowerLite S5 Series 6.0 lb (2.7 kg) PowerLite 77c... -
Page 97: Electrical
Safety and Approvals United States FCC Part15B Class B (DoC) UL60950-1 Canada ICES-003 Class B CSA C22.2 No. 60950-1 CE Marking Directive 73/23/EEC, 89/336/EEC IEC60950 Third Edition EN 55022, EN 55024 Pixelworks projector. ™ ™ ICs are used in this Technical Specifications... -
Page 98: Compatible Video Formats
Compatible Video Formats You can use any of the following video sources: VCR, DVD player, camcorder, digital camera, or gaming console. The projector supports composite video, S-Video, component video, and RGB video, and it automatically senses the video format (HDTV, SDTV, NTSC, PAL, or SECAM). -
Page 99: Compatible Computer Display Formats
SPARCstation. Although images are displayed at the projector’s native resolution of 800 × 600 pixels (PowerLite S5 Series) or 1024 × 768 pixels (PowerLite 77c). Epson’s patented SizeWise chip supports computer display formats ranging from VGA through SXGA+ (PowerLite S5 Series) or UXGA (PowerLite 77c). - Page 100 The projector supports these monitor display formats: Mode VGA EGA VGA—60 VESA—72 VESA—75 VESA—85 VGA—120 (PL 77c only) SVGA—56 SVGA—60 SVGA—72 SVGA—75 SVGA—85 SVGA—120 (PL 77c only) XGA—60 XGA—70 XGA—75 XGA—85 XGA—120 (PL 77c only) SXGA1—70 SXGA1—75 SXGA1—85 SXGA1—100 (PL 77c only) SXGA2—60...
-
Page 101: Notices
Do not block the slots and openings in the projector case. They provide ventilation and prevent the projector from overheating. Do not operate the projector on a sofa, rug, or other soft surface, or set it on top of loose papers, which could block vents underneath your projector. - Page 102 If smoke, strange odors, or strange noises come from the projector. If the power cord or plug is damaged or frayed. If liquid or foreign objects get inside the projector, or if it has been exposed to rain or water.
-
Page 103: Remote Control Information
Proposition 65 in Cal. Health & Safety Code §25249.5 et seq.) Remote Control Information You can operate the projector by remote control via a line-of-sight infrared (IR) receiver at the front and rear of the projector. The projector may not respond to remote control commands under the following conditions: ■... -
Page 104: Fcc Compliance Statement
FCC Compliance Statement For United States Users This equipment has been tested and found to comply with the limits for a Class B digital device, pursuant to Part 15 of the FCC Rules. These limits are designed to provide reasonable protection against harmful interference in a residential installation. -
Page 105: Index
Component video source, selecting, 59 Composite video cable, 24 to 25 Computer cable, 10, 19 to 20 connecting to projector, 18 to 20 source, selecting, 34, 44, 59 support, 7 supported display formats, 99 to 100 Computer/Component Video ports, 19 to 20,... - Page 106 18 to 19 iMac, connecting to, 13, 18 to 20 Image capturing and saving in projector, 67 to 68 correcting shape of, 39, 62, 88 fitting on screen, 41, 59, 60, 87 to 88 focusing, 37, 38...
- Page 107 52 to 54 Message setting, 63 Mouse compatibility, 96 Moving projector, 79 Noise level, 96 Operation Lock setting, 62, 71 Options for projector, 14, 94 Page up and Page down buttons, 48 Password default, 66 entering, 70 logo protection, 67 to 70...
- Page 108 Resolution, 7, 65, 95, 99 to 100 Safety approvals, 97 instructions, 101 to 103 Screen logo, see User’s Logo Screen, distance from projector, 16, 95 Screens, portable, 14 Security features, 66 to 71 Setting a password, 68 to 69 Settings menu, 52, 61 to 62...
- Page 109 92 to 93, 103 Turning off audio, 46 Turning off picture, 46 Turning off projector, 42 Turning on password, 69 Turning on projector, 32 to 34 Turning on User’s Logo, 63, 69 Typing the password, 70 Unpacking projector, 10 USB cable, 21 User’s Logo...
- Page 110 Index...