Table of Contents
Advertisement
Quick Links
DVD RECORDER
MODEL
DV-SR85RU
OPERATION MANUAL
Please read this Operation Manual carefully before
using your DVD RECORDER.
DV-SR85
DVD-RW/-R RECORDER
DVD-RW
-R RECORDER
The region number for
5
this unit is 5.
PROG.
REV
FWD
STOP
PLAY
OPERATE
OPEN/CLOSE
REC MODE
REC/OTR
PROGRESSIVE SCAN
PROGRESSIVE SCAN
PULL OPEN
Advertisement
Table of Contents

Related Manuals for Sharp DV-SR85RU


Summary of Contents for Sharp DV-SR85RU
-
Page 1: Dvd Recorder
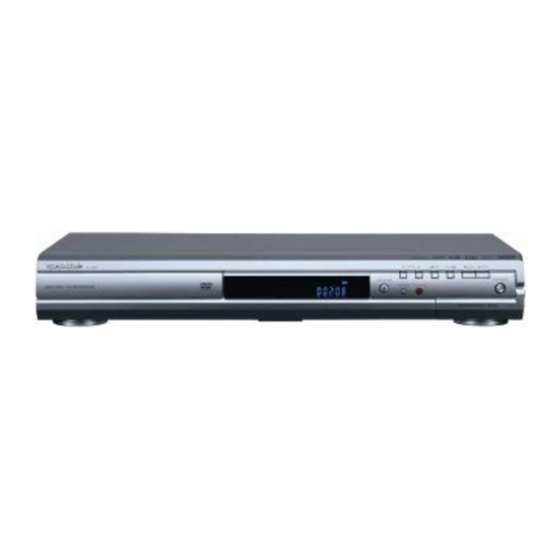
DVD RECORDER MODEL DV-SR85RU OPERATION MANUAL Please read this Operation Manual carefully before using your DVD RECORDER. PROG. STOP PLAY DV-SR85 OPERATE OPEN/CLOSE REC MODE REC/OTR DVD-RW DVD-RW/-R RECORDER -R RECORDER PROGRESSIVE SCAN PROGRESSIVE SCAN PULL OPEN The region number for this unit is 5. -
Page 2: Before You Start
For service and adjustment inside the cabinet, call Power Cord Protection a qualified dealer or service centre approved by SHARP. To avoid any malfunctions of the unit, and to protect • Be sure to remove a disc and unplug the AC power cord against electric shock, fire or personal injury, please from the output before carrying the unit. - Page 3 Before you start Precautions (cont’d) Copyright Audio-visual material may consist of copyrighted works which must not be recorded without the authority of the owner of the copyright. Please refer to relevant laws in your country. Copy Protection This unit supports Macrovision copy protection. On DVD discs that include a copy protection code, if the contents of the DVD disc are copied using a VCR, the copy protection code prevents the videotape copy from playing normally.
- Page 4 SERVICING 1. Please refer to relevant topics in the “Troubleshooting” on page 85 before returning the product. 2. Do not attempt to service this unit yourself. Instead, unplug it and contact a SHARP Approved Service Centre for inspection. 3. Be sure the service technician uses authorised replacement parts or their equivalents. Unauthorised parts may cause fire, electrical shock, or other hazards.
-
Page 5: Table Of Contents
Before you start Table of contents Basic playback .........41 Before you start . -
Page 6: Features
Before you start Features Recording A scene delete from a title (VR mode only): If the title has many commercials or the part you don't The unit is compatible with DVD-RW discs, which are want, you can erase them from the title. recordable repeatedly, and DVD-R discs, which are Making your own Playlist (VR mode, Playlist only): recordable only once. -
Page 7: Functional Overview
Before you start Functional overview 3 * 4 8 * 9 Front Panel 5 6 7 PROG. STOP PLAY DV-SR85 OPERATE OPEN/CLOSE REC MODE REC/OTR VIDEO L(MONO)-AUDIO-R 12 11 10 … You can also turn on the unit by pressing these buttons. 1 Disc tray 8 PLAY B button* •... - Page 8 Before you start Functional overview (cont’d) Rear Panel COMPONENT AUDIO IN ANALOG VIDEO OUTPUT S-VIDEO (AV3) AUDIO OUT DIGITAL AUDIO OUTPUT IN (AV3) PCM/BITSTREAM AV2 (DECODER) COAXIAL AV1 (TV) ANTENNA 5 6 7 9 10 1 ANTENNA IN jack 7 COMPONENT VIDEO OUTPUT jacks •...
- Page 9 Before you start Functional overview (cont’d) 6 MENU/LIST button • Press to change the bilingual Remote Control • Press to display the Disc menu audio source of an external during playback. equipment to “Main”, “Sub”, • Press to change the Original or “Main/Sub”.
-
Page 10: Installing Batteries In The Remote Control
Before you start Functional overview (cont’d) Installing batteries in the remote control About the remote control Install two R6 (AA) size batteries (supplied) into the • Make sure there is no obstacle between the remote control, carefully match with the polarity remote control and the remote control sensor on indicated inside the battery compartment. -
Page 11: Guide To On-Screen Displays
Before you start Functional overview (cont’d) Guide to On-Screen Displays DISPLAY menu With a disc inserted into the unit, 1 Disc type and format mode 5 Each icon means: press [DISPLAY] to display the In some descriptions in this : Search On-Screen Display. - Page 12 Before you start Functional overview (cont’d) Front Panel Display Guide 1. Current Status of the unit : Appears when a DVD / DivX® is inserted into the unit, or when recording. : Appears when disc playback is paused. Appears also during step by step : Appears when a DVD-RW disc is inserted playback.
-
Page 13: Connections
Connections Connecting to a TV • Be sure to turn off the unit and equipment to be connected before connecting. • Read through the Operation Manual for the equipment to be connected. • Be sure to keep the unit connection cables separate from the TV antenna cable when you install the unit, because it may cause electrical interference when you are watching television programmes. -
Page 14: Connecting To External Equipment
Connections Connecting to a TV (cont’d) Note • The unit is sending each video signals simultaneously. If you connected an S-VIDEO OUT and/or a COMPONENT VIDEO OUTPUT with the VIDEO OUT (SCART), make sure your TV’s input mode is set correctly according to the connection you made. -
Page 15: Connecting To An Audio System
Connections Connecting to an Audio System Playing Dolby Digital (5.1 channel audio), Playing 2 channel audio DTS or MPEG audio Connecting the unit to audio equipment provides normal Connecting an amplifier with a Dolby Digital/ DTS/ MPEG stereo sound, plus powerful stereo sound enhanced by audio digital surround processor to your unit's audio Dolby Digital 5.1 channel surround sound, DTS and MPEG digital jack provides richer and more powerful audio... -
Page 16: Getting Started
Getting started Easy DVD recording The following will help you to understand easily how to record on DVD discs. Make sure batteries are in the remote control and you have connected this unit and the TV correctly. Step 1: Choose a disc type. Step 2: Insert a blank disc. -
Page 17: Dvd Discs
Getting started Easy DVD recording (cont’d) Step 3: Select the Step 4: Select the Step 5: Record to recording desired DVD discs. mode. channel. PQRS WXYZ PQRS WXYZ AUDIO AUDIO DISPLAY SPACE CLEAR SETUP DISPLAY SPACE CLEAR SETUP OPERATE OPEN/CLOSE RETURN ENTER TOP MENU MENU/LIST... -
Page 18: Initial Setting
Getting started Initial setting Turn on this unit for the first time, you need to follow these steps. OPERATE OPEN/CLOSE Press [ENTER] to start Channel ZOOM TIMER PROG. Tuning. Press [ OPERATE]. .@/: The unit will start getting channels available in your area. PROG. -
Page 19: Manual Tuning
Getting started Channel setting (cont’d) Manual Tuning Manually tune each channel. OPERATE OPEN/CLOSE ZOOM TIMER PROG. Press [Cursor K / L] to start .@/: In stop mode, press [SETUP]. scanning. PROG. • The tuner will begin to search PQRS WXYZ AUDIO up or down automatically. -
Page 20: To Select A Channel
Getting started Channel setting (cont’d) To select a channel Notes on using [the Number buttons]: • Enter channel numbers as a two-digit number for the quickest result. For example, to select channel 6, press [0] and [6]. If you only press [6], channel 6 will be selected after 2 seconds. -
Page 21: Setting The Clock
Getting started Setting the clock Clock Setting In stop mode, press [SETUP]. Enter the date (day / month / OPERATE OPEN/CLOSE ZOOM TIMER PROG. year) using [Cursor K / L]. Press [Cursor B] to move the .@/: Select “Clock” using [Cursor cursor to the next field. -
Page 22: Selecting The On-Screen Display (Osd) Language
Getting started Selecting the On-Screen Display (OSD) language OPERATE OPEN/CLOSE ZOOM TIMER PROG. In stop mode, press [SETUP]. Select the appropriate OSD language using [Cursor K / L], .@/: then press [ENTER]. PROG. Select “Display” using [Cursor PQRS WXYZ AUDIO K / L], then press [ENTER]. -
Page 23: Recording
Recording Information on DVD recording Type of discs Disc type Disc format Functions Video mode Playing back, This unit can record on DVD-RW and DVD-R. You Limited recording, can record on DVD-R only once. On DVD-RW, you Limited editing can record and erase many times. It is possible to VR mode Playing back, record on DVD-R only in Video mode. -
Page 24: Information On Copy Control
Recording Information on DVD recording (cont’d) Information on copy control After finalising • After DVD-R discs are finalised: Some satellite broadcasts include copy-protected - A Title menu is created automatically. information. If you wish to record them, refer to - Undo finalising is not possible. the following. -
Page 25: Formatting A Disc
Recording Formatting a disc Choosing the recording format of a brand-new DVD-RW disc OPERATE OPEN/CLOSE ZOOM TIMER PROG. When inserting a brand-new disc, Select “Video mode” or “VR the unit automatically starts to .@/: mode” using [Cursor K / L], initialise the disc. -
Page 26: Setting Auto Chapter
Recording Formatting a disc (cont’d) Setting Auto Chapter OPERATE OPEN/CLOSE ZOOM TIMER PROG. Select “Auto Chapter” using The unit inserts a chapter mark .@/: [Cursor K / L], then press periodically (every 10 minutes by PROG. [ENTER]. default) during recording. Using the Auto Chapter menu, you can PQRS WXYZ... -
Page 27: Reformatting A Disc Manually
Recording Formatting a disc (cont’d) Reformatting a disc manually OPERATE OPEN/CLOSE If you are using a DVD-RW disc, Select “Start” using [Cursor ZOOM TIMER PROG. you can format the disc by K / L], then press [ENTER]. .@/: performing “Format”. By default PROG. -
Page 28: Selecting The Sound Mode
Recording Selecting the Sound mode This unit can receive bilingual broadcasts. • During reception of bilingual broadcasts You can switch between modes by pressing Display on the Mode Audio output [AUDIO] on the remote control. Each mode is TV screen indicated on the TV screen as follows. -
Page 29: Basic Recording
Recording Basic recording Follow the steps below to record Select the desired channel to a TV programme. record using [PROG. K / L] or OPERATE OPEN/CLOSE [the Number buttons]. ZOOM TIMER PROG. .@/: Press [ OPERATE] to turn on PROG. the unit. -
Page 30: One-Touch Timer Recording (Otr)
Recording One-touch Timer Recording (OTR) This is a simple way to set the Press [REC/OTR] repeatedly recording time in blocks of 30 until the desired recording OPERATE OPEN/CLOSE minutes. Check that the disc you ZOOM TIMER PROG. time (30 minutes to 8 hours) are recording onto has enough appears on the TV screen. -
Page 31: Timer Recording
Recording Timer Recording You can set the unit to record up Enter the time to start and to to 8 programmes, up to a month end using [Cursor K / L], then OPERATE OPEN/CLOSE ZOOM TIMER PROG. in advance. Daily or weekly press [Cursor B]. -
Page 32: Checking, Cancelling, Or Correcting The Timer
Recording Timer Recording (cont’d) Checking, cancelling, or correcting the timer programming information In the following example, No. 5 timer programming overlaps OPERATE OPEN/CLOSE ZOOM TIMER PROG. on No. 1 and No. 6 timer Check the information on the programmes. In such a case, you .@/: list you will need. -
Page 33: Hints For Timer Recording
Recording Timer Recording (cont’d) Hints for Timer Recording • If there is a power failure or the unit is unplugged for more than 1 hour, the clock setting and all timer settings will be lost. • If there is no disc or an unrecordable disc in the tray, the icon will flash and timer recording will not occur. -
Page 34: Satellite Link
Recording Satellite Link You can set the unit to start recording whenever it detects the video signal from the external Select “Satellite Link” using Press [ENTER] again. tuner. [Cursor K / L], then press In a second, the unit will be Preparing for the Satellite Link [ENTER]. -
Page 35: Settings For External Equipment
Recording Satellite Link (cont’d) Note • If you have not set the clock, the clock setting window will appear at step 3. Follow to step 4 in “Clock Setting” on page 21. • You cannot set the End time for the Satellite Link Timer Recording on this unit. •... - Page 36 Recording DV dubbing (cont’d) When the DV camcorder When the DV camcorder is in Playback mode... is not in Playback mode... 0:00:00 DVD-RW 0:00:00 DVD-RW Video mode Video mode The menu changes according Control to what mode of DV Camcorder. DV Audio Stereo1 AB-1234...
-
Page 37: Setting A Disc To Protect
Recording DV dubbing (cont’d) .@/: PROG. Press [ENTER] to display the Before recording from DV item selection. Select “DVC” PQRS WXYZ AUDIO camcorder, see page 14 for using [Cursor K / L], then press connection instructions. DISPLAY SPACE CLEAR SETUP [ENTER]. -
Page 38: Finalising Discs
Recording Finalising discs To cancel finalising... (DVD-RW only) You will need to finalise discs to play them back in other players. Press [STOP C] during the OPERATE OPEN/CLOSE Finalising may take from several finalising is in progress. Select ZOOM TIMER PROG. minutes up to an hour. -
Page 39: Auto Finalise
Recording Finalising the discs (cont’d) XXXX (cont’d) Auto finalise OPERATE OPEN/CLOSE ZOOM TIMER PROG. You can finalise discs Select “Auto Finalise” using .@/: automatically when the disc [Cursor K / L], then press space runs out if you set this in PROG. -
Page 40: Disc Playback
Disc Playback Information on playing back DVDs Read the following information before you play Disc Logo back a DVD. Playable discs DVD-Video You can play back all the discs listed on the right. Before attempting to play back a DVD, make sure DVD-RW it meets the requirements for Region Codes and (VIDEO / VR mode,... -
Page 41: Basic Playback
Disc Playback Basic playback Hint for DVD playback Start Rec. Stop/Start Stop Rec. The contents of a DVD are generally divided into titles. Titles are sometimes further Title 1 Title 2 subdivided into chapters. Chapter 1 Chapter 2 Chapter 3 Chapter 1 Chapter 2 Playing back a DVD-RW / DVD-R / DVD+RW / DVD+R... -
Page 42: Playing Back A Dvd-Video / Cd / Video Cd
Disc Playback Basic playback (cont’d) Playing back a DVD-Video / CD / Video CD If you are playing back a DVD- DISPLAY SPACE CLEAR SETUP Video or a Video CD, a menu may TOP MENU MENU/LIST RETURN ENTER appear. See pages 45-46 for details. Follow the steps 1 to 4 in “Playing back a DVD-RW / DVD- R / DVD+RW / DVD+R disc”... -
Page 43: Playing Back A Divx
Disc Playback Basic playback (cont’d) Kodak Picture CD • To exit the Picture CD 2 Press [Cursor K / L / { / B] thumbnail List, press to select a desired track to be The Picture CD is a service to [TOP MENU] again or press played back, then press convert photographs taken by... - Page 44 Disc Playback Basic playback (cont’d) It is recommended that files to be played back in Use [Cursor { / B] to select “YES” if you want this unit are recorded under the following speci- to play back the file, or to select “NO” if you do fications: not wish to play it back.
-
Page 45: Playing Back Discs Using The Disc Menu
Disc Playback Basic playback (cont’d) Hint • Press [MENU/LIST] to call up the Playback Media Selection screen in stop mode. • If DivX® files written on CD discs cannot be played • If you select “Audio & Picture”, instead of “Video” back, rewrite them on a DVD disc and try to play on the Playback Media Selection screen, this unit back. -
Page 46: Playing Back A Disc Using The Title Menu
Disc Playback Basic playback (cont’d) Playing back a disc using the Title menu The disc will start playing OPERATE OPEN/CLOSE ZOOM TIMER PROG. back at the title you selected. Some DVDs have a Title menu, The following operations are .@/: which lists the titles available on available. -
Page 47: Cancelling And Recalling The Pbc Function
Disc Playback PBC function for Video CDs (cont’d) Cancelling and Recalling the PBC function PQRS WXYZ AUDIO (PBC OFF) Insert a Video CD. Select “PBC (Video CD only)” DISPLAY SPACE CLEAR SETUP using [Cursor K / L], then press TOP MENU MENU/LIST RETURN ENTER [ENTER]. -
Page 48: Fast Forward / Fast Reverse
Disc Playback Special playback (cont’d) Fast forward / Fast reverse • For Audio CDs and MP3 files, DISPLAY SPACE CLEAR SETUP approximate speed is fixed at x8 with sound. TOP MENU MENU/LIST RETURN ENTER • For Video CDs, approximate forward speeds are x2, x8 and x16, and approximate reverse speeds are x2, x8 and x16. -
Page 49: Pause
Disc Playback Special playback (cont’d) Pause PQRS WXYZ AUDIO DISPLAY SPACE CLEAR SETUP TOP MENU MENU/LIST RETURN ENTER During playback, press REC MODE PLAY [PAUSE F] ] . RAPID PLAY SKIP PAUSE SKIP Playback will pause with the REC/OTR STOP CM SKIP sound muted. -
Page 50: Step By Step Playback
Disc Playback Special playback (cont’d) Step by step playback OPERATE OPEN/CLOSE ZOOM TIMER PROG. Press [SKIP H / G] repeat- .@/: edly. PROG. Each time you press [SKIP G], playback will go forward one PQRS WXYZ AUDIO frame (or step) at a time with the During playback, press DISPLAY SPACE... -
Page 51: Zoom
Disc Playback Special playback (cont’d) Zoom Select the desired zoom factor OPERATE OPEN/CLOSE to zoom using [Cursor K / L], ZOOM TIMER PROG. then press [ENTER]. .@/: The zoom area is displayed. PROG. PQRS WXYZ AUDIO During playback, press DISPLAY SPACE CLEAR SETUP... -
Page 52: Marker Setup
Disc Playback Special playback (cont’d) Marker Setup Marker setup menu for Audio CD mode 0:00:00 Audio CD OPERATE OPEN/CLOSE ZOOM TIMER PROG. (PBC OFF) .@/: You can assign a specific point PROG. on a disc to return later. PQRS WXYZ AUDIO DISPLAY SPACE... -
Page 53: Search
Disc Playback Search Title / Chapter search Searching for a Title: OPERATE OPEN/CLOSE ZOOM TIMER PROG. Enter the desired title number .@/: to search for using [Cursor Using [SKIP H / G] buttons K / L] or [the Number buttons], PROG. -
Page 54: Direct Search
Disc Playback Search (cont’d) Direct Search OPERATE OPEN/CLOSE ZOOM TIMER PROG. You can search the desired track directly. .@/: PROG. Using [the Number buttons] PQRS WXYZ AUDIO DISPLAY SPACE CLEAR SETUP During playback, if the display TOP MENU MENU/LIST RETURN ENTER menu is not displayed, press [the Number buttons] to enter... -
Page 55: Repeat/Random/Programme Playback / Slide Show
Disc Playback Repeat/Random/Programme playback / Slide Show Repeat playback PQRS WXYZ AUDIO Chapter: The current chapter will be DISPLAY SPACE CLEAR SETUP played back repeatedly. TOP MENU MENU/LIST RETURN ENTER (DVD only) (PBC OFF) All: The current disc will be played back repeatedly. -
Page 56: Programme Playback
Disc Playback Repeat/Random/Programme playback / Slide Show (cont’d) Programme playback OPERATE OPEN/CLOSE ZOOM TIMER PROG. (PBC OFF) You can programme the disc to .@/: Select the desired track using play back in your desired order. [Cursor K / L], then press PROG. -
Page 57: Divx® Vod
Disc Playback Repeat/Random/Programme playback / Slide Show (cont’d) DivX® VOD PQRS WXYZ AUDIO Playback menu will appear. DISPLAY SPACE CLEAR SETUP Playback TOP MENU MENU/LIST RETURN ENTER This unit allows you to play back Audio the files purchased or rented Video from DivX®... -
Page 58: Switching Audio Soundtrack
Disc Playback Selecting the format of audio and video (cont’d) Switching audio soundtrack OPERATE OPEN/CLOSE Select a desired audio sound- ZOOM TIMER PROG. track or audio channel using When playing back a DVD-Videos .@/: [Cursor K / L], then press recorded with two or more [ENTER]. -
Page 59: Switching Camera Angles
Disc Playback Selecting the format of audio and video (cont’d) Switching camera angles OPERATE OPEN/CLOSE ZOOM TIMER PROG. Some DVD-Videos feature scenes Select the icon using shot from two or more angles. .@/: [Cursor { / B], then press The disc case is usually marked [ENTER]. -
Page 60: Editing
Editing Information on disc editing You can edit a disc recorded using the PAL system. It is not possible to edit discs recorded using the NTSC system. Guide to a title list The title list enables you to check the titles recorded on a disc easily. You can choose a title to play back from the screen and easily edit the titles as you wish. -
Page 61: Editing Discs
Editing Information on disc editing (cont’d) Editing discs Type of title Item Page Deleting titles Video Editing title names Mode DVD-RW Adding or deleting chapter marks 65-66 VR Mode Setting pictures for thumbnails Original Deleting a part of a title 68-69 Dividing a title DVD-RW... -
Page 62: Editing Discs
Editing Editing discs Deleting titles Original Playlist OPERATE OPEN/CLOSE Select “Title Delete” using ZOOM TIMER PROG. You can delete titles which you [Cursor K / L], then press .@/: do not need anymore. [ENTER]. Be advised that the titles once PROG. -
Page 63: Editing Title Names
Editing Editing discs (cont’d) Editing title names Original Playlist Select “Yes” using [Cursor OPERATE OPEN/CLOSE You can edit the title names ZOOM TIMER PROG. K / L], then press [ENTER]. from this menu. The name you edited becomes .@/: The title names you edit will the title. -
Page 64: Guide To Edit Title Name
Editing Editing discs (cont’d) Guide to edit title name Original Playlist OPERATE OPEN/CLOSE ZOOM TIMER PROG. .@/: Select the desired character set PROG. using [Cursor K / L], then press PQRS WXYZ AUDIO [ENTER]. DISPLAY SPACE CLEAR SETUP TOP MENU MENU/LIST RETURN ENTER Using the list below as a guide,... -
Page 65: Adding Or Deleting Chapter Marks
Editing Editing discs (cont’d) Adding or deleting chapter marks Original Playlist OPERATE OPEN/CLOSE You can add chapter marks to a Select “Add” or “Delete” ZOOM TIMER PROG. title. After a title is marked with accordingly using [Cursor .@/: chapters, you can use the chapter K / L], then press [ENTER]. - Page 66 Editing Editing discs (cont’d) Select “Yes” using [Cursor Press [RETURN K / L], then press [ENTER]. OPERATE OPEN/CLOSE ZOOM TIMER PROG. Adding a chapter mark: If you select “Add” at step 4, a Press [RETURN ] again and .@/: new chapter mark is created at then [RETURN ] or [STOP C] PROG.
-
Page 67: Setting Pictures For Thumbnails
Editing Editing discs (cont’d) Setting pictures for thumbnails Original Playlist OPERATE OPEN/CLOSE You can set a picture as a Press [RETURN ] and then ZOOM TIMER PROG. thumbnail for each title. This [RETURN ] or [STOP C] to .@/: helps you to remember the exit. -
Page 68: Deleting A Part Of A Title
Editing Editing discs (cont’d) Deleting a part of a title Then use [SKIP H / G], [REV E], [FWD D], [PLAY B] Original Playlist and [PAUSE F] again to move OPERATE OPEN/CLOSE You can delete a specific part of ZOOM TIMER PROG. - Page 69 Editing Editing discs (cont’d) Select “Delete” using [Cursor Press [RETURN ] and then K / L], then press [ENTER]. [RETURN ] or [STOP C] to OPERATE OPEN/CLOSE exit. ZOOM TIMER PROG. Confirmation window will appear. Writing on the disc starts. .@/: It may take a while to write the Playlist - Scene Delete...
-
Page 70: Dividing A Title
Editing Editing discs (cont’d) Dividing a title Playlist OPERATE OPEN/CLOSE You can divide a title into two Press [RETURN ] or [STOP C] ZOOM TIMER PROG. new titles. to exit. .@/: Writing on the disc starts. PROG. It may take a while to write the Follow the steps 1 to 3 on page data on a disc. -
Page 71: Combining Titles
Editing Editing discs (cont’d) Combining titles Playlist You can combine two titles into a OPERATE OPEN/CLOSE Select “Yes” using [Cursor ZOOM TIMER PROG. single title. s / B], then press [ENTER]. .@/: The two titles will combine into a PROG. single title. -
Page 72: Adding Titles To A Playlist
Editing Editing discs (cont’d) Adding titles to a Playlist Playlist OPERATE OPEN/CLOSE You can add a title to the Playlist Select the desired title using ZOOM TIMER PROG. as you wish. [Cursor K / L / s / B], then .@/: You can add up to 99 titles to press [ENTER]. -
Page 73: Erasing All Playlist
Editing Editing discs (cont’d) Erasing all Playlist Playlist OPERATE OPEN/CLOSE A Playlist can be deleted if it is no Select “Yes” using [Cursor ZOOM TIMER PROG. longer needed. s / B], then press [ENTER]. .@/: “Are you sure?” will appear. PROG. -
Page 74: Setting Or Releasing The Title Protection
Editing Editing discs (cont’d) Setting or releasing the title protection Original OPERATE OPEN/CLOSE To prevent the accidental editing, Confirm the indication ZOOM TIMER PROG. or erasing of the titles, you can “OFF ➔ ON”. Press [ENTER] .@/: protect them in the Edit menu. again. -
Page 75: Setting Or Clearing All Chapter Marks In One Title
Editing Editing discs (cont’d) Setting or clearing all chapter marks in one title You can add chapter marks to a OPERATE OPEN/CLOSE Select “Yes” using [Cursor ZOOM TIMER PROG. title. After a title is marked with K / L], then press [ENTER]. chapters, you can use the chapter .@/: Chapter marks are added. -
Page 76: Changing The Setup Menu
Changing the Setup menu Tour of the Setup menu The following table shows the items you can set and their default settings. Use the table as a reference for efficient operation. Setup Items (highlight is the default) Contents 1. Language setting Disc Menu Sets the disc menu language. -
Page 77: Language Setting
Changing the Setup menu Language setting OPERATE OPEN/CLOSE In stop mode, press [SETUP]. ZOOM TIMER PROG. .@/: PROG. Select “Playback” using [Cursor K / L], then press [ENTER]. PQRS WXYZ AUDIO DISPLAY SPACE CLEAR SETUP Select “Language” using [Cursor K / L], then press [ENTER]. TOP MENU MENU/LIST RETURN ENTER... -
Page 78: Display Setting
Changing the Setup menu Language setting (cont’d) If “Other” is selected, enter the appropriate 4-digit code using [the Number buttons]. Refer to “Language code” on page 89. OPERATE OPEN/CLOSE ZOOM TIMER PROG. When you finish entering .@/: Language - Subtitle the code, press [ENTER]. -
Page 79: Audio Setting
Changing the Setup menu Display setting (cont’d) Screen Saver (Default: 10 minutes) Set the screen saver time delay. Select a setting using [Cursor Screen Saver Display K / L], then press [ENTER]. OSD Language English Your setting is activated. Angle Icon 5 minutes Screen Saver 10 minutes... - Page 80 Changing the Setup menu Audio setting (cont’d) PCM sampling (Default : 48kHz) Select a setting using [Cursor K / L], then press [ENTER]. Digital Out - PCM Your setting is activated. 48kHz 96kHz 48kHz: If your amplifier / decoder is NOT compatible with 96kHz PCM, select “48kHz”.
-
Page 81: Video Setting
Changing the Setup menu Audio setting (cont’d) Dynamic Range Control (Default: ON) Set to “ON” to make the dynamic range narrower. Select a setting using [Cursor Audio - Dynamic Range Control Audio K / L], then press [ENTER]. Digital Out Your setting is activated. - Page 82 Changing the Setup menu Video setting (cont’d) TV System (Default: PAL) Set the TV system. Select the desired system set- Video Video - TV System ting using [Cursor K / L], then Still Mode Auto press [ENTER]. Auto TV System Video Out SCART(RGB) Note...
-
Page 83: Dvd-Videos Parental Lock Level
Changing the Setup menu DVD-Videos Parental Lock level Some DVD-Videos feature a Parental Lock function. If the rating of the inserted disc exceeds the level you set, playback will stop. You must OPERATE OPEN/CLOSE enter a password before the disc will be played back. This feature ZOOM TIMER PROG. - Page 84 Changing the Setup menu DVD-Videos Parental Lock level (cont’d) A password is not yet set Select “Yes” using [Cursor K / L], Parental Lock Parental Lock then enter a new password using Change Password? [the Number buttons], then Password Input press [ENTER].
-
Page 85: Others
Others Troubleshooting Before requesting service for this unit, check the table below for a possible cause of the problem you are experiencing. Some simple checks or a minor adjustment by you may eliminate the problem and restore correct operation. Symptom Remedy Power The power does not turn on. - Page 86 Others Troubleshooting (cont’d) Symptom Remedy Playback The unit does not play back the • No disc is inserted. disc. • A blank disc is inserted. • The disc is upside down. Insert the disc with the labelled side facing up. •...
- Page 87 Others Troubleshooting (cont’d) Symptom Remedy DV signal cannot be input. • Before connection, turn on the power supplies for both this unit and the DVC, and make sure that these units have stopped. • Only a “DVC-SD” signal can be input from the DVC to this unit. Other types of signals are not supported.
- Page 88 Others Troubleshooting (cont’d) Error message Cause Solution Disc Error • An unplayable disc is inserted in the • Insert a standard disc shown in — Please eject the disc. — unit. “Playable discs”. (See page 40.) Playback feature may not be available on •...
-
Page 89: Language Code
Others Language code Language Code Language Code Language Code Abkhazian 4748 Hungarian 5467 Russian 6467 Afar 4747 Icelandic 5565 Samoan 6559 Afrikaans 4752 Indonesian 5560 Sangho 6553 Albanian 6563 Interlingua 5547 Sanskrit 6547 Amharic 4759 Interlingue 5551 Scots Gaelic 5350 Arabic 4764 Inupiak... -
Page 90: Glossary
Others Glossary Analogue audio Region code (Digital Theater System) An electrical signal that directly Regions associate discs and represents sound. In contrast, DTS is a Multi-channel surround players with particular areas of digital audio can also be an sound system, but it is different the world. -
Page 91: Specifications
Others Specifications General System DVD-Video, DVD-RW/-R, DVD+RW/+R, CD-DA, CD-RW/-R Power requirements 220–240V ~ ± 10%, 50Hz ± 0.5% Power consumption 25W (standby: 4.5W) Weight 2.4kg Dimensions (width x height x depth) 435 x 66 x 244mm Operating temperature 5°C to 40°C Operating humidity Less than 80% (no condensation) TV format... - Page 93 If the product is used for business purposes and you want to discard it: Please contact your SHARP dealer who will inform you about the take-back of the product. You might be charged for the costs arising from take-back and recycling.
- Page 94 SHARP CORPORATION 9HS1VMN23068 E7B16RD ★★★★★ Printed in China 1VMN23068...