
Related Manuals for Sharp MD-MT80W


Summary of Contents for Sharp MD-MT80W
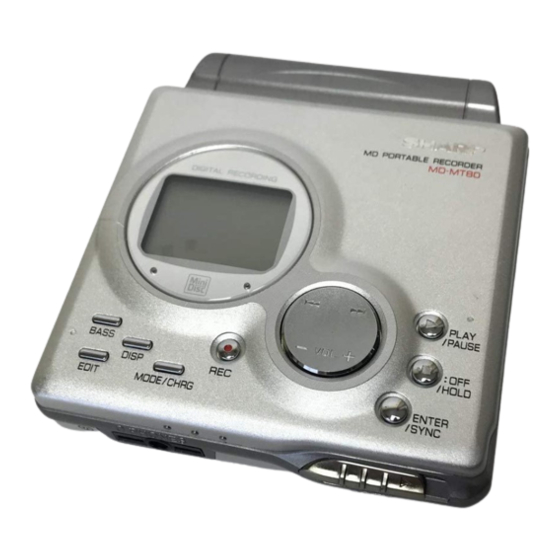
- Page 1 Thank you for purchasing this SHARP product. PORTABLE MINIDISC For the best performance, read this manual carefully. RECORDER It will guide you in operating your SHARP product. MODEL MD - MT80W OPERATION MANUAL...
-
Page 2: Optional Accessories
Accessories Headphones x 1 AC Adaptor x 1 Connection Cable (for analogue recording) x 1 Notes: ! Parts and equipment mentioned in this operation manual other than those detailed above are not included. ! The AC adaptor may be different from the one in the drawing. Optional Accessories Rechargeable Nick- Car adaptor... -
Page 3: Table Of Contents
Contents „ Important Introduction „ Advanced Features Special Notes ......4-5 Changing Default Settings . -
Page 4: Special Notes
Otherwise, problems or serious hazards may be cre- ated. „ Caution z SHARP is not liable for damage or loss of your record- ing arising from malfunction of this unit. z When recording important selections, make a prelimi- nary test to ensure that the desired material is prop- erly recorded. - Page 5 SHARP is not in a position to authorise the copying or broadcasting of copyright materials and noth- ing in this OPERATION MANUAL should be implied as giving that authority.
-
Page 6: Names Of Controls And Indicators
Names of Controls and Indicators „ Main unit 1. 5V DC Input Socket (10) 2. Optical/Line Input Socket (10,11) 3. Microphone Input Socket (23) 4. Bass/Delete Button (15,33) 5. Edit/Auto Mark/Time Mark Button (21,25,32) 6. Display/Character Select Button (26,32) 7. Mode/Charge Button (17,28) 8. - Page 7 „ Display panel 1. Level Meter (12) 2. Record Indicator (12) 3. Remaining Recording Time Indicator (26) 4. Monaural Long-Play Mode Indicator (19) 5. Repeat Indicator (17) 6. TOC Indicator (13) 7. Synchro Recording Indicator (18) 8. Disc Mode Indicator 9.
-
Page 8: Precautions
If the unit is used near radio tuners or TVs, noise and/ 5V DC supplied with this unit, as it may damage it. SHARP is not responsible for damage due to improper or picture interference may result. If you experience use. -
Page 9: Inserting A Minidisc
Inserting a MiniDisc Slide the OPEN lever to release the com- partment door. Lift it up. Insert a MiniDisc as shown. Close the compartment door. Notes: z Do not place the MiniDisc under the holder. z If any resistance is felt, do not force the MiniDisc into the unit, as it may cause damage to the unit. -
Page 10: Connections
Connections You can record your favourite CDs or tapes to MD. 00/12/26 80SCA_09_11.FM... - Page 11 00/12/26 80SCA_09_11.FM...
-
Page 12: Recording
Recording Press the button to adjust the re- cording level. Analogue recording Adjust the recording level so that the maximum sound volume from the source makes the reading swing somewhere between 4 dB and 0 dB. Digital recording You can adjust the level in 1dB increments within the range of +12 - 12dB. - Page 13 About the TOC Press the PLAY/PAUSE button to start the After any recording or editing function "TOC" (Table Of Contents) is displayed. To finalise the recording or editing MiniDisc unit recording. function, press the /:OFF button. During this process "TOC" will flash and "TOC EDIT!" will be displayed. Dur- Begin playback on the stereo system, the ing any recording or editing function the MiniDisc unit lid output will be recorded.
-
Page 14: Playback
Playback 00/12/26 80SCA_12_15.FM... - Page 15 „ Volume control Insert the headphones plug into the Press the VOL+ button to increase the volume and the PHONES socket. VOL- button to decrease the volume. Insert a MiniDisc (page 9). „ Bass control Press the PLAY/PAUSE button. Each time the BASS button is pressed, the tone will be Playback starts automatically with a playback only switched as follows.
-
Page 16: Advanced Playback
Advanced Playback „ To locate the beginning of a track To move to the beginning of the next track: Press the button during playback. To restart the track being played: Press the button during playback. To locate the next track: Press the button whilst the unit is stopped. - Page 17 „ Random play or repeat play During playback, press the MODE/CHRG button repeat- edly to select the playback mode. RANDOM Random play RANDOM Repeat play of tracks in random order Repeat play of all of the tracks Repeat play of a single track No display Normal playback „...
-
Page 18: Advanced Recording
Advanced Recording „ Playback sound-actuated recording Press the button to adjust the re- Recording automatically starts or pauses by detecting cording level. (See page 12.) sound from the stereo system (Synchronised recording). Press the PAUSE button on the stereo sys- tem to enter the playback pause mode. - Page 19 „ Long-play recording Press the MODE/CHRG button whilst the When recording in monaural long-play mode, the availa- recording is paused. ble recording time will be doubled. Monaural long-play recordings can be replayed at double speed, see page Stereo mode Monaural long-play mode Start recording.
- Page 20 Advanced Recording (continued) „ To start recording from the middle of a During playback, press the PLAY/PAUSE track button at the point where you want to be- You can erase a portion of a track and make a new gin recording. recording.
- Page 21 „ To create your own track numbers „ To prevent recorded MiniDiscs from You can create your own track numbers at any point. being erased accidentally Slide the accidental erase prevention tab, located on the Whilst recording, press the REC button at the point side of the MiniDisc, in the direction indicated by the where you want to create track numbers.
- Page 22 Advanced Recording (continued) „ About track numbers z When recording, if a programmed playback is per- formed by the source or playback is performed by 1. Track numbers are created automatically during re- selecting tracks manually, the MiniDisc track numbers cording via the analogue connection when a silence may not be the same as on the source.
-
Page 23: Recording From A Microphone
Recording from a Microphone „ To record from a microphone Press the button to adjust the re- cording level. Adjust the recording level so that the maximum sound volume from the source makes the reading swing between --- 4 dB and 0 dB. Press the PLAY/PAUSE button. - Page 24 Recording from a Microphone (continued) „ Sound-actuated recording (Mic Syn- About pause function The unit automatically pauses when the microphone chronised recording) does not pick up any sound for 3 seconds or more. (Pause function does not work for approximately 10 sec- Press the REC button.
- Page 25 „ Track intervals Example: Set to "5 minutes". When recording from the microphone, track numbers will During a mic manual recording be created automatically at regular intervals (default set- Timed auto marks will be created every 5 minutes. ting: approximately every 5 minutes). During a mic syn- chro recording, the unit pauses when a silence lasts for 3 seconds or more, and creates a track number.
-
Page 26: Checking Displays
Checking Displays „ To check the elapsed time and remain- „ To check the remaining recording time ing time of the track and the total playing time During playback, press the DISP button. Whilst in the stop mode, press the DISP button. Each time the button is pressed, the display will change Each time the button is pressed, the display will change as follows. - Page 27 „ To display the playing time of an indi- „ Checking the remaining amount of bat- vidual track tery level The remaining amount of battery level is shown by the Whilst in the stop mode, press the battery indicator ( ) during operation.
-
Page 28: Battery Power
Battery Power „ Charging the rechargeable battery When a separately available rechargeable battery is used for the first time or when you use it after a long period of disuse, be sure to charge it fully. Insert the rechargeable battery. A rechargeable battery other than the AD-N70BT cannot be charged. - Page 29 „ About charging time „ Using with the rechargeable or alkaline battery After about 3.5 hours have passed, " " will go out. The battery charging is about 90% com- plete. Disconnect the AC adaptor. To charge the battery fully, continue charging for about 2 more hours.
-
Page 30: Hold Function
Hold Function The present operation condition can be kept even if other buttons are accidentally pressed in a place such as a crowded train. If the battery is inserted or the AC adaptor is connected, If the hold function is active whilst the power is turned you can set this function even when the power is turned off, the power cannot be turned on by mistake and the off. -
Page 31: Changing Default Settings
Changing Default Settings „ Beep sound Whilst in the stop mode ... You can eliminate the confirmation sound that beeps when you press a button. With a MiniDisc inserted, press the MODE/ CHRG button for 2 seconds or more. "SET „... -
Page 32: Titling A Minidisc
Titling a MiniDisc „ Creating disc and track names Press the DISP button repeatedly to select Load a MiniDisc to be named. A playback only or record- the type of characters. ing prevented MiniDisc cannot be edited. <Disc name> <Track name> Whilst in the stop Whilst in the pause mode, press the EDIT... - Page 33 „ To erase a character To enter more letters, repeat steps 3 - 5. Press the VOL+ or VOL- -- button to move the cursor to the character you want to erase, and then press the BASS When the name has been completely en- button.
- Page 34 Titling a MiniDisc (continued) „ To add characters „ Stamping titles from another MiniDisc Put the unit in the character input mode. Before stamping When there are 2 MiniDiscs on which the same tracks (Perform steps 1 - 2 on page 32.) are recorded, you can transfer the character information (disc and track names) of the Master MiniDisc to another Press the VOL+ or VOL- - - button to move...
- Page 35 Master MiniDisc operation Operation of the MiniDisc for stamping Insert a Master MiniDisc. Load a MiniDisc for stamping. Do not mistake the Master MiniDisc for the target one. Whilst in the stop mode, press the EDIT button to select "NAME STAMP". Press the ENTER/SYNC button.
-
Page 36: Editing A Recorded Minidisc
Editing a Recorded MiniDisc „ To erase tracks one at a time „ To erase all of the tracks at once Start playing the track to be erased, and Whilst in the stop mode, press the EDIT press the PLAY/PAUSE button. button repeatedly to select "ALL ERASE". - Page 37 „ To divide a track „ To combine tracks Start playing the track to be divided into Start playing the last of the two tracks to two. Press the PLAY/PAUSE button at the be combined, and press the PLAY/PAUSE point where you want to divide the track. button.
- Page 38 Editing a Recorded MiniDisc (continued) „ To move a track When a track has a name before dividing: The two new tracks will have the same name. However, in the TOC FULL condition, the second track may not be Play the track to be moved, and press the named.
-
Page 39: Listening Through Another System
Listening through Another System „ Listening through a stereo system „ Listening through a car stereo Notes: Notes: z Adjust the volume of both this portable MD and a car z It is recommended that the volume level of the stereo. -
Page 40: Other Features And Caution
Other Features and Caution „ Resuming auto play „ Rechargeable battery z A rechargeable nickel-metal hydride battery is the only When you stop playback and replay the MiniDisc without removing it, playback starts from the point kind that can be used. Even if the battery is not used, you stopped it. -
Page 41: Minidisc System Limitations
MiniDisc System Limitations The unit may have the following symptoms whilst recording or editing. The unit is not out of order. SYMPTOM LIMITATIONS "DISC FULL" or "TOC FULL" appears More than 255 tracks (maximum) cannot be recorded regardless of even though the MiniDisc still has re- the recording time. -
Page 42: Error Messages
Error Messages ERROR MESSAGES MEANING REMEDY z The battery is run down. z Charge the rechargeable battery or replace the al- BATT EMPTY kaline battery (or use the AC adaptor for power). z Nothing is recorded. z Replace the disc with a recorded disc. BLANK MD z You tried to record from a copy prohibited z Record using the analogue cable. - Page 43 z Poor connection of the digital cable. z Connect the digital cable securely. NO SIGNAL z No output signal comes out from the z If the portable CD player has a function to prevent sound connected unit to playback. skips, deactivate it. z The input signal has improper sampling z Playback with the connected unit.
-
Page 44: Troubleshooting
Troubleshooting Many potential "problems" can be resolved by the owner without calling a service technician. If something seems to be wrong with this product, check the following before calling your authorised SHARP dealer or service centre. PROBLEM CAUSE z Is the AC adaptor disconnected? The unit does not turn on. -
Page 45: Maintenance
Maintenance „ If trouble occurs „ Cleaning When this product is subjected to strong external interfer- When the unit becomes dirty ence (mechanical shock, excessive static electricity, Clean it with a soft cloth.When the unit is excessively abnormal supply voltage due to lightning, etc.) or if it is dirty, use a soft cloth dampened in water (external sur- operated incorrectly, it may malfunction. -
Page 46: Specifications
Specifications As a part of our policy of continuous improvement, SHARP reserves the right to make design and specification chang- es for product improvement without prior notice. The performance specification figures indicated are nominal values of production units. There may be some deviations from these values in individual units. - Page 47 „ MiniDisc Recorder Input sensitivity: Recording Reference input Input impedance Type: Portable MiniDisc recorder level level Signal read- Non-contact, 3-beam semi-conductor MIC H 0.25 mV 10 k ohms out: laser pick-up MIC L 2.5 mV 10 k ohms Audio chan- Stereo 2 channels/monaural (long-play nels: mode) 1 channel...
- Page 48 SHARP CORPORATION TINSE0356AWZZ B0103.TO...