Advertisement
Available languages
Available languages
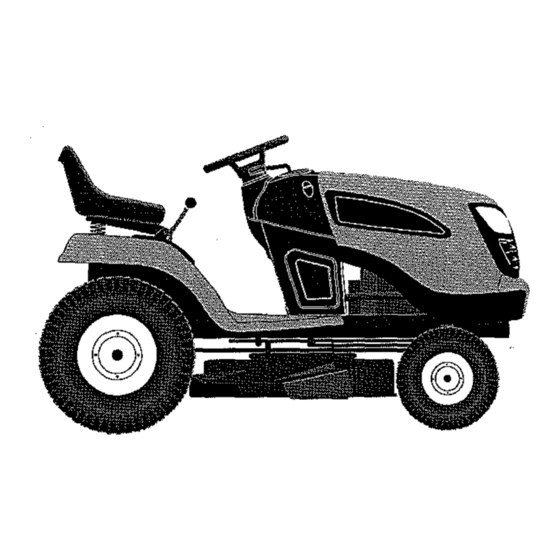
Operator's Manual
°
LAWN TRACTOR
21.0 HP,* 42" Mower
ELectric Start
Automatic Transmission
Model NO.
917.26651
• EspaSol, p. 33
This product has a low emission
engine which operates
differently
from previously
built engines.
Before you start the
engine, read and understand
this Operator's
Manual,
Read and follow all Safety
Rules and Instructions before
operating this equipment.
about this product, Call:
1-800-659-5917
SEARS Craftsman
Help Line
5 am - 5 pm, Mon - Sat
Gasoline containing up to 10% ethanol (EIO) is acceptable for use in this machine.
The use of any gasoline exceeding 10% ethanol (EIO) will void the product warranty,
Esta m_quina puede utiltzar gasolina con un contenido de hasta el 10% de etanol (El0).
El uso de una gasolina que super
el 10% de etanol (EIO) anular_ la garantia del producto.
Sears Brands Management Corporation, Hoffman Estates, IL 60179 U.S.A.
Visit our Craftsman
website:www, sears.com/craftsman
*Asrated bytheengine
man_'Pacturer
Advertisement

Related Manuals for Craftsman 917.26651


Summary of Contents for Craftsman 917.26651
- Page 1 Esta m_quina puede utiltzar gasolina con un contenido de hasta el 10% de etanol (El0). El uso de una gasolina que super el 10% de etanol (EIO) anular_ la garantia del producto. Sears Brands Management Corporation, Hoffman Estates, IL 60179 U.S.A. Visit our Craftsman website:www, sears.com/craftsman *Asrated bytheengine man_'Pacturer...
-
Page 2: Table Of Contents
WARRANTY SERVICE For warranty coverage details to obtain free repair or replacement, ceil 1-800-659-5917 or visit the web site: www.craftsman.com In all cases above, if part repair or replacement is impossible,the riding equipmentwill be replaced free of charge with the same or an equivalent model. - Page 3 _IbDANGER: This cutting machine is capable of amputating hands and feet and throwing objects. Failure to observe the following safety instructions could result in serious injury or death. ,_(_.WARNING: Inordertopreventacciden- • Never direct discharged material toward tal starting when setting up, transporting, anyone.
- Page 4 11,SLOPE OPERATION • Keep children out of the mowing area and in the watchful care of a responsible Slopes are a major factor related to loss of adult other than the operator, control and tip-over accidents, which can • Be alert and turn machine off if a child result in severe injury or death.
- Page 5 ° Remove gas-powered equipment from • Nevertamperwith safetydevices. Check thetruck ortrailer a nd refuel itonthe their proper operation regularly. ground, Ifthis isnot p ossible, then refuel • Keep machine free of grass, leaves, or such equipment with aportable container, other debris build-up. Clean oil or fuel rather than from a gasoline dispenser spillage and remove any fuel-soaked de- nozzle.
-
Page 6: Safety Rules
REPAIR PROTECTION AGREEMENTS Spark Plug: Champion RCt 2YC (Gap: .030'70.76 mm) Congratulations on making a smart pur- chase. Your new Craftsman® product is Charging 3 Amps Battery System: 5 Amps Headlights designed and manufactured for years of dependable operation. But like all products,... - Page 7 Slope Sheet Keys *installed by Dealer *Brush Guard Kit Key{s) Your new tractor has been assembled at the factory with exception of those parts left unassembled for shipping purposes. Label TOOLS REQUIRED FOR ASSEMBLY A socket wrench set will make assembly easier.
- Page 8 TOROLL TRACTOR O FF SKID(See Operation sectionfor locationand CHECKLIST function of controls) Before you operate your new tractor, we wish to assure that you receive the best 1. Raise attachment lift lever to its highest performance and satisfaction from this position.
-
Page 9: Operation
These symbols may appear on your tractor or in literature supplied with the product. Learn and understand their meaning. P,,I SLOW REVERSE NEUTRAL HIGH CHOKE FAST IGNITION swITCH 1.114 ENGINE REVERSE ENGINE ENGINE START PARKING BRAKE MOWER HEIGHT MOWER LIFT OPERATION SYSTEM (ROS) - Page 10 KNOW YOUR TRACTOR READ THIS MANUAL AND SAFETY RULES BEFORE OPERATING YOUR TRACTOR Compare the illustrations with yourtractor to familiarize yourself with the locations of various controls and adjustments. Save this manual for future reference. 03078 Our tractors conform to the applicable safety standards of the American National Standards Institute, (A) ATTACHMENT LIFT LEVER - Used to (F) IGNITION SWITCH - Used for starting...
- Page 11 The operation of any tractor can result in foreign objects thrown into the eyes, which can result in severe eye damage. Always wear safety glasses or eye shields while operating your tractor or performing any adjustments or repairs. We recommend standard safety glasses or a wide vision safety mask worn over spectacles.
- Page 12 TO MOVE FORWARD AND TO ADJUST GAUGE WHEELS BACKWARD Gauge wheels are properly adjusted when they are slightly offthe ground when mower The direction and speed of movement is is at the desired cutting height in operating controlled by the motion control lever. (J) position.
- Page 13 IMPORTANT: The motion control lever does REVERSE OPERATION SYSTEM (ROS) notreturn to neutral position when the clutch/ Your tractor is equipped with a Reverse brake pedal is depressed. Operation System (ROS). Any attempt by • To restart movement, slowly release park- the operator to travel in the reverse direction ing brake and clutch/brake pedal.
- Page 14 3. Place motion control lever in neutral BEFORE STARTING THE ENGINE position. CHECK ENGINE OIL LEVEL 4. Move attachment clutch to disengaged The engine in your tractor has been shipped, position, from the factory, already filled with summer 5. Move throttle control to choke position. weight oil.
- Page 15 PURGE TRANSMISSION MOWING TIPS • Tire chains cannot be used when the _CAUTION: Never engage or disengage mower housing is attached to tractor, freewheel lever while the engine is running. • Mower should be properly levered for best To ensure properoperation and performance, mowing performance.
-
Page 16: Maintenance Schedule
MAINTENANCE s=,'ORe Eve_ eVeRy LWeeY _veeY Ewe¥ eE_o'_'_" SCHEDULE _-,_c. a_soN S_ORAGe HOURS HOURS HOURS HOURS ,Check Brake Operatio,t_ V" v" i," "' Check Tire Pressut_ RTi Check Operator Presence & ROSllSYStei33S A Ch_ck for Le°ee Fastpi nets ..t/ ..CheeldRep.laee Mower Blades... - Page 17 TRACTOR CHECK REVERSE OPERATION (ROS) SYSTEM Always observesafety rules when p erforming any maintenance. • Whenthe engine is running with the ignition switch in the engine "ON" position and the BRAKE OPERATION attachment clutch engaged, any attempt If tractor requires more than five (5) feet to by the operator to drive in reverse should stop at highest speed in highest gear on a shut offthe engine.
- Page 18 BATTERY ENGINE "four tractor has a battery charging system LUBRICATION which is sufficient for normal use. However, Only use high quality detergent oil rated with periodic charging of the battery with an au- API service classification SG-SL. Selectthe tomotive charger will extend its life. oil's SAE viscosity grade according to your •...
- Page 19 ENGINE COOLING SYSTEM 6. Refill engine with oilthrough oil fiil dipstick tube. Pour slowly. Do not overfill. For ap- Debris may clog the engine's air cooling proximate capacity see "PRODUCT SP- system. Remove blower housing and clean ECIFICATIONS" section of this manual. area shown to prevent overheating and engine damage.
- Page 20 CLEANING Nozzle • Clean engine, battery, seat, finish, etc. Washout Port of all foreign matter. • Clean debris from steering plate. Debris can restrict clutch/brake pedal shaft movement, causing belt slip and loss of drive. CAUTION: Avoid all pinch points and movable parts IMPORTANT: Tug hose ensuring connec- Clutch/brake pedal...
-
Page 21: Service And Adjustments
WARNING: TO AVOID SERIOUS INJURY, BEFORE PERFORMING ANY SERVICE OR ADJUSTMENTS: 1. Depress clutch/brake pedal fully and set parking brake. 2, Place motion control lever in neutral position. 3. Place attachment clutch in "DISENGAGED" position. 4. Turn ignition key to "STOP" and remove key, 5. - Page 22 3. ATTACH MOWER SIDE SUSPENSION 7. insert end of link (E) into hole in front ARMS (A) TO CHASSIS - Position hole mower bracket [H) and secure with in arm over pin (B) on outside of tractor washer and retainer spring (J). chassis and secure with retainer spring.
- Page 23 TO LEVEL MOWER FRONT-TO-BACK ADJUSTMENT Make sure tires are properly inflated to the IMPORTANT: Deck must be level side- PSl shown ontires. Iftires are over or under to-side. inflated, it may affect the appearance of your To obtainthe best cutting results, the mower lawn and lead you to think the mower isnot adjusted properly.
- Page 24 TO REPLACE MOWER BLADE DRIVE BELT INSTALLATION - BELT 1. Install new belt from tractor rear to front, over the steering plate (F) and above The mower blade drive belt may be replaced withouttools. Park the tractor on level sur- clutch brake pedal shaft (G).
- Page 25 NOTE: if additional clearance is needed to TO REMOVE WHEEL FOR REPAIRS get to adjustment bolt, move mower deck 1. Block up axle securely, height to the lowest position, 2. Remove axle cover, retaining ring and After above adjustment is made, if the trac- washers to allow wheel removal...
- Page 26 REPLACING BATTERY TO REPLACE FUSE Replace with 20 amp automotive-type plug- n_a WARNING: Do not short battery terml- in fuse. The fuse holder is located behind y allowing awrench or any other object the dash. to contact both terminals at the same time. Before connecting battery, remove metal TO REMOVE HOOD &...
-
Page 27: Storage
Immediately prepare yourtractorfor storage ENGINE atthe end ofthe season orifthe tractor will FUEL SYSTEM not be used for 30 days or more. IMPORTANT: It is important to prevent WARNING: Never store the tractor with gum deposits from forming in essential fuel system parts such as carburetor, fuel hose, gasoline in the tank inside a building where fumes may reach an open flame or spark. - Page 28 TROUBLESHOOTING CHART: See appropriate section in manual unless directed to Sears service center CORRECTION PROBLEM CAUSE Will not start Out of fuel Fill fuel tank. See "TO START ENGINE" in Engine not "CHOKED" properly. Operation section. Wait several minutes before Engine flooded.
- Page 29 TROUBLESHOOTING CHART: See appropriate section in manual unless directed to Sears service center CAUSE CORRECTION PROBLEM Engine clicks Weak or dead battery, Recharge or replace battery. will not start Corroded battery terminals. Clean battery terminals. Loose or damaged wiring. Check all wiring. Faulty solenoid or starter.
- Page 30 TROUBLESHOOTING CHART: See appropriate section in manual unless directed to Sears service center P.oB,EM CORRECTION CAUSE ,, ,,,u,, RePlace blade, Tighien blade boit£ Poor cut - uneven Worn. bent or loose blade. cutting Mower deck not level Level mower deck. Clean underside of mower Buildup of grass, leaves, and trash under mower.
-
Page 31: Troubleshooting
TROUBLESHOOTING CHART: See appropriate section in manual unless directed to Sears service center PROBLEM ..CAUSE CORRECTION Bad ba_e_/ce,m(s), R'ep,acebatter)/. Battery will not charge Poor cable connections. Check/clean all connections, Faulty regulator (if so equipped), Replace regulator. Faulty alternator, Replace alternator, ,,,,,,,,,,u,,, .. - Page 32 SUGGESTED GUIDE FOR SIGHTING SLOPES FOR SAFE OPERATION WARNING: To avoid serious injury, operate your tractor up and AIL_ down the face of slopes, never across the face. Do not mow slopes greater than 15 degrees. Make turns gradually to prevent tipping or loss of control.
- Page 33 Ilame al 1-800-659-5917 6 visite el sitio web: www. craftsman.corn En redes los cases anteriores, si el reemp]azo es imposible, el equipo tractor ser_ sustituido sin cargo con el misme mode]o o uno equivafente.
- Page 34 _kPELIGRO: Esta Maquina cortadora es capaz de amputar las manosy |os pies y de lanzar objetos, si no se observan las instrucciones de seguridad siguientes se pueden producir lesiones graves o la muerte. d_ADVERTENCIA: Siernpre desconecte el alam- • No maneje la m_.quina si no tiene la trampa bre de la bujia y p6ngalo donde no pueda entrar para c@sped completa,la canaleta de descarga en contacto con la bujia, para evitar el arranque...
- Page 35 ° Escoger una velocidad demarcha baja d e • Tener el m_imo cuidado cuando se acerca modo que n o sea necesario pararse ocambiar a cantos ciegos, arbustos, _rboles u otros estando en una pendiente. objetos que pueden impedir la vista de niOos. .
- Page 36 OPERACIONES DE SERVICIO GENERALES • Nunca hacer funcionar la m&quina en un _.rea • Si se golpea un objeto ajeno, hay que pararse cerrada. e inspeccionar Ia m_.quina. Reparar, si es • Mantener todas las tuercas y pernosapretados necesario, antes de vo]ver a porter en marcha. para asegurarsede que trabaja en condiciones •...
- Page 37 (Abertura: .030"/0.76 ram) LA REPARACION Congratulaciones per su buena compra. Sistema de 3 Amps Bateria nuevo producto Craftsman@ est& diseSado y Carga: 5 Amps Luces fabricado para funcionar de mode liable per Bater_a: Amp/Hr: touches aries. Pero come todos los productos, Min.
- Page 38 Llaves Hoja de pendiente *lnstalado por el distribuidor *Juego de cubierta (1)Acceso_io d eIconexi6n L_VOS Su tractor nuevoha sido montadoen la f_-brica conla excepci6nde aquellaspartesque nose han montadopor razonesde env|o. HERRAM|ENTAS NECESARIAS PARA EL MONTAJE Un juego de IIaves de tubo fac[Iitar& el montaje. A continuaci6n se enumeran los tamar_os de las Ilaves est&ndar.
- Page 39 PARA HACER RODAR EL TRACTOR LISTA DE REVISION FUERA DE LA CORREDERA (Vea la sec- ci6n de la operaci6n para ia localidad Antes de operary de disfrutar de su tractor nuevo, la funci6n de los controles) le deseamos que reciba el meier rendimientoy la Apriete la manilla de levantamiento del pist6n mayor satisfaccionde este productode calidad.
- Page 40 Estos simbolos pueden aparecer sobre su tractor oen ]a literatura proporcionada con el producto. Aprenda y comprenda sus significados. MAROHA ATRAS NEUTRO ALTO BAJO ESTRANGU- R,_PIDO LENTO LACION MOTOR MOTOR FF;ENODE ALTURADE LA LEVANTAMIENTO MOTOR APA(3ADO SISTEMA ENCEND_OO ENMARCHA ESTACIONAM_ENTO SEGADORA DE LA SEGADORA FUNCIQNAMIENTO ATRAS(ROS} LUCES...
- Page 41 FAMILIARICESE CON SU TRACTOR LEA ESTE MANUAL LAS REGLAS DE SEGURIDAD ANTES DE OPERAR SU TRACTOR Compare las ilustraciones con su tractor para familiarizarse con las ubicaciones de los diversos controles y ajustes, Guarde este manual para referencia en el futuro, O3O78 Nuestros tractores cumplen con los est&ndares de seguddad del American National Standard Institute,...
- Page 42 La operaci6n de cualquier tractor puede hacer que salten objetos extra_os dentro de sus ojos, Io que puede producir da_os graves en _stos. Siernpre use anteojos de seguridad o protecoiones pars los ojos mientras opere su tractor o cuando hags ajustes o reparaciones. Recomendarnos galas de seguridad o i illll i illlll,llll una mdscara de vision amplia de seguridad ussda, soh, r e,,!,as,,,g, afas.
- Page 43 PARA MOVERS E HACIA ADELANTE Y HACIA AVISO: Ajuste Ias ruedas calibradoras con el ATP_S tractor en una superficie nivelada plana. 1. Ajuste Ia segadora a Ia altura de corte La direcci6n y la velocidad del movimiento son deseada con Ia manilla de ajuste de a!- controladas por medio de la palanca de control tufa (Vea "PARA AJUSTAR LA ALTURA DE de movimiento (J).
- Page 44 FUNCIONAMIENTO ATRAS •PARA TRANSPORTAR Tu tractor est,. equipado con el Sistema de Fun- Cuando empuje o arrastre sutractor asegQrese de cionamientoAtr_.s (ROS). Cualquier tentativa del desenganchar la transmisi6n poniendo el control operadorde viajar marcha atr&s conel embrague de la rueda Iibre en Ia posici6n de marcha de rue- da libre, El control de marcha de rueda libre esta puesto apagar&...
- Page 45 AGREGUE GASOLINA Inserte la Itave en la ignici6n y gire Ia Ilave en el sentido que giran las maniltas del reloj a [a • Llene el estanque de combustible. Llene posici6n de arranque start, y suelte la Ilavetan haste Ia parte inferior del cuello de relleno deI pronto come arranque el motor, No haga fun- estanque de gasolina.
- Page 46 PURGAR LA TRANSMISION CONSEJOS PARA SEGAR • Nose pueden usar lascadenas para las Ilantas _PRECAUCI6N: Nunca enganche o desen- cuando ]a caja de la segadora estd adjunta al ganche la palanca del control de rueda libre tractor. ouando et motor esta funcionando. •...
- Page 47 PROGRAMA DE A_,m_s CADA CADA CAOA CAOA MANTEN|MIENTO CAOA CAOA AU_CE_IEmO HOP.AS TEMPORAOA IHORAS HOIR_S Be,'# sa, r a p_k_n _3_ I{,_ull,_ R _:g_le=e es_ema A _,_='_' _ "_y _ 'J"=_ .._°_ ABlar/Qambi_r I_._ _hilla_ la segac[_ ....T T_ _,ub.:_ I/ ..
- Page 48 TRACTOR Vt_RIFIEZSISTEMA FUNCIO NAM IENTO ATR,g.S (ROS) Siempre observe ]as reglas de seguridad cuando d6 mantenimiento. • Cuando el motor est& en marcha con el [nte- OPERACI6N DEL FRENO rruptor de Ilave en posici6n de motor "ON" y el embrague del accesorio conectado, cualquier Si el tractor necesita m&s de cinco (5) pies para tentativa deI operador de viajar marcha atr_.s, detenerse a la m_xima velocidad al cambio m&s...
- Page 49 BATERIA MOTOR Su tractor cuenta con un sistema de carga de Ia LUBR1CACION bater[a que es suficiente para el usa normal. Sin Use solarnente aceite de detergente de alta embargo, si se carga la bateria peri6dicamente, calidad clasificado con Ia clasificaci6n SG-SL de con un cargador de automSviles, se prolongar&...
- Page 50 5. Vuelva afijarel accesorio SISTEMA DE ENFR|AMIENTO DE AIRE de purga del aceite Losescombrospueden atascar el sistema de en- en el alojamiento de la turbina del motor. friamiento de aire de motor.Remueva la cubierta 6. Vuelva a I[enar el motor con aceite a tray, s del soplador y limpie el &rea mostrada para evitar deI tubo de la varilta indicadora de nivel para et recalentamiento y dafios al motor.
- Page 51 Eche hacia atr&s la abrazadera de cierre del LIMPIEZA adaptador de la boquilla y empuje _ste en et Limpie todo material extrafio del motor, la puerto de lavado de la cubierta en el extreme baterfa, el asiento, el pulido, etc. izquierdo de la cubierta de ta segadora, Suelte Limpie los desechos de Ia pfaca gula.
- Page 52 ADVERTENCIA:PARA EVITAR LES|ONES SERIAS, ANTES DE DAR CUALQUIER SERVIC|O O DE HACER AJUSTES: 1. Presione el pedal del embragueifreno completamente y aplique el freno de estacionamiento. 2. Ponga la palanoa de contml de movimiento en la posici6n de neutro. 3, Ponga el embrague del accesorio en la posici6ndesenganchado (DISENGAGED). 4, Ponga la Ilave de ignicibn en la posici6n de apagado (STOP) y remu@vala, 5, Aseg_resequelascuchillasyquetodaslaspartesmoviblessehayandetenidocomptetamente.
- Page 53 Reatice el mismo procedimiento en el otro lade del tractor. 9. Retire el resorte de sujeci6n (K), deslice la FIJE LAS PIEZAS DE PROPULSION POSt abrazadera (L) hasta quitarla, y saque a TERIORES (C) - Levante la parte posterior presi6n Ia guia de la caja (P) hasta que se de la cortadora, ubique la ranura de la pieza salga deesoporte.
- Page 54 PARA NIVELAR LA SEGADORA 5. Vue[va a verificar las medidas y ajuste nueva- mente, en case necesario, haste que ambos Aseg_rese de que los neum_ticos est_n inflados Iados queden iguales. ata PSI que se indica en estos. Si est&n de- AJUSTE DE DELANTE A ATR/_S masiado inflados o poco inflados, el c6sped no le quedar&...
- Page 55 PARA CAMBIAR LA CORREA DE IMPULSI(3N MONTAJE DE LA CORREA DE LA CUCHILLA SEGADORA 1. Instale la correa nueva de la parte de atr&s La correa de imputsibn de la cuchilla segadora a la parle de adelante de[ tractor, pas_.ndola se puede cambiar sin herramientas.
- Page 56 PAPA REMOVER LAS RUEDAS Palanca de control Neutro Cierre 1, BIoquee el eje en forma segura. 2, Remueva la cubierta del eje, el anil[o de reten- ciSn y las arandelas para perrnitir la rernoci6n de las ruedas (la rueda trasera contiene una Ilave cuadrada - no ta pierda), 3, Repare Ia llanta y vu_lvata a montar.
- Page 57 REEMPLAZAR LA BATERIA ENTRECIERRE Y RELES El alambrado suelto o dafiado puede producir el _,DVERTENCtA: No haga cortocircu_o con los real funcionamiento de su tractor, o que deje de terminales de la bateria at permitir que una Ilave funcionar,o le impida el arrancar. de tuerca o cualquierotro objeto entre en contacto •...
- Page 58 lnmediatamente prepare su tractor para el al- - Vaciar el dep6sitodel carburante poniendo en macenamiento al final de Ia temporada o si el marcha el motor y dej&ndolo funcionar hasta tractor no se va a usar por 30 dfas o m&s. que el carburante termine el carburador est_ vacio.
- Page 59 IDENT|FICACION DE PROBLEMAS: Vea la seccien apropiada en el manual a manes que est_ dirigido a un centre de servicio Sears. CAUSA CORRECCION PROBLEMA Sin combustible, l." Liana'el estanque de""combustible. NLOarranoa Motor sin ]a"ESTRANGULACION" Vea"PARA HACER ARRANCAR EL Me- (CHOKE) adecuada. TOR"...
- Page 60 IDENTIFICACION DE PROBLEMAS: Vea la seccibn apropiada en el manual a men0s que est_ dirigido a un centre de servicio Sears. PROBLEMA CAUSA CORRECCI6N P6rdida de Ague en el combustible, Vaciarelestanq uedecombustibleyelcarbu - fuetT_a rador.vue[vaa l[enare[esfanque con gaso- lina nueva y cambie el fiUrode combustible. (sigue) 10.
- Page 61 IDENT|FtCACI6N DE PROBLEMAS: Vea la secci6n apropiada en el manual a menus que estd dirigido a un centre de servicio Sears, .OSLEMA CAUSA CORRECCION Las lUz (cos) Ei"intemJptor est_ "APAGADO"(OFF), "ENCIEND_' iON) el interrupter. de lantera(s) Bombilla(s) o [&mpara(s) quemad&(s). Gamble le bombllIa(s) o lbmpara{s), no funciona, Revise/cambie el interrupter de la luz,...
- Page 63 GUiA SUGERIDA PARA MEDIR LAS PENDIENTES CON LA VISTA PARA UNA OPERACION SEGURA DVERTENCIA: Para _vitar da_os graves, haga funclonar SU tractor arrlba y abajo de las pendientes, nunca _ransvarsalmente con respecto alas pendlentes. No _ortar pendientes mayores de t5 grados, Haga los vlrajes gradualmente para evitar volcarsa o [a p,_rdida de control, Tonga mucho cufdado cuando cambie de dlrecci6n en laa partdfentes.
- Page 64 NEED MORE HELP? - :[Or f_'ee! You'[[ findthe answe_ and mo_e on managemyhome.cam , Find this and all. your other product manuals online, • Get answers from our team of home experts. - Geta personatized maintenance planfor yourhome. = Findinformationandtook to helpwith home projects. manage home brought'_o...