Advertisement
Available languages
Available languages
Quick Links
ge.com
0_
Safety Instructions
...........
2,3
Installation
Instructions
....... 4
Operating
Instructions
Control Settings
..................
5, 6
Care and Cleaning ............
7-9
Reversing the Door ..................
9
Troubleshooting Tips ...... lO, 11
Consumer
Support
Consumer Support
........
bock cover
Product Registration
(C(]n(]d(]) . .15, 16
Product Registration
(U.S.) ......
1::3,14
W(]rr(]ntLl (C(]n(]d(]) ................
18
W(]rr(]ntLl (U.S.) ....................
17
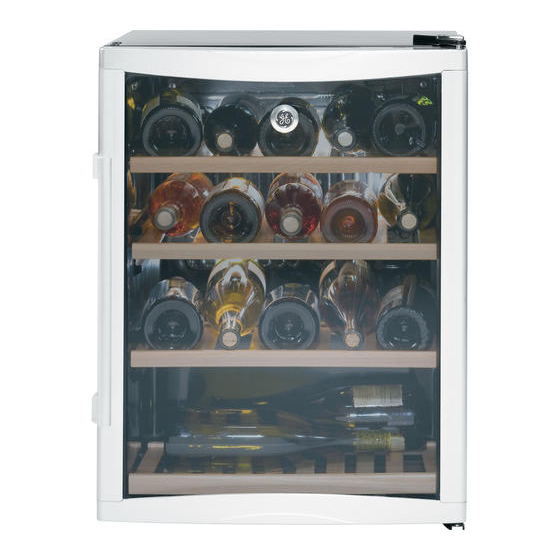
Refroidisseur
vin
La section frangaise commence _ la page 29
Centro
de vinos
La secci6n en espafiol empieza en la p6gina 33
0_
Write the model and serial
numbers here:
Model #
Serial #
Find these numbers inside the wine
chiller on the left side.
197D4613PO05 49-60564
04-08JR
Advertisement

Related Manuals for GE GWS03ADWASS


Summary of Contents for GE GWS03ADWASS
- Page 1 Safety Instructions ... Installation Instructions ..4 Operating Instructions Refroidisseur Control Settings ....5, 6 Care and Cleaning .... Reversing the Door ....Troubleshooting Tips ..lO, 11 Consumer Support La section frangaise commence _ la page 29 Consumer Support ..
- Page 2 IMPORTANT SAFETY INFORMATION. READ ALL INSTRUCTIONS BEFORE USING. WARNING! Use this appliance only for its intended purpose as described in this Owner's Manual. SAFETY PRECAUTIONS When using electrical appliances, basic safety precautions should be followed, including the following: This wine chiller must be properly installed and Keep fingers out of the "pinch point"...
- Page 3 _e.COtTI HOW TO CONNECTELECTRICITY Do not, under any circumstances, cut or remove the third (ground) prong from the power cord. For personal safety, this appliance must be properly grounded. The power cord of this appliance is equipped This provides the best performance and also with a 3-prong (grounding) plug which mates prevents overloading house wiring circuits which could cause a fire hazard from overheated wires.
- Page 4 Installing the wine chiller. Removing the Packaging Before using the wine chiller, be sure all packing materials and tape have been removed, including the protective film covering the control and any film protecting the cabinet. If gou are discarding an old refrigeration product, remove the doors to reduce the danger of children being trapped inside.
- Page 5 About the control and settings, ge.com Control Settings After plugging in the wine chiller, turn the Temperature Control Knob located on the exterior rear wall of the cabinet to the position corresponding to the desired setting on the dial. The temperature ranges between 40°F (4,4°C)and 60°F (15,6°C)
- Page 6 About the interior space. Wooden Shelves Wooden shelves in the wine chiller are removable for easg cleaning and for storing larger items. To remove a shelf, open the door completelg to avoid potential damage to the shelf. Lift slightlg and pull the shelf forward.
- Page 7 Care and cleaning, ge.com Cleaning the Outside IMPORTANT:Unplug the wine chiller Protect the paint finish. The finish on the outside of the wine chiller is before cleaning. a high-quality, baked-on paint finish. Keep the outside clean. The cabinet With proper care, it will stay new-looking can be washed with mild soap and water.
- Page 8 Care and cleaning. In the Event of a Power Failure If the power fails, open the door as infrequentlg as possible to maintain the temperature. A gradual rise in temperature should not hove ang adverse effect on the wine. If it is extremelg hot, you may want to unload the wine from the wine chiller and move the wine to o cooler location until power is restored.
- Page 9 Reversing the Door. ge.com Unplug the wine chiller. Screw Hinge cover__._ Tape the door shut with masking tape to secure alignment. Plug Button To ,,n0e Remove the top hinge cover by removing the screw. Remove the 2 screws securing the top hinge to the frame.
- Page 10 Before gou call for service... Troubleshooting Tips Save time and moneg! Review the charts on the following pages first and btou mabt not need to call for service. Possible Causes What To Do Wine chiller does not Wine chiller is unplugged. •...
- Page 11 Possible Causes What To Do Wine chiller has odor Interior needs cleaning. • See Care and cleaning. Moisture forms on Not unusual during periods • Wipe surface dry. outside of wine chiller of high humiditg. Moisture collects inside Too frequent or too long (in humid weather, door openings.
- Page 12 Notes. "O...
- Page 13 GE Service Protection PIus'" GE, a name recognized worldwide for quality and dependability together with Assurant Solutions, offers you Service Protection PlusTM--comprehensive protection on your appliances.* Benefits Include: • Prompt, reliable service from GE Authorized Servicers • Convenient hours designed to suit your busy schedule •...
- Page 14 GEA'scarefullg selected partners. General Electric Compang GE Consumer Louisville, KY40225 & Industrial FAILURETOCOMPLETEAND RETURNTHIS CARDDOESNOT DIMINISH YOURWARRANTY RIGHTS. ge.com For information about GEA's privacg and data usage policg, go to ge.com and click on "Privacg Policg" or call 800.626.2224.
- Page 15 Please place in envelope and mail to: Veuillez mettre dans une enveloppe et envoyez _ : OWHERSHJP REGISTRATIOH P.O. BOX1780 MJSSISSAUGA, OHTARiO L4Y 4G1 (FOR CAHADIAHCOHSUMERS OHLY)
- Page 16 Please register yourproduct t o enable usto contact y ou Veuillez e nregi_ervceeproduit a riadenouspermet_e d e in the remote event a safety notice is issued for this product communiquer avec vous sijamais un avis de s6cudt6 concemant and to allow for efficient communica_on under the terms ce produit 6ta_6mis et de communiquer facilement avec vous en ofyour warranty, should the need arise,...
- Page 17 USA. If the product is located in an area where service bg a GE Authorized Servicer is not available, Sou mag be responsible for a trip charge or Sou mag be required to bring the product to an Authorized GE Service location for service.
- Page 18 (From Date of Sale) Repair or Replace at Habe's Option Compressor GE Profile: Ten (10) Years GE Profile: Ten (10) Years GE Profile: Five (5) Years GE and All Other GE and All Other GE and All Other Brands: One (!) Year...
- Page 19 Instructions de s_curit_ ..20, 21 Instructions d'instollotion ..22 lode d'emploi Espace int6rieur ....... R_glages des commandes ..... Entretien et nettoyoge ..25-27 Inversion de la porte ....Conseils de d6pannage ..2& 29 Service _ la dient_le Garantie .......
- Page 20 CONSEILS DESECURITE IMPORTANT& LISEZTOUTESLESINSTRUCTIONS AVANT D'UTILISERVOTREAPPAREIL. AVERTISSENENT! Cat appareil doit _tre utilis_ uniquement aux fins pr_vues et d_crites dans ce manuel. MESURES DE SECURITdL Lors de I'utilisation de I'appareil, observez les pr4cautions 414mentaires, dont les suivantes ' _, Ce refroidisseur (_vin dolt @trecorrectement _, @oignez les doigts des parties o0 vous pouvez install@,conform@ment _ ces instructions, avant facilement vous pincer;...
- Page 21 www.electromenagersge.ca RACCORDEMENT E-LECTRIQUE Ne coupez ou ne retirez en oucun cos Io troisi_me broche (mise _ Io terre) de Io fiche du cordon d'olimentotion. Pour votre s_curit_, cet opporeil doit _tre correctement mis a Io terre. Le cordon d'alimentation de cet appareil est Cette precaution est recommand_e pour garantir muni d'une fiche (_3 broches (mise _ la terre) un rendement optimum et _viter une surcharge...
- Page 22 Installation du refroidisseur vin. D_ballage Avant d'utiliser I'appareil, assurez-vous que tousles mat4riaux de conditionnment et le ruban adh4si{ y compris le film de protection des commandes et de la caisse ont dtd enlevds. Si vous mettez au rebut un rdrig4rateur ou un appareil semblable, d4montez d'abord ses portes pour dviter que les enfants ne s'emprisonnent a I'intdrieur.
- Page 23 Commandes et r .glages, www.electromenagersge Rdglagesdes commandes (mdcaniques) Apr@savoir branch_ le refroidisseur (_vin, tournez le Bouton de R@glagede la Temperature (situ_ sur le cBt@ext_rieur (_I'arri@rede I'appareil) sur la position correspondant au r@glage souhait@.Les temp@ratures de fonctionnement varient de 40°F (4,4°C)(_60°F (!5,6°C) dans une pi@ce_ une temperature mogenne de 70°F (2!,!°C).
- Page 24 Espaceint rieur. €.t) ,',_'_ Cloyettes en Oois Les clayettes en bois de votre refroidisseur 6 vin peuvent _tre retir6es pour faciliter le nettogage et pour entreposer des articles volumineux. Pour retirer une clogette, ouvrez la porte compl@tement afin de ne pas endommager la clagette.
- Page 25 Entretien et nettoyuge, www.e ectromenagersge.ca Entretien de l'ext_rieur Prot#gez le fini de la peinture. Le fini sur IMPORTANT : D_branchez I'appareil avant I'ext_rieur est une peinture cuite de haute de le nettoyer. qualit& En I'entretenant correctement, Gardez I'ext#rieur propre. La caisse il gardera son aspect neuf et restera sans se love avec une solution d'eau 16g6rement rouille pendant de nombreuses ann@es.
- Page 26 Entretien et nettoyoge. Lots d'une panne de courant S'il n'y a pas de courant, ouvrez la porte le moins souvent possible pour maintenir le niveau de temperature. Une augmentation graduelle de la temperature ne devrait pas _tre n_faste pour le vin. S'il fait tr_s chaud, le vin retir_ du refroidisseur devrait _tre mis dans un endroit plus fraisjusqu'au...
- Page 27 Inversion du sens d°ouverture de lu porte, www.electromenugersge.cu D6branchez le refroidisseur a vin. Cachede la charni6re._.4t_Vis Maintenez la porte ferm6e a I'aide de ruban-cache pour conserver Bouchon Charni re I'alignement. sup_rieure Retirez le cache de la charni6re sup_rieure en enlevant la vis. Retirez les 2 vis maintenant la charni6re sup6rieur au cadre.
- Page 28 Avant de contacter un service de d pannage... Conseils de d_pannage E-conomisez du temps et de I'argent! Consultez le tableau ci-dessous et celui de la page suivante pour dviter tout appel de service qui ne serait pas ndcessaire. Causes possibles Solutions L'appareil L'appareil est d_branch_.
- Page 29 www.electromenagersge.ca Causes possibles Solutions II y e des odeurs clans Un nettogage de Fint_rieur est • Consultez la section : Entretien et nettoyage. I'appareii n_cessaire. L'ext_rieurde I'appareil Ceci n'est pas rare Iorsque • Essugez la surface humide. est humide le degr_ d'humidit_ dens Fair est _lev&...
- Page 30 Notes.
- Page 31 (5 partir de la R@aration ou date d'achat) remplacement au choix de ivlabe _ompresseur GE Profile: Dix (!0) arts GE Profile: Dix (!0) arts GE Profile: Cinq (5)arts GEet toutes autre GEet toutes autre GEet toutes autre marques : Un (!) an...
- Page 32 Internet au site www.electromenagersge.ca 24 heures parjour, tousles jours de I'ann_e. Servicede r@arations 1.800.561.3344 Service de r@arations GEest tout pros de vous. Pour faire r@arer votre @lectrom@nager GE,il suffit de nous t@l@honer. Studiode conceptionrdaliste Sur @man@, GEpeut fournir une brochure sur I'am@nagementd'une cuisine pour les personnes 6 mobilit@r@duite.
- Page 33 Informaci6n de seguridad ..34-3s Instrucciones de instalaci6n ..38 Instrucciones de operuci6n Ajustes de control ....Espacio interior ...... Cuidado g limpieza ... 39-41 C6mo invertir el vaiv6n de la puerta ......42,43 Solucionar problemas ..Soporte al consumidor Garantia ......
- Page 34 IMPORTANTE INFORMACION DE SEGURIDAD. LEA TODAS LAS INSTRUCCiONES ANTES DEL USO. iADVERTENCIA! Use este aparato solo para el prop6sito para el cual fue disefiado coma se describe en este manual del propietario. PRECAUCIONES DE SEGURIDAD AI usar aparatos el#ctricos, se deben seguir precauciones bdsicas de seguridad, inclugendo las siguientes: iiiB,...
- Page 35 USO DE CABLES DE EXTENSION Debido a los peligros potenciales para la seguridad bajo ciertas condiciones, recomendamos enfdticamente no usar cables de extension. Sin embargo, si debe usar un cable de extensi6n, es absolutamente necesario que est@incluido en la lista UL, un cable de extensi6n para electrodom@sticos con conexi6n a tierra de tres alambres que tenga enchufe g tomacorriente con conexi6n a tierra g cuga calificaci6n el_ctrica sea de 15 amperios (mfnimo) g 120 voltios.
- Page 36 C6mo instalar el enfriador de vinos. Retirar el empaque Antes de usar el enfriador de vinos, asegOrese de que se hayan retirado todos los materiales de empaque bl la cinta, incluyendo la pelfcula de protecciOn que cubre el control y protege el gabinete. Si est6 cambiando un aparato antiguo de refrigeracidn, retire los puertas para reducir el peligro de que los nihos puedan quedarse atrapados al interior.
- Page 37 Acerca de los controles y ajustes, g_._o_ Ajustes de los controles Despu_s de enchufor el enfriodor de vinos, gire el control de temperoturo ubicodo en Io pored posterior externo del gobinete o Io posici6n que correspondo ol ojuste deseodo de Io perillo. Lo temperoturo oscilo entre 40°F (4,4°C)y 60°F (15,6°C)en uno hobitoci6n tfpico de 70°F (21,1°C).
-
Page 38: Espacio Interior
Sobre el espaciointerior. Estantes de madera Los estantes de madera del enfriador de vinos son desmontables para facilitar la limpieza g para poder almacenar elementos m6s grandes. Pure quitur un estunte, abra la puerta por completo para evitar danos potenciales al estante. -
Page 39: Cuidado G Limpieza
Cuidado g iimpieza, ge.com Limpieza del exterior IIPORTANTE: Desconecte el enfriador Proteja el acabado de pintura. El acabado de vinos antes de la limpieza. en la parte exterior del enfriador de vinos es de alta calidad, un acabado de pintura Mantenga el exterior limpio. - Page 40 Cuidado g iimpieza. En el evento de una falla de energia Si la energfa falla, abra las puertas Io menos que pueda para mantener la temperatura. Un aumento gradual en la temperatura no deberfa causar ningOn efecto adverso en el vino. Si hace calor extremo, descargar el vino del enfriador de vinos g trasladarlo a un sitio m6s frfo hasta que se restablezca...
- Page 41 C6mo invertir el vaiv n de la puerto. Desenchufe el enfriador de vinos. Tapa de la bisagra ._.L'_ Tornillo Tap6n Cierre la puerto con cinta adhesiva para asegurar la alineaci6n correcta. Bisag[a superior Quite la tapa de la bisagra superior quitando el tornillo. Quite los 2 tornillos que sujetan la bisagra superior al marco.
- Page 42 Antes de so/icitar un servicio... Consejos para la soluci6n de problemas iAhorre tiempo g dinero! Revise primero la siguiente tabla g quizds no tenga que Ilamar para soficitar el servicio. Posibles causas Qu6 hacer El enfriador de vinos El enfriador de vinos est6 + Empuje el enchufe completamente dentro no funciona desconectado,...
-
Page 43: De La Puerta
Cause possible Que faire El enfriador de vinos El interior necesita limpieza. • Consulte la secci6n Cuidado g !impieza. produce un olor Se forma humedad No es extra_o durante • Seque la superficie. en e! exterior los perJodos de humedad alto. - Page 44 Notos. _°_...
- Page 45 Notes. ge.com...
- Page 46 Para concertar una cita de reparaci6n, en Ifnea, de la fecha de compra visite nosal ge.com, o Ilame al 800.GE.CARES (800.432.2737). origina! para obtener un Cuando Ilame para solicitar servicio, par favor tenga a mano servicio bajo la garantfa. el nOmero de serie y el nOmero de modelo.
-
Page 47: Soporte Al Consumidor
Solicite una reparaci6n ge.com El servicio de expertos GE est6 a tan s61oun paso de su puerta, iEntre en Ifnea y solicite su reparaci6n cuando le venga cualquier dfa del aho! O Ilame al 800.GE.CARES (800./452.2757) durante horas normales de oficina. - Page 48 Customers in Canada should consult the gellow pages for the nearest Habe service center,or call 1.888.261.3055. Contact Us g e.com In the U.S.: If gou are not satisfied with the service gou receive from GE,contact us on our Website with all the details including gour phone number, or write to: General Manager,Customer Relations GEAppliances,Appliance Park Louisville,KY/40225 In Canada: www.geappliances.ca, or write to:...