JVC AV-65WP94 User Manual
I'art pro projection television
Hide thumbs
Also See for AV-65WP94:
- User manual (88 pages) ,
- How-to (7 pages) ,
- Supplementary manual (6 pages)
Table of Contents
Advertisement
Quick Links
Download this manual
See also:
User Manual
For Models:
AV-65WP94
AV-56WP94
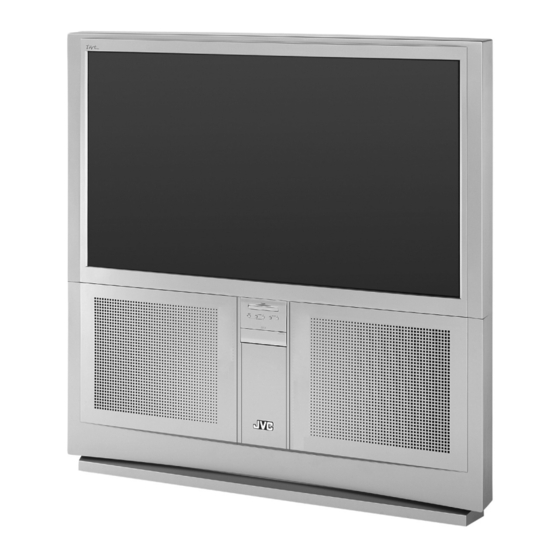
Illustration
of A V-56WP94 and RM-C12G
In the spaces
below,
enter the model
and serial
number
of your television
(located
at the rear of the television
cabinet).
Staple
your sales
receipt
or invoice
to the
inside
Cover of this guide.
Keep this userls
guide
in a convenient
place for future
reference.
Keep the carton
and original
packaging
for future
use.
Model
Number:
Serial
Number:
LCT1468-001B-A
1003-TNdI-IM
Advertisement
Table of Contents

Related Manuals for JVC AV-65WP94


Summary of Contents for JVC AV-65WP94
- Page 1 For Models: AV-65WP94 AV-56WP94 Illustration of A V-56WP94 and RM-C12G In the spaces below, enter the model and serial number of your television (located at the rear of the television cabinet). Staple your sales receipt or invoice to the inside Cover of this guide.
- Page 2 5. In the event of trouble, unplug the unit and call a service technician. not attempt to repair it yourself or remove the rear cover. Changes or modifications not approved by JVC could void the warranty. • When you don_t use this TV set for a long period of time, be sure to...
- Page 3 • As an "ENERGY STAR®'' partner, JVC has determined that this product or product model meets the "ENERGY STAR ®', guidelines for energy efficiency. ENERGYSTAR CAUTION: Please read and retain for your safety, Electrical energy can perform many useful functions. This TV set has been engineered manufactured to assure your personal safety.
- Page 4 7 Anoutside antenna system s hould not b elocated inthe vicinity ofoverhead power lines orother electric light orpower circuits, orwhere i tcan fall i nto such power lines o rcircuits. When i nstalling anoutside antenna system, extreme care should betaken t okeep f rom touching such power lines o rcircuits ascontact with them might befatal.
- Page 5 PORTABLE CART WARNING (Symbol provided by RETAC) 13 For added protection of the TV set during a lightning storm or when the TV set is to be left unattended for an extended period of time, unplug it from the wall outlet and disconnect the antenna.
- Page 6 By displaying fixed i mages forextended periods oftime, can leave a subtle but p ermanent ghost image inyour picture. This isreferred toas "burn-in". To avoid this, m ix your viewing pattern. Examples include, but a renotlimited t othe following: • Stock-market report bars For example...
- Page 7 m[i,][_ ii ii[;t i- ... [!l_llr_ ,_!,,I,_1 ( ! i j ..... Set Clock ....Unpacking your TV .... On/Off Timer ....TV Models ....TV Remote Control ... I"(mlIiL(°] II W II I1,_ €[*] II_ ..Getting Started ..... Multi Screen Function...
- Page 8 Thank you foryour purchase ofaJVC Color Television. Before you begin s etting upyour n ew television, please check tomake s ure you have a llofthe following items. Inaddition tothis guide, your television box should include: Two A A 1Television 1Remote Control Batteries Note: Your television and/or remote...
- Page 9 _\vl_,]iai,],id!'l'71_e,_'t,-][-_ Used to connect JVC AV CompuLink capable components for an Used to connect high bandwidth automated home theater. digital content protection DTV decoders, DVD players and D-VHS players ",-,,,,. Used to connect an amplifer that Used to connect an i.LINK has an optical digital input terminal.
- Page 10 NOTE: Before you connect your television to another device, please refer to the proper diagrams for your specific TV and remote. These will help assist you in understanding how to connect your television to another device, as well as use the remote to set up your television.
- Page 11 MODELS: AV-GSWP94 AV-56WP94 • For information on remote control buttons, see pages 59 - 73. • The DIGITAL CH (DCS), iLINK/TIMER, SUB CHANNEL +/- and EPG buttons are for digital channels. If your TV is connected to an ATSC antenna, you can use these buttons.
-
Page 12: The Remote Control
These quick setup pages will provide you, in three easy steps, with the basic information need to begin using your new television right away. If you have questions, or for more detailed information on any of these steps, please consult other sections of this manual. - Page 13 Basic Operation Turn the television on and off by pressing the POWERbutton at the top right corner of the remote. If this is the first time you are turning on the TV, the interactive plug- in menu appears. • Make sure the TV/CATV switch is set to TV. Move the switch to CATV only if you need to operate a cable box.
- Page 14 Cable or Antenna Diagram #I Output Coaxial Cable _ (VHF / UHF) TV Rear Panel Cable Box ATSC Antenna Connection Cable or Antenna Output TV Rear Panel Notes: • If you do not have a cable box, connect the cable wire from the wall outlet into the back of the TV.
- Page 15 Diagram #2 Cable or Antenna Output TV Rear Panel Coaxial Cable 75 _) {VHF / UHF) Two-Way Splitter Cable Box Recording a broadcast from ATSC connection TV Rear Panel Notes: • If your VCR is a mono sound unit, it will have only one audio out jack. Connect it to the LEFT AUDIO INPUT on the front of the TV.
- Page 16 Notes: • Green, blue and red are the most common colors for DVD cables. Some models may vary colors. Please consult the user's manual for your DVD player for more information. • Be careful not to confuse the red DVD cable with the red audio cable. It is best to complete one set of connections (DVD or audio output) before starting the other to avoid accidentally switching the cables.
- Page 17 VCR's PLAY • If your JVC brand VCR has "A code/B code remote control switching" (see your VCR's instruction book), using VCR A code will switch the TV to input !. • Refer to your DVD instruction book for detailed connection information.
- Page 18 Connecting to a Camcorder You may connect a camcorde r, game console or other equipment to your television by using th e front input jack s (Input 4) located unde r the front panel d0or: To access, pul! on the door to open it.
- Page 19 Connecting to an External Ampfifier Subwoofer Out - Use a powered subwoofer with the surround feature to simulate a home theater system. Simply connect the subwoofer to the back of the TV. TV Rear Panel 1) Connect a white cable from the LEFT AUDIO OUTPUT on the back of the TV to the LEFT AUDIO INPUT on the amplifier.
- Page 20 Connecting to a Digital TV Receiver w/HDCP By inputting a high bandwidth digital content protection high definition picture source to the digital-in terminal of this television, high-definition pictures can be displayed on the screen in their digital form. (This terminal is for use in the future when high bandwidth digital content protection DTV decoders and DVD players and D-VHS are put on the market.) DTV Decoder After the connections have been made,...
- Page 21 Connecting to an AV Receiver using your television's V1 Smart Input By connecting your AV Receiver to your television's Vl Smart Input, you can watch picture sources from many different devices, without having to change or use the other input connections on your TV.
- Page 22 (For example, a JVC D-VHS VCR). LLINK refers to the IEEE1394-1995...
- Page 23 Language After the "JVC INTERACTIVE PLUG IN MENU" has been displayed, the TV automatically switches to the LANGUAGE settings. You can choose to view your onscreen menus in three languages: English, French (FranQais) or Spanish (Espadol).
- Page 24 Auto Clock Set Before you use any of your TV's timer functions, you must first set the clock. You may precisely set your clock using the XDS time signal broadcast by most public broadcasting stations. If you do not have this in your area, you will have to set the clock manually. See manual clock set below.
- Page 25 JVC onscreen menu system to customize your television viewing experience. Notes: • If you want to cancel the Auto Tuner Setup, press the MENU button.
- Page 26 _|ali[, [_-*111kvAvLe,]_ti[,IIm_vAm] [e,_'. [:__ You Can program your Eemote to Operate your cable bOX, Satellite receiver, VCR 0rDVD player by Using the instructions and Codes listed below. If the equipment does not respond to I any Of the Codes listed bel0w Or t0 the code Searc h functi0n, use the remote Contro I SuPplied by the manufacturer.
-
Page 27: Vcr Codes
The remote control is programmed with VCR codes for power on/off, play, stop, fast-forward, rewind, pause, record, channel up/down operation. 1) Find the VCR brand from the list of codes shown below. 2) Slide the first 2-way selector switch to "TV" and the other 2-way selector switch to "VCR". 3) Press and hold down the DISPLAY button, then enter the first code number listed with the 10 key pad. -
Page 28: Dvd Codes
The remote control is programmed with DVD codes for power on/off, play, stop, fast-forward, rewind, previous/next chapter, tray open/close, and stilllpause operation. 1) Find the DVD player brand from the list of codes shown below. 2) Slide the first 2-way selector switch to "TV" and the other 2-way selector switch to "DVD". 3) Press and hold down the DtSPLAYbutton, then enter the first code number listed with the 10 key pad. -
Page 29: Search Codes
Cable/Satellite Search Codes Function 1) Slide the first 2-Way Mode Selector switch to CATV. 2) Press and hold down the POWER button, then press the RETURN+/TV button for more than three seconds. 3) Release the RETURN+/TV button, then release the POWERbutton. 4) Press the POWERbutton on the remote, and see if the cable or satellite box responds. - Page 30 Certain symbols are used throughout this guide to help you learn about the features of your new television. The ones you will see most frequently are: Up and Down arrows mean press the CH+ or CH- buttons. Pressing the CH+ or CH- buttons let you: •...
-
Page 31: Onscreen Menu System
I i il'_l[o_ I_v_ L"_'_ T !'1 L(_v_"_ ;l_'_r Your television comes with JVC's onscreen menu system. The onscreen menus let you make adjustments to your television's operation simply and quickly. Examples of the onscreen menus are shown on the next page. Detailed explanations on using each menu follow later in this guide. - Page 32 Press the MENUbutton _i0ii PREVIOUS PREVIOUS PREVIOUS AUTO TUNER SETUP CLOCK SPEAKER { ON AUDIO _ FIX_ CHANNEL SUMMARY ON / OFF TIMER CENTER CH INPUT _OFF_ V-CHIP ATSC SOUND _iPCi_ LOCK CODE DIGITAL-IN { SIZE1 CONVERGENCE AUTO DEMO {OFF v NEXT PAGE NEXT...
-
Page 33: Auto Tuner Setup
The auto tuner setup function is described on page 25 as the interactive plug-in menu. If you need to run the auto tuner setup again, follow the steps below. Press the MENUbutton To AUTO TUNER SETUP IN ANALOG TUNER MODE _ CABLE •... -
Page 34: V-Chip
When a viewer attempts to watch a guarded channel, the following message appears: To watch a channel that you have locked, enter the Lock THIS cHANNEL IS LOCKED BY 1 Code using the !0 key pad. CHANNEL GUARD. If the wrong code is entered, the message PLEASE ENTER LOCK CODE "INVALID LOCK CODE!"... - Page 35 Unrated programming refers to any programming which does not contain a rating signal. Programming on television stations which do not broadcast rating signals will be placed in the "Unrated Programming" category. Examples of Unrated programs: • Emergency Bulletins • Locally Originated Programming •...
- Page 36 U.S. PARENTAL RATING SYSTEMS Programs with the following ratings are appropriate for children. TVY is Appropriate for All Children Programs are created for very young viewers and should be suitable for all ages, including children ages 2 - 6. 3 TVY7 is for Older Children Most parents would find such programs suitable for children 7 and above.
- Page 37 Press the MENUbutton To V-CHIP V-CHIP _ OFF F I I SET US TV RATINGS • • To operate (lock icon I_ appears) SET MOVIE RATINGS _ SET CANADIAN RATINGS Press ZEROto access the V-Chip menu SET CANADIAN RATINGS FRE _ UNRATED _VIEW _J •...
- Page 38 (J NR- Not Rated This is a film which has no rating. In many cases these films were imported from countries which do not use the MPAA ratings system. Other NR films may be from amateur producers who didn't intend to have their film widely released. NR (Not Rated) Programming may contain all types of programming including...
- Page 39 3 E - Exempt Exempt programming includes: news, sports, documentaries and other information programming, talk shows, music videos, and variety programming. (3 C - Programming Intended for Children Violence Guidelines: There will be no realistic scenes of violence. Depictions of aggressive behavior will be infrequent and limited to portrayals that are clearly imaginary, comedic or unrealistic in nature.
-
Page 40: Set Lock Code
Channel guard and V-Chip settings are protected by a four-digit lock code. Your TV comes preset with a lock code of "0000".You may change the code to any four-digit number you wish. To change the lock code, follow the steps below. ii!l_ i!iL c _ i;... - Page 41 This TV has three color projection tubes: one for red, green, and blue. When mixed together in the proper portions, the output of these three color tubes can produce any color. To produce these colors, however, the beams must be precisely aligned over each other so that the colors can be mixed.
- Page 42 Manual Press the MENU button To CONVERGENCE • I_ To enter To choose MANUAL • I_ To enter If all the lines are white, no convergence adjustment necessary, If not, you need to perform the manual color convergence below. Select the location you want to adjust by using the number buttons on the remote control.
-
Page 43: Auto Demo
r-'T!T_Im]'_ Your TV is equipped with D.I.S.T 1500i. This feature allows you to view the demonstration picture quality with D.I.S.T 1500i on or off. Press the MENU button h. PREVIOUS To AUTO DEMO AUTO TUNER SETUP To turn AUTO DEMO ON CHANNEL SUMMARY V-CHIP... -
Page 44: Closed Caption
Many broadcasts now include an onscreen display of dialog called closed captions. Some broadcasts may also include displays of additional information in text form. Your television can access and display this information using the closed caption feature. To activate the closed caption feature, follow the steps below. - Page 45 Digital Manual Setting Press the MENUbutton @_L _ _APT! IN DIGITAL To CLOSED CAPTION SERVICE TYPE 1OFF • • To enter CC DISPLAY { MANUAL To SERVICE TYPE FONT/TYPE COLOR _ • • To select 1, 2, 3, 4, 5, 6 or OFF To CC DISPLAY PRESS_TO FINISH...
-
Page 46: Auto Shut Off
v_,yr[_] _-1 _1!"1_ jell| This function automatically shuts off your TV when there is no signal from the channel the TV is on. Press the MENUbutton PREVIOUS LANGUAGE _f'4_ FRAN. ESP. To AUTO SHUT OFF CLOSED CAPTION_ To turn ON or OFF I AUTO SHUT OFF _OFF XDS ID... -
Page 47: Atsc Monitor Out
V-'_I _o,] I_'_ L ';3"Tt[I'7_'_ [oZ!'Ti You can select the aspect mode for ATSC from 4:3 or 16:9. Press the MENU button PREVIOUS To ATSC MONITOR OUT LANGUAGE FRAN. ESP. • • To select 4:3 or 16:9 CLOSED CAPTIONF _,UTO SHUT OFF 40FF_ XDS ID _ON_... -
Page 48: Front Panel Lock
la'_I "._I II_,_ This allows you to lock the keys on the front of the TV, so that a child may not accidentally change your viewing preferences. Press the MENUbutton _' PREVIOUS To FRONT PANEL LOCK NOISE MUTING _ON_ 4 I_ To turn ON or OFF FRONT PANEL... -
Page 49: Position Adjustment
I'.,Z_'_ r.,T_lrr_;_'i'T'_! Position adjustment allows you to adjust the position of the picture on the screen vertically when the aspect is set to panorama, cinema, or full. Press the MENUbutton To POSITION ADJUSTMENT • • To enter Ay •• To adjust the position Press the MENUbutton to finish Notes: •... -
Page 50: Tv Speaker
vll_,,'_'l If your TV is connected to a stereo system, you can turn off the TV speakers and listen to the audio through your stereo. Press the MENUbutton * PREVIOUS To TV SPEAKER TV SPEAKER 4 ON 4 I_ To turn the TV's speakers ON or OFF FIX_ T AUDIO CENTER CH INPUT... -
Page 51: Atsc Sound
You can select the optical digital sound output, either PCM or Dolby Digital when your TV is connected to an amplifier that has Dolby Digital decoder. If you select Dolby Digital, you can enjoy listening in 5.1ch sound when watching digital broadcasts. @ ['_ :l_'hakSST Press the MENUbutton... - Page 52 These settings allow you tochange and adjust the way the picture appears onyour television. TINT Tint a llows you toadjust the levels ofred and green i nyour TVpicture. COLOR The color function lets you make all the colors in the TV picture appear either more vivid or subtle.
-
Page 53: Color Temperature
You can decide how strong ordull t he colors appear onthe TVscreen. Press the MENU button To COLOR TEMPERATURE _" PREVIOUS DYNAMIC 4 • To enter TINT 00 } COLOR 00 _ PICTURE _+10! BRIGHT 00 _ 411, To set LOW or HIGH DETAIL {+05 COLOR... -
Page 54: Natural Cinema
Natural Cinema corrects the problem of blurred edges which may occur when viewing a program originally shot on film (such as motion pictures) or animation. If you notice blurring at the edges of these programs, press NATURAL CINEMAand set it to AUTO. Natural Cinema helps correct conversion errors that occur when film, which is shot at 24 frames-per-second, broadcast at the television rate of 30 frames-per-second. -
Page 55: Reset
_"_ I _'-_ql'_ These settings allow you to change and adjust the sound on your television. BASS - You can increase or decrease the level of low-frequency sound in the TV's audio with the bass adjustment. TREBLE - Use treble to adjust the level of high-frequency sound in your TV's audio. -
Page 56: A.h.s
V-,!-" I!,.'] A.H.S. - Adds a more spacious surround sound. Music gives basic effect and movie for more effect. If you do not want more surround sound, select off. _ ::r'_ SOUN#6 UtST Press the MENU button PREVIOUS To A.H.S. I A.H.S. -
Page 57: Set Clock
The set clock function is described on page 24 as the interactive ptug-in menu. You can choose to set the clock automatically, or manually. If you need to set the clock again, follow the steps below. Press the MENUbutton To SET CLOCK •... -
Page 58: On/Off Timer
[o)'TY£o]iln The on/off timer lets you program your television to turn itself on or off. You can use it as an alarm to wake up, to help you remember important programs, or as a decoy when yodre not home. Press the MENUbutton ON TIME 7100 PM To ON/OFF TIMER... -
Page 59: Split
I_v_ ['!I [ _ _ I_'I'_-_'_I Your television has two kinds of screen: SPLIT (2 channels) and INDEX (12 channels). Note: After you press any multiscreen button, if you press the MENUbutton, only the picture adjust screen will appear. Activate the split-screen option by pressing SPLIT on the remote control. -
Page 60: Multi Screen Function
Cable Box Note: The Multi-Screen function may not operate when used with certain cable boxes. This is because while some models of cable boxes may receive up to 181 channels, and may only send the signal from one channel to your television. (Please refer to diagram on page 14). For the Multi screen function to operate correctly, it must have access to all available channels. -
Page 61: Power
I".Z71"_3 Turns the TV on or off. Press the POWERbutton I_[!1111,"FJ11 [,] II_!i I".,_i_ :l'_([(_Tt_m Use the number buttons on the remote controi to move directly to a specific channel. For example, to move to channel 7: 0 (Zero) 7 (Seven) Note: When you select the digital channel, first press the DCS button, next press the number buttons. -
Page 62: Volume
Use these buttons to raise or lower the TV's volume level. The RETURN+/Tv button has three functions: Return - Returns to the channel viewed just before the channel currently onscreen. Return+ - Lets you program a specific channel to return to while scanning through the channels using the CH+ and CH- buttons. -
Page 63: Video Status
The video status button gives you a choice of four TV picture display settings, including a display of your own preferences. Standard - Resets the picture display to the factory settings. Dynamic - Gives a vivid picture with better contrast when viewing in a brightly lit room. -
Page 64: Display
The display screen shows the current status of timers, inputs, and XDS ID. Press the DISPLAYbutton The screen to the right shows the following information: KLVX • The current channel or AV input (Channel 05) JAzZ FESTIVAL • The current time (12:20 pm) 12_20 PM •... -
Page 65: Aspect
This f eature will h etp y ou adjust the picture you are watching togive you the best possible picture quality. PANORAMA - With this ratio a normal REGULAR - The regular ratio is used 4:3 aspect picture is stretched to fit the when you want to watch a 4:3 broadcast dimensions of the 16:9 aspect screen. -
Page 66: Aspect Ratios
Press the ASPECT button • By pressing the ASPECT button, you can change the size. When you change the aspect ratios, it is different from their broadcast or recorded program. NTSC, 480i, 480p, HDCP 480p HD, HDCP 1080i 720P, HDCP 720p Notes: •... -
Page 67: Tv/Catv Slide Switch
You can control a VCR or DVD player with the buttons on the lower part of the remote controI. Move the slide switch to VCR or DVB to operate. Notes: • The remote is preset with the code 000 to control JVC-brand VCR's. For any other manufacturer's brand VCR, please see the code chart and instructions on page 27. -
Page 68: Digital Ch (Dcs)
When you choose the digital channel, first press the Digital Ch (DCS) button, then press the number buttons on the remote control. For example, to move to channel D23: Press the DIGITALCH (DCS) button Press 2 (two) Press 3 (three) _"]"rl,'l[o] i 'W1'_ I _fZ - The main channel sometimes has minor channels (Sub Channels). -
Page 69: Ilink/Timer
lllll_l_il iLINK Timer has four menus - Timer, Timer List, Controller and Device. By connecting a D-VHS VCR with an iLINK cable, you can set the timer easily. Notes: • If the iLINK is not connected, "Controller" and "Device" will not appear. •... -
Page 70: Vcr Buttons
Controller You can operate a D-VHS VCR connected with an iLINK cable by using this controller. Notes: • If the iLINK is not connected, the Controller OSD will not appear. • If you want to stop the recording on the D-VHS VCR, press the • (stop) button. •... - Page 71 Timer You can set the two timers: Record and view. The timer starts the recording or turns to the channel you set for it automatically. Press the iLINK/TIMER button • • To TIMER Timer List Cont roller Device Set Timer •...
- Page 72 Timer List When you want to confirm the timer you set or edited, or delete the timer setting, use this function. Timer Edition Press the iMNK/TIMERbutton • I_ To TIMER LIST Timel AI, V To select the timer list you want to edition Press the OK button •...
- Page 73 I:l'.,z_ You can set the recording timer or viewing timer by selecting the program from the Easy Programming Grid (EPG). Notes: • The EPG function will only work when you are receiving digital programming only. • The EPG will not show the correct time and date if you have not performed the set clock function on your television.
- Page 74 Easy Rec Timer - Edit You can edit (change to view) or delete the Easy Rec Timer you set. Press the EPG button To select the time zone To select the channel Press the OK button The detail information of the program appears. To Easy View or Delete Press the OK button When you change to Easy View, the _...
- Page 75 When you set the Easy View Timer, the digital program you set the timer for turns on automatically. Press the EPG button • • To select the time zone To select the channel Press the OK button The detail information of the program appears.
-
Page 76: Osd Warning
This OSD warning appears when the digital channel that you have selected is too weak to receive or no signal is being detected for that channel. The position of the OSD warning wilI move automatically every two seconds to prevent the screen from burn-in. See page 6. I_11 _I-_] _..1 i_1 This OSD warning appears on the television when the television is receiving a carrier signal, but the carrier signal does not contain any broadcast programming. - Page 77 There is no power * See if the power cord became unplugged. • Check for a blown fuse or circuit breaker or a power outage. There is no picture * The antenna could be disconnected. or sound * The input mode could be set improperly. See page 61.
- Page 78 square appears * It appears when you are operating the Auto Convergence. If not, then this may be a problem with the Auto Convergence. Contact a service agent. Check the fan on the back of the TV and make sure nothing has obstructed entered...
-
Page 79: Warranty
Commonwealth of Puerto Rico. WHAT WE WILL DO: If this product is found to be defective within the warranty period, JVC will repair or replace defective parts at no charge to the original owner. Such repair and replacement services shall be rendered during regular business hours by JVC authorized service centers. - Page 80 OF ANY IMPLIED WARRANTIES, INCLUDING THE IMPLIED WARRANTY OF MERCHANTABILITY, IS LIMITED TO THE DURATION OF THE EXPRESS WARRANTY HEREIN. JVC SHALL NOT BE LIABLE FOR ANY LOSS OF USE OF THE PRODUCT, INCONVENIENCE, OR ANY OTHER DAMAGES, WHETHER DIRECT, INCIDENTAL CONSEQUENTIAL (INCLUDING,...
- Page 81 To prevent electrical shock, do not open the cabinet. There are no user serviceable parts inside. Please refer to qualified service personnel for repairs. Accessories To purchase accessories for your JVC product, please call toll free:l (800) 882-2345 or on the web at www.JVC.com...
-
Page 82: Specifications
Model AV.65WP94 AV.56WP94 Type Rear Projection Television Reception Format NTSC, BTSC System (Multi-Channel Sound) ATSC Terrestrial Reception Range VHF 2 to 13, UHF 14 to 69 Sub, Mid, Super, Hyper and Ultra bands (180 channel frequency synthesizer system) Power Source AC 120V, 60 Nz Power Consumption 320W... - Page 83 COMPANY OF AMERICA JVC CANADA, INC. 21 Finchdene Square Division of JVC Americas Corp. Scarborough, Ontario 1700 Valley Road Canada, MIX 1A7 Wayne, New Jersey, 07470...