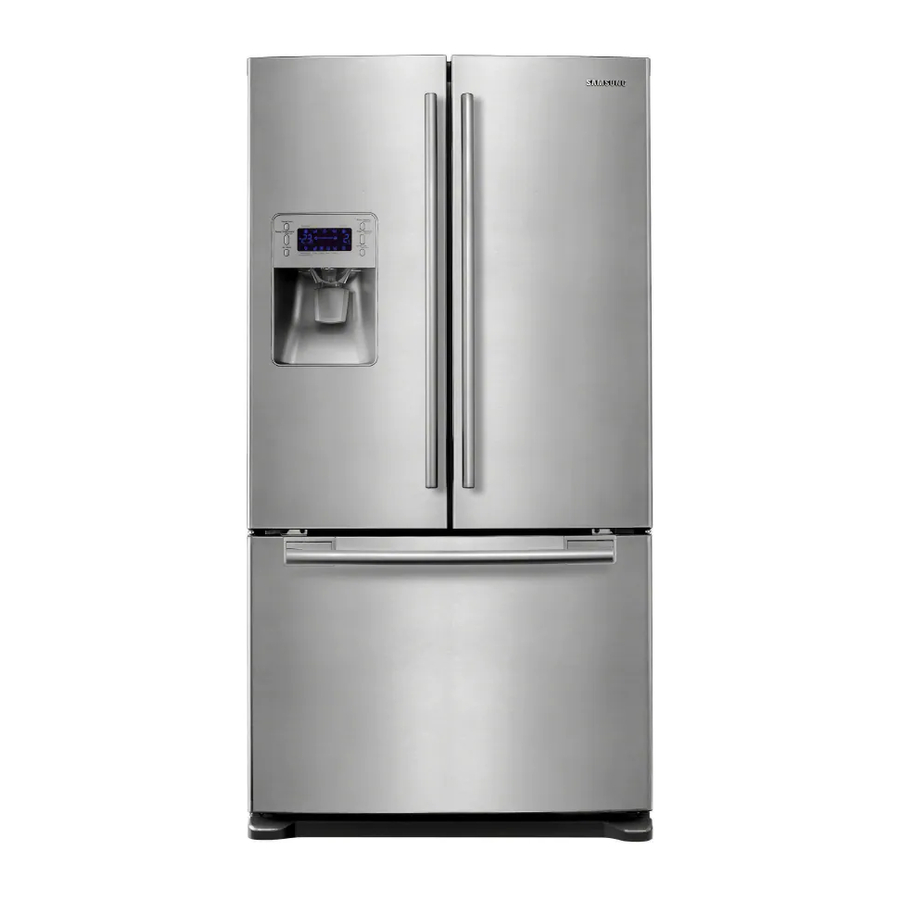
Samsung RF268AB User Manual
Hide thumbs
Also See for RF268AB:
- Quick start manual (8 pages) ,
- User manual (84 pages) ,
- User manual (42 pages)

Related Manuals for Samsung RF268AB


Summary of Contents for Samsung RF268AB
- Page 1 Thank you for purchasing this Samsung product, To receive more complete service, please register your product at www. samsu ng.com/recj ister...
-
Page 2: Key Features Of Your New Refrigerator
F ofrgor or Fo turot of your KEY FEATURES OF YOUR NEW REFRIGERATOR Your Samsung French Door Refrigerator comes equipped with various innovative storage and energy-efficient features. , Twin Cooling System The Refrigerator and Freezer have separate evaporators. Due to this independent... -
Page 3: Safety Information
SAFETY INFORMATION Before using your new Samsung French Door Refrigerator,please read this manual thoroughly to ensure that you know how to safely and efficiently operate the features and functions that your new appliance offers. This appliance is not intended for use by persons (includingchildren)with reduced physical, sensory or mental capabilities, or lack of experience and knowledge, unless they have been given supervision or instruction concerning use of the appliance by a person responsible for their safety. -
Page 4: Caution Signs For Installation
nforrn t on • If the wall socket is loose, do not insert the power plug. - There is a risk of electric shock of fire. • Do not use a cord that shows cracks or abrasion damage along its length or at either end. •... - Page 5 Lamp Cover and LED Lamp by ® yourself. - Please contact your service agents, • If any dust or water is in Refrigerator, pull out power plug and contact your Samsung Electronics service center. - Otherwise there is a risk of fire CAUTION CAUTION SIGNS FOR USING •...
- Page 6 • Service warranty and Modification. - Any changes or modifications performed by a 3rd party on this finished appliance is not covered under Samsung warranty service, nor can Samsung be responsible for safety issues that result from 3rd party modifications.
-
Page 7: Setting Up Your French Door Refrigerator
Using the tilting pocket Removing the freezer accessories Food Storage Tips Cleaning the refrigerator Changing the interior lights Changing the water filter TROUBLESHOOTING 37 Troubleshooting WARRANTY 38 Water filter chart 39 Water filter certification i;!fl 40 Warranty on SAMSUNG refrigerator... -
Page 8: Getting Ready To Install The Refrigerator
First thing! Make sure that you can easily move your Refrigerator to its final location by measuring doorways (both width and height), thresholds, ceilings, stairways, etc. The following chart details the exact height and depth of Samsung French Door Refric erator. Overall Depth Height Model "E 77 Height "D"... -
Page 9: Setting Up The Refrigerator
SETTING UP THE REFRIGERATOR Now that you have your new Refrigerator installed in place, you are ready to set up and enjoy the features and functions of the appliance. By completing the following steps, your Refrigerator should be fully operational. 1. - Page 10 Door Refrgera or 2. Disconnect 2 connectors ( 3 ) at each side of the top cap and one connector ( 4 ) on the left side door. Remove the water line ( 5 ) while pressing the dark gray color part ( 6 ) of the water line coupler.
-
Page 11: Disassemble The Freezer Drawer
DISASSEMBLE THE FREEZER DRAWER 1. Take out the upper drawer by lifting it up. 2. Remove the tilting pocket ( 1 ) by pulling both support guards ( 2 ) upward at the same time. 3. Take out the lower basket( 3 ) by lifting the basket up from the rail system. - Page 12 up your Fron Door F ofr r tor REATTACHING THE REFRIGERATOR DOORS Assemble the Refrigerator doors 1. Reattach the lower left and right door hinges ( 12 ). With a Philips head screwdriver, insert and tighten the screw ( 10 ) into the lower left and right door hinges. With a allen wrench(3/16"), insert and tighten the 2 hex head bolts ( 11 ) into the lower left and right door...
- Page 13 REATTACHING THE REFRIGERATOR DOORS Connect the dispenser door tube ( 5 ) and then insert a clip on the coupler with pulling tube. Connect the connector ( 4 ) on the left side door and two connectors ( 3 ) at each side of the top cap.
-
Page 14: Assemble The Freezer Drawer
up your Fron Door ofr or tor ASSEMBLE THE FREEZER DRAWER 1. Pull out the rails fully on each side of the cabinet. 2. Attach the freezer door front onto the open slots on the sides. 3. Tighten 4 hex head bolts completely with a socket wrench(7/16"). - Page 15 ADJUSTING THE DOORS After putting the doors back on the refrigerator, make sure the refrigerator is level so that you can make final adjustments. If the Refrigerator is not level, it will not be possible to get the doors perfectly even, which may cause moisture condensation and increased energy bills.
-
Page 16: Making Minor Adjustments Between Doors
up your Fron Door F ofr r tor MAKING MINOR ADJUSTMENTS BETWEEN DOORS Remember, a level Refrigerator is necessary for getting the doors perfectly even. If you need help, review the previous section on leveling the Refrigerator. When the left When the left door is lower door is higher... -
Page 17: Adjusting The Freezer Drawer Level
ADJUSTING THE FREEZER DRAWER LEVEL Adjustment part Freezer Drawer 1. Locate the height-adjuster ( 1 ) in the freezer drawer. Unscrew the 8 Phillips screws ( 2 ) slightly to loosen the door. 2. Loosen the controller screw( 3 ) with a Phillips screwdriver(+). 3. -
Page 18: Checking The Water Dispenser Line
up your ron Door Aofr r tor CHECKING THE WATER DISPENSER LINE A water dispenser is one of the helpful features on your new Refrigerator. To help promote better health, the water filter removes unwanted particles from your water. However, it does not sterilize or destroy microorganisms. -
Page 19: Installing The Water Line
INSTALLING THE WATER LINE Connecting the water supply line to the refrigerator. There are several items that you need to purchase to complete this connection. You may find these items sold as a kit at your local hardware store. Refrigerator _"_ .... - Page 20 Door F ofrg r or Remove the filter cap ( 4 ) and insert the filter Cover filter. into the filter housing. Slowly turn the water filter 90 ° clockwise to align with the printing mark on the cover, locking the filter in position.
-
Page 21: Using The Control Panel
YronohDoor F ofr USING THE CONTROL PANEL Press the Energy Saver button for better energy efficiency. If water drops appear on the doors, turn Energy Saver the Energy Saver function off. Press the Freezer / Power Freeze button to set the Freezer to your desired temperature. You can set the temperature between -8°F and 8°F Freezer / Power Press and hold the Freezer / Power Freeze Button for 3 seconds, to speed up the time needed to... - Page 22 (}poratn USING THE CONTROL PANEL Freezer Temp ( 1 ) indicates the current Freezer temperature. Fridge Temp ( 2 } indicates the current Refrigerator temperature. If you do not press any button, the freezer & fridge temperature indicator will turn off in a few seconds. If any button is pressed, the display will light up again.
-
Page 23: Controlling The Temperature
Energy saver _2 This icon will light up when you press the Energy Saver button. The Energy Saver function automatically set to "ON" when power is supplied to the Refrigerator. If condensation occurs on the doors, turn the Energy Saver mode off. Lighting =8.,,, This icon will light up when you press the Lighting... -
Page 24: Using The Cold Water Dispenser
Once the normal set temperatures are reached, the blinking will stop. If the blinking continues for a long period of time, please contact a Samsung Electronics Service Center. USING THE COLD WATER DISPENSER Press the Ice type or water button to select the type of you want Using the ice Dispenser Placea glass underneaththe ice dispenser and push gently againstthe dispenserleverwith your glass. - Page 25 In case ice doesn't come out, pull out the ice bucket and press the test button located on the right side of ice maker. CAUTION Do not press the test button continuously when the tray is filled with ice or water. Water may overflow or ice jamming may occur.
-
Page 26: Parts And Features
r FronchDoorRofr Oporatn PARTS AND FEATURES Use this page to become more familiar with the parts and features of the Refrigerator. Light Auto Door Closer Dairy FF Ice-Maker Compartment _} Water Filter Foldable-Shelf Tempered Glass Slide-Shelf helves @ Egg Container Vertical Hinged Door Bins _} Section... -
Page 27: Storing Food In The Refrigerator
STORING FOOD IN THE REFRIGERATOR The Samsung French Door Refrigerator has been designed to provide you with maximum space saving features and functions. Here are some of the customized compartments we have created to keep your food fresher longer. In order to further prevent odor from seeping into the ice compartment, stored food should be wrapped securely and as airtight as possible. - Page 28 Opor ncj USING THE COOL SELECT PANTRYpws The Cool Select Pantry Pwsis a full-width drawer with an adjustable temperature control. This pantry can be used for large party trays, dell items, pizzas, beverages or miscellaneous items. There is a temperature sensor which can adjust the amount of cold air allowed into the pantry.
-
Page 29: Removing The Refrigerator Accessories
REMOVING THE REFRIGERATOR ACCESSORIES 1. Door Bins & Dairy Compartment To remove - Simply lift the bin up and pull straight out. To relocate - Slide it in above the desired location and push down until it stops. Injury may occur if the door bins are not firmly assembled. CAUTION DO not allow children to play with bins. -
Page 30: Using The Doors
G ofrcjo ©por t ncjyoL 4. Cool Select Pantry pWs To remove the pantry - Pull the pantry out to full extension. Tilt up the front side of pantry and pull straight out. To relocate the pantry - Push the rails to the back of the Refrigerator. -
Page 31: Removing The Freezer Accessories
REMOVING THE FREEZER ACCESSORIES 1. Tilting Pocket To remove - Pull both brackets( 1 ) upward until you hear a clicking sound and remove the pocket To replace - Hook the ends of the pocket into both brackets ( 1 ) and push down until it locks into place. -
Page 32: Food Storage Tips
G Refrge Oporat ng yoL FOOD STORAGE TIPS DAIRY PRODUCTS Butter 2-3 Weeks 6-9 Months Wrap or cover tightly. Check date code. Most milk and similar products are sold in date-coded Milk 1-2 Weeks Not recommended cartons that indicate a products's peak freshness. Re-sealwith cap or wrap tightly. - Page 33 FISH ANDSHELLFISH Fish Fatty Fish (mackerel, 1-2 Days 2-3 Months trout, salmon) Keep in original wrapper and store in coldest part of refrigerator.Pack- Lean Fish (cod, flounder, age invapor-proof and moisture proof wrap for freezer. Freezeat 0°R 1-2 Days 6 Months etc) Thaw in refrigerator or Check date code.
-
Page 34: Cleaning The Refrigerator
G ofrcjo ©por t ncj7oL CLEANING THE REFRIGERATOR Caring for your Samsung Refrigerator prolongs the life of your appliance and helps keep it odor and germ-free. Cleaning the Interior Clean the inside walls and accessories with a mild detergent and then wipe dry with a soft cloth. You can remove the drawers and shelves for a more thorough cleaning. -
Page 35: Changing The Interior Lights
If are unsure CAUTIONabout changing the lights after reading through these directions, contact a Samsung authorized service center for help. The Replacement bulb for the freezer is available from your local home improvement or electronics store. -
Page 36: Changing The Water Filter
Water Filter For a replacement water filter, you can visit your local home improvement center or contact the Samsung Parts distributor. Be sure the replacement water filter has the SAMSUNG logo on the box and on the water filter. Link: http://www.samsungparts.com... - Page 37 Troub o hooI ng Check that the power plug is properly connected. Check the set temperature on the digital display is warmer than the freezer or fridge inner temperature. Try setting it to a lower temperature. Is the Refrigerator in direct sunlight or located near a heat source? Is the back of the Refrigerator too close to the wall and therefore keeping air from circulating? Check to see if the set temperature on the digital display is too low.
-
Page 38: Water Filter Chart
WATER FILTER CHART Performance Data Sheet For Samsung Model DA97=06317A Using Replacement Cartridge DA29-00003G This system has been tested according to NSF/ANSI Standards 42 and 53 for the reduction of the substances listed below. The concentration of the indicated substances in water entering the system was reduced to a concentration less than or equal to the permissible limit for water leaving the system, as specified in NSF/ANSI 42 and 53. -
Page 39: Water Filter Certification
Health Water Treatment Device Certificate Number O4 - 166O Date Issued: July 7, 2004 Date Revised: June 2, 2008 Trademark/Model Designation Replacement Elements Samsung DA61-00159A-B " DA29-00003 Samsung DA97-06317A DA29-00003G Manufacturer: Curio Incorporated ,ursuant to Section minants Microbiological Contaminants and Turbidity__... -
Page 40: Limited Warranty To Original Purchaser
Samsung or Samsung authorized service center. Samsung will repair or replace any part found to be defective, at our option and at no charge as stipulatedX herein, with new or reconditioned parts during the limited warranty period specified above. - Page 41 HASBEEN ADVISED OFTHEPOSSIBILITY O FSUCHDAMAGES. NORSHALLRECOVERY O FANYKIND AGAINST SAMSUNG BEGREATER INAMOUNT THANTHEPURCHASE PRICE OFTHEPRODUCT SOLDBY SAMSUNG ANDCAUSING THEALLEGED DAMAGE. W ITHOUT LIMITING THEFOREGOING, PURCHASER ASSUMES ALLRISKANDLIABILITY FORLOSS,DAMAGE ORINJURY TO PURCHASER ANDPURCHASER'S PROPERTY A NDTO OTHERS ANDTHEIRPROPERTY A RISING OUTOFTHEUSE,MISUSE ORINABILITY TO USETHISPRODUCT SOLDBYSAMSUNG NOTCAUSED DIRECTLY B YTHENEGLIGENCE O FSAMSUNG.
- Page 43 Gracias por adquirir un producto Samsung. Para recibir un servicio mas completo, registre su producto en www. samsu ng,com/reg ister...
- Page 44 Caracto ist c as do su nuovo of go ador CARACTERiSTICAS PRINCIPALES DE SU NUEVO REFRIGERADOR Su refrigerador Samsung de tres puertas esta equipado con multitud de caracteristicas innovadoras almacenamiento y eficiencia energ6tica. o Sistema de doble enfriamiento El refrigerador...
-
Page 45: Informacion De Seguridad
Como las siguientesinstruccionesde funcionamiento est_tndestinadasa varios modelos, las caracterfsticas de su refrigerador p uedendiferirligeramente de lasdescritasen estemanual.Sitienecualquierpregunta, p Ongase en contacto con nosotrosen el 1-800-SAMSUNG o busqueayudae informaciOn o nlineen www.samsung.com. Important safety symbols... - Page 46 nforrn o6n do ogurd d • Si el tomacorriente estuviera suelto, no enchufe el cable de alimentacion. - Existe riesgo de choque electrico o incendio. No use un cable agrietado o con dafios abrasivos en su Iongitud o extremos. No doble excesivamente ni coloque articulos pesados sobre el cable de alimentaci6n.
- Page 47 Si advirtiese la presencia de polvo o agua en el refrigerador, desconecte el cable de alimentaciOn y pOngase en contacto con su centro de servicio Samsung Electronics. - De Io contrario, existe riesgo de incendio, pREc c 6,SENALES DE PRECAUCION RELATIVAS AL USO...
- Page 48 - Cualquier cambio o modificaciOn realizada pot terceros sobre este electrodomestico acabado, no ester cubierta pot el servicio de garantia de Samsung ni seran responsabilidad de Samsung las cuestiones relativas a la seguridad resultantes de dichas modificaciones realizadas pot terceros, No bloquee las aberturas de ventilaci6n.
-
Page 49: Solucion De Problemas
Consejos 0tiles para el almacenaje de alimentos Limpieza del refrigerador Reemplazo de los focos interiores Reemplazo del filtro de agua SOLUCION DE PROBLEMAS Soluci0n de problemas DIAGRAMA DE CIRCUITO Cuadro del filtro de agua Certificaci0n del filtro de agua ii ;!i Garanfia del refrigerador SAMSUNG... - Page 50 PREPARATIVOS PARA INSTALAR EL REFRIGERADOR Felicidades pot la adquisiciOn de su refrigerador Samsung de tres puertas. Esperamos que disfrute de las caracteristicas y rendimiento de alta tecnologia que este nuevo electrodomestico tiene que ofrecer. Selecci6n del mejor emplazamiento para el refrigerador •...
-
Page 51: Ajuste Del Refrigerador
AJUSTE DEL REFRIGERADOR Ahora que tiene su nuevo refrigerador instalado y en su sitio, esta preparado para ajustarlo y disfrutar de todas las caracteristicas y funciones de las que dispone el electrodomestico. Completando los siguientes pasos, su refrigerador debera estar totalmente operativo. - Page 52 2.Desconecte los2 conectores (3 )situados a cadalado delatapasuperior y elconector ( 4 ) situado sobre lapuerta dellado izquierdo. Desmonte latomadeagua (5 )mientras presiona l apieza decolorgrisoscuro ( del conector de la toma de agua. ECA_UCSi el acoplador incluye una 16Nabrazadera roja, debera retirarla antes de retirar el tubo.
- Page 53 MONTAR LA GAVETA DE LA NEVERA 1. Extraiga el compartimento superior levantandolo. 2. Extraiga el compartimento inclinable ( 1 ) tirando hacia arriba de ambos soportes de protecci6n ( 2 ) al mismo tiempo. 3. Saque la cesta inferior ( 3 ) levantandola del sistema de railes.
-
Page 54: Desmontaje De Las Puertas Del Refrigerador
rofr or dordotro DESMONTAJE DE LAS PUERTAS DEL REFRIGERADOR Montar las puertas del refrigerador 1. Vuelva a montar las bisagras inferiores izquierda y derecha de la puerta ( 12 ). Con la ayuda de un destornillador de cabeza Philips, introduzca y apriete el perno ( 10 ) en las bisagras inferiores izquierda y... - Page 55 DESMONTAJE DE LAS PUERTAS DEL REFRIGERADOR 4. Conecte el tubo de la puerta del dispensador ( 5 ) y, a continuaciSn, introduzca un clip en el conector tirando del tubo. Fije el conector ) situado en la puerta del lado izquierdo y los dos conectores ( 3 ) situados...
- Page 56 rofr or dor doIro MONTAR LA GAVETA DE LA NEVERA 1. Extraiga completamente los railes de cada lado de la carcasa. 2. Fije la puerta de la nevera sobre las ranuras abiertas de los lados. 3. Apriete por completo los 4 pernos de cabeza hexagonal la ayuda de una Ilave tubular (7/16").
-
Page 57: Ajuste De Las Puertas
AJUSTE DE LAS PUERTAS Tras volver a colocar las puertas del refrigerador, aseg0rese de que el electrodomestico este nivelado para poder realizar los ajustes finales. Si el refrigerador no esta nivelado, no sera posible conseguir que las puertas esten perfectamente igualadas, que podria provocar condensaci6n... - Page 58 nst c On rofr or dordotros REALIZACION DE AJUSTES MENORES ENTRE PUERTAS Recuerde que es necesario que el refrigerador este nivelado para Iograr que las puertas esten igualadas forma uniforme, Si necesita ayuda, revise las secciones anteriores relativas a la nivelaci6n del refrigerador, Cuando la Cuando puerta izquierda...
-
Page 59: Ajuste Del Nivel De La Gaveta De La Nevera
AJUSTE DEL NIVEL DE LA GAVETA DE LA NEVERA Pieza de ajuste Gaveta de la nevera 1. Localice el regulador de altura ( 1 ) en la gaveta de la nevera. Desenrosque parcblmente los 8 pernos Philips ( 2 ) para aflojar la puerta. 2. -
Page 60: Chequeo De La Toma De Agua Del Dispensador
rofrgor dor dotro CHEQUEO DE LA TOMA DE AGUA DEL DISPENSADOR Un dispensador es s61o una de las 0tiles caracteristicas de su nuevo refrigerador. Para fomentar una mejor salud, el filtro elimina particulas no deseadas del agua. Sin embargo, no esteriliza ni destruye microorganismos. - Page 61 INSTALACI6N DE LA TOMA DE AGUA DEL DISPENSADOR Conexi6n de la toma de agua al refrigerador Debera adquirir varios elementos para realizar esta conexi6n. Podra encontrar estos elementos a la venta en forma de kit, en su ferreteria habitual. Refrigerador _"_ ,, Tubo de cobre de 1A"...
- Page 62 4. Retire la tapa del filtro ( 4 ) e introd0zcalo en su Cubiertadel filtro alojamiento. Gire lentamente el filtro de agua 90 ° en sentido horatio para alinearlo con la marca impresa situada en la cubierta, bloqueando el filtro en su posici6n.
-
Page 63: Uso Del Panel De Control
USO DEL PANEL DE CONTROL Energy Saver Pulse el botOn Energy Saver para mejorar el rendimiento energetico. Si se produjese goteo de agua en las puertas, desactive la funcion Energy Saver (Ahorro de energfa). (Ahorro de energia) Pulse el boton Freezer / Power Freeze (Heladera / Congelacion rb.pida) para ajustar la heladera a la temperatura deseada. - Page 64 Funoonam onto do rofrgor ctor dotrocpuortas USO DE LA PANTALLA DIGITAL Temperatura de la heladera ( 1 ) indica la temperatura actual en la heiadera. Temperatura de la heladera ( 2 ) indica la temperatura actual en el refrigerador. Si no pulsa ning0n bot6n, los indicadores de temperatura de la heladera y el refrigerador se apagaran...
-
Page 65: Control De La Temperatura Del Refrigerador
Ahorro de energia Este icono se iluminara al pulsar el bot6n Energy Saver (Ahorro de energia). La funci6n de ahorro de energia se activara automaticamente en "ON" al conectar el refrigerador. Si se produjese condensaci6n las puertas, desactive la funci6n de Ahorro de energia. Iluminaci6n Este icono se iluminara al pulsar el bot6n Lighting (lluminaci6n). - Page 66 Si continua parpadeando duranteun perbdo de tiempo prolongado,pOngaseen contacto con su centro de servicio Samsung Electronics. USO DEL DISPENSADOR DE AGUAFRIA Pulse el bot6n de Tipo de hielo o agua segt_n sus preferencias.
- Page 67 En caso de que el hielo no salga, extraigael depOsitode hieloy pulseel botOnde prueba situado en el lateralderecho de la maquinade hielo. PRECAUCION No pulse el botOnde prueba de forma continua cuando la bandeja esta Ilenade hielo o agua. Podrfaproducirseun derramamientode agua oun bloqueo de hielo. Uso normal ParaIlenarel depOsitode hieloa su maximacapacidad tras la instalaciOn, a seg0resede seguir los pasos expuestos a continuaciOn.
-
Page 68: Partes Y Funciones
Funoonam onto do rofrgor dor dotrochuortac PARTES Y FUNCiONES Use esta pagina para familiarizarse con las partes y funciones dei refrigerador. Cierre automatico de puerta Maquina de hielo del Compartimento refrigerador para bcteos (_ Filtro de agua Balda plegable Baldas de cristal templado Huevera (_ partimentos... -
Page 69: Almacenaje De Alimentos En El Refrigerador
ALMACENAJE DE ALIMENTOS EN EL REFRIGERADOR El refrigerador Samsung de tres puertas ha sido dis@ado para proporcionarle caracteristicas y funciones de ahorro maximo de espacio. Aqui tiene algunos de los compartimentos personalizados que hemos creado para mantener sus alimentos frescos durante periodos de tiempo ma.slargos. Para evitar la penetraciOn de olores en el interior del compartimento del hielo, los alimentos almacenados debe@.nserenvueltos adecuadamente, tan hermeticos como sea posible. - Page 70 Funconans entode ef ge ador det espuortas USO DEL COOL SELECT PANTRY pcus El Cool Select Pantry Pwses una gaveta de ancho completo que dispone de control de temperatura ajustable. Este compartimento puede usarse como bandeja grande para fiestas, delicatesen, pizzas, bebidas o articulos diversos.
-
Page 71: Desmontaje De Los Accesorios Del Refrigerador
DESMONTAJE DE LOS ACCESORiOS DEL REFRIGERADOR 1. Compartimento de puerta y para I&cteos Para desmontarlo - Simplemente levantelo y extraigalo directamente. Para volver a montarlo - Deslfcelo sobre el emplazamiento deseado y pulse hasta encajarlo en posicion. Si los compartimentos de la puerta no estan montados de forma pRECAUCt6Nfirme, pueden producirse lesiones.No monte un compartimento Ileno de alimentos. -
Page 72: Uso De Las Puertas
Funoonam ento de refrger dor detrecpuertas 4. Cool Select Pantry PLUS Para extraer el compartimento - Extraiga toda la extension de la gaveta, incline hacia arriba la cara frontal dei compartimento y extraigaio directamente hacia fuera. Para voiver a co iocar ei compartimento - Empuje los rieies hacia la parte posterior dei refrigerador. - Page 73 DESMONTAJE DE LOS ACCESORIOS DEL REFRIGERADOR 1. Compartimento Inclinable Para desmontarlo - Tire de hacia arriba de los soportes ( 1 ) hasta que oiga el "clic" y retire el compartimento. Para volver a montarlo - Enganche los extremos compartimento en ambos soportes ( 2 ) y empuje hacia abajo hasta que encaje en...
- Page 74 Funoonam onto do refrgor ctor dotrocpuortas CONSEJOS 0TILES PARA EL ALMACENAJE DE ALIMENTOS Mantequilla 2-3 semanas 6-9 meses Envuelvalao tb, p ela hermeticamente. Chequeelafecha. La mayoriade laleche y productos similaresse venden Leche 1-2 semanas No recomendado en cajas de carton fechadasque indicanel periodo de maximafrescura de un producto.
- Page 75 PESCADO Y MARISCO Pescado Pescado azul (caballa, 1-2 dias 2-3meses Mantengaloen su envoltorio original e introdLizcaloen la parte mas fria trucha, salmon) del refrigerador.IntrodLizcaloen plastico para congelados con protec- Pescado blanco (ba- 1-2 dias 6meses ciOncontra elvapor y la humedad. Congelelo a 0° F (-18° C). Desconge- calao, lenguado, etc.) lelo en el refrigeradoro bajo chorro de agua.
-
Page 76: Limpieza Del Refrigerador
Funconam o nto do refrgor dor dotrocpuortas LIMPIEZA DEL REFRIGERADOR Los cuidados de su refrigerador Samsung de tres puertas prolongaran su vida Otily ayudaran a mantenerlo libre de olores y germenes, Limpieza del interior Limpie las paredes interiores y los accesorios con un detergente suave y, a continuacion, enjuague y seque con un patio suave. -
Page 77: Reemplazo De Focos Interiores
Existen focos de repuesto para la heladera a su disposici0n en su tienda de reformas o electr0nica. Use focos de tama_o E26 y un maximo de 60 vatios. El cambio de la lampara LED del refrigerador debe realizarlo un centro Samsung autorizado. Reemplazo de los focos interiores de la gaveta de la nevera 1. -
Page 78: Reemplazo Del Filtro De Agua
Para reemplazar el filtro del agua, puede visitar su centro de bricolaje habitual o ponerse en contacto con el distribuidor de repuestos de Samsung. Aseg0rese de que el filtro de agua de repuesto dispone del Iogotipo SAMSUNG en la caja yen el propio filtro. - Page 79 do prob • tChequee que la toma de alimentaci0neste correctamenteconectada. Chequeesi la temperaturade ajuste de la pantalladigitales mayor que la temperaturainteriorde la heladerao refrigerador. Intenteajustarloa una temperaturainferior. t Estainstaladoel refrigeradorbajo la luzdirecta del sol o junto a una fuentede calor? t Estala parteposteriordel refrigeradordemasiadopegada a la paredy, por tanto, impidiendola circulaci0ndel aire? Chequeesi la temperaturade ajuste de la pantalladigitales demasiadobaja.
-
Page 80: Cuadro Del Filtro De Agua
Hoja de datos de rendimiento para el modelo DA97=06317A de Samsung Uso del cartucho de repuesto DA29-00003G Este sistema ha sido probado seg0n los estandares 42 y 53 de la NSF/ANSI para la reducci0n de las sustancias que se enumeran a continuaci0n. La concentracion de las sustancias indicadas en la entrada de agua del sistema fue reducida a una concentracion inferior o igual al limite permitido para la salida de agua del sistema, tal y como especifican en los estandares 42 y 53 de la NSF/ANSI. - Page 81 Aguas N.mero de certificado 04 - 1660 Fecha de emisi.n: julio 7, 2004 Fecha de revisi.n: junio 2, 2008 Designaci.n de Marca comercial/Modeio Elementos de reemplazo Samsung DA 61-00159 A,B ....Samsung DA97-063 )03G Fabricante: Los dist prueba conti_rme a la Secci.n...
- Page 82 REFRIGERADOR SAMSUNG (26 PIES COBICOS) DE CAPACIDAD Y MAYOR) GARANT/A LIMITADA AL COMPRADOR ORIGINAL Este producto de marca Samsung, suministrado y distribuido por Samsung Electronics America, Inc. (Samsung) y entregado nuevo, en se caja de cart6n original al comprador original, esta garantizado...
- Page 83 CONCRFTO QUEPUDIERAN RESULTAR P ERTINENTES TRASLOSPER/ODOS E XPLJCITOS DEGARANTiA INDICADOS CONANTERIORIDAD. TAMPOCO SERANLEGALMENTE V lNCULANTES P ARASAMSUNG OTRAS GARANTiAS EXPL/CITAS U OFRECIDAS P ORPERSONAS, FIRMAS O EMPRESAS ENRELACION A ESTEPRODUCTO. SAMSUNG NOSERALEGALMENTE R ESPONSABLE DELA PERDIDA DE INGRESOS O BENEFICIOS, LA NOMATERIALIZACION DEAHORROS U OTROS BENEFICIOS, O DECUALQUIER...
- Page 84 QUESTIONS OR COMMENTS? COU.T.Y CALL O. WS_T uSO.U.EAT WRITE 800-SAMSUNG Samsung Electronics America, Inc. 400 Valley (800-726-7864) www.samsung.com Road Suite 201 Mr. Arlington, NJ 07956 Samsung Electronics Canada Inc. Customer 800-SAMSUNG CANADA www.samsung.com/ca Service, 55 Standish Court Mississauga, Ontario (800-726-7864) LSR 4B2 Canada Code No.