Table of Contents
Advertisement
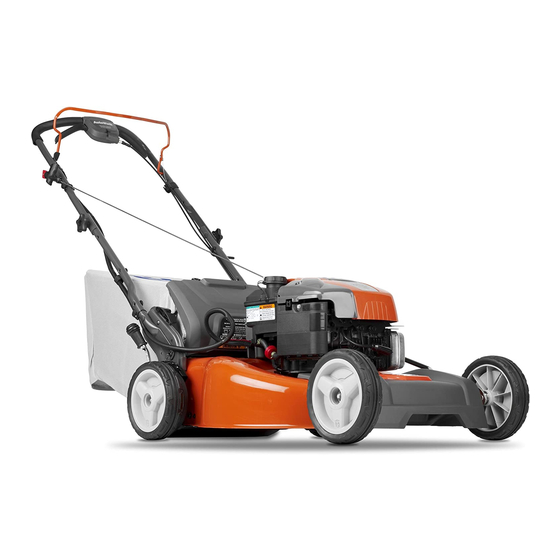
Operator's Manual
Gasoline containing up to 10% ethanol (E10) is accept-
able for use in this machine. The use of any gasoline ex-
ceeding 10% ethanol (E10) will void the product warranty.
Owner's Manual
HD725E / 961430087
Please read the operator's manual carefully and make sure
you understand the instructions before using the machine.
532 44 59-02 Rev. 2
English
Advertisement
Table of Contents

Related Manuals for Husqvarna HD725E


Summary of Contents for Husqvarna HD725E
- Page 1 The use of any gasoline ex- ceeding 10% ethanol (E10) will void the product warranty. Owner’s Manual HD725E / 961430087 Please read the operator's manual carefully and make sure you understand the instructions before using the machine.
- Page 2 MEETS CPSC SAFETY REQUIREMENTS Husqvarna rotary walk-behind power lawn mowers conform to the safety standards of the American National Standards Institute and the U.S. Consumer Product Safety Commission. CONGRATULATIONS on your purchase of a new lawn mower. It has been designed, engineered and man u fac tured to give you the best possible dependability and performance.
-
Page 3: Product Specifications
III. CHILDREN Tragic accidents can occur if the operator is not alert to the presence of children. Children are often attracted to WARNING: This lawn mower is equipped with an the machine and the mowing activity. Never assume that internal com bus tion engine and should not be children will remain where you last saw them. -
Page 4: Table Of Contents
TABLE OF CONTENTS SAFETY RULES ............2-3 OPERATION ............8-12 PRODUCT SPECIFICATIONS ........3 MAINTENANCE ........... 13-17 CUSTOMER RESPONSIBILITIES ......3 SERVICE AND ADJUSTMENTS ......18-19 SAFETY AND INSTRUCTIONAL DECALS ....4 STORAGE ............20-21 ASSEMBLY ............... 4-6 TROUBLESHOOTING ..........22 PRODUCT OVERVIEW .......... -
Page 5: Assembly
ASSEMBLY TO INSTALL ATTACHMENTS MOWING PO SI TION Your lawn mower was shipped ready to be used as a mulcher. To convert mower to bagging or discharging, see “TO CON VERT MOWER” in the Operation section of this man u al. TO RE MOVE LAWN MOW ER FROM CAR TON 1. - Page 6 ASSEMBLY TO PREPARE BATTERY NOTE: Your battery must be charged before you can start your lawn mower. 1. Open battery box (Figure 5). 2. Con nect battery charger con nec tor (male) to harness con nec tor (fe male). 3. Plug battery charger into 110 volt A.C. outlet. 4.
-
Page 7: Product Overview
PRODUCT OVERVIEW Figure 6 1. Drive control levers 8. Housing 2. Operator presence control bar 9. Air filter 3. Grass catcher 10. Gas filler cap 4. Single point height adjuster 11. Handle knob 5. Engine oil cap with dipstick 12. Auxiliary starter handle 6. -
Page 8: Operation
OPERATION OPERATION 2. Forward motion will stop when either the operator presence control bar or a drive control lever are ENGINE SPEED released. To stop forward motion without stop ping The engine speed was set at the factory for optimum engine, re lease a drive control lever only. -
Page 9: To Adjust Cutting Height
OPERATION TO ADJUST CUTTING HEIGHT All four wheels are adjusted by a single lever. 1. Pull adjuster lever toward wheel. To raise mower, move lever forward to desired position. To lower mower, move the lever toward the rear (Figure 10). Figure 11 1. -
Page 10: Before Starting Engine
OPERATION ADD GASOLINE BEFORE STARTING ENGINE IMPORTANT: Fill fuel tank to bottom of tank filler neck. Do ADD OIL not overfill. Use fresh, clean, regular unleaded gasoline Your lawnmower is shipped without oil in the engine. For with a minimum of 87 octane. Do not mix oil with gasoline. type and grade of oil to use, see “EN GINE”... -
Page 11: To Empty Grass Catcher
OPERATION TO START ENGINE USING KEY START TO EMPTY GRASS CATCHER 1. Lift up on grass catcher using the frame han dle NOTE: Due to protective coatings on the engine, a small (Figure 17). amount of smoke may be present during the initial use of the product and should be considered normal. -
Page 12: Mowing Tips
OPERATION MOWING TIPS MULCHING MOWING TIPS IMPORTANT: FOR BEST PERFORMANCE, KEEP MOWER HOUSING FREE OF BUILT-UP GRASS AND TRASH. SEE “CLEANING” IN THE MAINTENANCE SECTION OF THIS MANUAL. CAUTION: Do not use de-thatcher blade • The special mulching blade will recut the grass clippings attachments on your mower. -
Page 13: Maintenance
MAINTENANCE BEFORE AFTER EVERY EVERY EVERY BEFORE EACH EACH 25 HOURS STORAGE HOURS OR SEASON HOURS Check for Loose Fasteners Clean / Inspect Grass Catcher * Check Tires Check Drive Wheels *** Clean Lawn Mower **** Clean under Drive Cover *** Check Drive Belt / Pulleys *** Check / Sharpen / Replace Blade Lubrication... -
Page 14: Lawn Mower
MAINTENANCE LAWN MOWER 4. Be sure the trailing edge of blade (opposite sharp edge) is up toward the engine. Always observe safety rules when performing any main- 5. Install the blade bolt with the lock washer and hardened te nance. washer into blade adapter and crankshaft. -
Page 15: Grass Catcher
MAINTENANCE TO SHARPEN BLADE GRASS CATCHER NOTE: We do not recommend sharp en ing blade - but if • The grass catcher may be hosed with water, but must you do, be sure the blade is balanced. An un bal anced be dry when used. -
Page 16: Air Filter
MAINTENANCE TO CHANGE ENGINE OIL AIR FILTER NOTE: Before tipping lawn mower to drain oil, empty fuel Your engine will not run properly using a dirty air filter. tank by running engine until fuel tank is empty. Replace paper cartridge every 100 hours of operation or every season, which ev er occurs first. -
Page 17: Spark Plug
MAINTENANCE MUFFLER WATER WASHOUT FEATURE Inspect and replace corroded muffler as it could create a Your lawn mower is equipped with a fitting that allows fire hazard and/or damage. quick and easy cleaning of the underside of the housing. To use this feature, proceed as follows: SPARK PLUG 1. -
Page 18: Service And Adjustments
SERVICE AND ADJUSTMENTS CAUTION: to avoid serious injury, BEFORE PERFORMING ANY SERVICE OR ADJUSTMENTS: 1. Release control bar and stop engine. 2. Make sure the blade and all moving parts have completely stopped. 3. Disconnect spark plug wire from spark plug and place where it cannot come in contact with plug. -
Page 19: Engine Speed
SERVICE AND ADJUSTMENTS TO ADJUST HANDLE The handle on your lawn mower has three (3) height posi- tions - adjust to height that suits you. 1. Remove knob and carriage bolt on one side of the lower handle (Figure 27). 2. -
Page 20: Storage
STORAGE Immediately prepare your mower for storage at the end of the season or if the unit will not be used for 30 days or more. LAWN MOWER MOWING PO SI TION When lawn mower is to be stored for a period of time, clean it thoroughly, remove all dirt, grease, leaves, etc. -
Page 21: Fuel System
STORAGE ENGINE FUEL SYSTEM IMPORTANT: IT IS IMPORTANT TO PREVENT GUM DEPOSITS FROM FORMING IN ESSENTIAL FUEL SYSTEM PARTS SUCH AS CARBURETOR, FUEL FILTER, FUEL HOSE, OR TANK DURING STORAGE. ALCOHOL BLENDED FUELS (CALLED GASOHOL OR USING ETHANOL OR METHANOL) CAN ATTRACT MOISTURE WHICH LEADS TO SEPARATION AND FORMATION OF ACIDS DURING STORAGE. -
Page 22: Troubleshooting Points
TROUBLESHOOTING POINTS PROBLEM CAUSE CORRECTION Does not start 1. Dirty air filter. 1. Clean/replace air filter. 2. Out of fuel. 2. Fill fuel tank. 3. Stale fuel. 3. Empty fuel tank and refill tank with fresh, clean gasoline. 4. Water in fuel. 4. - Page 23 (a) Engines and Attachments.Except where otherwise indicated on Exhibit A, all Engines and Attachments are not covered by this Limited Warranty. In most cases, these items are NOT manufactured by Husqvarna in which case they may be covered separately by their respective manufacturer's warranties if one is provided and included with the product at the time of purchase.
- Page 24 10. Authorized Husqvarna Servicing Dealer/Center. In order to obtain warranty coverage it is your responsibility (at your expense) to deliver or ship your Husqvarna unit to an authorized Husqvarna Servicing Dealer/Center and arrange for pick-up or return of your unit after the repairs have been made.
-
Page 25: Warranty
Riding Lawn Tractors: Frame, Chassis, Front Axle 5 Years No Warranty No Warranty Engine* Transmission (if made by Husqvarna/Peerless) 3 Years No Warranty No Warranty Transmission (if third party)** XLS Models only - stamped deck shell. Armor Protected Limited Warranty... - Page 26 ** See reference 1 (b) of the warranty statement. RZ - Two (2) Year Consumer warranty, parts & labor, with Hydro-Gear Distributor network. EZ - One (1) Year Commercial warranty, parts & labor, with Husqvarna. Two (2) Year Consumer warranty, parts & labor, with Hydro-Gear Distributor network.
- Page 27 05/02/2012 BY/TH/BY...