Table of Contents
Advertisement
Quick Links
Advertisement
Table of Contents

Related Manuals for Sanyo Sprint KATANA


Summary of Contents for Sanyo Sprint KATANA
-
Page 1: User Guide
User Guide KATANA ® Eclipse by SANYO ® www.sprint.com © 2008 Sprint. Sprint and the logo are trademarks of Sprint. Other marks are the property of their respective owners. SANYO is a registered trademark of SANYO Electric Co., Ltd. and used under license. -
Page 2: Table Of Contents
Table of Contents Displaying Your Phone Number ....19 Making and Answering Calls ....20 Entering Text . - Page 3 2D. Roaming ......60 Secret Contacts Entries .....76 Dialing Sprint Services .
- Page 4 2J. Camera ......104 Using SMS Voice Messaging ....137 Using Caller ID .
- Page 5 Section 4: Safety and Warranty Information ....167 4A. Important Safety Information ..168 General Precautions ..... .168 Maintaining Safe Use of and Access to Your Phone .
-
Page 7: Introduction
Introduction User Because of updates in phone software, this printed guide may not be the most current Guide version for your phone. Visit www.sprint.com Note and log on to My Sprint Wireless to access This introduces you to Sprint ® service and all UserGuide the most recent version of the user guide. -
Page 8: Your Phone's Menu
Your Phone’s Menu 5: Missed Alerts 6: My Stuff The following table outlines your phone’s list menu structure. For more information about using your phone’s 1: Games menus, see “Navigating Through Phone Menus” on 1: Get New 2: My Content Manager page 18. - Page 9 7: Photos 7: Settings & Info 1: Camera 1: Auto Save to 2: Location 3: Status Bar 4: Slideshow Intvl Press the right softkey for the following options: 5: Account Info 6: Help 1. Picture Mode 2. Zoom 3. Self-Timer 4.
- Page 10 9: Contacts 9: Settings 1: Notification 0: Settings 1: Msgs and Icon 2: Icon Only 1: Display 2: Msg Reminder 1: Main Screen 1: Text Message 2: Picture Mail 1: Screensaver 2: Animation 3: Voicemail 4: VoiceSMS 3: Backlight 4: Input Font 5: Email 5: Foreground 6: Sleep Mode...
- Page 11 8: Return to Idle 6: Vibrate Type 1: Incoming Calls 2: Messages 1: Automatically 2: End Key 3: Alarm 4: Schedule 2: Sounds 3: Illumination 1: Volume 1: On/Off 1: Ringer 2: Earpiece 2: Incoming Calls 3: Headset 4: Speakerphone 5: Applications 6: StartUp/PwrOff 3: Messages...
- Page 12 3: Device Name 8: VoiceSMS Options 4: Device Info 1: Speakerphone 2: From Name 3: Connect. Alert 5: Trusted List 6: Text Entry 6: Voice Priority 1: Auto-Capital 2: Auto-Space 3: Input Language 4: My Words 7: Exchange Folder 5: T9 Settings 6: Default Input 5: Messages 7: Add Word...
- Page 13 4: Call Setup : Security 1: Lock My Phone 2: Change Code 1: Call Answer 2: Auto-Answer 3: Special Numbers 4: Edit Contacts List 3: Abbrev. Dial 4: Contacts Match 5: Delete/Reset 5: Contacts : Navigation Keys (Default Settings) 1: Speed Numbers 2: Show Secret/Hide Secret 1: Left Navigation (Sprint TV)2: Right Navigation (Web) 3: My Name Card...
- Page 14 #: Get Stuff 3: Bluetooth 1: Handsfree Pairing 2: Send Contact In Use Menu 3: Print Picture 4: Add to Trusted 5: Trusted List 6: Send Biz Card Press Options (right softkey) to display the following 7: More... options: 4: Calculator 1.
-
Page 15: Section 1: Getting Started
Section 1 Getting Started... -
Page 16: Setting Up Service
Section 1A Setting Up YourPhone Setting Up Service Install the battery. Press the release button and remove the battery cover from the back of the phone. Setting Up YourPhone (page 2) Insert the battery into the opening, making sure Activating YourPhone (page 3) the connectors align. -
Page 17: Activating Your Phone
From your computer’s Web browser, go to Note Your phone’s battery should have enough charge and complete the www.sprint.com/activate for your phone to turn on and find a signal, set up onscreen instructions to activate your phone. your voicemail, and make a call. You should fully Contact Sprint Customer Service at 1-888-211- charge your battery as soon as possible. -
Page 18: Setting Upyour Voicemail
Setting UpYour Voicemail Sprint Account Passwords All unanswered calls to your phone are automatically As a Sprint customer, you enjoy unlimited access to transferred to your voicemail, even if your phone is in use your personal account information, your voicemail or turned off. -
Page 19: Getting Help
Voicemail Password Getting Help You will create your voicemail password (or passcode) when you set up your voicemail. See “Setting Up Your Managing YourAccount Voicemail” on this page or on page 4 for more information on your voicemail password. Online: www.sprint.com Access your account information. - Page 20 From YourSprint Phone Sprint 411 Press to check minute usage and Sprint 411 gives you access to a variety of services and account balance. information through your phone, including residential, Press to make a payment. business, and government listings; movie listings or showtimes;...
-
Page 21: Section 2: Your Phone
Section 2 Your Phone... -
Page 22: Phone Basics
Section 2A Your Phone 1. Earpiece Phone Basics 2. Main Screen Your Phone (page 8) Viewing the Display Screen (page 11) Features of Your Phone (page 13) 15. Softkeys Turning Your Phone On and Off (page 15) 3. Navigation Key 14. - Page 23 Key Functions allows other callers to hear you clearly Microphone when you are speaking to them. lets you hear the caller and automated Earpiece facilitates reception and Internal Antenna prompts. transmission. To maximize performance, do not displays all the information needed to Main Screen obstruct the internal antenna while using the phone.
- Page 24 deletes characters from the display in text lets you monitor the phone’s status and BACK Key Outer Screen entry mode. When in a menu, pressing the Back key see who’s calling without opening the phone. returns you to the previous menu. This key also allow you to access the Music Store External Keys allows you to return to the previous screen in a...
-
Page 25: Viewing The Display Screen
Viewing the Display Screen indicates your phone is not currently able to access Sprint Vision service features. Your phone’s display screen provides information about indicates Sprint PowerVision status. your phone’s status and options. This list identifies the (The icon is animated while service is active.) symbols you’ll see on your phone’s display screen: indicates Sprint PowerVision service is To view a list of your phone’s icons and... - Page 26 indicates you have more than two different indicates the phone is connected to or kinds of messages. communicating with a Bluetooth device via both Hands-free Profile (HFP) and Advanced indicates you have urgent messages. Audio Distribution Profile (A2DP). indicates you have two or more different types indicates access to a secure site.
-
Page 27: Features Of Your Phone
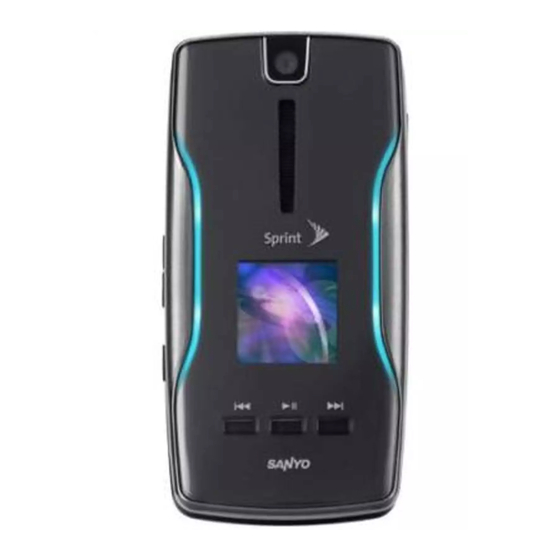
Features of Your Phone indicates all the sound settings except applications volume are off and the vibrate feature is set. ® The KATANA Eclipse by SANYO is lightweight, easy to indicates all the sound settings are off. use, and reliable, and it offers many features and service options. - Page 28 The built-in Calendar offers several personal The built-in Bluetooth technology allows you to information management features to help you connect wirelessly to a number of Bluetooth devices manage your busy lifestyle (page 80). to share information more easily than ever before (page 121).
-
Page 29: Turning Your Phone On And Off
Turning Your Phone On and Off Turning Your Phone Off Press and hold for two seconds until you see the powering down animation on the display Turning Your Phone On screen. Press Your screen remains blank while your phone is off (unless the battery is charging). -
Page 30: Using Your Phone's Battery And Charger
Using Your Phone’s Battery and BatteryCapacity Your phone is equipped with a Lithium Ion (Li-Ion) Charger battery. It allows you to recharge your battery before it is fully drained. The battery provides up to 4.6 hours of continuous digital talk time. WARNING Use only Sprint-approved or manufacturer- approved batteries and chargers with your... -
Page 31: Charging The Battery
Installing the Battery Insert the battery into the opening on the back of the phone, making sure the connectors align (1). Gently press down to secure the battery (2). Replace the battery cover and slide it upward until you hear a click (3). Charging the Battery Charge your battery as soon as possible so you can begin using your phone. -
Page 32: Navigating Through Phone Menus
Using the Phone Charger Navigating Through Phone Plug the phone charger into a wall outlet. Menus Open the micro-USB connector cover located on the upper left side of your phone. The navigation key on your phone lets you scroll through Plug the other end of the phone charger into the menus quickly and easily. -
Page 33: Displayingyour Phone Number
Selecting Menu Items Backing Up Within a Menu As you navigate through the menu, menu options are To go to the previous menu: highlighted. Select any option by highlighting it and Press pressing . If the option is numbered, you can select it by pressing the corresponding number on the phone’s To return to standby mode: keypad. -
Page 34: Making And Answering Calls
Making and Answering Calls Making Calls Placing a call from your wireless phone is as easy as making a call from any landline phone. Enter the Holding Your Phone number, press , and you’re on your way to clear calls. To maximize performance, do not obstruct the internal Make sure your phone is on. -
Page 35: Dialing Options
Dialing Options Answering Calls When you enter numbers in standby mode, you will see Make sure your phone is on. (If your phone is off, a variety of dialing options by pressing (right incoming calls go to voicemail.) Options softkey). Press to answer an incoming call. - Page 36 Your phone notifies you of incoming calls in the Answering a Roam Call With Call Guard following ways: Enabled The phone rings or vibrates. Call Guard is an option that helps you manage your The indicator light flashes. roaming charges when making or receiving calls while The backlight illuminates.
- Page 37 Missed Call Notification Calling Emergency Numbers When an incoming call is not answered, the Missed Call You can place calls to 911 (dial ), even if log is displayed on your screen. your phone is locked or your account is restricted. To display the Missed Call entry from the notification Note When you place an emergency call, your phone...
- Page 38 To exit Emergency mode: Enhanced 911 (E911)Information Press to end a 911 call. This phone features an embedded Global Positioning System (GPS) chip necessary for utilizing E911 Press (right softkey) to display the options Options emergency location services where available. menu.
- Page 39 In-Call Options WARNING Because of higher volume levels, do not place the phone near your ear during Pressing (right softkey) during a call displays a Options speakerphone use. list of available in-call features. To select an option, press the corresponding keypad number or select the option Press the left softkey during a call to mute the microphone.
- Page 40 Saving a Phone Number Finding a Phone Number Your phone can store up to 500 Contacts entries. You can search Contacts entries for phone numbers Contacts can store up to a total of 700 phone numbers, that contain a specific string of numbers. and each Contacts entry’s name can contain up to 64 Enter the last three or more digits of the number in characters.
- Page 41 Using Abbreviated Dialing Note You can have multiple pauses in a phone number and combine two-second and hard pauses. Abbreviated Dialing is similar to speed dialing. You can use either of the following abbreviated dialing features. To dial or save phone numbers with pauses: –...
- Page 42 To place a call using Prepend Abbreviated Dialing: Plus (+)Code Dialing Enter the last four or five digits of the number. When placing international calls, use Plus Code Dialing to automatically enter the international access code for Press your location (for example, 011 for international calls Dialing From the Contacts List made from the United States).
-
Page 43: Entering Text
Using Speed Dialing Entering Text You can store up to 98 numbers in your phone’s speed dial memory to make contacting friends and family as SelectingText Input Options easy as pressing a button or two. With this feature, you Your phone provides convenient ways to enter words, can dial speed dial entries using one keypress for letters, punctuation, and numbers whenever you are locations 2–9 or two keypresses for locations 10–99. - Page 44 to enter preprogrammed messages. Entering Text Using T9 Text Input Preset Msgs (See page 33.) T9 Text Input lets you enter text by pressing keys just to enter messages used recently. Recent Msgs once per letter. (To select the mode when T9 Word to paste copied or cut text.
- Page 45 Adding a Word to the T9 Database Customizing T9 Settings If a word you want to enter is not displayed as an option Press Menu > Settings > Text Entry > T9 Settings when you are using T9 Text Input, add it to the database. Select an option and press Select the text input option.
- Page 46 EnteringText Using Alphabet Mode Characters scroll in the following order: English Sequence Select the mode. (See “Selecting Text Input Alphabet Upper Case Lower Case Options” on page 29.) . , @ 1 ? ! Press the corresponding keys repeatedly until the A B C 2 a b c 2 correct letter appears.
- Page 47 Entering Numbers, Symbols, Smileys, To enter preset messages: Emoticons, and Preset Messages Select the Preset Msgs mode. (See “Selecting Text Input Options” on page 29.) To enter numbers: Select a message and press Select the mode and press the appropriate NUMBER key.
-
Page 48: Using Maps
Setting Text Entry Options Using Maps Press Menu > Settings > Text Entry Activating Maps Select an option and press Auto-Capital to turn auto-capitalization on or off. You can access Maps from your phone’s main menu, anywhere on the Sprint network. to turn auto-spacing on or off after T9 Auto-Space words you enter. -
Page 49: Settings
Section 2B Sound Settings Settings Ringer Types Ringer types help you identify incoming calls and Sound Settings (page 35) messages. You can assign ringer types to individual Contacts entries, types of calls, and types of messages. Display Settings (page 39) Location Settings (page 43) Selecting RingerTypes for Incoming Calls Messaging Settings (page 43) - Page 50 Selecting RingerTypes for Messages Selecting a RingerType for Alarms, Power On/Off Tone, or Scheduled Events Press Menu > Settings > Sounds > RingerType > Messages Press Menu > Settings > Sounds > RingerType Select Text Message Picture Mail Voicemail Select Alarm Power On Power Off...
- Page 51 Selecting a Key Tone Note When the ringer volume is set to Silence All or Vibrate All , voice prompts cannot be heard. Your phone offers a number of options for selecting the audible tones accompanying a keypress. The keypress echo function is available when you are in standby mode.
-
Page 52: Alert Notification
Adjusting the Alert Volume Alert Notification You can set the alert volume separately from the ringer Set your phone to alert you with an audible tone when volume setting. you change service areas, once a minute during a voice call, or when a call has been connected. Press Menu >... -
Page 53: Display Settings
Display Settings Changing the Screen Saver Your phone offers you the option of displaying a screen saver while in standby mode. Changing the BacklightTime Length Press Menu > Settings > Display > Main Screen Select how long the display screen and keypad remain OuterScreen >... - Page 54 Changing the Background , or Calendar/Alarm Active Call Playing Music select an available option. Customize your phone display’s appearance by Demo to select Endless Play 1 time 3 times , or selecting a color scheme to reflect your personality. 5 times Press Menu >...
- Page 55 Changing the Clock Display Changing the Input Font Size Choose whether you want your phone’s clock to be Adjust the font size when entering text (for example, displayed in analog mode, digital mode, or with time when adding a Contacts entry). and date.
-
Page 56: Powersave Mode
PowerSave Mode Setting the Next Schedule This feature helps conserve your battery power by You can display the next scheduled event on the Outer setting: Screen. Main Screen and Outer Screen backlight to Press Menu > Settings > Display > Outer Screeen > Dim Only Next Schedule Key backlight to... -
Page 57: Location Settings
Location Settings To enable your phone’s Location feature: Press Menu > Settings > More... > Location (The Location disclaimer will be displayed.) Your phone is equipped with a Location feature for use in connection with location-based services. Read the disclaimer and press The Location feature allows the network to detect your Select and press... - Page 58 Setting Message Notification SMS Text Messages When you receive a message, your phone notifies you Setting a CallbackNumber by displaying an icon on your display screen. You can also choose to be notified with a message notification With this feature, you can specify the callback number on your display screen.
- Page 59 Adding a Customized Signature Select , edit the message (see “Entering Text” on Edit page 29), and press Add a customized signature to each message you send. – or – Press Menu > Settings > Messages > Signature Select Delete > Yes (left softkey) to delete the message.
- Page 60 SMS Voice Messages Setting an Alert Notification SMS Voice Messaging uses your phone’s data services. Setting the Speakerphone Your phone can alert that you are connecting to data services each time you send an SMS Voice message. You can set the speakerphone on or off for SMS Voice messaging.
-
Page 61: Airplane Mode
Airplane Mode TTYUseWith Sprint Service Airplane Mode allows you to use many of your phone’s ATTY (teletypewriter, also known as a TDD orText features, such as Games and Voice Memos, when you Telephone) is a telecommunications device that allows are in an airplane or in any other area where making or people who are deaf, hard of hearing, or who have receiving calls or data is prohibited. - Page 62 To turn TTYMode on or off: WARNING 911 Emergency Calling Sprint recommends that TTYusers make Press Menu > Settings > More... > Accessibility > TTY emergency calls by other means, including (An informational message will be displayed.) Telecommunications Relay Services (TRS), Read the disclaimer and press (left softkey).
-
Page 63: Phone Setup Options
Phone Setup Options Call Answer Mode Select how to answer incoming calls on your phone: whether you want to be required to press , to press Shortcuts any number key, or simply to open the phone. Your phone offers you the option of assigning shortcuts to Press Menu >... - Page 64 Setting the Key Guard Setting Abbreviated Dialing This feature enables you to lock external keys while the To activate the Contacts Match feature: phone is closed. Press Menu > Settings > More... > Call Setup Press Menu > Settings > More... > Key Guard Select Contacts Match >...
-
Page 65: Browser Settings
Headset Options To set the ringer mode: Press Menu > Settings > More... > Headset Mode Set up your phone for hands-free use, the type of headset (mono or stereo), and the ringer mode. Select RingerSound > Normal Headset Only To connect the headset: Browser Settings Simply plug the headset into your phone’s headset... - Page 66 to set the selected bookmark as your Editing the Home Page Set Home home page. This feature allows you to edit the URL of the home page to delete the selected bookmark. Delete on your phone. to delete all bookmarks saved in the Delete All Press Menu >...
-
Page 67: Security
Section 2C Accessing the Security Menu Security All of your phone’s security settings are available through the Security menu. You must enter your lock code to view the Security menu. Accessing the Security Menu (page 53) Press Menu > Settings > More... > Security Using Your Phone’s Lock Feature (page 54) Enter your lock code to display the Security menu. -
Page 68: Using Your Phone's Lock Feature
Using Your Phone’s Lock Feature Unlocking Your Phone From standby mode, press (left softkey). Unlock Locking Your Phone Enter your lock code. When your phone is locked, you can only receive Changing the Lock Code incoming calls or make calls to 911, Sprint Customer Service, or special numbers. -
Page 69: Restricting Calls
Locking the Camera/Photos Menus Restricting Calls Press Menu > Settings > More... > Restrict and Lock There may be occasions when you want to limit the Select , and then enter your lock Camera/Pictures numbers your phone can call or from which it can code. -
Page 70: Using Special Numbers
Using Special Numbers Deleting Phone Content Special numbers are important numbers that you have Use the Security menu to quickly delete all the content designated as being “always available.”You can call and you have created or stored in your phone. receive calls from special numbers even if your phone is Press and enter... -
Page 71: Resetting Phone Content
to delete all voice data and call Resetting Phone Content Delete Voice Data memos saved in the phone. Delete Message to delete all messages (including Resetting the phone restores all the factory defaults, locked ones) in the Inbox, Sent Mail, Pending, and including the ringer types and display settings. -
Page 72: Security Features For Sprint Power Vision
Security Features for Sprint Read the disclaimer and press (left softkey). If you are certain that you would like to reset your Power Vision phone, press (left softkey). Enabling and Disabling Data Services You can disable data services without turning off your phone;... - Page 73 To enable data services: Press Menu > Settings > More... > Data > Enable Data (A message is displayed.) Press (left softkey) to enable Vision service. Locking Sprint Data Services You can lock access to Sprint data services without signing out. Press Menu >...
-
Page 74: Roaming
Section 2D Understanding Roaming Roaming Recognizing the Roaming Icon on the Display Screen Understanding Roaming (page 60) Your phone’s display screen always lets you know when Setting Your Phone’s Roam Mode (page 61) you’re off the Sprint National Network. Anytime you are roaming, the phone displays the roaming icon ( Using Call Guard (page 62) Using Data Roam Guard (page 63) -
Page 75: Settingyour Phone's Roam Mode
SettingYour Phone’s Roam Mode Note If you’re on a call when you leave the Sprint National Network, your call is dropped. If your call is dropped in an area where you think Sprint service is Your phone allows you to control your roaming available, turn your phone off and on again to capabilities. -
Page 76: Using Call Guard
Using Call Guard To place roaming calls with Call Guard on: From standby mode, dial 1 + area code + the seven-digit number and press Your phone has two ways of alerting you when you are roaming off the Sprint National Network: the onscreen Press any key to delete the pop-up message, and roaming icon and Call Guard. -
Page 77: Using Data Roam Guard
Using Data Roam Guard To use data services when Data Roam Guard is active: When a pop-up notification appears informing you that data roam charges may apply, press (left Roam Depending on service availability and roaming softkey) to connect. agreements, your phone may be able to access data services while roaming on certain digital systems. -
Page 78: History
Section 2E Viewing History History History is a list of the last 60 phone numbers (or Contacts entries) for calls you placed, accepted, or missed. History makes redialing a number fast and easy. Viewing History (page 64) It is continually updated as new numbers are added to the beginning of the list and the oldest entries are HistoryThread (page 65) removed from the bottom of the list. -
Page 79: History Thread
History Thread Note History records only calls that occur while the phone is turned on. If a call is received while yourphone is turned off, it will not be included in the phone’s The History thread screen shows all history of a selected Incoming or Missed call logs. -
Page 80: History Menu Options
History Menu Options Making a Call From History Select a History entry and press to display the date To make a phone call from History: and time of the call, the phone number (if available), and From the History list display, use your navigation key the caller’s name (if the number is already in your to select an entry and press Contacts). -
Page 81: Saving A Phone Number From History
Saving a Phone Number From Prepending a Phone Number History From History Your phone can store up to 500 Contacts entries. If you need to make a call from History and you are Contacts entries can store up to a total of 700 phone outside your local area code, you can add the numbers, and each entry’s name can contain 64 appropriate prefix by prepending the number. -
Page 82: Deleting History
Deleting History You can delete individual or all entries in your History using the Options menu. Press to display your History. Menu > History Select an entry you wish to delete and press Options (right softkey) . (Select if you wish >... -
Page 83: Contacts
Section 2F About Contacts Contacts Your phone can store up to 500 Contacts entries. Contacts can store up to 700 phone numbers, 1000 email addresses, and 500 Web addresses. You can also About Contacts (page 69) add Contacts entries to , allowing you to send the Groups same text, picture, or voice message to up to 25... -
Page 84: Finding Contacts Entries
Finding Contacts Entries ICE– In Case of Emergency To make it easier for emergency personnel to identify important contacts, you can list your local There are several ways to display your Contacts entries: emergency contacts under “ICE”in your phone’s by name, by speed dial number, and by group. Follow Contacts list. - Page 85 Finding Speed Dial Numbers Viewing History from Contacts Press Menu > Settings > More... > Contacts > You can view the history of a selected Contacts entry Speed Numbers from the Contacts list. Scroll through speed dial entries. Speed dial Highlight an entry and press (right softkey) Options...
-
Page 86: Contacts Entry Options
Contacts Entry Options Group options: to create a new group. New Group to edit the selected group. Edit Group To access a Contacts entry’s options, highlight the entry and press Options (right softkey). Select an option and to delete the selected group. Delete Group press Send Contact... -
Page 87: Editing A Contacts Entry
Editing a Contacts Entry Selecting an Illumination Pattern fora Contacts Entry Adding a Phone Number to a Contacts You can assign an illumination scheme to a Contacts entry so you can identify the caller by illumination Entry pattern. (See “Changing the Illumination” on page 40.) Display a Contacts entry. -
Page 88: Assigning Speed Dial Numbers
Assigning Speed Dial Numbers Select an available speed dial location and press . (A confirmation will be displayed.) Your phone can store up to 98 phone numbers in speed dial locations. (For details on how to make calls using Note If you attempt to assign an already in-use speed dial speed dial numbers, see “Using Speed Dialing”... - Page 89 Selecting a RingerType for a Contacts Assigning an Image to a Contacts Entry Entry You can assign an image to a Contacts entry. The image is displayed when the entry calls you. Assign a ringer type to a Contacts entry so you can Display a Contacts entry and press identify the caller by the ringer type.
-
Page 90: Secret Contacts Entries
Secret Contacts Entries Note If you make an entry secret, calls cannot be made to that entry if Contacts Only is selected in Settings > More... > Restrict and Lock > Voice > Restrict > You can hide an entry by making it secret. The entry is Incoming Calls or Outgoing Calls (see page 55). -
Page 91: Dialing Sprint Services
Dialing Sprint Services Wireless Backup Your Contacts list is preprogrammed with contact This feature allows you to back up all of your contacts to numbers for various Sprint services. the Sprint Web site and restore them if your phone is lost, stolen, damaged, or replaced. - Page 92 Activating and Deactivating Wireless Backup To deactivate the wireless backup service: Service Press Menu > Settings > More... > Wireless Backup > . (A message will be displayed.) Unsubscribe To activate the wireless backup service: Follow the onscreen instructions to unsubscribe Press Menu >...
- Page 93 To display the wireless backup service information, press Menu > Settings > More... > Wireless Backup > Learn More . When the service is available, you can also select Troubleshoot to display the troubleshooting guide. Section 2F. Contacts...
-
Page 94: Calendar And Tools
Section 2G Using Your Phone’s Calendar Calendar and Tools Adding a Schedule Event to the Calendar Your Calendar helps organize your time and reminds Using Your Phone’s Calendar(page 80) you of important events up to 100 items. Using Your Phone’s Alarm Clock (page 84) Press Menu >... - Page 95 to select an event priority ( Adding a Call Alarm to the Calendar Priority None High You can set call alarms to notify you when you need to place Start to schedule a start time for the event. Use a call. The call alarm will let you know when and to whom to your keypad or navigation key to set the hours, place a scheduled call.
-
Page 96: Viewing Events
Adding To Do List Items Event Alert Menu Your phone can store and manage up to 40 To Do List When your phone is turned on and you have an event items. alarm scheduled, your phone alerts you and displays the event summary. - Page 97 to select and delete multiple events at Select In the monthly view, days with events scheduled are one time. indicated by a small triangle just to the left of the date. to delete all events on the list. All on This List to delete completed Completed To Do Events...
-
Page 98: Using Your Phone's Alarm Clock
Using Your Phone’s Alarm Clock Press the left softkey ( On or Off ) to toggle the alarm on and off. Your phone comes with a built-in alarm clock that has To change the alarm settings, press Settings (right multiple alarm capabilities. softkey) to set the ringer length and snooze options. -
Page 99: Using The Stopwatch
Using the World Clock Press the left softkey ( On or Off ) to toggle the countdown alarm on and off. To view the time in different locations: To change the alert settings, press Settings (right Press Menu > Tools > World Clock softkey) to set the ringer length and snooze options. -
Page 100: Voice Services
Section 2H Using Automatic Speech Recognition (ASR) Voice Services You can use your phone’s built-in automatic speech recognition (ASR) software to dial a phone number in Using Automatic Speech Recognition (ASR)(page 86) your Contacts or to launch phone functions. All you have Voice and Call Recording (page 89) to do is to talk into the phone, and ASR will recognize Setting Up Screen Call (page 91) - Page 101 Note Use ASR in a quiet environment so it can accurately Note If ASR does not recognize the name or number, it recognize your commands. will find the most likely matches and display a list of up to three names or numbers. You will hear “Did you say…”...
- Page 102 Checking Phone Status Using ASR To adapt the system to your voice: Press and hold You can use ASR to obtain information about your phone: Press (right softkey) Settings > Adaptation > My Phone Number Adapt Voice Network Press (left softkey) and repeat each word, Start Signal Strength phrase, or telephone number you hear.
-
Page 103: Voice And Call Recording
To change the ASR dialing region: Voice and Call Recording Press and hold Use your phone’s voice recording to record brief memos Press (right softkey) Settings > Dialing region to remind you of important events, phone numbers, or select an option. grocery list items and to record the other party’s voice to recognize only numbers valid in North America... - Page 104 To record a phone conversation: to activate or deactivate Speaker On Speaker Off the speakerphone mode. During a call, press (right softkey) Options > to edit the title of a voice memo. Edit Title Call Memo Rec to display information about a voice Properties Start recording after the beep.
-
Page 105: Setting Up Screen Call
Deleting Voice and Call Recordings Setting the Recording Mode This feature allows you to match the sensitivity of the To delete an individual recording: microphone to the type of recording you are making. Press Menu > Tools > Voice Memo > List Press (left Menu >... - Page 106 Recording Your Name for a Prerecorded While the caller’s message is being recorded, press TALK to answer the call, or press END to stop Announcement recording and disconnect the call. You can use a prerecorded announcement with or To screen calls automatically: without your name.
- Page 107 Recording a Customized Announcement Deleting an Announcement Press Press Menu > Tools > Voice Memo > Screen Call > Menu > Tools > Voice Memo > Screen Call > Announcement Announcement Highlight and press (right softkey) Select , and press Custom Edit >...
-
Page 108: Microsd Card
Section 2I Using Your Phone’s microSD Card and Adapter microSD Card Using the microSD Card Using Your Phone’s microSD Card and Adapter Your phone is equipped with a 256 MB microSD (Secure (page 94) Digital) memory card and its adapter to expand the File Manager(page 97) phone’s available memory space. - Page 109 Note Be sure to use only recommended microSD cards (64MB-8GB). Using non-recommended microSD cards could cause data loss and damage your phone. microSD Icon Indicators The following icon will be displayed on your phone’s display screen when a microSD card is properly Note The microSD card and its adapter can be easily damaged by improper operation.
- Page 110 Using the microSD Adapter Setting Write Protection The supplied microSD adapter allows microSD cards to The included microSD adapter has built-in write be used in SD-compatible devices. Before using, you protection to prevent accidental overwriting or erasure of will need to insert the microSD card into the microSD your vital data.
-
Page 111: File Manager
File Manager File Manager Icons Content Type Icon File Extension jpeg, jpg, wbmp, png, bmp, gif File Manager allows you to manage files such as Picture pictures, videos, music, and applications stored in your Video m4v, mp4, 3gp, 3gpp, 3gp2, 3g2, wmv, asf phone or on the microSD card. - Page 112 Using File Manager Options to copy a file to your microSD card. Copy to microSD to copy a file to your phone. Copy to Phone When you are in the file manager, several user options to use File Manager with the microSD Go to microSD are available by selecting (right softkey).
-
Page 113: Microsd Settings
Sorting the Folder Contents microSD Settings Press Menu > Tools > File Manager > Phone microSD Creating Folders in the microSD Card Select a folder and press The following steps allow your phone to create default folders for storing files in your microSD card. Press (right softkey) Options... -
Page 114: Microsd Folders
Backing Up Your Contacts Data to Note The formatting procedure deletes all the data on the microSD card, after which the files CANNOTbe the microSD Card retrieved. To prevent the loss of important data, please check the contents before you format the card. -
Page 115: Setting Up The Digital Print Order Format
Setting Up the Digital Print Order to set the number of copies you Set No. of Copies want to print. (The maximum number of copies Format that you can select is 99 copies.) When you have finished setting the print options, press (left softkey). -
Page 116: Connecting Your Phone To Your Computer
Reviewing an Order Summary Connect your phone to your computer using a compatible USB cable. (Wait for the connection to With the microSD inserted, press Menu > Tools > be completed. When connected, the host computer File Manager > microSD Options > DPOF Print will automatically detect your phone.) Select . - Page 117 Important Connection Information No driver installation is required forWindows 2000/ME/XP users. If you use Windows 98/98SE, you have to download and install the USB Mass Storage Driver from the Sprint Web site at www.sprint.com To avoid loss of data, DO NOT remove the USB cable, the microSD card, or the battery while files are being accessed or transferred.
-
Page 118: Camera
Section 2J Taking Photos Taking pictures with your phone’s built-in camera is as Camera simple as choosing a subject, pointing the lens, and pressing a button. You can activate the phone’s camera Taking Photos (page 104) mode whether the phone is open or closed. Recording Videos (page 110) To take a picture with the phone open: Storing Photos and Videos (page 113) - Page 119 To take a picture with the phone closed: Press (right softkey) for more options: Options to return to camera mode to take Take New Picture Press and hold the side camera key to activate another picture. camera mode. to send your picture. (See page 115 Send Media Point the camera lens at your subject.
- Page 120 Camera Mode Options Note If your Sprint service plan does not include Sprint Picture Mail, you will first be prompted to subscribe When the phone is open and in camera mode, press to the service for an additional monthly charge. (right softkey) to display additional camera Options options:...
- Page 121 to select an option from Image Controls Brightness Get ready for the picture. (When the timer is down to , or White Balance Sharpness Contrast three seconds, the self-timer icon will turn red and the phone will begin to beep.) to select your settings.
- Page 122 Using the Zoom Select the duration of the interval between shots ) and press Normal Fast This feature allows you to zoom in on an object when Press (left softkey), , or the side Capture you take a picture. Depending on your resolution camera key to take the pictures.
-
Page 123: Camera Settings
Selecting Camera Settings Camera Icon Key Function Icon Details From camera mode, press (right softkey) Options > In Phone Appears when the storage destination is your phone. Camera Settings Storage Area In microSD Appears when the storage destination is the microSD. Select an option and press Beach/Snow Use this setting in bright light. -
Page 124: Recordingvideos
RecordingVideos to send your video. (See page 115 for Send Media details.) to access available services. Post to Services In addition to taking pictures, you can also record, view, Select to display the latest services. Update and send videos to your friends and family with your to upload the video you just took to the Upload phone’s built-in video camera. - Page 125 to select your settings. (See “Selecting Video Settings Note When taking a video with the phone closed, the Video Settings” on page 112 for details.) subject image appears in reverse on the external display. The captured image will not be saved in to go to the In Phone folder or microSD Review Media reverse.
-
Page 126: Video Settings
Selecting Video Settings Video Icon Key Function Icon Details From video mode, press (right softkey) > Options In Phone Appears when the storage destination is your phone. Storage Video Settings Area In microSD Appears when the storage destination is the microSD. Select an option and press Sunny Use this setting for sunny weather. -
Page 127: Storing Photos And Videos
Storing Photos and Videos To review your stored pictures and videos in the In Phone folder: Press Menu > Photos > My Albums > In Phone Your phone’s picture and video storage area is called . There are three types of folders in My Albums: My Albums Use your navigation key to view and scroll through (see below) - Page 128 In Phone Folderand microSD File Options Note Deleting data will free up memory space to enable you to take more pictures and videos. Once When you are viewing the In Phone folder or the deleted, the data cannot be uploaded to your online microSD card folders, press (right softkey) to Options...
-
Page 129: Sending Sprint Picture Mail
Assigned Media Folder Sending Sprint Picture Mail When you assign a picture or video, it will automatically be saved in the folder. The folder allows Once you have taken a picture or a video, you can use Assigned Media you to store copies of pictures or videos on your phone the messaging capabilities of your phone to instantly and to assign pictures and videos to various phone share it with family and friends. - Page 130 Sending Photos and Videos From Follow step 2 of “Composing SMS Text Messages” on page 136. Messages If you wish to include a text message, scroll to Text You can also send Sprint Picture Mail from your phone’s and then enter your message. Messages menu.
-
Page 131: Managing Sprint Picture Mail
Managing Sprint Picture Mail Managing Online Photos and Videos From Your Phone Using the Sprint Picture Mail Web Site Use your phone to manage, edit, or share pictures and videos you have uploaded to the Sprint Picture Mail Web Once you have uploaded pictures or videos to your site at www.sprint.com/picturemail . - Page 132 Uploading Photos and Videos Accessing Online Picture and Video Options From Your Phone Press Menu > Photos > My Albums > In Phone Select a picture or video from your Online Albums. Check the picture(s) and video(s) you wish to (See “Managing Online Photos and Videos From upload and press (right softkey) >...
-
Page 133: Printing Photos Directly From Your Phone
to edit or display details relating to your Printing Photos Directly From Details/Edit pictures or videos. Your Phone to filter only pictures, only videos, or to Media Filter display all media files. to display the album list. Album List Your phone is PictBridge compatible, allowing you to print directly from your phone without connecting to a To access your online Albums options from your phone: computer. - Page 134 Note You may not be able to print pictures that you Note While you are connected to the printer, your cannot display on your phone. phone’s screen will display “Phone Off.” You cannot make or receive calls during this time. : You can select the print mode from Layout , or...
-
Page 135: Bluetooth
Section 2K Turning Bluetooth On and Off Bluetooth By default, your device’s Bluetooth feature is turned off. Turning Bluetooth on makes your phone “discoverable” by other in-range Bluetooth devices. To make your Turning Bluetooth On and Off (page 121) phone visible to other devices you must also set your phone’s visibility to other than Hidden. -
Page 136: Using The Bluetooth Menu
Bluetooth Status Indicators Using the Bluetooth Menu The following icons show your Bluetooth connection status at a glance: menu allows you to access your phone’s Bluetooth Bluetooth functions. – Bluetooth feature is active. (The icon will dim when the phone is connected with another To access the Bluetooth menu: Bluetooth device.) Press... - Page 137 Find Me Highlight a device you want to add to the Block List and press Block (left softkey). If you are going to use a Bluetooth profile to pair with a Bluetooth device, you will need to allow the other device Block List Options to initiate pairing with your phone.
-
Page 138: Using The Bluetooth Settings Menu
Using the Bluetooth Settings Menu Select to display a list of trusted Trusted List Bluetooth devices. Select to choose the default device Voice Priority menu allows you to set up many Bluetooth Settings you want to use for incoming and outgoing calls. of the characteristics of your phone’s Bluetooth service, Select , or... - Page 139 This profile functions as a – This profile HFP: Hands-Free Profile – A2DP: Advanced Audio Distribution Profile wireless car kit. Incoming calls ring to the hands-free allows you to transmit high quality stereo music from headset or device. Calls can be received by pressing your phone to other compatible accessories including a button on the headset or device.
-
Page 140: Pairing Bluetooth Devices
Pairing Bluetooth Devices Using the Trusted Devices Options Paired Devices The Bluetooth pairing process allows you to establish Once you have created paired devices, several options trusted connections between your phone and another are available from the trusted devices list. Bluetooth device. -
Page 141: Printing Data Via Bluetooth
to sort the trusted devices. Sort by Select , or Handset Default Create Print Job PrinterDefault to delete the selected device from the list. Delete to print items by creating a print job Handset Default to delete all devices from the list. Delete All via the Basic Printing Profile. -
Page 142: Sending Data Via Bluetooth
Sending Data via Bluetooth You can send data saved on your phone to another Bluetooth device. Press Menu > Tools > Bluetooth > Trusted List Select the device from the trusted devices list and then press (right softkey) Options > Send Item Select an item ( Business Card Contacts... -
Page 143: Section 3: Sprint Service
Section 3 Sprint ® Service... -
Page 144: Sprint Service Features: The Basics
Section 3A Using Voicemail Sprint Service Features: Setting Up Your Voicemail All unanswered calls to your phone are automatically The Basics transferred to your voicemail, even if your phone is in use or turned off. Therefore, you will want to set up your Sprint Voicemail and personal greeting as soon as your Using Voicemail (page 130) phone is activated. - Page 145 Note Voicemail Passcode Note When you are roaming off the Sprint National If you are concerned about unauthorized access to Network, you may not receive notification of new your voicemail account, Sprint recommends that voicemail messages. It is recommended that you you enable your voicemail passcode (do not periodically check your voicemail by dialing 1 + activate One-Touch Message Access).
- Page 146 Using the Menu Keys on Your Phone to Access Voicemail KeyGuide Your Messages Here’s a quick guide to your keypad functions while listening to voicemail messages. For further details and Press Menu > Messages > Voicemail menu options, see “Voicemail Menu Key” on page 135. Press to listen to your messages.
- Page 147 Sprint Callback Press and hold to access your voicemail. (If your voicemail box contains any new messages, Return a call after listening to a message without press to access the main voicemail menu.) disconnecting from voicemail. Press to change your Personal Options, Press after listening to a message.
- Page 148 Voicemail-to-Voicemail Message Forwarding Extended Absence Greeting Forward a voice message, except those marked When your phone is turned off or you are off the Sprint “Private,” to other Sprint Voicemail users. National Network for an extended period, your phone can play this greeting instead of your normal personal After listening to a message, press greeting.
- Page 149 Voicemail Menu Key Send a Message Personal Options Following the prompts on the voicemail system, you can use your keypad to navigate through the voicemail Settings menu. The following list outlines the Sprint voicemail Skip Passcode system menu structure. Autoplay Listen Play Back Date, Time, and CallerInfo.
-
Page 150: Using Sms Text Messaging
Using SMS Text Messaging (right softkey) to enter a recipient’s New Addr. wireless phone number or email address directly. Press (left softkey) when you have finished Continue With SMS Text Messaging, you can send and receive entering recipients. (You may include up to 25 instant text messages between your wireless phone and recipients per message.) another messaging-ready phone. -
Page 151: Using Sms Voice Messaging
Using SMS Voice Messaging If you have two or more notifications, the Missed Alert list will appear. Select a message in the list and press View (left softkey) to view the message. In addition to SMS Text Messaging, your phone is enabled with SMS Voice Messaging. -
Page 152: Using Callerid
(right softkey) to enter a recipient’s Using CallerID New Addr. wireless phone number or email address directly. Start recording after the beep. (You can record up to Caller ID allows people to identify a caller before two minutes.) answering the phone by displaying the number of the incoming call. -
Page 153: Responding To Call Waiting
Responding to Call Waiting Making a Three-Way Call When you’re on a call, Call Waiting alerts you to With Three-Way Calling, you can talk to two people at incoming calls by sounding one beep. Your phone’s the same time. When using this feature, the normal screen informs you that another call is coming in and airtime rates will be charged for each of the two calls. -
Page 154: Using Call Forwarding
Using Call Forwarding Call Forwarding lets you forward all your incoming calls to another phone number – even when your phone is turned off. You can continue to make calls from your phone when Call Forwarding is activated. To activate Call Forwarding: Press Enter the area code and phone number to which your future calls should be forwarded. -
Page 155: Sprint Power Vision
Section 3B Sprint Power Vision Applications Sprint Power Vision Here is a brief list of the applications available through your phone. For more information, please visit us online www.sprint.com Sprint Power Vision Applications (page 141) – Instantly shoot, share, and print sharp Sprint Picture Mail digital pictures, and take and send short video clips with Getting Started With Sprint Power Vision (page 142) -
Page 156: Getting Started With Sprint Power Vision
Getting Started With Finding Your User Name If you aren’t sure what your user name is, you can easily Sprint Power Vision find it online or on your phone. Sign on to your account using your At www.sprint.com. With your Sprint service, you are ready to start enjoying phone number and password. - Page 157 Launching a Sprint PowerVision While connecting, an animation may be displayed. Connection To change the default launch page to the last page you viewed, press Menu (right softkey) > To launch a Sprint Power Vision connection: More... > Preferences > Launch Page and select Press .
- Page 158 Data Connection Status and Indicators If no indicator is displayed, your phone does not have a current data connection. To launch a connection, see Your phone displays the current status of your Data “Launching a Sprint Power Vision Connection” on connection through indicators at the top of the screen.
- Page 159 To use softkeys: You’ll find that the left softkey is used primarily for selecting items. This softkey is often labeled “OK.” Press a softkey. (If an additional pop-up menu is displayed when you press the softkey, select menu If the items on a page are numbered, you can use items using your keypad [if they’re numbered], or by your keypad (number keys) to select an item.
-
Page 160: Accessing Messaging
Accessing Messaging To access Sprint Mail from your phone: Press Menu > Web You can send and receive email messages, instant From the Sprint Power Vision home page, select messages, and text messages and participate in Web- Messaging > Email > PCS Mail based chat rooms right from your phone. - Page 161 Repeat as necessary for s and Use your keypad to enter the required sign-in information for the selected provider, such as user Enter the and your . (Select each Subject Message name, email address, or password, and select field and press to enter text.) (Your mailbox for the selected provider will Sign In.
- Page 162 Accessing Sprint Instant Messaging Accessing Wireless Chatrooms Sprint Power Vision also provides you with access to Sprint Power Vision gives you the ability to join wireless popular instant messaging (IM) clients, including AOL ® chatrooms from your phone. Instant Messenger , MSN ®...
-
Page 163: Downloading Content
Downloading Content Selecting an Item to Download You can search for available items to download in a number of ways: With Sprint PowerVision, you have access to a dynamic variety of Premium Services content, such as Featured displays a rotating selection of featured items. downloadable Games, Ringers, Screen Savers, and Categories allows you to narrow your search to a... - Page 164 Downloading an Item Using MyContent Manager Once you’ve selected an item you wish to download, Whether you purchase your Premium Services content highlight it and press , or press (left softkey). You from your phone or from your online account will see a summary page for the item including its title, management page at , all of your...
-
Page 165: Exploring The Web
To download purchased content from My Content Exploring the Web Manager: From the display (see the My Content Manager With Web access on your phone, you can browse full- previous page), highlight the item you wish to color graphic versions of your favorite Web sites, making download, and press . - Page 166 Although the Sprint Power Vision home page offers a Allows you to bookmark the current site. Mark this page. broad and convenient array of sites and services for you Allows you to access and manage View Bookmarks. to browse, not all sites are represented, and certain your bookmarks.
-
Page 167: Deleting A Bookmark
Creating a Bookmark Deleting a Bookmark Bookmarks allow you to store the address of your Press the right softkey to open the browser menu. favorite Web sites for easy access at a later time. Select View Bookmarks Go to the Web page you want to mark. Select a bookmark and press the right softkey. -
Page 168: Phone As Modem
Reloading a Web Page Phone as Modem To reload (refresh)a Web page: Your phone’s data capabilities enable you to use its Press the right softkey to open the browser menu. high-speed data connection as a modem for your Select Refresh this page . - Page 169 Setting Up a Data Connection With Your Launch the Sprint PCS Connection Manager software, select a profile, and click Connect Computer Once the connection is established, launch an In order to use your phone as a modem, you’ll first need Internet session, check your email, or do anything to load the Sprint PCS Connection Manager software...
-
Page 170: Sprint Power Vision Faqs
Sprint Power Vision FAQs Can I make calls and use Sprint Power Vision services at the same time? You cannot use voice and Sprint Power Vision services simultaneously. If you receive a call while Sprint Power How will I know when my phone is ready for Sprint Power Vision service is active, the call will be forwarded to Vision service? voicemail. - Page 171 Can I sign out of data services? You can sign out without turning off your phone; however, you will not be able to browse the Web or use other Sprint Power Vision services. While signed out, you can still place or receive phone calls, check voicemail, and use other voice services.
-
Page 172: Entertainment: Sprint Tv And Sprint Music
Section 3C Sprint TV Entertainment: Sprint TV Your Sprint TVChannel Options The Sprint TV application offers a wide variety of and Sprint Music accessible channels. Subscription options include comprehensive basic packages as well as a full menu of “a la carte” channels. Visit for more www.sprint.com Sprint TV(page 158) - Page 173 Playing a Video or Audio Clip While you are playing a clip, you can press the navigation key up and down to surf to a different Press Menu > Entertainment channel. A small pop-up screen will be displayed that tells you which channel you are watching as Select , or to display channel...
- Page 174 Playing Music Applications Using the Sprint TV FAQs External Control Keys Will I know if I’m receiving an incoming call while I’m viewing or listening to a media clip? The external control keys can be used to play, pause, No. All incoming calls will roll into voicemail while stop, forward, or rewind a music application.
- Page 175 page, you have the ability to cancel the service or Are the videos that I’m viewing “live”videos? any channels to which you subscribe. It depends on the content provider. Some of the channels available through Sprint TV stream live If I put on my stereo headset and insert it into the phone’s content.
-
Page 176: The Sprint Music Store
The Sprint Music Store Purchasing and Downloading Music Now that you’re in the store, you can shop for songs to The Sprint Music Store enables you to purchase and purchase and download to your phone’s microSD card. download digital music files to play on your phone or From the Sprint Music Store opening page, select computer. - Page 177 When you select , the file will to browse through all of your Buy Song All My Music ● download to your phone’s microSD card. downloaded music, including music purchased (If there is no microSD card installed or if there from the Sprint Music Store and any additional is not enough free memory space on the card, songs you have loaded onto your microSD card...
- Page 178 Backing Up Your Downloaded Music Files Note Although you can store AAC+ files on your computer, they will only be playable on your phone When you purchase and download a music file and on your account. from the Sprint Music Store, you get two versions of the song: one to download and play on your phone If you copy the files to a new microSD card, you will (file type: AAC+), and another to download from...
-
Page 179: Streaming Music
If the phone is running more than one simultaneous Streaming Music application (such as [from My Music Store Application Stuff], and Games ), the user interface can begin to slow In addition to the Sprint Music Store, Sprint PowerVision down and result in music or sound interruptions. offers a variety of musical options through the Music To solve this type of issue, it is best to close down category in the Sprint TV menu, including SIRIUS Music,... -
Page 181: Section 4: Safety And Warranty Information
Section 4 Safety and Warranty Information... -
Page 182: Important Safety Information
Section 4A General Precautions Important Safety There are several simple guidelines to operating your phone properly and maintaining safe, satisfactory service. Information To maximize performance, do not touch the bottom portion of your phone where the internal antenna is located while using the phone. -
Page 183: Maintaining Safe Use Of And Access To Your Phone
Maintaining Safe Use of and Using Your Phone Near Other Electronic Devices Most modern electronic equipment is shielded from radio Access to Your Phone frequency (RF) signals. However, RF signals from wireless phones may affect inadequately shielded electronic equipment. RF signals may affect improperly installed or inadequately shielded electronic operating systems or entertainment systems Do Not Rely on Your Phone for Emergency Calls in motor vehicles. -
Page 184: Using Your Phone With A Hearing Aid Device
Turning Off Your Phone in Dangerous Areas Using Your Phone With a Hearing To avoid interfering with blasting operations, turn your phone off Aid Device when in a blasting area or in other areas with signs indicating two-way radios should be turned off. Construction crews often use remote-control RF devices to set off explosives. - Page 185 out the phone with your hearing device is the best way to find the one that works best with your hearing aid device. Should evaluate it for your personal needs. you experience interference or find the quality of service unsatisfactory after purchasing your phone, promptly return it to M-Ratings : Phones rated M3 or M4 meet FCC requirements for the store within 30 days of purchase.
-
Page 186: Caring For The Battery
Caring for the Battery Don’t attempt to disassemble or short-circuit the battery. The battery may need recharging if it has not been used for a long period of time. Protecting Your Battery The guidelines listed below help you get the most out of your It’s best to replace the battery when it no longer provides battery’s performance. -
Page 187: Radio Frequency (Rf)Energy
Radio Frequency (RF)Energy approved carrying case, holster or other body-worn accessory. If you do not use a body-worn accessory, ensure the antenna is at least 0.945 inch (2.4 centimeters) from your body when Understanding How Your Phone Operates transmitting. Use of non-Sprint-approved accessories may Your phone is basically a radio transmitter and receiver. - Page 188 in safety. SAR values at or below the federal standard of 1.6 W/kg FCC Notice are considered safe for use by the public. This device complies with Part 15 of the FCC Rules. Operation is The highest reported SAR values of the KATANA ®...
-
Page 189: Owner's Record
If this equipment does cause harmful interference to radio or User Guide Proprietary Notice television reception, which can be determined by turning the equipment off and on, the user is encouraged to try to correct CDMATechnology is licensed by QUALCOMM Incorporated the interference by one or more of the following measures: under one or more of the following patents: Reorient the direction of the internal antenna. -
Page 190: Manufacturer's Warranty
Section 4B Note In addition to the warranty provided by your phone’s manufacturer, which is detailed on the following pages, Sprint offers a number of optional plans to Manufacturer’s Warranty cover your equipment for non-warranty claims. Sprint Total Equipment Protection provides the combined coverage of the Sprint Equipment Manufacturer’s Warranty (page 177) Replacement Program and the Sprint Equipment... -
Page 191: Manufacturer's Warranty
Manufacturer’s Warranty This limited warranty covers batteries only if battery capacity falls KYOCERA SANYO Telecom, Inc. (“KSTI”) offers you, the below 80% of rated capacity or the battery leaks. Also this limited original purchaser who has purchased the enclosed subscriber warranty does not cover any battery if (i) the battery has been unit (“Product”) only from an authorized dealer in the United... - Page 192 KSTI To obtain warranty service, contact or a KSTI authorized service center. KYOCERA SANYO Telecom, Inc This warranty is valid only in the United States. Attention : Customer Services forWireless Products...
- Page 193 Copyright © 2008 InnoPath Software. All rights reserved. The Bluetooth word mark and logos are owned by the Bluetooth SIG, Inc. and any use of such marks by Kyocera Corporation is under license. Other trademarks and trade names are those of their respective owners.
-
Page 194: Index
Index Calculator 84 Data Roam Guard 63 Calendar 80 Deleting Phone Content 56 Call Forwarding 140 Dialing Options 21 Abbreviated Dialing 27, 50 Call Guard 62 Display Language 50 Airplane Mode 47 Call Waiting 139 Display Screen 11 Alarm Clock 84 CallerID 138 Display Settings 39 Answering Calls 21... - Page 195 Headset Options 51 Location 43 Net Guard 143 History 64 Lock Code Deleting 68 Changing 54 Phone (Illus.) 8 Making a Call From 66 Locking YourPhone 54 Phone Number Menu Options 66 Displaying 19 Prepending a Phone Number Making Calls 20 Finding 26 Maps 34 Saving 26...
- Page 196 Sprint Picture Mail Sprint Service Resetting 57 Downloading Photos and Account Passwords 4 videos 118 Restricting Calls 55 Dialing Sprint Services 77 Sending 115 – 116 RingerTypes 35 OperatorServices 6 Uploading Photos and Videos Roaming 60 Setting Up 2 Setting Roam Mode 61 Sprint 411 6 Web Site 117 Sprint TV 158...
- Page 197 Videos Options 111 Recording 110 Settings 112 Voice Memos 89 – 91 Voice Services 86 – 93 Voicemail Menu Key 135 Options 132 Retrieving 131 Setting Up 4 While Roaming 61 Volume 37 Warranty 177 Web 151 – 154 Wireless Backup 77 World Clock 85 Index...
- Page 198 NOTES...