Table of Contents
Advertisement
Quick Links
Advertisement
Table of Contents

Related Manuals for Siemens GIGASET C88


Summary of Contents for Siemens GIGASET C88
- Page 1 HW D CD 8516 P/T S Be inspired Gigaset User Manual...
- Page 3 Congratulations Congratulations on your purchase of the Siemens Gigaset C88 telephone system! This phones 2.4 GHz frequency and high-speed digital voice encoding provide re- ception and voice clarity that is superior to other cordless phones. And, its digital spread spectrum technology will provide you with secure, private conversations.
-
Page 4: Quick Reference
General Quick reference Handset Turn handset on/off Hold down (see page 10) ª Turn keypad protection on/off Hold down (see page 10) « Turn tones on/off Hold down Make an external call (see page 15) Redial a number If applicable, select an entry (see page 17) Copy telephone number... -
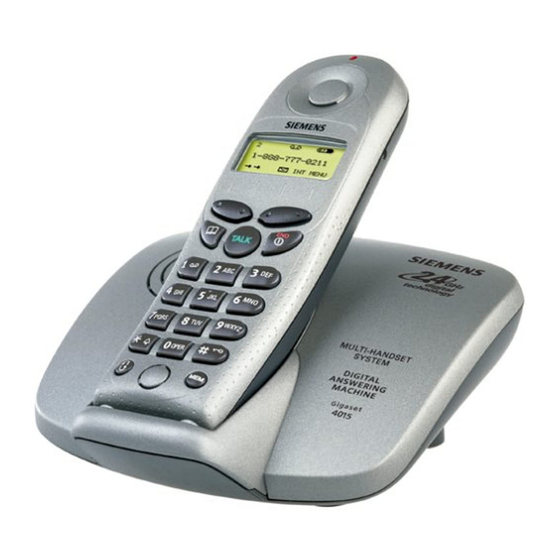
Page 5: Handset Diagram
General Handset Diagram lights up during a call; flashes at: - incoming calls - new messages - alarm call Headset jack Charging status 10--30 AM Talk key Display - answer a call INT MENU MENU MENU MENU Current display and - dial a telephone number soft keys see below... -
Page 6: Display Symbols
General Display symbols General 10--30 AM INT MENU MENU MENU MENU MENU Automatic redial Mailbox icon: Intercom key: Menu key: key: Opens the messages/ Call other regis- To access menu Opens the list entries in the Call Log/ tered handsets. (when the tele- with the last five Telco voice mail. -
Page 7: Table Of Contents
4010 BookTOC.fm 29.01.03 Gigaset 4010 Classic, CHIN, A31008-G4010-C101-2-7619 Table of Contents Installing the Telephone System ......6 Date and Time ............11 Making Calls ............15 Enhanced Telephone Features ....... 17 Handset Operation ..........26 Individual Handset Settings ........31 Base Station Settings .......... -
Page 8: Installing The Telephone System
Installing the Telephone System Press Keys: Installing the Telephone System The package contains the following: • 1 Gigaset C88 base station • 1 Gigaset C88 handset • 1 power supply unit • 1 telephone cord • 1 belt clip • 2 AA rechargeable NiCd batteries •... - Page 9 Installing the Telephone System Connecting the Base Station Power supply unit Telephone jack and tele- (220 V / 50 Hz phone cord with cord ) • Insert the small plug on cord into phone jack • Place cord in the base cable channel •...
-
Page 10: Setting Up The Handset
• Use only “AA” rechargeable NiCd or NiMH batteries. Do not use Alkaline, Lithium or non-rechargeable batteries. • Never use non-Siemens charging units as these could damage the batteries and phone. Placing the Handset into the Base Station and Charging the Batteries Ö... -
Page 11: Attaching The Belt Clip
Installing the Telephone System Press Keys: Leave the handset for about 12–14 hours in the base station to charge the batteries. The charging status symbol flashes on the handset, indicating that the batteries are being charged: Ý Û Batteries empty Batteries (symbol flashes) charged... - Page 12 Installing the Telephone System Press Keys: Turning Handset On/Off To turn handset on/off, hold down the End key – you will hear a confirmation beep* The handset is turned on as soon as you in- sert the batteries and place the handset in the base station.
-
Page 13: Date And Time
Date and Time Press Keys: Date and Time Setting the Date and the Time The date and time settings are necessary in order for the date and time of the arrival of messages/in- coming calls to be displayed correctly. If you sub- scribe to Caller ID, the time and date will be auto- matically set with the first incoming call. -
Page 14: Clock Mode
Date and Time Press Keys: The current setting is displayed as HH:MM. For example: ]Þ^Þ Enter the hours/minutes for example, 10:30 as shown. < > ååååååå ååååååå If necessary, skip to a digit to correct it. ååååååå Save the setting by pressing OK. If 12 hour mode is set as Clock Mode: ååååååå... -
Page 15: Setting The Alarm
Date and Time Press Keys: Setting the Alarm Your Gigaset has an alarm function to help you keep track of your schedule. A prerequisite for this function that you have set date and time (see page 11). Turning the Alarm On The active alarm rings every day at the set time. - Page 16 Date and Time Press Keys: Stopping the Alarm Sound An alarm clock rings and both LED and ring tone work about 30 seconds. Press any key on the hand- set to turn off the alarm sound. The alarm will sound about 30 seconds and stop.
-
Page 17: Making Calls
Making Calls Press Keys: Making Calls Making an External Call Dial the telephone number. If necessary use the backspace key to correct single digits. Press the Talk key. To end the call, press the End key. • You can also press the Talk key first and then enter the telephone number –... -
Page 18: Answering A Call
Making Calls Press Keys: Answering a Call Press the Talk key. ÖÄ ÖÄk k k k ÖÄ ÖÄ Pick up the handset from the base station or charg- er (default: Auto talk, see page 32). Answering Caller ID Calls Caller ID is a service provided by the local telephone company which allows your Gigaset to display the name and number of the person who is calling you. -
Page 19: Enhanced Telephone Features
Enhanced Telephone Features Press Keys: Enhanced Telephone Features In addition to standard telephoning, your Gigaset offers a number of other fast, convenient features. Redial Your handset automatically saves the last five tele- phone numbers dialed. ååååååååå Select RDL. ååååååå ååååååå Scroll to the desired telephone number. -
Page 20: Dialing A Number From The Directory
Enhanced Telephone Features Press Keys: Directory The Directory allows you to store up to 20 tele- phone numbers. Storing a Directory Entry Open the Directory list. åååååååååååå Open the Menu. MENU ååååååå åååååååååååååååååååååååååååååååå ååååååå Scroll to New Entry and press OK. NEW ENTRY o Enter the telephone number (max. -
Page 21: Open The Directory
Enhanced Telephone Features Press Keys: Displaying and Editing a Directory Entry Open the Directory. For example: Enter the first letter of the name, such as Eric. åååååååååååå Open the Menu. MENU ååååååå åååååååååååååååååååååååååååååååå ååååååå Scroll to Display Entry and press OK. The number is DISPLAY ENT displayed. - Page 22 Enhanced Telephone Features Press Keys: Memory Dial List The Memory Dial allows you to store up to 9 fre- quently dialed numbers for quick access using the 1–9 keys. It is recommended that you use the "1" for answering machine or voice mail from the tele- phone company.
- Page 23 Enhanced Telephone Features Press Keys: Dialing a Number from the Memory List Select the memory location desired and give the key a long press. Example: Long press on key is for Eric. The telephone number is displayed. Press the Talk key. Displaying and Editing a Memory Dial Number Open the Memory Dial list.
-
Page 24: Call Log
Enhanced Telephone Features Press Keys: Call Log The numbers of the last 30 incoming calls are saved in the Call Log. • Calls picked up on the first ring will not be logged in the Call Log. Call Waiting calls are included in the Call Log if you have sub- scribed to Caller ID with Call Waiting from your local telephone company. -
Page 25: New Call Indicator
Enhanced Telephone Features Press Keys: New Call Indicator ååååååå If there are new calls or a telco voice message, the new call symbol in the display and the LED on top of the handset will flash. New Calls ååååååå Select the new call symbol. ååååååå... - Page 26 Enhanced Telephone Features Press Keys: Calling from Call Log Important: There are certain exceptional cases (such as a long distance call despite the same Area Code, Metro Numbers) which are not covered by this check. In these cases please dial the correct number manually. ååååååå...
- Page 27 Enhanced Telephone Features Press Keys: Copying Call Log Number to the Directory ååååååå Open the Call Log. ååååååå åååååååååååååååååååååååååååååååå ååååååå Scroll to Call Log and press OK. C LOG ååååååå ååååååå Scroll to the telephone number. åååååååååååå Open the Menu. MENU ååååååå...
-
Page 28: Handset Operation
Automatic Registration Automatic registration is possible for only the sup- Ö plied handset and any additional Gigaset C88 hand- sets. Before using your handset, turn it off and place it in the base station with the display facing you. After approximately one minute, the handset will be registered and its internal (intercom) number is shown (for example, 2). -
Page 29: Manual Registration
Handset Operation Press Keys: Manual Registration You may also manually register additional handsets to your base station. åååååååååååå Open the Menu. MENU ååååååå åååååååååååååååååååååååååååååååå ååååååå Scroll to Register Handsets and press OK. REGISTER HS is displayed. ååååååå Enter the 4-digit system PIN (default: 0000) and press OK (see page 33 for Changing System PIN). -
Page 30: Changing The Name Of A Handset
Handset Operation Press Keys: Changing the Name of a Handset The names INT 1, INT 2, and so on are assigned au- tomatically. However, you can change these names, for example, to ANNE or OFFICE (10 characters maximum). ååååååå Press the intercom soft key. ååååååå... -
Page 31: Transferring A Call
Handset Operation Press Keys: Transferring a Call You can transfer an external call to another handset. ååååååå Press the Intercom soft key. The external caller hears music on hold. For example: Ÿ Enter the intercom handset number. When the internal user answers, announce the ex- ternal call. -
Page 32: Resetting A Handset
Handset Operation Press Keys: Turning the Ringer On/Off All handsets ring when there is an incoming call. You can turn off the ringer. « Hold down the asterisk key until the handset does not ring any more. The ringer is deactivated. «... -
Page 33: Individual Handset Settings
Individual Handset Settings Press Keys: Individual Handset Settings You can set your handset according to your wishes to distinguish it from the standard settings and to maximize convenience. Change the Display Language of a Handset åååååååååååå Open the Menu. MENU ¬Ÿ... -
Page 34: Ringer Melody
Individual Handset Settings Press Keys: Ringer Melody You can choose from ten ringer melodies (1–10). åååååååååååå Open the Menu. MENU ååååååå åååååååååååååååååååååååååååååååå ååååååå Scroll to Handset Settings and press OK. HS SETT ååååååå åååååååååååååååååååååååååååååååå ååååååå Scroll to Melody and press OK. MELODY ååååååå... -
Page 35: Base Station Settings
Base Station Settings Press Keys: Base Station Settings Ö All base station settings are conveniently made us- ing the handset! Changing the System PIN To protect the system settings from unauthorized access, you should change the default PIN (0000) to a PIN that only you know. T åååååååååååå... -
Page 36: Connecting The Base Station To A Pbx
Connecting the Base Station to a PBX Press Keys: Connecting the Base Station to a PBX Your Gigaset may be operating behind a PBX. Changing the Dialing Mode It is necessary to change the dialing mode only if your PBX does not operate with the preset tone di- aling (DTMF –... -
Page 37: Setting Pauses
Connecting the Base Station to a PBX Press Keys: Switching Temporarily to Tone Dialing If your PBX still operates with dial pulsing (DP) but tone dialing (DTMF) is required (for example, to check the mailbox), you must switch to tone dialing (DTMF) during the call. -
Page 38: Appendix
Appendix Appendix Character Map Blank Ÿ ¡ ¢ £ ¤ ¥ ¬ Þ – « ª Press the relevant key repeatedly or hold it down. < > Control the cursor with . Delete a character with . Characters are always inserted to the left of the cursor. The entries are sorted in the following sequence: 1. -
Page 39: Troubleshooting
Troubleshooting Maintenance Simply wipe the base station and handset with a damp cloth or an antistatic wipe. Never use a dry cloth as this can cause static discharge! Troubleshooting If your telephone does not behave the way you want it to, first try to solve the prob- lem using the following list. -
Page 40: Safety Precautions
Safety Precautions Safety Precautions Before using your telephone equipment, basic safety instructions should always be followed to reduce the risk of fire, electric shock and injury to persons. 1. Read and understand all instructions. 2. Follow all warnings and instructions marked on the product. 3. - Page 41 Safety Precautions BATTERY SAFETY PRECAUTIONS: To reduce the risk of fire, injury or electric shock, and to properly dispose of batteries, please read and understand the following instructions. CONTAINS NICKEL CADMIUM BATTERY. BATTERY MUST BE RECYCLED OR DISPOSED OF PROPERLY. DO NOT DISPOSE OF IN MUNICIPAL WASTE.
- Page 42 A3 1 0 0 8 - G4 0 1 0 - C 1 0 1 - 2 - 7 6 1 9...