Brother P-touch PT-2030 User Manual
Hide thumbs
Also See for P-touch PT-2030:
- Guía del usuario (74 pages) ,
- User manual (68 pages) ,
- Specifications (2 pages)
Table of Contents
Advertisement
Advertisement
Table of Contents

Related Manuals for Brother P-touch PT-2030


Summary of Contents for Brother P-touch PT-2030
- Page 1 ESPAÑOL USER’S GUIDE INTRODUCTION Read this User’s Guide before you start using your P-touch. Keep this User’s Guide in a handy place for future reference. GETTING STARTED EDITING A LABEL LABEL PRINTING USING THE FILE MEMORY MAINTAINNING YOUR P-TOUCH LABELER TROUBLESHOOTING APPENDIX INDEX...
- Page 2 This Class B digital apparatus complies with Canadian ICES-003. Compilation and Publication Notice Under the supervision of Brother Industries, Ltd., this manual has been compiled and published, covering the latest product’s descriptions and specifications. The contents of this manual and the specifications of this product are subject to change without notice.
-
Page 3: Important Information
Important Information Should you have questions, or need information about your Brother Product, we have a variety of support options for you to choose from: Customer Service 1-877-BROTHER (877-276-8437) Fax: (514) 685-4898 World Wide Web www.brother.ca/ Supplies / Accessories www.brother.ca/ or 1-877-BROTHER 1 rue Hôtel de Ville, Dollard-des-Ormeaux, Québec, H9B 3H6 Canada... -
Page 4: Table Of Contents
INTRODUCTION Contents How to use the P-touch labeler ..................4 Safety Precautions ......................5 General Precautions ......................8 Symbols Used in this Guide ...................9 GETTING STARTED................10 Unpacking Your P-touch labeler ..................10 General Description .....................10 LCD Display & Keyboard .....................11 LCD Display......................11 Key Names and Functions..................12 Power Supply .......................14 Battery ........................14 AC Adapter ......................15... - Page 5 Setting Character Attributes ..................25 Setting Character Attributes by Label ..............25 Setting Character Attributes by Each Line ............25 Setting Auto Fit Style .................... 28 Setting Label Attributes ....................29 Using Auto-Format Layouts..................31 Using Templates - Example creating an Asset Tag..........31 Using Block Layouts .....................
- Page 6 INTRODUCTION TROUBLESHOOTING ................55 What to do when......................55 Error Messages......................56 APPENDIX .................... 59 Specifications .......................59 INDEX....................60...
-
Page 7: How To Use The P-Touch Labeler
How to use the P-touch labeler Create a label with the P-touch labeler GETTING STARTED Prepare the P-touch labeler. P. 10 CREATING A LABEL • Entering and Editing text. In addition to entering text, the P-touch labeler P. 20 has a large range of formatting options. •... -
Page 8: Safety Precautions
INTRODUCTION Safety Precautions To prevent injury and damage, important notes are explained using various symbols. The symbols and their meanings are as follows: Indicates a potentially hazardous situation which, if not avoided, WARNING could result in death or serious injuries. Indicates a potentially hazardous situation which, if not avoided, CAUTION may result in minor or moderate injuries. - Page 9 Failure to observe this may result in an DO NOT use the AC adapter in places accident or damage. Brother shall not of high humidity such as bathrooms. assume any responsibility for any DO NOT use a damaged adapter cord accident or damage resulting from not or power plug.
- Page 10 INTRODUCTION CAUTION Battery Follow these guidelines to avoid liquid leakage, heat or rupture of the battery . DO NOT use old and new batteries DO NOT set the positive and negative together. end in the wrong position. DO NOT mix alkaline batteries with Remove the batteries if you do not other type batteries.
-
Page 11: General Precautions
• Depending on the environmental conditions and the applied settings, some characters or symbols may be difficult to read. • Use only Brother TZ tapes with this machine. Do not use tapes that do not have the mark. • DO NOT pull or apply pressure to the tape in the cassette. Otherwise the tape cassette or printer may be damaged. -
Page 12: Symbols Used In This Guide
INTRODUCTION Symbols Used in this Guide The following symbols are used throughout this guide to indicate additional information. This symbol indicates information or directions that may result in damage or injury if ignored, or operations that will result in errors. This symbol indicates information or directions that may help you understand and use the P-touch more efficiently. -
Page 13: Getting Started
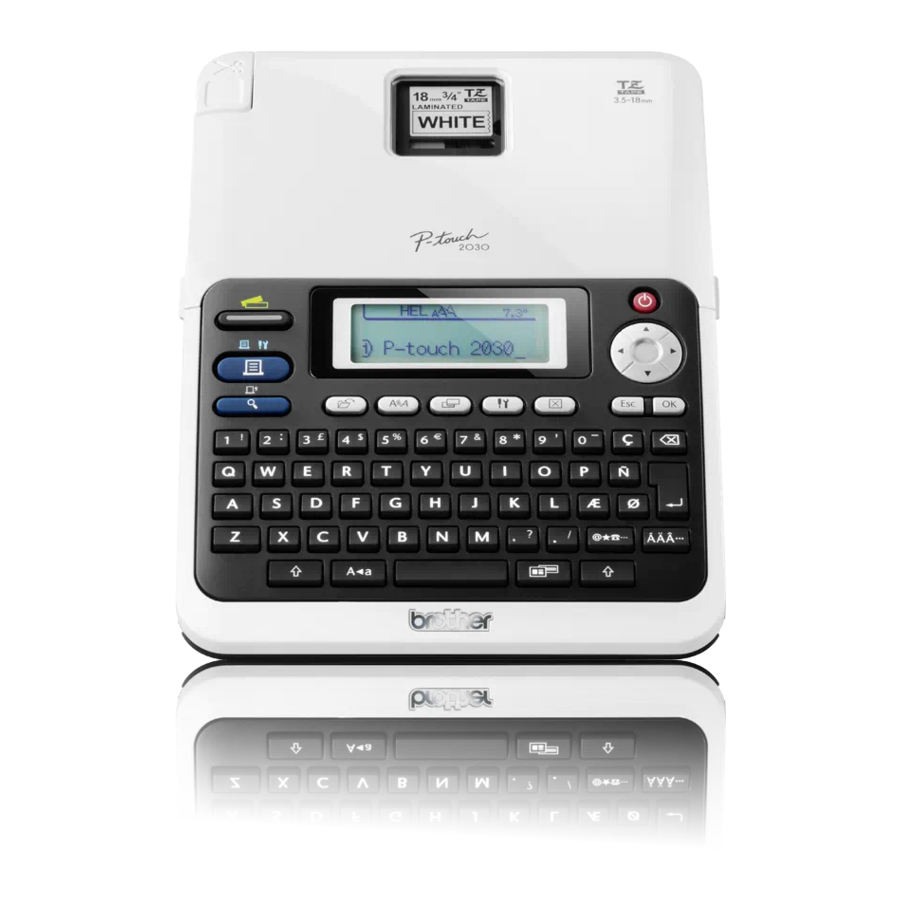
GETTING STARTED Unpacking Your P-touch labeler Check that the package contains the following before using your P-touch labeler. P-touch labeler PT-2030 Starter Tape Cassette AC adapter User’s Guide The plug may differ by countries. General Description Tape cassette compartment Tape compartment cover LCD display Tape viewer Tape exit slot... -
Page 14: Lcd Display & Keyboard
GETTING STARTED Battery compartment cover Battery case AC adaptor connector LCD Display & Keyboard LCD Display 1. Line number 5.~8. Style guidance Indicates line number within the label Indicates the current font (5), character layout. size (6), character style (7) and frame (8) settings. -
Page 15: Key Names And Functions
Key Names and Functions The default language is "English". 1. Power 6. Print Turns the P-touch on and off. • Prints the current label design onto the tape. 2. Cursor ( • Opens the Print Options menu when Moves the cursor in the direction of the used in combination with the Shift arrow. - Page 16 GETTING STARTED 9. Text 15. Shift • Enables character attributes for the Use this key in combination with the label to be set. letter and number keys to type • Character attributes can be set for uppercase letters or the symbols each line of the label when the Text indicated on the number keys.
-
Page 17: Power Supply
Power Supply Battery After making sure that the power is off, remove the battery compartment cover on the back of the machine. If the batteries are already in the machine, remove them. Make sure that the power is turned off when replacing batteries. -
Page 18: Ac Adapter
• Use only the adapter, which is designed exclusively for your P-touch. Failure to observe this may result in an accident or damage. Brother shall not assume any responsibility for any accident or damage resulting from not using the specified AC adapter. -
Page 19: Inserting A Tape Cassette
Inserting a Tape Cassette Tape cassettes of 3.5 mm, 6 mm, 9 mm, 12 mm or 18 mm width can be used in your P-touch labeler. Use only Brother tape cassettes with the mark. • If the new tape cassette has a cardboard stopper, be sure to remove the stopper before inserting the cassette. -
Page 20: Turning Power On/Off
GETTING STARTED Insert the tape cassette into the tape compartment, with the end of the tape facing the machine's tape exit slot, and press firmly until you hear a click. When inserting the tape cassette, make sure that the tape and ink ribbon do not catch on the print head. -
Page 21: Feeding Tape
Feeding Tape Feed function The Feed function feeds 25 mm of blank tape. • Be sure to feed tape to remove any slack in the tape and ink ribbon after inserting the tape cassette. • Do not pull the label coming out of the tape exit slot. Doing so will cause the ink ribbon to be discharged with the tape. -
Page 22: Setting Language And Unit
GETTING STARTED Setting Language and Unit Language Press the Setup key to display the Setup menu, select "Language" using the key, and then press the OK or Enter key. Select a language for menu commands and messages shown on the LCD display by using the key. -
Page 23: Editing A Label
EDITING A LABEL Entering and Editing Text Entering Text from the Keyboard The keyboard of your P-touch labeler can be used in the same way as a standard computer keyboard. Adding a New Line To end the current line of text and start a new line, press the Enter key. A return mark appears at the end of the line and the cursor moves to the start of the new line. -
Page 24: Deleting Text
EDITING A LABEL Deleting Text Deleting one character at a time To delete a character from an existing line of text, move the cursor to the character to the right of the position you want to start deleting text and then press the Backspace key. -
Page 25: Entering Symbols
Entering Symbols In addition to the symbols available on the keyboard, there are various symbols (including international and extended ASCII characters) available with the symbol function. To enter a symbol, use the Symbol function (see below). Alternatively, hold down the Shift key and then press a key on the keyboard to enter the symbol printed on the selected key's upper-right corner. - Page 26 EDITING A LABEL Symbol List Category Symbols Punctuation Business Mathematics Brackets Arrows Unit International Number Pictograph Electrical Audio_Visual Signs Communication Vehicle Sports Nature Others The use of the CE mark is strictly governed by one or more European Council directives. Ensure that any labels you produce which use this mark conform with the relevant directives.
-
Page 27: Entering Accented Characters
Entering Accented Characters The P-touch labeler can display and print a set of accented characters such as other language specific characters. Enter the character you wish to change to an accented character. Caps mode can be used with the Accent function. Press the Accent key. -
Page 28: Setting Character Attributes
EDITING A LABEL Setting Character Attributes Setting Character Attributes by Label Using the Text key, you can select a font and apply size, width, style, line, and alignment attributes. Press the Text key. The current settings are displayed. Select an attribute using the key, and then set a value for that attribute using the key. - Page 29 Setting Options Attribute Value Result (Helsinki) (Brussels) Font (Florida) (Calgary) When Auto is selected, the text is Auto automatically adjusted to print in the largest size available for each tape width. 42pt 36pt 24pt Size 18pt 12pt Setting Character Attributes...
- Page 30 EDITING A LABEL Attribute Value Result Width x2/3 x1/2 Normal (Bold) (Outline) (Shadow) (Solid) Style (Italic) I+BLD (Italic Bold) I+OUT (Italic Outline) I+SHD (Italic Shadow) I+SLD (Italic Solid) (Vertical) Setting Character Attributes...
-
Page 31: Setting Auto Fit Style
Attribute Value Result Line (Underline) (Strikeout) Left Center Align (Alignment) Right Just (Justify) Setting Auto Fit Style When "Size" is set to "Auto" and "Length" is set to a specific length, you can select the way of reducing the text size to fit within the label length. When "Text Size"... -
Page 32: Setting Label Attributes
EDITING A LABEL Setting Label Attributes Using the Label key, you can create a label with a frame around the text and specify the label length and tab length. (Refer to “Setting Margin” on page 45.) Press the Label key. The current settings are displayed. - Page 33 Attribute Value Result Frame The length of the label can be set within the range 30 mm - Length 300 mm. When Auto is selected, the length of the label is automatically adjusted based on the amount of text entered. The length of the tab can be set within the range 0 mm - 100 mm.
-
Page 34: Using Auto-Format Layouts
EDITING A LABEL Using Auto-Format Layouts Using the Auto-Format function you can quickly and easily create labels for a variety of purposes, such as file tabs, equipment labels, name badges, etc. Simply select a layout from the templates or block layouts, enter the text and apply formatting as desired. Symbols and accented characters can also be used in auto-format layouts. - Page 35 Enter the text and then press the OK or Enter key. Repeat this for each text field. After all text fields are entered, the print menu is displayed when the OK or Enter key is pressed. Select "Print" using the key and then press the OK or Enter key to print the label.
- Page 36 EDITING A LABEL Attribute Value Details Bin Box (18 mm x 76 mm) Equipment Label (18 mm x 58 mm) Faceplate (VRT) (12 mm x 70 mm) Cable Wrap (18 mm x 39 mm) Address Label (18 mm x 70 mm) Template Name Name Badge 1 (18 mm x 72 mm)
-
Page 37: Using Block Layouts
Using Block Layouts Press the Auto-Format key to display the Auto-Format screen, and then select “Block Layouts” using the key. Press the OK or Enter key to display the Tape Width screen, and then select a tape width using the key. - Page 38 EDITING A LABEL • Press the Escape key to return to the previous step. • Refer to the Block Layouts table for a list of available block layouts. • To print multiple copies, sequentially numbered copies, or a mirror image of the label, with the print menu displayed hold down the Shift key and press the Print key to display the Print Options menu.
- Page 39 Attribute Value Details 2LineA 2LineB Block layout (12 mm tape) 3Line 1+2Line 2LineA Block layout 2LineB (9 mm tape) 1+2Line Block layout 1+2Line (6 mm tape) Using Auto-Format Layouts...
-
Page 40: Creating A Bar Code Label
EDITING A LABEL Creating a Bar Code Label Using the Bar Code function you can create labels with one dimensional bar codes for use with cash registers, stock control systems or other bar code reader systems, or even asset control tags used in an asset management system. •... -
Page 41: Entering Bar Code Data
Bar Code Settings Attribute Value CODE39, CODE128, EAN-8, EAN-13, Protocol GS1-128 (UCC/EAN-128), UPC-A, UPC-E, I-2/5 (ITF), CODABAR Small Width Large Under# (characters printed below bar code) C.Digit (check digit) (only available for the CODE39, I-2/5 and CODABAR protocols) Entering Bar Code Data Press the Setup key to display the Setup menu, select “Bar Code Input”... -
Page 42: Special Character List
EDITING A LABEL • Press the Escape key to return to the previous step. • Refer to the Special Characters List table for a list of all available settings. Special Character List CODE39 CODABAR Code Special Character Code Special Character (SPACE) Creating a Bar Code Label... -
Page 43: Editing And Deleting A Bar Code
CODE128, GS1-128 (UCC / EAN-128) Code Special Character Code Special Character Code Special Character (SPACE) FNC3 FNC2 FNC4 FNC1 Editing and Deleting a Bar Code • To edit the bar code data position the cursor beneath the bar code mark on the data entry screen and then open the Bar Code Input screen. -
Page 44: Label Printing
LABEL PRINTING Label Preview Using the Preview function you can check the layout of the label before printing. Press the Preview key. An image of the label is displayed on the screen. The length of the label is shown in the lower-right corner of the screen. Press the key to scroll the preview to the left or right. -
Page 45: Printing A Single Copy
Printing a Single Copy Make sure that the appropriate tape cassette is inserted and ready for printing. Press the Print key. "Printing...Copies" is displayed while the labels are being printed. To stop printing, press the Power key to turn off the P-touch labeler. There are several other messages that may appear when you press the Print key. -
Page 46: Auto-Numbering Labels
LABEL PRINTING Auto-numbering Labels Using the numbering function you can create a set of sequentially numbered labels from a single label format. Make sure that the appropriate tape cassette is inserted and ready for printing. Hold down the Shift key and press the Print key to display the print options screen, and then select "Numbering"... -
Page 47: Mirror Printing
Letters and numbers increase as shown below: ...9 ...Z ...z ...A9 Spaces (shown as underscores “_” in the example below) can be used to adjust the spacing between characters or to control the number of digits that are printed..99 AA ...ZZ 2_0 ...9_9 Mirror Printing... -
Page 48: Setting Margin
LABEL PRINTING Setting Margin The tape cutting options allow you to specify how the tape is fed and cut when printing labels. In particular, the “Chain” options greatly reduce the amount of wasted tape by using smaller margins and eliminating blank sections cut between labels. Press the Label key to display the Label menu. -
Page 49: Adjusting The Label Length
Setting Description Example • Use this setting when printing several *Feed the tape before using the cutter. labels with minimum margins. • Feed the tape before using the cutter. Otherwise a part of the text may be cut off. Do not try to pull the tape since this may 9.4 mm damage the tape cassette. -
Page 50: Printing From The Label Collection
LABEL PRINTING • The backing of some types of tapes may be pre-cut to make it easier to peel the backing.To remove the backing, simply fold the label lengthwise with the text facing inward, to expose the inside edges of the backing. Next, peel off the backing one piece at a time. •... - Page 51 Label Collection List Category Label Files (12 mm tape only) Office Signage (18 mm tape only) * Labels are for illustrative purposes only. Printing from the Label Collection...
- Page 52 LABEL PRINTING Category Label Caution (18 mm tape only) Shipping (18 mm tape only) (18 mm tape only) * Labels are for illustrative purposes only. Printing from the Label Collection...
- Page 53 Category Label Retail (18 mm tape only) Personal (12 mm tape only) * Labels are for illustrative purposes only. Printing from the Label Collection...
-
Page 54: Using The File Memory
USING THE FILE MEMORY You can store up to 9 of your most frequently used labels in the file memory. Each label is stored as a file, allowing you to quickly and easily recall your label when needed again. • When the file memory is full, each time you save a file you will need to overwrite one of your stored files. -
Page 55: Printing A Stored Label File
Printing a Stored Label File Press the File key to display the File screen. Select "Print" using the key. Press the OK or Enter key. The file number of a stored label is displayed. The label text is also displayed to identify the label. Select a file number using the key, and then press the Print, OK or Enter key to print the selected label. -
Page 56: Maintaining Your P-Touch Labeler
MAINTAINING YOUR P-TOUCH LABELER Resetting the P-touch Labeler You can reset the internal memory of your P-touch labeler when you want to clear all saved label files, or in the event the P-touch labeler is not operating correctly. Resetting the data to factory settings (Label collections stored in Favorites is not reset.) Turn off the machine. -
Page 57: Cleaning The Tape Cutter
Cleaning the Tape Cutter Tape adhesive can build up on the cutter blade after repeated use, taking the edge off the blade which may result in the tape jamming in the cutter. • About once every year, wipe the cutter blade using a cotton swab moistened with Isopropyl alcohol (rubbing alcohol). -
Page 58: Troubleshooting
TROUBLESHOOTING What to do when... Problem Solution The screen ‘locks’, or Refer to “Resetting the P-touch Labeler” on page 53 and the P-touch labeler reset the internal memory to the initial settings. If resetting does not respond the P-touch labeler does not solve the problem, disconnect normally. -
Page 59: Error Messages
Error Messages When an error message appears on the display, follow the directions provided below. Message Cause/Remedy Battery Weak! * The installed batteries are getting weak. Check The installed batteries are about to run out of power. Replace with new batteries or connect the AC adapter before continuing. Battery! Wrong Type An incompatible AC adapter is connected. - Page 60 TROUBLESHOOTING Message Cause/Remedy Insert An 18 mm tape cassette is not installed when an Auto- 18mm Tape Format for 18 mm tape is selected. Install an 18 mm tape Cassette! * cassette. Insert An 12 mm tape cassette is not installed when an Auto- 12mm Tape Format for 12 mm tape is selected.
- Page 61 Message Cause/Remedy Maximum Of There are already 5 bar codes entered in the text data when 5 Bar Codes you try to enter a new bar code. You can only use up to five Per Label! * bar codes in each label. Category Full! * The memory available for categories is full.
-
Page 62: Appendix
APPENDIX Specifications Main Unit Item Specification Display Character display 16 characters x 1 guidance and 2 lines text (128 dot x 48 dot) Screen contrast 5 levels (+2, +1, 0, -1, -2) Printing Print method Thermal Transfer Print head 112 dot / 180 dpi Print height 15.8mm max. -
Page 63: Index
INDEX AC adapter ........15 Return mark ........11 Accented Character List ....24 Auto power-off time ......17 size ............25 Special Character List .......39 Battery ..........14 Specifications ........59 Block Layouts ........35 style ...........25 Symbol List ........23 symbols ..........22 Caps mode ........ - Page 64 Contact Information (For Canada Only) Service Center Locations If you need a local service center, please consult www.brother.ca or call 1-877-BROTHER (1-877-276-8437) to locate the authorized service center closest to you. Note: Be sure to call the Service Center before your visit.