Toshiba e-STUDIO230 User Manual
Set up & start up basic copier operations key operator functions
Hide thumbs
Also See for e-STUDIO230:
- Operator's manual (316 pages) ,
- Service handbook (762 pages) ,
- Service manual (708 pages)

Related Manuals for Toshiba e-STUDIO230


Summary of Contents for Toshiba e-STUDIO230
- Page 1 User Guide Set Up & Start Up Basic Copier Operations Key Operator Functions Toshiba America Business Solutions, Inc. © 2004 Toshiba America Business Solutions, Inc. © 2004 Training and Dealer Development Training and Dealer Development...
- Page 3 SET UP & START UP Turning the System On Turning the System Off Overview of Copier Components Overview of Operator Panel Touch Panel Page 1...
-
Page 4: Turning The System On
Turning the System On 1. Open the switch cover, and then turn ON the power switch. “Wait Warming Up” appears on the Basic screen on the touch panel. 2. About 25 seconds later, the equipment will be ready. “READY” appears on the Basic screen. TIPS: While the copier is warming up, you can use the Auto Job Start function. - Page 5 Turning the System Off (Cont’d.) 2. Press the USER button to enter the user setting menu, and then press the SHUTDOWN button. 3. “Processing job will be deleted. Are you sure you want to shutdown?” appears on the screen. Press the YES button. To cancel the shutdown operation, press the NO button.
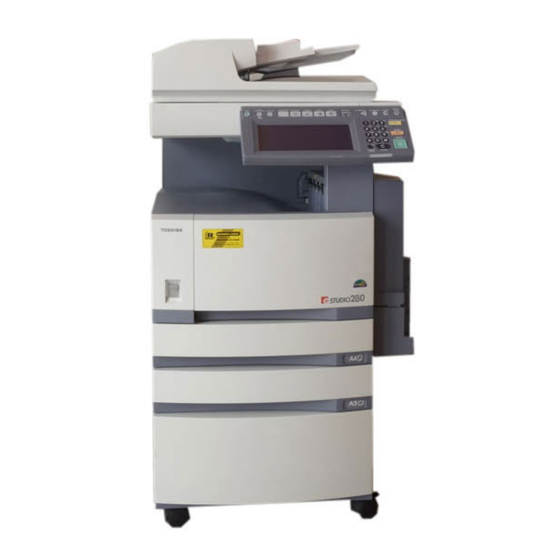
- Page 6 Overview of Copier Components 1. Front cover 2. Drawers 3. Operator’s Manual Pocket (back side) 4. Power switch 5. Automatic duplexer 6. Bypass tray *1, *2: Optional Page 4...
- Page 7 7. Original scale 8. Inner tray 9. Control panel 10. Touch panel 11. Touch panel contrast adjustment volume 12. Toner Page 5...
- Page 8 Overview of Operator Panel OUCH PANL 1. HELP button When pressing this button, appropriate operation procedures are displayed. 2. USER FUNCTIONS button Press this button to set the paper size of the drawer, the drawer for special use, or to set/register the settings including such as the change of the default setting of the copy, scan and Fax functions.
- Page 9 8. FAX button Press this button to use the Fax/Internet Fax function. (Optional FAX board, printer/scanner kit, or both printer kit and scanner upgrade kit is required.) 9. PRINT DATA/MEMORY RX/FAX communication If these lamps light, they show the status of receiving data, receiving original(s) standing by to be printed and currently used telephone line (1 or 2).
-
Page 10: Touch Panel
Touch Panel When the power is turned on, and “READY” is displayed, the BASIC screen of the copy function is shown on the touch panel. On the screen, currently set functions, selected functions and the copier status are shown via messages and illustrations. NOTE: The contents of touch panel screens in this manual show the equipment with all options. -
Page 11: Touch-Buttons
Touch Panel (Cont’d.) TOUCH-BUTTONS The various function items are touch-button selectable. Press any button lightly with your finger. Index buttons — These buttons are used for switching the menu. The type and the number of the index buttons varies depending on each function of Copy, Scan and Fax. Function setting area —... -
Page 12: Clearing The Functions Selected
Touch Panel (Cont’d.) CLEARING THE FUNCTIONS SELECTED If you press any button that is half-tone shaded, the function selected is cleared. Also, if the copier is left inactive for a while, the automatic function clear works and the setting is cleared. Automatic Function Clear —... - Page 13 BASIC COPIER OPERATIONS Making a Copy From the Glass Making a Copy From the RADF Magazine Sort & Saddle Stitch Mode (Booklet Mode) Hole Punch Mode Page 11...
-
Page 14: Sheet Originals
Making a Copy From the Glass Sheet Originals: 1. Raise the original cover or the reversing automatic document feeder (optional), and place the original face down on the glass. Raise it 60 degrees or more for detecting the original. A: Original 2. -
Page 15: In The Continuous-Feed Mode
Making a Copy From the RADF In the Continuous-Feed Mode: 1. After aligning the edges of originals, place the originals face up and align the slides to their width. Align the originals in order from the top because they will be fed from the top. One original sheet is also acceptable. - Page 16 Magazine Sort & Saddle Stitch (Booklet Mode) When the Magazine Sort mode is selected, 1-sided originals can be copied and bound like magazines or booklets. When the saddle-stitch finisher (optional, MJ-1025) is installed, you can select the saddle stitch mode that will automatically fold and staple the center of the document.
- Page 17 Setting Magazine Sort & Saddle Stitch Mode 1. Place paper in the drawer(s). 2. Set the paper size. 3. Place the original(s). When placing originals in the reversing automatic document feeder (optional), set them by referring to the order of previous pages in the illustrations. When placing them on the glass, place the first page of the originals first if the MAGAZINE SORT or the MAGAZINE SORT &...
-
Page 18: Hole Punch Mode (Optional)
Hole Punch Mode (Optional) When the optional hole punch unit is attached to the finisher (Optional: MJ-1025), you can hole punch your copies. The paper weight should be in the range of 17 lb. to 110 lb. Special paper such as OHP files or labels is excluded. 1. -
Page 19: Key Operator Functions
KEY OPERATOR FUNCTIONS Replacing the Toner Cartridge Changing the Paper Size of the Drawer and Adding Paper How to Clear a Misfeed Counter Reading Service Calls and Supply Orders Replacing the Toner Cartridge When the toner in the cartridge runs out, the REPLACE TONER CARTRIDGE symbol blinks and “Install new toner cartridge”... - Page 20 Replacing the Toner Cartridge (Cont’d.) 3. Pull out the toner cartridge. 4. Shake the new toner cartridge well to loosen the toner inside. 5. Pull out the seal in the direction of the arrow. 6. Insert the toner cartridge until it clicks. Page 18...
- Page 21 Replacing the Toner Cartridge (Cont’d.) 7. Lower the bypass tray. 8. Open the automatic duplexer. 9. Open the transfer cover to take out the transfer charger cleaner from the front pocket. 10. Wipe the transfer charger wire properly with the transfer charger cleaner.
- Page 22 Replacing the Toner Cartridge (Cont’d.) 11. Return the transfer charger cleaner to the front pocket, and then close the transfer cover. 12. Return the automatic duplexer and the bypass tray to their original position. 13. Close the front cover. Page 20...
- Page 23 Changing the Paper Size of the Drawer and Adding Paper The paper size of the drawers can be changed. The drawers can also be set for cover sheet, insertion, thick paper 1, Fax and special sheets. 1. Pull out the drawer carefully until it comes to a stop. 2.
- Page 24 Changing the Paper Size of the Drawer and Adding Paper 5. Push the arrow part (left side) to lock the size selection lever. 6. Place paper in the drawer(s). Place paper face up. Fan the paper well before placing it in the drawer. Do not add paper above the line indicated on the guide.
- Page 25 Changing the Paper Size of the Drawer and Adding Paper 9. Press the USER FUNCTIONS button on the control panel. 10. Press the USER button, then press the GENERAL button on the touch panel. 11. Press the DRAWER button. 12. Press the drawer button corresponding to the one in which the paper size has been changed, and then press the button indicating the new paper size.
-
Page 26: Paper Misfeed In The Drawer Feeding Area
How to Clear a Misfeed Paper Misfeed in the Drawer Feeding Area 1. Open the bypass tray. 2. Open the automatic duplexer. 3. Open the transfer cover. 4. Rotate the green knob as indicated by the arrow toward the inside and remove any misfed paper. 5. - Page 27 How to Clear a Misfeed (Cont’d.) 6. Open the cover. 7. Remove any misfed paper. 8. Close the cover. Paper Misfeed on the Bypass Feed Unit 1. Pull out misfed paper on the bypass tray. Page 25...
- Page 28 How to Clear a Misfeed (Cont’d.) Paper Misfeed in the Automatic Duplexer 1. Make sure that the bypass tray is opened, and then open the automatic duplexer. CAUTION: Be careful not to let your fingers be caught between the equipment and the automatic duplexer. Do not touch the metal portion of a guide board as it could burn you.
-
Page 29: Paper Misfeed In The Fuser Unit
How to Clear a Misfeed (Cont’d.) Paper Misfeed in the Fuser Unit 1. Make sure that the bypass tray and the automatic duplexer are opened, and then open the transfer cover. 2. Open the exit cover. Press it down completely. 3. -
Page 30: Displaying Print Counter
Counter Reading Displaying Print Counter This feature allows you to display the total number of the print counter. The print counter contains following counters: Copy Counter — indicates the number of sheets that has been printed by copy operations. Fax Counter — indicates the number of sheets that has been printed by fax receptions. Printer Counter —... -
Page 31: Displaying Scan Counter
Counter Reading (Cont’d.) Displaying Scan Counter This feature allows you to display the total number of the scan counter. The scan counter contains following counters: Copy Counter — indicates the number of originals that has been scanned by copy operations. Fax Counter —... -
Page 32: Displaying Print Counter For Department Code
Counter Reading (Cont’d.) Displaying Print Counter for Department Code This feature allows you to display the number of the print counter for each department code. NOTE: The department counter is available only when this equipment has been managed with the department code. The print counter contains following counters: Copy Counter —... - Page 33 Counter Reading (Cont’d.) Displaying Print Counter for Department Code (Cont’d.) 4. Press the PRINT COUNTER button. 5. The Print Counter for the specified department code is displayed. Page 31...
-
Page 34: Displaying Scan Counter For Department Code
Counter Reading (Cont’d.) Displaying Scan Counter for Department Code This feature allows you to display the number of the scan counter for each department code. NOTE: The department counter is available only when this equipment has been managed with the department code. The scan counter contains following counters: Copy Counter —... - Page 35 All service calls and supply orders will be placed using the phone number below: ________________________________________________ Please reference the Toshiba serial # on the GOLD Label on the front of the copier/fax system. Toshiba Serial Number ___________________________________________________ * IMPORTANT SUPPLY INFORMATION: PLEASE MAKE SURE THAT THE KEY-OP ORDERS ADDITIONAL SUPPLIES AS SOON AS THE LAST CARTRIDGE IS PLACED IN THE COPIER.
- Page 36 Notes Page 34...