Table of Contents
Advertisement
S
T T
able
o o
f
C C
ontents
Description of Control
Front Panel
Rear Panel
On-Screen Display
Display Window
Remote Control
Getting Connected Up
VCR to AV TV Connection Using the
SCART Connection
VCR to AV TV Connection Using the
S-Video Connection
Setting Up
Auto Set Up/Follow TV
Menu Operations
Power Save Mode
Language Setting
Follow TV
Auto Channel Setting
Manual Channel Setting
Clock Setting
S
V
®
Set Up
HOW
IEW
Selecting Colour Mode
Basic Operations
Playback
Recording
Automatic Operations
Main Features
Tape List
Timer Recording
Timer Recording Using S
System
Timer Recording
Turbo Timer
4
4
4
4
6
6
8
8
8
9
9
%
%
&
&
(
(
,
,
-
.
.
/
:
;
;
=
V
HOW
IEW
=
>
[
—
3
Advanced Operations
Special Effect Playbacks
Tracking Adjustments
Index Search
SmartPicture
DSPC
Receiving/Recording NICAM Stereo
and Bilingual Programmes
Selecting Monitor Sound
Using On-Screen Display
One Touch Recording (OTR)
Record End Search
Selecting Recording Format
Selecting AV1 and AV2 Output/Input
Signal
Automatic Satellite Programme
Recording
S-VHS ET
EasyLink Functions
Stabilizing Playback Quality
Audio Dubbing
Tape Duplication
System Connections
Connection to a Satellite Tuner
(Simple Connections)
Connection to a Satellite Tuner (Perfect
Connections)
Connection to a Decoder
Satellite Tuner Control Setting
Operating TV
Operating Satellite Tuner
Before Requesting Service
Specifications
—
\
\
]
]
]
^
_
_
{
{
|
|
|
}
V
0
0
1
2
3
3
4
5
6
8
9
!
#
Advertisement
Table of Contents

Related Manuals for Philips VR1200/02


Summary of Contents for Philips VR1200/02
- Page 1 able ontents Description of Control Advanced Operations Front Panel Special Effect Playbacks Rear Panel Tracking Adjustments On-Screen Display Index Search Display Window SmartPicture Remote Control DSPC Getting Connected Up Receiving/Recording NICAM Stereo VCR to AV TV Connection Using the and Bilingual Programmes SCART Connection Selecting Monitor Sound VCR to AV TV Connection Using the...
- Page 2 A B L E A B L E O N T E N T S O N T E N T S A B L E O N T E N T S afety recautions When the equipment is installed in a cabinet or a shelf, make sure that it has sufficient space on all sides to allow for WARNING:...
-
Page 3: Front Panel
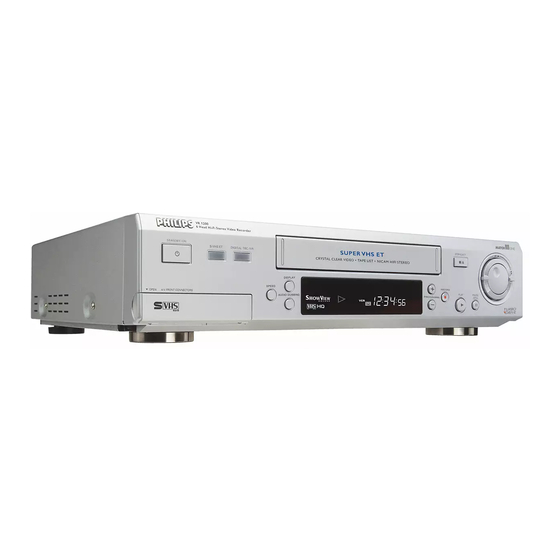
E S C R I P T I O N E S C R I P T I O N O N T R O L S O N T R O L S E S C R I P T I O N O N T R O L S Front Panel 17 18... - Page 4 ront anel 1 STANDBY/ON button 11 VIDEO input jack 2 S-VHS ET button (✈P.42) (✈P.39) 12 AUDIO input jacks 3 AUDIO DUBBING button (✈P.42) (✈P.41) 13 C. RESET button 4 SPEED button (✈P.23) (✈P.23, P.27, P.28) 14 Display window 5 DISPLAY button (✈P.6, P.7) (✈P.23) 15 IR (infrared) remote sensor...
-
Page 5: Display Window
E S C R I P T I O N E S C R I P T I O N O N T R O L S O N T R O L S E S C R I P T I O N O N T R O L S O N T I N U E D O N T I N U E D... - Page 6 isplay indow 1 Sound level indicator 6 Speed indicator SP – Standard Play 2 Programme time indicators \ \ \ \ \ : Start programme time. LP – Long Play (2 times recording mode for | | | | | : Stop programme time. PAL signal) EP –...
-
Page 7: Scart Connection
E T T I N G E T T I N G O N N E C T E D O N N E C T E D E T T I N G O N N E C T E D onnection iagram Outdoor antenna... -
Page 8: Auto Set Up/Follow Tv
E T T I N G E T T I N G E T T I N G Display window Auto Set Up/Follow TV For the first time you press the STANDBY/ON On-screen display button on the front panel (or POWER button on the remote control) to turn on the VCR after you \ BELGIUM ˇ... - Page 9 E T T I N G E T T I N G E T T I N G O N T I N U E D O N T I N U E D O N T I N U E D 5 5 5 5 5 Press OK/STATUS.
- Page 10 Do NOT press any button on the front panel or Notes: remote control until the display window shows • Auto channel set function takes place first; it either the display as illustrated in step 2 or “- - automatically assigns all receivable stations : - -”.
- Page 11 E T T I N G E T T I N G E T T I N G O N T I N U E D O N T I N U E D O N T I N U E D IMPORTANT •...
- Page 12 • If station names (ID)(✈P.19) have also been stored in the VCR’s memory, the station FOLLOW TV name will be displayed at the top left corner PLEASE WAIT of the screen for about 5 seconds when the VCR is tuned to a different station. •...
-
Page 13: Menu Operations
E T T I N G E T T I N G E T T I N G O N T I N U E D O N T I N U E D O N T I N U E D Menu Operations Power Save Mode You can reduce the power consumption while the... -
Page 14: Language Setting
6 6 6 6 6 Press 5 or ∞ to select “FOLLOW TV”, then Language Setting press OK/STATUS. The Follow TV screen You can also change the language manually. appears and then Guide Prog. Set screen 1 1 1 1 1 Press VCR. appears. -
Page 15: Auto Channel Setting
E T T I N G E T T I N G E T T I N G O N T I N U E D O N T I N U E D O N T I N U E D •... - Page 16 (Ex.) To store in position 12. If you want to delete unwanted channels You can delete channels manually. PR CH ID PR CH C26 E-SP CDB SKY1 09 WEST 1 1 1 1 1 Press VCR. C24 SAT1 C65 RAI1 C23 OSF 2 2 2 2 2 Press MENU.
- Page 17 E T T I N G E T T I N G E T T I N G O N T I N U E D O N T I N U E D O N T I N U E D If you want to change the station name to If you want to descramble programmes the ones other than the registered one, press...
-
Page 18: Tv Station And Id List
TV Station And ID List STATION NAME STATION NAME TV1000 ORF2 ORF2 1000 3SAT ORF3 ORF3 3SAT ADLT ADULT OWL3 OWL3 ANT3 ANTENA3 PREM PREMIERE PRO7 PRO7 ARTE RAI1 RAI1 ARTE BBC GROUP RAI2 RAI2 BBC1 RAI3 RAI3 BBC1 BBC2 BBC2 RET4 RETE4... -
Page 19: Show View ® Set Up
E T T I N G E T T I N G E T T I N G O N T I N U E D O N T I N U E D O N T I N U E D Notes: Clock Setting •... -
Page 20: Selecting Colour Mode
b) when you wish to timer-record a satellite Selecting Colour Mode programme with S system. In this case, set the Guide Channel Numbers for all satellite Before using the VCR, you need to set the colour broadcasts received on your satellite tuner. mode both for recording and playback. -
Page 21: Tape Position Indicator
A S I C A S I C P E R A T I O N S P E R A T I O N S A S I C P E R A T I O N S Tape Position Indicator Playback The tape position indicator appears on screen when, from the Stop mode, you press 1, ¡... - Page 22 To pause recording Recording (or PAUSE/STILL 8 on Press STILL/SLOW the front panel). When using this VCR, an index mark is always To resume recording, press the button again. marked at the beginning of every recording. • During the Record Pause mode, you can These index marks make it easier for you to change the channel position by pressing the search for the beginning of the recordings (see...
-
Page 23: Automatic Operations
A S I C A S I C P E R A T I O N S P E R A T I O N S A S I C P E R A T I O N S O N T I N U E D O N T I N U E D O N T I N U E D To prevent accidental erasure:... - Page 24 E A T U R E S Tape List 5 5 5 5 5 Press OK/STATUS. The VCR searches for the The Philips Tape List is a very helpful assistant. programme along the tape. The Tape List will tell you on which tape you find your recorded programmes.
- Page 25 Title Editing 1 Press 8 (TUV) once to enter “T”, then press FF 3. When you record a TV programme with this 2 Press 8 (TUV) three times to enter “V”, then VCR, the VCR automatically records the press FF 3. recording start time, date, and channel in each 3 Press 0 ( ) twice to enter the space, then...
- Page 26 I M E R I M E R E C O R D I N G E C O R D I N G I M E R E C O R D I N G 8 8 8 8 8 Press TIMER or OK/STATUS. “PROGRAM Timer Recording Using S WAS COMPLETED”...
-
Page 27: Timer Recording
I M E R I M E R E C O R D I N G E C O R D I N G I M E R E C O R D I N G O N T I N U E D O N T I N U E D O N T I N U E D 4 4 4 4 4 Press CH 5 or ∞... - Page 28 When two programmes overlap If you want to store other programmes, repeat steps 1 to 10. The Programmes Review PR CH START STOP DATE screen will appear with a 12 08:00 10:00 D 21/07 ! ! ! ! ! Press POWER (or STANDBY/ON on the 25 11:00 13:00 10/08...
- Page 29 I M E R I M E R E C O R D I N G E C O R D I N G I M E R E C O R D I N G O N T I N U E D O N T I N U E D O N T I N U E D ALT/SPEED : Changes the tape speed.
-
Page 30: Turbo Timer
VPS/PDC Recording Now available from some TV stations, PDC (Programme Delivery Control) and VPS (Video 2 2 2 2 2 To change the START time, press the 5 or ∞ Programme System) are services designed to assure safe, accurate timer recording. With this (if you press and hold the button, the time system, special code signals are transmitted changes in 30-minute increments) then press... -
Page 31: Special Effect Playbacks
D V A N C E D D V A N C E D P E R A T I O N S P E R A T I O N S D V A N C E D P E R A T I O N S To rapidly locate, then freeze, a particular Special Effect Playbacks scene... -
Page 32: Tracking Adjustments
button repeatedly, indicating how many index Tracking Adjustments marks ahead of or behind that recording you want is from the tape’s current position. Auto tracking • Up to ±9th index mark from the current Each time a tape is inserted, auto tracking starts position on the tape can be located. - Page 33 D V A N C E D D V A N C E D P E R A T I O N S P E R A T I O N S D V A N C E D P E R A T I O N S O N T I N U E D O N T I N U E D O N T I N U E D...
-
Page 34: Receiving/Recording Nicam Stereo And Bilingual Programmes
Receiving/Recording NICAM Stereo Selecting Monitor Sound and Bilingual Programmes This VCR is capable of recording three sound- This VCR can receive and record stereo and tracks (Hi-Fi L, Hi-Fi R, and normal) and will bilingual programmes, including the NICAM play back the one you select. Also, this VCR can (Digital Stereo Sound) and A2 (sound Multiplex) receive and record stereo and bilingual pro- broadcasts. -
Page 35: Using On-Screen Display
D V A N C E D D V A N C E D P E R A T I O N S P E R A T I O N S D V A N C E D P E R A T I O N S O N T I N U E D O N T I N U E D O N T I N U E D... -
Page 36: Record End Search
Selecting AV1 and AV2 Output/Input Record End Search Signal This function enables you to search forward to the next unrecorded portion of the tape (or to the This VCR has two AV terminals on the rear panel. point at which recording was stopped). You have to correctly set the input or output signal depending on the type of unit connected to 1 Press the REC END button. - Page 37 D V A N C E D D V A N C E D P E R A T I O N S P E R A T I O N S O N T I N U E D O N T I N U E D D V A N C E D P E R A T I O N S...
- Page 38 Notes: S-VHS ET • Pressing the POWER or STANDBY/ON This VCR allows recording in Super VHS ET button while Automatic Satellite Programme (Expansion Technology) mode. You can record Recording mode or stand-by mode is in with S-VHS picture quality on VHS cassettes. progress will cancel the mode and “AUTO However, this function is available only for SP SAT RECORD LINK”...
- Page 39 D V A N C E D D V A N C E D P E R A T I O N S P E R A T I O N S D V A N C E D P E R A T I O N S O N T I N U E D O N T I N U E D O N T I N U E D...
-
Page 40: Audio Dubbing
Audio Dubbing Audio dubbing replaces the normal audio sound of a previously recorded tape with a new soundtrack. Use your VCR as the recorder. Pre-recorded tape Normal audio track Audio cable Video/Hi-Fi audio track Audio component Audio-dubbed (CD player etc.) tape 1 Connect an audio component to the AUDIO Notes:... -
Page 41: Tape Duplication
D V A N C E D D V A N C E D P E R A T I O N S P E R A T I O N S D V A N C E D P E R A T I O N S O N T I N U E D O N T I N U E D O N T I N U E D... -
Page 42: Connection To A Satellite Tuner (Simple Connections)
Y S T E M Y S T E M O N N E C T I O N S O N N E C T I O N S Y S T E M O N N E C T I O N S Connection to a Satellite Tuner (Simple Connections) Aerial Aerial... -
Page 43: Connection To A Satellite Tuner (Perfect Connections)
Y S T E M Y S T E M O N N E C T I O N S O N N E C T I O N S Y S T E M O N N E C T I O N S O N T I N U E D O N T I N U E D O N T I N U E D... -
Page 44: Connection To A Decoder
Connection to a Decoder Receiver RF Cable (provided) TV Aerial Cable ANT. IN ANTENNE ENTREE SORTIE IN/OUT AUDIO ENTREE/SORTIE AV1 (L-1) SAT CONTROL CONTROLEUR SAT AUDIO IN/DECODER ENTREE/SORTIE RF OUT PAUSE AV2 (L-1) ANTENNE TELEC. LP20916-003B SORTIE LP20916-003B Decoder The AV2 (L-2) IN/DECODER connector can be Notes: used as an input terminal for an external decoder •... - Page 45 A T E L L I T E A T E L L I T E U N E R U N E R O N T R O L O N T R O L E T T I N G E T T I N G A T E L L I T E U N E R...
- Page 46 CONFIRM : OK press OK/STATUS. END : MENU PANASONIC • If the brand code you PHILIPS 66, 84 entered is invalid, the code field will be reset. Enter the correct brand code again. SABA • If the recorder is in playback or recording, SAGEM you cannot set the brand code.
-
Page 47: Operating Tv
Note: TV Manufacturers’ Codes Though this remote control can operate most BRANDT of the PHILIPS TV’s as well as many other EMERSON manufacturers’ TVs, some of the TV’s will not FINLUX operate or some functions available on the GOLDSTAR TV’s will not work with this remote control. -
Page 48: Operating Satellite Tuner
CANAL SATELLITE....... 81 KATHREIN........70,71 CANAL +..........81 LUXOR..........68 D-BOX..........85 NOKIA........68, 87 ECHOSTAR........78 PACE..........86 ECHOSTAR (VIA DIGITAL)...82 PHILIPS........66, 84 FINLUX..........68 SALORA...........68 GRUNDIG........64 TPS............83 Setting Satellite tuner manufacturer’s code Note: 1 Press and hold SAT/CBL/DBS. Though this remote control can operate many... - Page 49 E F O R E E F O R E E Q U E S T I N G E Q U E S T I N G E R V I C E E R V I C E E F O R E E Q U E S T I N G E R V I C E...
- Page 50 If the top of your playback picture waves • Because the VCR playback signal is not as back and forth excessively. stable as an off-the-air TV signal, the top of your TV screen may be bent or unstable during playback. To solve this problem, slowly turn the horizontal hold control on your TV to correct the wavy picture.
-
Page 51: Specifications
P E C I F I C A T I O N S P E C I F I C A T I O N S P E C I F I C A T I O N S General Mains voltage AC 220V –...