LG 37LC2R Owner's Manual
32lc2r/37lc2r/42pc1rv/42lc2r/50pc1r/32lb1r/37lb1r/50pc3r/42lb1r series
Hide thumbs
Also See for 37LC2R:
- Owner's manual (89 pages) ,
- Service manual (44 pages) ,
- Owner's manual (88 pages)
Table of Contents
Advertisement
Quick Links
P
L
A
S
M
A
L
C
D
"
¢ K H U
"
¢ K H U
A Ç Å
Ç É Ü
∆
À ¿
a A
Õ
¿ æ
ñ G
¥ u Ê
O H e
« ∞ ∑ K
e ...
§ N
‹ √
« " «
© d
œ ...
e Ë
« ∞ L
¥ u Ê
O H e
« ∞ ∑ K
e ...
§ N
‹ √
L
C
D
W
U ®
° A
œ ...
e Ë
« ∞ L
± U
ö "
W °
32LC2R * * /37LC2R * * 42PC1RV * *
42LC2R * *
50PC1R * *
32LB1R * * /37LB1R * * 50PC3R * *
42LB1R * *
.
N U "
« ∞ π
O q
A G
Ë ¢
O q
« ∞ b ∞
≥ c «
¡ ...
Æ d «
Æ ∂ q
≠ o
∞ L d
‹ «
u ± U
L F K
q « ∞
œ ∞ O
¡ ...
Æ d «
.
} F Ñ
_ L
¿ Ç Ü
v ó
¿ Ö ç
X Z
.
å A Œ
¿ Ç R
â r
d
å é
‡ Q
å A Œ
Ç R
Ñ ¿
_
_ É
á Ö
‡ Õ |
å A Œ
¿ Ç R
À ï Ñ
Ö è
| á
Ñ Õ
R ñ
é
Z ‡ à
¿ Ç Ü
∆
Ö A
q É è
¿ Ç Ü
k A Â
E C p
‡ | á
É w ò
¿ Ç X
k A Â
Ç t
ò ¿
p É
v ~
Ç Ü \
~ ¿
e
¿ Ç Ü É
n \
, ¡ à
ñ A à é
e
Ç É
L A »
r .
:
\ ¿ Œ
Ñ :
_
_ É
P P / / N N O O : : 3 3 8 8 2 2 8 8 9 9 U U 0 0 0 0 2 2 5 5 H H ( ( 0 0 6 6 0 0 4 4 - - R R E E V V 0 0 0 0 ) )
ú L
« " «
© d
U ®
° A
§ v
¥ d
^ L
æ
E ç
_
E L
| á
K U
Ö A
p â Z
F A ô
ç Ç É
p É ñ
Ç k
á ¿
Õ |
á Ö
Õ |
LCD TV
PLASMA TV
OWNER's MANUAL
LCD TV MODELS
PLASMA TV MODELS
32LC2R * * /37LC2R * * 42PC1RV * *
42LC2R * *
50PC1R * *
32LB1R * * /37LB1R * * 50PC3R * *
42LB1R * *
M
P P l l e e a a s s e e r r e e a a d d I I n n f f o o r r m m a a t t i i o o n n
a a n n u u a a l l i i n n c c l l u u d d e e d d
t t o o g g e e t t h h e e r r b b e e f f o o r r e e r r e e a a d d i i n n g g t t h h i i s s m m a a n n u u a a l l a a n n d d o o p p e e r r - -
a a t t i i n n g g y y o o u u r r s s e e t t . .
Retain it for future reference.
Record model number and serial number of the set.
See the label attached on the back cover and quote
this information to your dealer when you require service.
Model number
:
Serial number
:
Advertisement
Table of Contents
Troubleshooting

Related Manuals for LG 37LC2R


Summary of Contents for LG 37LC2R
- Page 1 ± U ö “ W ° U ® ° A 32LC2R * * /37LC2R * * 42PC1RV * * 32LC2R * * /37LC2R * * 42PC1RV * * 42LC2R * * 50PC1R * * 42LC2R * * 50PC1R * *...
-
Page 3: Accessories
ACCESSORIES Ensure that the following accessories are included with your TV. If an accessory is missing, please contact the dealer where you purchased the product. INPUT POWER INPUT TEXT SIZE POSTION PIP PR- PIP PR+ PIP INPUT SWAP LIST I/II MENU EXIT SLEEP... -
Page 4: Table Of Contents
CONTENTS ACCESSORIES ......... . . TV MENU INTRODUCTION On Screen Menus Selection and Adjustment . - Page 5 TV MENU S S c c r r e e e e n n M M e e n n u u O O p p t t i i o o n n s s Auto Configure (RGB [PC] mode only) .
-
Page 6: Introduction
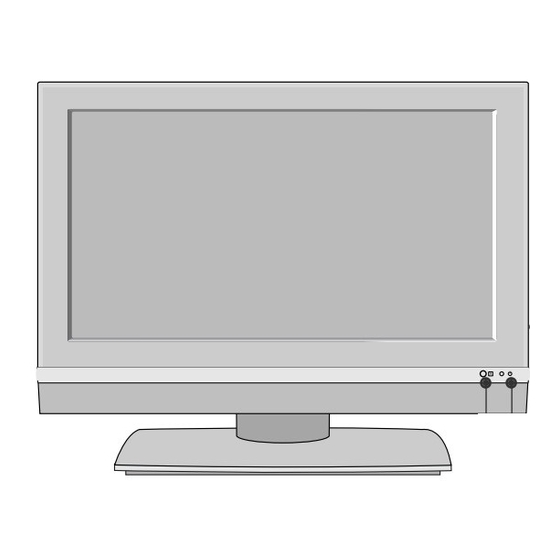
INTRODUCTION CONTROLS This manual explains the features available on the 4 4 2 2 P P C C 1 1 R R * * , 5 5 0 0 P P C C 1 1 R R * * TVs. ■... - Page 7 This manual explains the features available on the 5 5 0 0 P P C C 3 3 R R * * TVs. ■ This is a simplified representation of a front panel. Here shown may be somewhat different from your TV. Front Panel Controls PROGRAMME Buttons VOLUME Buttons...
-
Page 8: Connection Option
INTRODUCTION CONNECTION OPTION 4 4 2 2 P P C C 1 1 R R * * , 5 5 0 0 P P C C 1 1 R R * * , 5 5 0 0 P P C C 3 3 R R * * This is the back panel of models TVs. - Page 9 CONTROLS This manual explains the features available on the 3 3 2 2 L L C C 2 2 R R * * , 3 3 7 7 L L C C 2 2 R R * * , 4 4 2 2 L L C C 2 2 R R * * TVs.
- Page 10 INTRODUCTION CONTROLS This manual explains the features available on the 3 3 2 2 L L B B 1 1 R R * * , 3 3 7 7 L L B B 1 1 R R * * , 4 4 2 2 L L B B 1 1 R R * * TVs.
- Page 11 CONNECTION OPTION This is the back panel of models 3 3 2 2 L L C C 2 2 R R * * , 3 3 7 7 L L C C 2 2 R R * * , 4 4 2 2 L L C C 2 2 R R * * TVs.
- Page 12 INTRODUCTION CONNECTION OPTION This is the back panel of models 3 3 2 2 L L B B 1 1 R R * * , 3 3 7 7 L L B B 1 1 R R * * , 4 4 2 2 L L B B 1 1 R R * * TVs.
- Page 13 REMOTE CONTROL KEY FUNCTIONS POWER Switches the set on from standby or off to standby. INPUT POWER TV INPUT Returns from , AV2 , INPUT Component1 , Component2 , RGB , HDMI/DVI to the TV mode. Switches the set on from standby. TEXT SIZE POSTION...
-
Page 14: Functions/Installing Batteries
INTRODUCTION REMOTE CONTROL KEY FUNCTIONS MODE Selects the remote operating modes. INPUT POWER TELETEXT These buttons are used for teletext. INPUT BUTTONS For further details, see the ‘Teletext’ section. TEXT SIZE POSTION PIP PR- PIP PR+ PIP INPUT SWAP THUMBSTICK Allows you to navigate the on-screen menus and adjust (Up/Down/Left the system settings to your preference. -
Page 15: Installation
INSTALLATION UNFOLDING THE BASE STAND (42PC1R * ) This feature is not available for all models. ■ Place the set with the screen facing down on a cushion or soft cloth as shown in Figure 1. ■ Before unfolding the stand, please make sure two locks (A) on the bottom of the stand push outward. Pull the stand out as shown above in Figures 2 ~ 3. -
Page 16: Stand Installation
INSTALLATION STAND INSTALLATION (Only 32LC2R * ) Carefully place the product screen side down on a cushioned surface that will protect product and screen from damage. Place the product stand on the product as shown. Install the 4 bolts securely, in the back of the product in the holes provided. -
Page 17: Basic Connection
BASIC CONNECTION (42PC1R * , 50PC1R * , 50PC3R * ) These models have two cable arrangement methods according to the stand type. ■ Stand type 1 Arrange the cables as shown picture. Stand type 2 Hold the C C A A B B L L E E M M A A N N A A G G E E M M E E N N T T with both hands and push it as shown. -
Page 18: How To Remove The Cable Management
BASIC CONNECTION (LCD TV models) (a) - 32LC2R *. (b) - 37LC2R * , 42LC2R *, 32LB1R * , 37LB1R * , 42LB1R *. Connect the cables as necessary. After connecting the cables neatly, arrange the cables to the Cable Holder. -
Page 19: How To Join The Product Assembly To The Wall To Protect The Set Tumbling
HOW TO JOIN THE PRODUCT ASSEMBLY TO THE WALL TO PROTECT THE SET TUMBLING Set it up close to the wall so the product doesn’t fall over when it is pushed backwards. ■ The instructions shown below is a safer way to set up the product, which is to fix it on the wall so the ■... -
Page 20: Installation
INSTALLATION INSTALLATION The TV can be installed in various ways such as on a wall, or on a desktop etc. ■ The TV is designed to be mounted horizontally. ■ G G R R O O U U N N D D I I N N G G Power Supply Ensure that you connect the earth ground wire to prevent... -
Page 21: Connections & Setup
CONNECTIONS & SETUP To prevent the equipment damage, never plug in any power cords until you have finished connecting all equipment. ■ ANTENNA CONNECTION For optimum picture quality, adjust antenna direction. ■ An antenna cable and converter are not supplied. ■... -
Page 22: Vcr Setup
CONNECTIONS & SETUP VCR SETUP To avoid picture noise (interference), leave an adequate distance between the VCR and TV. ■ Typically a frozen still picture from a VCR. If the 4:3 picture format is used; the fixed images on the sides of the ■... -
Page 23: External Equipment Connections
S-VIDEO VIDEO AUDIO When connecting with an S-Video cable Connect the S-VIDEO output of the VCR to the S S - - V V I I D D E E O O input on the set. The picture quality is ANT IN V V C C R R improved;... -
Page 24: Dvd Setup
CONNECTIONS & SETUP DVD SETUP When connecting with a component cable Connect the video outputs (Y, PB, PR) of the DVD to the C C O O M M P P O O N N E E N N T T I I N N V V I I D D E E O O jacks on the set. D D V V D D (R) AUDIO (L) Connect the audio outputs of the DVD to the... - Page 25 S-VIDEO VIDEO AUDIO When connecting with a HDMI cable Connect the HDMI output of the DVD to the H H D D M M I I / / D D V V I I I I N N jack on the set. Select H H D D M M I I / / D D V V I I input source with using the HDMI/DVI IN REMOTE...
-
Page 26: Stb(Set-Top Box) Setup
CONNECTIONS & SETUP STB(SET-TOP BOX) SETUP This TV can receive Digital Over-the-air/Cable signals without an external digital set-top box. However, if you do ■ receive Digital signals from a digital set-top box or other digital external device, refer to the figure as shown below. When connecting with a component cable D D i i g g i i t t a a l l S S e e t t - - t t o o p p B B o o x x Connect the video outputs (Y, PB, PR) of the digital... - Page 27 HDMI COMPONENT IN VIDEO AUDIO RGB IN AV OUT When connecting with a D-sub 15 pin cable S-VIDEO VIDEO AUDIO RGB IN Connect the RGB output of the digital set-top box AV OUT D D i i g g i i t t a a l l S S e e t t - - t t o o p p B B o o x x (R) AUDIO (L) RGB-DTV OUTPUT RGB IN...
-
Page 28: Pc Setup
AUDIO VIDEO AUDIO CONNECTIONS & SETUP PC SETUP This TV provides Plug and Play capability, meaning that the PC adjusts automatically to the TV's settings. ■ When connecting with a D-sub 15 pin cable Connect the RGB output of the PC to the R R G G B B ( ( P P C C / / D D T T V V ) ) jack on the set. - Page 29 We recommend using 1 360*768, 60Hz (32LC2R * , Play automatically by the set.) 37LC2R * , 42LC2R * ,32LB1R *, 37LB1R *. 42LB1R * ) DOS mode may not work depending on video for the PC mode, they provide the best picture quality.
- Page 30 Supported Display Resolution Supported Display Resolution (42PC1R *, 50PC1R * , 50PC3R * ) (32LC2R * , 37LC2R * , 42LC2R * ,32LB1R *, 37LB1R *, 42LB1R * ) RGB [PC] / HDMI [PC] mode RGB[PC] / HDMI[PC] mode Horizontal...
-
Page 31: Turning The Tv On
TURNING THE TV ON INPUT POWER INPUT If your TV will be turned on, you will be able to use its features. TEXT SIZE POSTION Turing on the TV PIP PR- PIP PR+ SWAP PIP INPUT First, connect power cord correctly. At this moment, the TV switches to standby mode. -
Page 32: Special Functions
SPECIAL FUNCTIONS PIP (PICTURE-IN-PICTURE) / DOUBLE WINDOW / POP PIP lets you view 2 different inputs (sources) on your TV screen INPUT POWER at the same time. One source will be large, and the other source will show a smaller inset image. INPUT Double window mode splits the screen into 2, allowing 2 picture TEXT... -
Page 33: Input Source Selection For Sub Picture
Input Source Selection for Sub Picture Press the P P I I P P I I N N P P U U T T button to select the input source for the sub picture. Each press of P P I I P P I I N N P P U U T T button is pressed, each input source for the sub picture is displayed as shown below. Component1 HDMI/DVI Component2... -
Page 34: Swapping Between Main And Sub Pictures
SPECIAL FUNCTIONS PIP (PICTURE-IN-PICTURE) / DOUBLE WINDOW / POP Swapping between main and sub pictures Press the S S W W A A P P button to exchange the main and sub pictures. SWAP Main Picture Sub Picture POP (Picture-out-of-Picture: Programme Scan) Use POP to search the programmes of all the memorized channels one-by-one on the 3 POP screen display, (while the main picture source remains the current channel). -
Page 35: Switch On/Off
TELETEXT This feature is not available for all countries. ■ Teletext (or TOPtext) is an optional function, therefore only a setwith the teletext system can receive the teletext broadcast. Teletext is a free service broadcast by most TV stations which gives up-to-the-minute information on news, weather, television programmes, share prices and many other topics. -
Page 36: Top Text
SPECIAL FUNCTIONS TOP Text The user guide displays four fields-red, green, yellow and blue at the bottom of the screen. The yellow field denotes the next group and the blue field indicates the next block. B B l l o o c c k k / / g g r r o o u u p p / / p p a a g g e e s s e e l l e e c c t t i i o o n n 1. -
Page 37: Special Teletext Functions
Special Teletext Functions R R E E V V E E A A L L Press this button to display concealed information, such as solutions of riddles or puzzles. Press this button again to remove the information from the display. S S I I Z Z E E Selects double height text. -
Page 38: Tv Menu
In the teletext mode, menus are not displayed. d. In some models, XGA will display on the SCREEN menu. e. It’s not available to use ISM Method and Low Power in 32LC2R , 37LC2R , 42LC2R , 32LB1R 37LB1R... -
Page 39: Auto Programme Tuning
TV MENU Setting up TV stations AUTO PROGRAMME TUNING LIST I/II MENU EXIT SLEEP Up to 100 TV stations can be stored by programme numbers (0 to 99). Once you have preset the stations, you will be able to use the PR +/- or NUMBER buttons to scan the stations you have programmed. -
Page 40: Manual Programme Tuning
TV MENU Setting up TV stations MANUAL PROGRAMME TUNING LIST I/II MENU EXIT SLEEP Manual programme lets you manually tune and arrange the stations in whatever order you desire. Q.VIEW Press the M M E E N N U U button and then button to select the MUTE menu. -
Page 41: Fine Tuning
FINE TUNING LIST I/II MENU Normally fine tuning is only necessary if reception is poor. EXIT SLEEP Q.VIEW MUTE Press the M M E E N N U U button and then button to select the menu. STATION Press the button and then button to select Manual Auto programme... -
Page 42: Assigning A Station Name
TV MENU Setting up TV stations ASSIGNING A STATION NAME LIST I/II MENU EXIT SLEEP You can assign a station name with five characters to each programme number. Q.VIEW MUTE Press the M M E E N N U U button and then button to select the STATION menu. -
Page 43: Booster (Option)
BOOSTER (Option) LIST I/II MENU In some models, B B o o o o s s t t e e r r is an optional function. Only a set EXIT SLEEP with B B o o o o s s t t e e r r can perform this function. If the reception is poor at the fringe area of TV signal, select B B o o o o s s t t e e r r to O O n n . -
Page 44: Programme Edit
TV MENU Setting up TV stations PROGRAMME EDIT LIST I/II MENU This function enables you to delete or skip the stored pro- EXIT SLEEP grammes. Also you can move some stations to other pro- gramme numbers or copy a blank station data into the selected programme number. -
Page 45: Favourite Programme
FAVOURITE PROGRAMME This function lets you select your favourite programmes LIST I/II MENU directly. EXIT SLEEP Repeatedly press the F F A A V V button to select stored favourite programmes. Q.VIEW MUTE Press the M M E E N N U U button and then button to select the STATION menu. -
Page 46: Calling The Programme Table
TV MENU Setting up TV stations CALLING THE PROGRAMME TABLE LIST I/II MENU EXIT SLEEP You can check the programmes stored in the memory by displaying the programme table. Q.VIEW D D i i s s p p l l a a y y i i n n g g p p r r o o g g r r a a m m m m e e t t a a b b l l e e MUTE Press the L L I I S S T T button to display the Programme table menu. -
Page 47: Psm (Picture Status Memory)
TV MENU Picture Menu PSM (Picture Status Memory) LIST I/II MENU EXIT SLEEP D D y y n n a a m m i i c c Select this option to display with a sharp image. S S t t a a n n d d a a r r d d The most general and natural screen display status. -
Page 48: Picture Adjustment (Psm-User Option)
TV MENU Picture Menu PICTURE ADJUSTMENT (PSM-User option) LIST I/II MENU EXIT SLEEP C C o o n n t t r r a a s s t t Adjusts the difference between the light and dark levels in the picture. -
Page 49: Csm (Colour Status Memory)
CSM (Colour Status Memory) LIST I/II MENU EXIT SLEEP To initialize values (reset to default settings), select the C C o o o o l l option. Choose one of three automatic colour adjustments. Set to warm to enhance hotter colours such as red, or set to cool to see less intense colours with more blue. -
Page 50: Manual Colour Temperature Control (Csm - User Option)
TV MENU Picture Menu MANUAL COLOUR TEMPERATURE CONTROL (CSM - User option) LIST I/II MENU EXIT SLEEP You can adjust red, green, blue to any colour temperature you pre- fer. Q.VIEW MUTE Press the M M E E N N U U button and then button to select the PICTURE menu. -
Page 51: Function
FUNCTION LIST I/II MENU XD is LG electronic's unique picture improving technology to display EXIT SLEEP a real HD source through an advanced digital signal processing algorithm. This menu is activatived after selecting the U U s s e e r r 1 1 or U U s s e e r r 2 2 of PSM. -
Page 52: Advanced
TV MENU Picture Menu ADVANCED LIST I/II MENU When you watch the movie, this function adjusts the set to EXIT SLEEP the best picture appearance. Adjusting the contrast and the brightness of the screen using the black level of the screen. function works in the following mode: Cinema- TV, AV1, AV2 or Component1/2 480i/576i. -
Page 53: Reset
RESET LIST I/II MENU EXIT SLEEP Press the M M E E N N U U button and then button to select Q.VIEW the PICTURE menu. MUTE Press the button and then button to select Reset . Press the button to initialize the adjusted value. •... -
Page 54: Ssm (Sound Status Memory)
TV MENU Sound Menu SSM (Sound Status Memory) You can select your preferred sound setting; Surround MAX, LIST I/II MENU Flat, Music, Movie or Sports and you can also adjust the sound EXIT SLEEP frequency of the equalizer. SSM lets you enjoy the best sound without any special adjustment because the TV sets the appropriate sound options based on the programme content. -
Page 55: Sound Frequency Adjustment (Ssm - User Option)
TV MENU Sound Menu SOUND FREQUENCY ADJUSTMENT (SSM - User option) LIST I/II MENU EXIT SLEEP Adjust the sound equalizer. Press the M M E E N N U U button and then button to select Q.VIEW the SOUND menu. MUTE Press the button and then... -
Page 56: Avl (Auto Volume Leveler)
TV MENU Sound Menu AVL (Auto Volume Leveler) LIST I/II MENU EXIT SLEEP AVL automatically keeps on an equal volume level even if you change programmes. Q.VIEW Press the M M E E N N U U button and then button to select the SOUND menu. -
Page 57: Speaker
SPEAKER LIST I/II You can adjust the internal speaker status. MENU EXIT SLEEP In AV1, AV2,COMPONENT1 , COMPONENT2, RGB and HDMI/DVI with HDMI to DVI cable, TV speaker and/or vari- able audio can be outputted even though there is no video signal. -
Page 58: Stereo/Dual Reception
TV MENU Sound Menu STEREO/DUAL RECEPTION When a programme is selected, the sound information for the LIST I/II station appears after the programme number and station name MENU disappear. EXIT SLEEP DUAL I Sends the primary broadcast language to the loudspeakers. -
Page 59: Nicam Reception
NICAM RECEPTION If the set is equipped with the receiver for NICAM reception, the high quality NICAM (Near Instantaneous Companding Audio Multiplex) digital sound can be received. Sound output can be selected according to the type of received broadcast as follows by press- ing the I/II button repeatedly. -
Page 60: Clock Setup
TV MENU Time Menu CLOCK SETUP You must set the time correctly before using on/off time function. LIST I/II MENU EXIT SLEEP If current time setting is erased by a power failure or the set is unplugged, reset the clock. After approx. 5 minutes. Q.VIEW MUTE Press the M M E E N N U U button and then... -
Page 61: On/Off Time
ON/OFF TIME LIST I/II MENU The Off time automatically switches the set to standby at the EXIT SLEEP preset time. Two hours after the set is switched on by the on time function it will automatically switch back to standby mode unless a but- ton has been pressed. -
Page 62: Auto Sleep
TV MENU Time Menu AUTO SLEEP LIST I/II MENU EXIT SLEEP If set to on and there is no input signal, the TV turns off automatically after 10 minutes. Q.VIEW Press the M M E E N N U U button and then MUTE button to select the TIME menu. -
Page 63: Child Lock
TV MENU Special Menu CHILD LOCK The TV can be set so that the remote control is needed to control it. This feature can be used to prevent unauthorized viewing. This set is programmed to remember which option it was last LIST I/II set to even if you turn the set off. -
Page 64: Ism (Image Sticking Minimization) Method
TV MENU Special Menu ISM (Image Sticking Minimization) METHOD A frozen of still picture from a PC/video game displayed on the PIP PR- PIP PR+ PIP INPUT SWAP screen for prolonged periods will result in a ghost image remain- ing even when you change the image. Avoid allowing a fixed image to remain on the set's screen for a long period of time. -
Page 65: Low Power
LOW POWER LIST I/II MENU EXIT SLEEP This is the function to reduce the power consumption of the set. It’s not available to use this function in LCD TV models Q.VIEW Language Child lock ISM Method Press the M M E E N N U U button and then button to Low Power select the SPECIAL menu. -
Page 66: Tv Menu
TV MENU Screen Menu AUTO CONFIGURE (RGB [PC] mode only) Automatically adjusts picture position and minimizes image LIST I/II shaking. MENU EXIT SLEEP Although the image is still not correct, your set is functioning properly but needs further adjustment. The A A u u t t o o c c o o n n f f i i g g . . functions don’t need to be run for HDMI mode. -
Page 67: Manual Configure
MANUAL CONFIGURE LIST I/II MENU If the picture isn’t clear after auto adjustment and espe- EXIT SLEEP cially if characters are still trembling, adjust the picture phase manually. To correct the screen size, adjust C C l l o o c c k k . This function works in the following mode : RGB[PC], RGB[DTV], COMPONENT (480p/576p/720p/1080i), Q.VIEW... -
Page 68: Setting The Picture Format
TV MENU Screen Menu Options SETTING THE PICTURE FORMAT TEXT SIZE POSTION PIP PR- PIP PR+ PIP INPUT SWAP You can watch the screen in various picture formats; S S p p e e c c t t a a c c l l e e F F u u l l l l ( ( o o p p t t i i o o n n ) ) , O O r r i i g g i i n n a a l l , 4 4 : : 3 3 , 1 1 6 6 : : 9 9 (Wide), 1 1 4 4 : : 9 9 and Z Z o o o o m m 1 1 or Z Z o o o o m m 2 2 . - Page 69 • Z Z o o o o m m 1 1 Following selection will lead you to view the picture without any NOTE alternation, while filling the entire screen. However, the top and You can only select 4 4 : : 3 3 , 1 1 6 6 : : 9 9 bottom portions of the picture will be cropped.
-
Page 70: Selecting Wide Vga/Xga Mode
TV MENU Screen Menu Options SELECTING WIDE VGA/XGA MODE LIST I/II MENU To see a normal picture, match the resolution of RGB mode EXIT SLEEP and selection of VGA/XGA mode. This function works in the following mode: RGB[PC] mode Q.VIEW Auto config. -
Page 71: Appendix
APPENDIX EXTERNAL CONTROL DEVICE SETUP Connect the RS-232C input jack to an external control device (such as a computer or an A/V control system) and control the Monitor’s functions externally. Connect the serial port of the control device to the RS-232C jack on the Monitor back pane l.RS-232C connection cables are not supplied with the Monitor. -
Page 72: Communication Parameters
APPENDIX RS-232C Configurations 7-Wire Configurations ( Standard RS-232C cable ) 3-Wire Configurations ( Not standard ) D-Sub 9 D-Sub 9 D-Sub 9 D-Sub 9 Set ID Use this function to specify a set ID number. Refer to ‘Real Data Mapping 1’. See page 74. Language Press the M M E E N N U U button and then button... -
Page 73: Command Reference List
Command Reference List DATA DATA C C O O M M M M A A N N D D 1 1 C C O O M M M M A A N N D D 2 2 C C O O M M M M A A N N D D 1 1 C C O O M M M M A A N N D D 2 2 (Hexadecimal) (Hexadecimal) 01. - Page 74 APPENDIX 0 0 1 1 . . P P o o w w e e r r ( ( C C o o m m m m a a n n d d 2 2 : : a a ) ) 0 0 5 5 .
- Page 75 1 1 0 0 . . S S h h a a r r p p n n e e s s s s ( ( C C o o m m m m a a n n d d 2 2 : : k k ) ) 1 1 5 5 .
- Page 76 APPENDIX 2 2 5 5 . . A A u u t t o o C C o o n n f f i i g g u u r r e e ( ( C C o o m m m m a a n n d d 1 1 : : j j , , C C o o m m m m a a n n d d 2 2 : : u u ) ) 2 2 0 0 .
- Page 77 2 2 7 7 . . S S e e n n d d I I R R C C o o d d e e ( ( C C o o m m m m a a n n d d 1 1 : : m m , , C C o o m m m m a a n n d d 2 2 : : c c ) ) 2 2 9 9 .
-
Page 78: Ir Codes
APPENDIX IR CODES 1. How to Connect Connect your wired remote control to the Remote Control port on the TV. ■ 2. Remote Control IR Codes Output waveform ■ Single pulse, modulated with 37 .917KHz signal at 455KHz Carrier frequency FCAR = 1/TC = fOSC/12 Duty ratio = T1/TC = 1/3 Configuration of frame... -
Page 79: Remote Control Ir Codes
REMOTE CONTROL IR CODES Code Code Function Note Function Note (Hexa) (Hexa) R/C Button R/C Button INPUT R/C Button GREEN R/C Button POWER R/C Button (Power On/Off) YELLOW R/C Button POWER ON Discrete IR Code (Only Power On) BLUE R/C Button POWER OFF Discrete IR Code (Only Power OFF) VOL +... -
Page 80: Programming The Remote
APPENDIX PROGRAMMING THE REMOTE The remote is a multi-brand or a universal remote. It can be programmed to operate most remote-control- lable devices of other manufacturers. Note that the remote may not control all models of other brands. Programming a code into a remote mode Test your remote control. -
Page 81: Programming Code
145 147 VIDEOSONIC 047 048 REALISTIC 003 008 010 014 WARDS 003 013 017 024 LG (GOLDSTAR) 001 012 013 020 031 033 034 040 031 033 034 040 101 106 1 14 123 053 054 101 053 054 131... - Page 82 APPENDIX PROGRAMMING CODE Brand Codes Brand Codes Brand Codes APEX DIGITAL MITSUBISHI 005 006 DENON 020 014 SAMSUNG 01 1 015 005 006 ONKYO 008 017 SONY HARMAN KARDON PANASONIC 003 009 THOMPSON 005 006 PHILIPS TOSHIBA 019 008 001 010 016 025 PIONEER 004 026 YAMAHA...
-
Page 83: Troubleshooting Checklist
TROUBLESHOOTING CHECKLIST T T h h e e o o p p e e r r a a t t i i o o n n d d o o e e s s n n o o t t w w o o r r k k n n o o r r m m a a l l l l y y . . Check to see if there is any object between the product and the remote control ■... -
Page 84: Troubleshooting Checklist
APPENDIX TROUBLESHOOTING CHECKLIST T T h h e e a a u u d d i i o o f f u u n n c c t t i i o o n n d d o o e e s s n n o o t t w w o o r r k k . . Press the V V O O L L + + / / - - button. -
Page 85: Maintenance
MAINTENANCE Early malfunctions can be prevented. Careful and regular cleaning can extend the amount of time you will have your new TV. Be sure to turn the power off and unplug the power cord before you begin any cleaning. Cleaning the Screen Here’s a great way to keep the dust off your screen for a while. -
Page 86: Product Specifications
APPENDIX PRODUCT SPECIFICATIONS 32LC2R 37LC2R 42LC2R MODELS 32LC2R 37LC2R 42LC2R 944 x 729 x 286 mm 1054 x 813 x286 mm with stand 81 1 x 630 x 235 mm 37 .1 x 28.7 x 1 1.2 inches 41.4 x 32x 1 1.2 inches Dimensions 31.9 x 24.8 x 9.2inches... -
Page 87: Product Specifications
PRODUCT SPECIFICATIONS 32LB1R 37LB1R 42LB1R MODELS 32LB1R 37LB1R 42LB1R 1045.8x 693.8x 260.4 mm 1 1 75 x 768x300 mm with stand 91 1.4 x 599 x 259 mm 41.1 x 27 .2 x 10.2 inches 46.2 x 30.2 x 1 1.8 inches Dimensions 35.8 x 23.5 x 10 inches (Width x Height x Depth)