Table of Contents
Advertisement
Quick Links
Advertisement
Table of Contents

Related Manuals for D-Link DirectPort DMF-560TXD


Summary of Contents for D-Link DirectPort DMF-560TXD
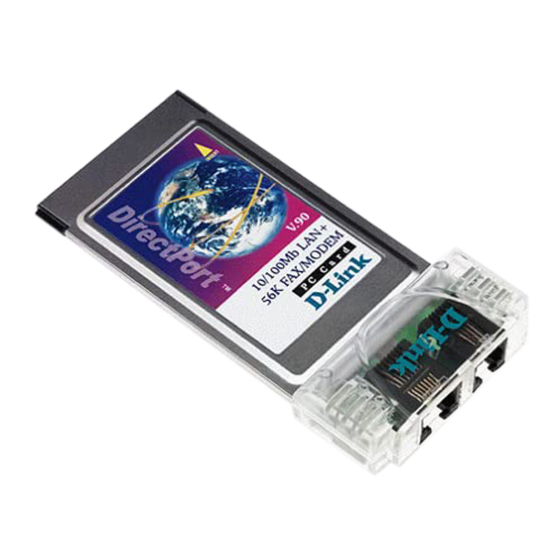
- Page 1 PCMCIA D-Link DMF-560TXD DirectPort Multifunction PC Card User Manual 56K BPS...
- Page 2 USER MANUAL DirectPort PC Card First Edition (September, 1998) Second Edition (May, 1999) Document No. M-LF560MA-rev2.0 Printed in Taiwan...
- Page 3 FCC REGULATORY STATEMENTS FCC Certification 10/100 Fast Ethernet + 56K Fax/Modem PC Card FCC ID: MQ4PLM56 Made in Taiwan The United States Federal Communication Commission (FCC) and the Canadian Department of Communications have established certain rules governing the use of modems and other electronic equipment.
- Page 4 devices can be connected to your telephone line. In most areas, the sum of the REN's of all the devices on any one line should not exceed 5.0. If too many devices are attached, they may not ring properly. FCC Part 15 Registration This device complies with Part 15 of FCC rules.
-
Page 5: Table Of Contents
TABLE OF CONTENTS 1. INTRODUCTION 1.1 ABOUT THIS MANUAL 1.2 ABOUT THIS PRODUCT 1.2.1 SPECIFICATIONS 1.2.2 FEATURES 1.3 SYSTEM REQUIREMENTS 1.4 CONTENTS INCLUDED IN THE PACKAGE 2. INSTALLATION 2.1 HARDWARE INSTALLATION 2.2 INSTALLING THE SOFTWARE 2.2.1 NOVELL NETWARE 2.2.2 MICROSOFT LAN MANAGER 2.2.3 PACKET DRIVER 2.2.4 WINDOWS FOR WORKGROUPS 3.11 2.2.5 WINDOWS NT 3.51 &... - Page 6 7. APPENDIX B: UNINSTALLATION THE DIRECTPORT IN WIN 98/95 8. APPENDIX C: AT COMMAND QUICK REFERENCE 9. APPENDIX D: S-REGISTERS QUICK REFERENCE...
-
Page 7: Introduction
INTRODUCTION 1.1. ABOUT THIS MANUAL This manual will explain how to install and use your DMF-560TXD DirectPort PC Card 1.2. ABOUT THIS PRODUCT Your DirectPort PC Card is a multifunction communication device that lets you perform multiple communication tasks at the same time:... -
Page 8: Specifications
to successfully access to the servers on 10/100 Fast Ethernet LAN and hook up to the Internet, transmit E-Mail, send and receive information and communicate with other PCs, Bulletin Board Services (BBS) or on-line computer networks such as CompuServe and America On line. 1.2.1. -
Page 9: Features
• Drivers and utilities provided with this product • Driver software loaded on your PC • Data and/or fax communications software. 1.4. CONTENTS INCLUDED IN THE PACKAGE • DMF-560TXD DirectPort PC Card • RJ 11 Phone Cable • Quick Installation Guide - 3 -... - Page 10 • Driver Diskettes for PC and Apple/Macnitosh • Manual Diskette • Windows-based 56K Fax/Modem application program (CD-ROM) - 4 -...
-
Page 11: Installation
INSTALLATION This chapter describes how to install your DirectPort multifunction PC Card. Installation procedures also cover many popular Network Operating Systems. 2.1. HARDWARE INSTALLATION Hold the card label up and insert the card into the computer's PCMCIA slot with the 68 pin connector facing the computer. -
Page 12: Novell Netware
For Non-Windows 95/98 & Non-Windows NT System Plug the driver diskette into the floppy drive and set the current drive to the floppy drive (A:\). Then run INSTALL to install the dirver. 2.2.1. Novell Netware Installation Follow the steps bellow to complete the Novell Netware installations. - Page 13 5.Installation program starts installing drivers and modifying AUTOEXEC.BAT and NET.CFG. Select Yes then press Enter to modify the files. 6. Now, the installation is completed. 7. Restart your computer to make Netware connections. To install the ODI driver manually, follow the instructions below: 1.Copy the file \NETWARE\LM28ODI.COM...
-
Page 14: Microsoft Lan Manager
CARDEN /IOP=nnn /IRQ=nnn /COM=n /MIR=n ;Link Support Layer Module ;provided by Novell LM28ODI ;Hardware Specific Module IPXODI ;IPX Protocol Stack Module ;provided by Novell NETx ;Shell Support Module provided by ;Novell LOGIN 2.2.2. MS LAN Manager Installation 1.Cast a look at the README.TXT in the \NDIS2 directory in the driver disk. -
Page 15: Packet Driver
[PROTMAN] DRIVERNAME = PROTMAN$ DYNAMIC = YES PRIORITY = NETBEUI [NETBEUI_XIF] Drivername = netbeui$ SESSIONS = 6 NCBS = 12 BINDINGS = "LMNDIS_NIF" LANABASE = 0 [LMNDIS_NIF] ; protocol.ini session for multifunction LAN/MODEM driver. IOADDRESS = 0x320 INTERRUPT = 11 DRIVERNAME = LMNDIS$ 2.2.3. -
Page 16: Windows For Workgroups
2.2.4. Windows for Workgroups 3.11 Installation Run INSTALL.EXE in root directory on the driver disk. Select Windows for Workgroup in Network Operating System screen. If current settings are accepted, select Start Installation and go to step 13. Otherwise, select Modify Parameters to make modifications. Move cursor to the setting you want to make a change for then press Enter to select a fit value. -
Page 17: Windows Nt 3.51
box; put the driver diskette into floppy drive then press OK. 13. Select Enhanced mode NDIS3 for..then press 14. Follow Windows instructions to complete the installation and exit Windows 15. Reboot the computer to run with WFW 3.11. 2.2.5. Windows NT 3.51 & NT 4.0 Installation Getting Start for Windows NT3.51 1. - Page 18 1. Open Program Manager Main group Control Panel Devices 2. Select PCMCIA 3. Press STARTUP 4. Select BOOT, then press OK 5. When all PCMCIA adapters are added, press Close and restart Windows NT Check Event Viewer when system reboots. Ask your laptop dealer for help if any problems occur during the pre-installation.
- Page 19 14. Give appropriate system resources to the your DirectPort PC Card, the settings must be unique for this device. Resources Recommendation I/O Base I/O:300. Possible alternative: 220, 320, 340 Interrupt IRQ:5. If your laptop is equipped (IRQ) with multimedia devices, higher interrupt (IRQ:11) may be needed.
- Page 20 3. Login with a full access level i.e. ADMINISTRATOR 4. Remove all existing network support from MY COMPUTER CONTROL PANEL NETWORK ADAPTERS 5. Press CLOSE after all network components are removed. 6. Remove all serial port devices in MY COMPUTER CONTROL PANEL PORTS 7.
- Page 21 These configurations are unique for each network. If you want to change them, ask your network administrator for help. Press Next twice to use default NETWORK ♦ SERVICES settings Enter the correct path for NT 4.0 system source ♦ files. A dialog box will pop up.
- Page 22 MODEMS 2. Using default settings and press NEXT 3. System should have detected your LANmodem PC Card, and enter the Modem Manufactures & Models list screen. 4. Press FINISH and then CLOSE to complete modem setting. 5. Reboot the system. 6.
-
Page 23: Artisoft Lantastic
3.Enter the correct path, i.e. :\”, then insert the driver disk. The driver will be installed automatically, and system may ask for the Windows 95/98 installation CD/disks to update the existing files or drivers. After the update, system will reboot automatically. - Page 24 4.If current settings are correct, select Start Installation and go to step 6. Otherwise, select Modify Parameters to make changes. 5.Move cursor to each field you want to make modification and press Enter to set correct value. Then press Enter on the OK. 6.Installation program starts copying drivers and modifying CONFIG.SYS, PROTOCOL.INI, and STARTNET.BAT.
-
Page 25: Modem Basics
MODEM BASICS This chapter covers the basic commands and techniques involved in modem operation. In many cases, this is the only information you will need in order to get your DirectPort PC Card up and running with communication software, and to start making connections with your PC Card. - Page 26 Windows ”Hyper Terminal” program. This program provides a simple method to manually enter AT commands so you can do things such as: store phone numbers you commonly connect to. Once the DirectPort PC Card is connected to your computer serial port and telephone line, open the Windows 95/98 ”Accessories”...
-
Page 27: Dialing & Answering Techniques
AT<Enter> LANmodem responds This confirms that the modem and your computer are communicating correctly. To test the telephone line connection, issue the manual answer command. Type: ATA<Enter> The LANmodem will pick up the phone line, and try to communicate. Normally, this command is only used to answer an incoming call made from another modem. - Page 28 incoming call. Disabling Auto-Answer: ATS0=0 Manually Answering a Call: Take modem off-hook: ATH1 Hang up modem (on-hook): ATH0 Manually Disconnecting a Call: +++ATH - 22 -...
-
Page 29: Drivers Information
4. DRIVERS INFORMATION 4.1. Notes for NDIS Driver The following are examples of CONFIG.SYS file and AUTOEXEC.BAT for loading System Soft Card Services and NDIS2 driver: Examples of CONFIG.SYS file: device=c:\cardsoft \ss365sl.exe device=c:\cardsoft \cs.exe device=c:\cardsoft \csalloc.exe c:\cardsoft\csalloc.ini device=c:\lanman.dos\drivers\10/100 Fast Ethernet\lm28\carden.exe /iop=nnn /irq=n /com=n /mir=n device=c:\cardsoft \cardid.exe device=c:\lanman.dos\deivers\protman.dos /i:c:\lanman.dos... - Page 30 [LMNDIS_NIF] DRIVERNAME - LMNDIS$ This line must always be presend IOADDRESS - value where value is one of the following address: 0x300, 0x320, 0x340, 0x360. The leading 0x for the hex notation is required. To have Card Services select the address base from it's pool of available address then use a value of 0.
- Page 31 CONFIG.SYS and AUTOEXEC.BAT for you so that the driver will be loaded upon system start up. When modifying the two files, the system will make copies named CONFIG.ABO and AUTOEXEC.ABO in the system's directory. If the driver of PC Card is not successfully loaded, replace the two *.ABO file for related file and try to start the system again.
-
Page 32: Questions & Answers
QUESTIONS AND ANSWERS This chapter provides a number of examples of Questions (Q:), Causes (C:), and Answers (A:). If your modem is not functioning properly, look up the problem here, or ask your dealer for technical assistance. Q:The modem does not respond to AT commands. C:The COMx: port that the modem is set to may be used by another card in the computer already. - Page 33 Q:The modem does not give a response after an AT command was executed. C:The echo and/or responses may be turned off by the ATE0Q1 commands. Use AT&V to check that. A:Use ATE1Q0 then Enter to change them back. C:Make sure the modem is in Command Mode not in Data Mode when you type the AT command.
- Page 34 C:Some TSRs (programs that stay in memory after they are loaded) may conflict with the communications software. A:Try starting your computer without loading any TSRs. Q:The characters on the screen are doubled. C:Both the modem and the software have the echo feature turned on.
- Page 35 C:If you are using touch tone dialing on a phone line that requires pulses, then it may not work. Use ATDT in place of ATDP. Q:When your communications software tells the modem to dial, it does not. C:Make sure the software dialing prefix is ATDT. C:Make sure the software and modem are set to the same COMx: port.
- Page 36 Q:The modem disconnects (looses the connection) in the middle of use. C:The remote modem may have locked up. C:The telephone switch may have disconnected your call. C:Your software may have turned off the DTR signal. Q:The modem does not connect with another modem.
- Page 37 C:If both modems are using MNP or V.42 protocol, then the flow control may not be enabled. A:Configure your software to use RTS/CTS flow control. That will cause your computer to pause long enough for the file to be stored to disk. Q:The text on the screen is not legible.
- Page 38 Q:When the modem is connecting to another modem, it reports a higher connect baud rate that it is really using. C:The modem defaults to report the modem-to- computer baud rate when it responds with CONNECT. A:Go to command mode with your communication program (like Telix) and type ATW2, then press Enter.
- Page 39 (IRQ3 to 6). Make sure that the resources are available for the LAN/Modem card. Q:How can I know the LAN/Modem card has been enabled or not ? A:If the Card Service is installed, you can check by hearing the beep when card insertion. A:Run CARDEN /CHK to check, if the card has been enabled.
- Page 40 Q: The Netware driver runs successfully but fails to login on to the Netware server C: Frame type imcompatiable with server. A: The default frame type for Netware 3.11 and before is 802.3 but it changed to 802.2 in Netware 4.x and 3.12.
-
Page 41: Appendix A: Ndis2 & Odi Drivers For Wfw
APPENDIX A: NDIS2 AND ODI DRIVERS FOR WFW 3.11 NDIS2 Driver for Workgroups 1.Run Windows for Workgroups and click Network Setup icon in Network group. 2.In Network Settings dialog box, click Networks... button to select the network operating system. 3.In Networks dialog box, check the radio button before Install Microsoft Windows Network and No Additional Network. - Page 42 12.Move cursor to the setting you want to make a change for then press Enter to select a fit value. When the configuration is set completely, press Enter on the OK field to exit the screen then go back to step 11. 13.Select NDIS Server(LAN Manager,...) as the network server that you will attach to then press Enter key.
- Page 43 8.Follow Windows’ instructions to complete the installation and exit Windows. 9.Run INSTALL.EXE from root directory of driver diskette. 10.Select Windows for Workgroup in Network Operating System screen. 11.If current settings are accepted, select Start Installation and go to step 13. Otherwise, select Modify Parameters to make settings changed.
- Page 44 APPENDIX B: UNINSTALLATION THE DIRECTPORT FROM WIN 95/98 When you face the installation problems of DirectPort PC Card, you need to uninstall the Card and install it once again. This uninstallation guide is for uninstallation procedure for Win98/95. Remove the Multi-function adapters properties from the Device Manager folder of System in Control Panel program group.
- Page 45 Click Start button in Windows 95/98 main screen then select Run…. Insert the Driver Disk, then enter A:\delinf.exe then click on OK. Re-start Windows 95/98. Now your DirectPort PC Card is completely uninstalled. - 39 -...
- Page 46 - 40 -...
- Page 47 8. APPENDIX C: AT COMMAND QUICK REFERENCE 8.1 Modem AT Commands Basic AT Command Set Command Options Function & Description - 41 -...
- Page 48 - 42 -...
- Page 49 - 43 -...
- Page 50 - 44 -...
- Page 51 - 45 -...
- Page 52 - 46 -...
- Page 53 - 47 -...
- Page 54 - 48 -...
- Page 55 Extended “AT&” (Ampersand) Command Set Command Options Function & Description - 49 -...
- Page 56 - 50 -...
- Page 57 - 51 -...
- Page 58 - 52 -...
- Page 59 Extended “AT\” (Back Slash) Command Set Command Options Function & Description - 53 -...
- Page 60 - 54 -...
- Page 61 - 55 -...
- Page 62 Extended “AT%” (Percent) Command Set Command Options Function & Description - 56 -...
- Page 63 Extended “AT-” (Dash) Command Set Command Options Function & Description 8.2 Result Code Options Result Code Options Table ATV0 ATV1 X0 X1 X2 X3 X4 X7 - 57 -...
- Page 64 - 58 -...
- Page 65 Extended Result Code Options Table ATV0 ATV1 W0 W1 W2 W2\V0 - 59 -...
- Page 66 - 60 -...
- Page 67 - 61 -...
- Page 68 APPENDIX D: S- REGISTERS QUICK REFERENCE S-Registers, TSn=x” Register Dec. Function & Description Default - 62 -...
- Page 69 - 63 -...
- Page 70 - 64 -...
- Page 71 - 65 -...
- Page 72 - 66 -...
- Page 73 - 67 -...
- Page 74 - 68 -...
- Page 75 - 69 -...
- Page 76 - 70 -...
- Page 77 - 71 -...
- Page 78 - 72 -...
- Page 79 - 73 -...