
Related Manuals for Toshiba SD-4900


Summary of Contents for Toshiba SD-4900
- Page 1 FILE NO. 810-200327 SERVICE MANUAL DVD VIDEO PLAYER SD-4900 DOCUMENT CREATED IN JAPAN, Jul., 2003...
-
Page 2: Owner's Manual(Sd-4900)
SECTION 1 SUMMARY CONTENTS OWNER’S MANUAL(SD-4900) ....................1-2 PRODUCT SAFETY SERVICING GUIDELINES FOR VIDEO PRODUCTS ... 1-36 SERVICING PRECAUTIONS ....................1-37 • General Servicing Precautions • Insulation Checking Prodedure • Electrostatically Sensitive Devices... -
Page 3: Dvd Player
DVD PLAYER OWNER’S MANUAL MODEL : SD-4900 3 3 3 3 D D D D S S S S u u u u r r r r r r r r o o o o u u u u n n n n d d d d... -
Page 4: Safety Precautions
Safety Precautions FCC WARNING: This equipment may generate or use radio CAUTION frequency energy. Changes or modifications to this equipment may cause harmful interference unless the modifi- RISK OF ELECTRIC SHOCK DO NOT OPEN cations are expressly approved in the instruction manual. The user could lose the authority to operate this equipment if an CAUTION: TO REDUCE THE RISK... -
Page 5: Important Safety Instructions
IMPORTANT SAFETY INSTRUCTIONS CAUTION: PLEASE READ AND OBSERVE ALL WARNINGS AND 15. Attachments INSTRUCTIONS IN THIS OWNER’S MANUAL AND THOSE Only use attachments/accessories specified by the manufacturer. MARKED ON THE UNIT. RETAIN THIS BOOKLET FOR 16. Accessories FUTURE REFERENCE. Use only with the cart, stand, tripod, bracket, or This set has been designed and manufactured to assure personal safety. -
Page 6: Table Of Contents
Table of Contents Introduction Operation with Audio CD and MP3/WMA Disc . . 22-23 Playing an Audio CD and MP3/WMA Disc ..22 Safety Precautions ......2 Notes on MP3/WMA Recordings . -
Page 7: Before Use
DVD discs, Toshiba America Consumer Products, enabling you to locate the chapter you want. Depending Inc., Toshiba Hawaii, Inc. and Toshiba of Canada, Ltd. on the disc, chapters may not be recorded. cannot guarantee that this player will play every fea- ture of every DVD bearing the DVD logo. -
Page 8: Precautions
Before Use (Continued) Precautions Storing discs After playing, store the disc in its case. Handling the unit Do not expose the disc to direct sunlight or sources of heat, or leave it in a parked car exposed to direct sun- When shipping the unit light, as there may be a considerable temperature The original shipping carton and packing materials... -
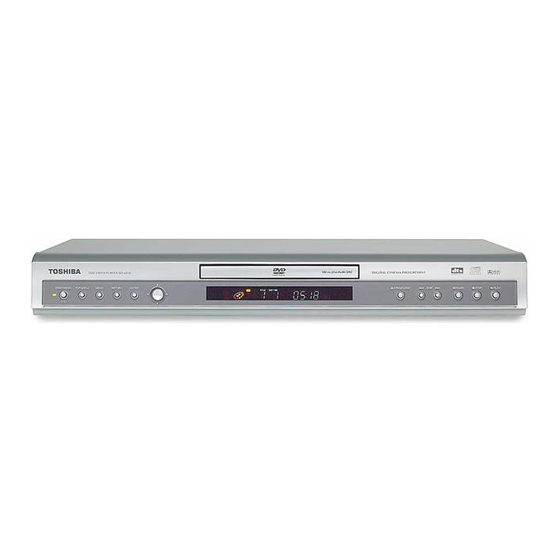
Page 9: Front Panel And Display Window
Front Panel and Display Window PLAY ( Power indicator Starts playback. Lights green when the DVD player is turned on. STOP ( Stops playback. ON/STANDBY ( Switches the player ON PAUSE ( and OFF. Pause playback temporarily/ press repeatedly > TOP MENU for frame-by-frame playback. -
Page 10: Remote Control
Remote Control SETUP ON/STANDBY Accesses or removes setup menu. Switches DVD Player ON and OFF. OPEN/CLOSE E.A.M. Opens and closes the disc tray. Selects sound mode during disc playback. 0-9 number buttons Selects numbered items in a menu. PROGRAM Enters to the program edit mode or FL DIM exits from that. -
Page 11: Rear Panel
Rear Panel 5.1 CHANNEL AUDIO OUT COAXIAL (Digital audio out jack) Connect to a 5.1 channel receiver Connect to digital (coaxial) audio equipment. – center speaker connection – subwoofer connection AUDIO OUT (Left/Right) – front speakers connections Connect to an amplifier, receiver, –... -
Page 12: Connections
Connections Progressive Scan (ColorStream ® Pro) connection Tips If your television is a high-definition or “digital ready” Depending on your TV and other equipment you wish television, you may take advantage of the DVD to connect, there are various ways you could connect Player’s progressive scan output for the highest the player. -
Page 13: Connecting To Optional Equipment
Connections (Continued) Connecting to Optional Equipment Notes – If the audio format of the digital output does not match Connecting to an amplifier equipped with two the capabilities of your receiver, the receiver will channel analog stereo or Dolby Pro Logic ll/ produce a strong, distorted sound or no sound at all. -
Page 14: Before Operation
Before Operation General Explanation Temporary Feedback Field Icons Repeat Title This manual gives basic instructions for operating the TITLE DVD Player. Some DVDs require specific operation or Repeat Chapter CHAPT allow only limited operation during playback. When this Repeat Group (DVD audio discs only) GROUP occurs, the symbol appears on the TV screen, indi-... -
Page 15: On-Screen Display
Before Operation (Continued) On-Screen Display (Continued) DVD-A Items Function Selection Method (Press 3 3 /4 4 to select desired item) Group Number Shows the current group number and total number 1 1 / 2 2 , or 2 /6 of groups, and skips to the desired group number. Numbers, SELECT/ENTER Track Number Shows the current track number and total number... -
Page 16: Initial Settings
Before Operation (Continued) Initial Settings Picture TV Aspect You can set your own Personal Preferences on the DVD-V DVD-A player. 4:3 Letterbox: Select when a standard 4:3 TV is con- nected. Displays theatrical images with masking bars Initial Settings General Operation above and below the picture. -
Page 17: Sound
Before Operation (Continued) Sound 5.1 Speaker settings DVD-V DVD-A Select speaker settings, including volume balance and Digital Audio Output delay time, or test the speaker settings. Each DVD disc has a variety of audio output options. Speaker settings are only active on the Analog Multi- Set the player’s Digital Audio Output according to the Channel Output. -
Page 18: Others
Before Operation (Continued) Others Pluge (Blacker than Black) DVD-V For proper adjustment of your television brightness The DRC, Vocal, PBC, Auto Play, B.L.E., Pluge and settings utilizing a commercially available test disc. DNR settings can be changed. On: Select when you adjust the level of your TV using a Press to select the desired item and press commercially available test disc that contains pluge signals. -
Page 19: Parental Control
Before Operation (Continued) Parental Control Area Code DVD-V Enter the code of a country/area whose standards were Rating DVD-V used to rate the DVD video disc, referring to the list Movies on DVDs may contain scenes not suitable for (See “Area Code List”, page 30.). children. -
Page 20: Operation With Dvd And Video Cd
Operation with DVD and Video CD Playing a DVD and Video CD General Features Playback Setup VCD2.0 VCD1.1 Note DVD-V DVD-A Unless stated otherwise, all operations described use Turn on the TV and select the video input source con- the remote control. Some features may also be nected to the DVD player. -
Page 21: Still Picture And Frame-By-Frame Playback
Operation with DVD and Video CD General Features (continued) 3 To cancel the sequence, press A-B RPT. Still Picture and Frame-by-frame playback VCD2.0 VCD1.1 DVD-V DVD-A 1 Press PAUSE/STEP during playback. The player will now go into PAUSE mode. 2 You can advance the picture frame-by-frame by pressing PAUSE/STEP repeatedly on the remote con- trol. -
Page 22: Repeat
Operation with DVD and Video CD General Features (continued) 2 Press to select the Marker number that you want to erase. 3 Press CLEAR. Selecting the sound enhancement The Marker number will be erased from the list. 4 Repeat steps 2 and 3 to erase additional Marker NORM. -
Page 23: Dvd Audio Discs
Operation with DVD and Video CD DVD Audio Discs DVD-A Viewing another PAGE 1 /12 DVD-A Since DVD Audio discs can hold a lot of content, there DVD Audio is a new disc format building on the success are various ways to see what’s available on the disc. of DVD to provide high quality, uncompressed, multi- 1 Press DISPLAY during playback. -
Page 24: Operation With Audio Cd And Mp3/Wma Disc
Operation with Audio CD and MP3/WMA Disc Playing an Audio CD and MP3/WMA Disc Notes on MP3/WMA Recordings About MP3 An MP3 file is audio data compressed by using the The DVD Player can play MP3/WMA formatted record- MPEG1 audio layer-3 file-coding scheme. We call ings on CD-ROM, CD-R or CD-RW discs. -
Page 25: Pause
Operation with Audio CD and MP3/WMA Disc (Continued) Pause Repeat A-B 1 Press PAUSE/STEP during playback. To repeat a sequence. 2 To return to playback, press PLAY or press 1 During disc playback, press A-B RPT at your desired PAUSE/STEP again. starting point. -
Page 26: Operation With Jpeg Disc
Operation with JPEG Disc > Moving to another File Viewing a JPEG disc JPEG Press SKIP once during viewing a picture This DVD Player can play discs with JPEG files. Before to advance to the next file or to the previous file. playing JPEG recordings, read the notes on JPEG Still Picture Recordings on right. -
Page 27: Programmed Playback
Programmed Playback VCD2.0 VCD1.1 Programmed Playback with Audio CD Programmed Playback with Video CD and MP3/WMA Disc Note The Program function enables you to store your favorite On a Video CD with PBC, you must set PBC to Off on the tracks from any disc in the player memory. -
Page 28: Additional Information
Additional Information Screen Saver Video Mode Setting VCD2.0 VCD1.1 DVD-V DVD-A The screen saver picture appears when you leave the DVD Player in stop mode for about five minutes. With certain discs, the playback picture may be flick- After the Screen Saver has been engaged for about five ering or Dot Crawl is shown on straight lines. -
Page 29: Speaker Settings
Speaker Settings Make the following settings for the built-in 5.1 channel Distance surround decoder. If you connected speakers to your DVD Player, setting the Distance lets the speakers know how far the sound Disc Audio has to travel to reach your set listening point. This Disc Subtitle allows the sound from each speaker to reach the listen- Disc Menu... -
Page 30: Troubleshooting
Troubleshooting Check the following guide for the possible cause of a problem before contacting service. Symptom Cause Correction The power cord is disconnected. Plug the power cord into the wall outlet No power. securely. No disc is inserted. Insert a disc. (Check that the DVD or, The power is on, but audio CD indicator in the display the DVD player does... -
Page 31: Language Code List
Language Code List Enter the appropriate code number for the initial settings “Disc Audio”, “Disc Subtitle” and/or “Disc Menu” (See page 14). Code Language Code Language Code Language Code Language 6566 Abkhazian 7074 Fiji 7678 Lingala 8373 Singhalese 6565 Afar 7073 Finnish 7684... -
Page 32: Area Code List
Area Code List Enter the appropriate code number for the initial setting “Area Code” (See page 17). Code Area Code Area Code Area Code Area Andorra Eritrea Saint Lucia Seychelles United Arab Emirates Spain Liechtenstein Sudan Afghanistan Ethiopia Sri Lanka Sweden Antigua and Barbuda Finland... -
Page 33: Specifications
Specifications General Power requirements AC 120V, 60 Hz Power consumption Dimensions (approx.) 430 X 60 X 242 mm (16.9 x 2.4 x 9.5 inches) (w x h x d) Mass (approx.) 2.4 kg (5.3 lbs) Operating temperature 5˚C to 35˚C (41˚F to 95˚F) Operating humidity 5 % to 90 % System... -
Page 34: Limited Warranty Dvd Video Player
LIMITED WARRANTY DVD VIDEO PLAYER Toshiba America Consumer Products, Inc. (“TACP”) and Toshiba Hawaii, Inc. (“THI”) make the following limited warranties to origi- nal consumers for DVD Players purchased and used in the United States. THESE LIMITED WARRANTIES EXTEND TO THE ORIGINAL CONSUMER PURCHASER OR ANY PERSON RECEIVING THIS DVD PLAYER AS A GIFT FROM THE ORIGINAL CONSUMER PURCHASER AND TO NO OTHER PURCHASER OR TRANSFEREE. -
Page 35: Limited Warranty Dvd Video Player
Canadian consumers are requested to complete the special Canadian “Warranty Registration Form” enclosed, and forward this completed form with a copy of bill of sale to TOSHIBA OF CANADA to “Register and Validate” their warranty. Product must be purchased from an Authorized Canadian Dealer. Products purchased in the U.S.A. and used in Canada are not covered by these warranties. - Page 36 PRODUCT SAFETY SERVICING GUIDELINES FOR VIDEO PRODUCTS CAUTION : DO NOT ATTEMPT TO MODIFY THIS PRODUCT IN ANY WAY, SUBJECT : X-RADIATION NEVER PERFORM CUSTOMIZED INSTALLATIONS WITHOUT MANUFAC- 1. BE SURE PROCEDURES AND INSTRUCTIONS TO ALL SERVICE PER- TURER’S APPROVAL. UNAUTHORIZED MODIFICATIONS WILL NOT ONLY SONNEL COVER THE SUBJECT OF X-RADIATION.
-
Page 37: Servicing Precautions
SERVICING PRECAUTIONS CAUTION : Before servicing the DVD covered by this service Electrostatically Sensitive (ES) Devices data and its supplements and addends, read and follow the Some semiconductor (solid state) devices can be damaged SAFETY PRECAUTIONS. NOTE : if unforeseen circum- easily by static electricity. - Page 38 SECTION 2 CABINET & MAIN CHASSIS CONTENTS 1. EXPLODED VIEWS ........................2-2 1. Cabinet and Main Frame Section ...................2-2 2. Packing Accessory Section ....................2-3...
-
Page 39: Exploded Views
EXPLODED VIEWS 1. Cabinet and Main Frame Section SCART&5.1CH MODEL ONLY... -
Page 40: Packing Accessory Section
2. Packing Accessory Section RF CABLE 810 CABLE SET ASS'Y PLUG ASS'Y 1WAY(YELLOW) PLUG ASS'Y 2WAY BATTERY PLUG ASS'Y 1WAY(BLACK) REMOCON OWNER'S MANUAL PACKING SHEET PACKING PACKING BOX CARTON OPTIONAL PARTS... - Page 41 SECTION 3 ELECTRICAL CONTENTS ELECTRICAL TROUBLESHOOTING GUIDE ..............3-2 1. Power check flow........................3-2 2. System operation flow ......................3-3 3. Test & debug flow ........................3-4 DETAILS AND WAVEFORMS ON SYSTEM TEST AND DEBUGGING ....3-10 1. SYSTEM 27MHz CLOCK,RESET,FLASH R/W SIGNAL ............3-10 2. SDRAM CLOCK ........................3-12 3.
-
Page 42: Electrical Troubleshooting Guide
ELECTRICAL TROUBLESHOOTING GUIDE 1. Power check flow No VF+ No 5V_A . Is 5.2VA section working? Is 5.2VA section working? Is 5.2V present at emitter Check F102 No 5.2VA. of Q107? Replace D109. Check F101 Replace Q107. Is there a DC voltage at Replace R101. -
Page 43: System Operation Flow
2. System operation flow Power On 1. 8032 initializes SERVO, DSP & RISC registers 2. Write RISC code to SDRAM 3. Reset RISC Show LOGO Tray Closed? Tray Close to Closed position SLED at Inner Side? SLED Moves to Inner Position 1. -
Page 44: Test & Debug Flow
3. Test & debug flow TEST Check the AC Vol tage Check the POWER PART Power PCBA (110V or 220V) Switch on the Power PCBA the DC Vol tage outputs OK? Check the POWER PART (5V, 3.3V, 8V, 12V) Make sure the main PCBA don’t Is 3.3V and 2.5V DC Check the regulators or diode( D670). - Page 45 RESET or Power On. Flash Check connecti on lines between FLASH Memory operates Show LOGO? & MT1379 and the FLASH access time properly? whether is sui table or not. Check connection lines between SDRAM SDRAM(IC502,IC503) & MT1379 and the works properl y? SDRAM is damaged.
- Page 46 Does the SLED move Check the connection line of Motor Driver STBY to inner side when it is at STBY signal . Pin is High? outter positi on? Check the rel ated circuit of Motor Driver STBY FMSO. Pin is High? Check the amp circuit on SL+ and SL- output motor driver.
- Page 47 Check the laser power circuit Laser turns on when LD01 or LD02 output on MT1336 and connecting to reading disc? properly? power transistor. (Q204, Q205) Collector Check therel ated ci rcuit on voltage of power laser power transi stor transistor is OK? ( Q204, Q205) Check cable connection between transistor couput and pick-up head.
- Page 48 Proper Check connections between signals on A, B, C, Focus ON OK? MT1336 and pick-up head. D of MT1336 Check the related circuit Proper FEO signal on MT1336 FEO sugnal . on MT1336? Check FEO connection between MT1336 and MT1379 Check the related Proper FEO signal Track On OK?
- Page 49 Audio Normal DAC received Check connection between MT1379 Audio output & Audio DAC. (Check VRST#, ACLK, correct data stream? when disc playback? ABCK, ASDAT3) Normal Check the related circuit of Audio DAC Audio DAC. (Check Audio out? (IC601) out Pin 14, 15,18,19) Check Audio filter, amplify, mute circuit.
-
Page 50: Details And Waveforms On System Test And Debugging
DETAILS AND WAVEFORMS ON SYSTEM TEST AND DEBUGGING 1. SYSTEM 27MHz CLOCK,RESET,FLASH R/W SIGNAL 1) MT1379 main clock is at 27MHz(X501) 3.8V, 27MHz FIG 1-1 2) MT1379 & MT1336 reset is high active. Power Cord in 5.2VA PWR_CTL(CN505 PIN 7) M_RESET(CN505 PIN 9) URST(IC501 PIN 188) FIG 1-2... - Page 51 3) RS232 waveform during procedure(Downloading) TXD(J6 PIN3) RXD(J6 PIN 2) FIG 1-3 4) Flash R/W enable signal during download(Downloading) FRD(IC5A1 PIN 28) FWR(IC5A1 PIN 11) FIG 1-4 3-11...
-
Page 52: Sdram Clock
2. SDRAM CLOCK 1) MT1379 main clock is at 27MHz(X501) DCLK = 93MHz, Vp-p=2.2, Vmax=2.7V (IC502,IC503 PIN 35) FIG 2-1 3. TRAY OPEN/CLOSE SIGNAL 1) Tray open/close waveform OPEN((CN203 PIN 3) CLOSE(CN203 PIN 2) TROPEN(IC202 PIN 1) TRCLOSE(IC202 PIN 2) FIG 3-1 3-12... - Page 53 2) Tray close waveform OPEN((CN203 PIN 3) CLOSE(CN203 PIN 2) TROPEN(IC202 PIN 1) TRCLOSE(IC202 PIN 2) FIG 3-2 3) Tray open waveform OPEN((CN203 PIN 3) CLOSE(CN203 PIN 2) TROPEN(IC202 PIN 1) TRCLOSE(IC202 PIN 2) FIG 3-3 3-13...
-
Page 54: Sled Control Related Signal (No Disc Condition)
4. SLED CONTROL RELATED SIGNAL (NO DISC CONDITION) FMSO(2.0V/1.4V/1.0V) (IC501 PIN 19) STBY(5V) – (IC201 PIN 50) SL+(4.7V/3.6V/1.9V) (IC202 PIN 12) SL-(5.3V/3.7V/2.5V) (IC202 PIN 13) FIG 4-1 5. LENS CONTROL RELATED SIGNAL(NO DISC CONDITION) FOSO(1.5V/1.4V/1.3V) (IC501 PIN 12) F+(4.0V/3.6V/3.2V) (IC202 PIN 9) F-(4.0V/3.6V/3.2V) (IC202 PIN 8) FIG 5-1... -
Page 55: Laser Power Control Related Signal(No Disc Condition)
6. LASER POWER CONTROL RELATED SIGNAL(NO DISC CONDITION) MDI1(0V/180mV) (IC201 PIN 124) LD01(5.0V//3.5V) IC201 PIN 125) LD02(5.0V/3.6V) (IC201 PIN 126) FIG 6-1 7. DISC TYPE JUDGEMENT WAVEFORM F+(IC202 PIN 9) FE(IC201 PIN 18) RFL(IC201 PIN 19) FIG 7-1 (DVD) 3-15... - Page 56 F+(IC202 PIN 9) FE(IC201 PIN 18) RFL(IC201 PIN 19) FIG 7-2 (DVD) F+(IC202 PIN 9) FE(IC201 PIN 18) RFL(IC201 PIN 19) FIG 7-3 (CD) 3-16...
-
Page 57: Focus On Waveform
F+(IC202 PIN 9) FE(IC201 PIN 18) RFL(IC201 PIN 19) FIG 7-4 (CD) 8. FOCUS ON WAVEFORM FE(IC201 PIN 18) FOSO(IC501 PIN12) F+(IC202 PIN 9) F-(IC202 PIN 8) FIG 8-1 (DVD) 3-17... -
Page 58: Spindle Control Waveform (No Disc Condition)
FE(IC201 PIN 18) FOSO(IC501 PIN12) F+(IC202 PIN 9) F-(IC202 PIN 8) FIG 8-2 (CD) 9. SPINDLE CONTROL WAVEFORM (NO DISC CONDITION) DMSO(1.4V/1.8V) (IC501 PIN 18) SP-(3.6V/2.4V) (IC202 PIN 10) SP+(3.6V/4.8V) (IC202 PIN 11) FIG 9-1 3-18... -
Page 59: Tracking Control Related Signal(System Checking)
10. TRACKING CONTROL RELATED SIGNAL(System checking) TE(IC201 PIN 21) TRSO(IC501 PIN 13) T-(IC202 PIN 7) T+(IC202 PIN 6) FIG 10-1(DVD) TE(IC201 PIN 21) TRSO(IC501 PIN 13) T-(IC202 PIN 7) T+(IC202 PIN 6) FIG 10-2(CD) 3-19... -
Page 60: Rf Waveform
11. RF WAVEFORM RFOP(2.3V/1.1V) (IC201 PIN 6) RFON(0.8V/2.0V) (IC201 PIN 7) FIG 11-1 12. MT1379 AUDIO OPTICAL AND COAXIAL OUTPUT (ASPDIF) (IC501 PIN 153) FIG 12-1 3-20... -
Page 61: Mt1379 Video Output Waveform
13. MT1379 VIDEO OUTPUT WAVEFORM 1) Full colorbar signal(CVBS) DCLK = 93MHz, Vp-p=2.2, Vmax=2.7V (IC604 PIN 23) FIG 13-1 2) Y (IC604 PIN 21) FIG 13-2 3-21... -
Page 62: Audio Output From Audio Dac
3) C DCLK = 93MHz, Vp-p=2.2, Vmax=2.7V (IC604 PIN 26) FIG 13-3 14. AUDIO OUTPUT FROM AUDIO DAC 1) Audio L/R (JK601 PIN 4,5) FIG 14-1 3-22... - Page 63 2) Audio related Signal ASDATA3 ASDAT3(IC501 PIN 157) ABCK(IC501 PIN 148) ALRCK(IC501 PIN 149) FIG 14-2 3-23...
-
Page 64: Block Diagrams
BLOCK DIAGRAMS 1. Overall Block Diagram MA11,BA1 DQM[2:3] MUTE DQ[16:31] ASPDIF Y[1:6] CVBS ASPECT DQM[0:1] DQ[00:15] URST F+,F-,T+,T- SP+,SP- SL+,SL- LOAD+,LOAD- DECK MECHANISM DV7800M'S TOSHIBA 3-24... -
Page 65: Power(Smps) Block Diagram
2. Power(SMPS) Block Diagram TRANS SWITCHING IC RECTIFIER LINE FILTER DV7800M'S TOSHIBA 3-25... -
Page 66: Servo Block Diagram
3. SERVO Block Diagram DQ[16:31] DQ[0:15] DV7800M'S TOSHIBA 3-26... -
Page 67: Mpeg & Memory Block Diagram
4. MPEG & MEMORY Block Diagram AD[0:7] A[0:19] DQ[16:31] PWR,PCE,PRD DQM2,DQM3 CS,DCKE,MA[0:10] DCLK,WE,CAS,RAS M_REQ VFD_TXD VFD_SCK DQ[0:15] DQM0,DQM1 AMDAT VFD_RXD URST,S_REQ ALRCK ACLK,ABCK DV7800M'S TOSHIBA 3-27... -
Page 68: Video & Audio Block Diagram
5. VIDEO & AUDIO Block Diagram DV7800M'S TOSHIBA 3-28... -
Page 70: Circuit Diagrams
2. Voltages are DC-measured with a digital voltmeter MODIFIED OR ALTERED WITHOUT PERMISSION IMPLEMENTATION OF THE LATEST SAFETY AND during Play mode. FROM THE TOSHIBA ELECTRONICS CORPORATION. PERFORMANCE IMPROVEMENT CHANGES INTO ALL COMPONENTS SHOULD BE REPLACED ONLY THE SET IS NOT DELAYED UNTIL THE NEW SERVICE WITH TYPES IDENTICAL TO THOSE IN THE ORIGI- LITERATURE IS PRINTED. -
Page 71: System Circuit Diagram
System not working or screen is abnormal System not working or Digitron not display System not operate Digitron all not display Program download fail System not working Video signal Y '02. 12. 26 R14600A Video signal Color TOSHIBA 3-31 3-32... -
Page 72: Rf & Servo Circuit Diagram
3. RF & SERVO CIRCUIT DIAGRAM CD/DVD LD will not on '02. 12. 26 R14601A TOSHIBA 3-33 3-34... -
Page 73: Timer, 5.1Ch, Scart, Karaoke Circuit Diagram
Power LED abnormal (OPTIONAL PART) Karaoke not operate. Remocon not operate System not operate System not operate or Digitron abnormal or Digital abnormal Key not operate. (OPTIONAL PART) (OPTIONAL PART) 5.1CH Audio Bad '03. 3. 10 R14603B TOSHIBA 3-35 3-36... -
Page 74: Av/Jack Circuit Diagram
All Video signal isn't appear or bad 2CH Audio out bad. SACD OPTION 2.5V doesn't appeat System not working 2CH Audio out bad. Video Signal Y Video Signal CVBS '02. 12. 26 R14602A Video Signal Color 2CH Audio TOSHIBA 3-37 3-38... -
Page 75: Circuit Voltage Chart
• CIRCUIT VOLTAGE CHART IC201 IC202 IC501 IC502 IC505 IC510 IC5A1 IC5K1 IC601 IC602 IC604 IC201 IC202 IC501 IC502 IC505 IC510 IC5A1 IC5K1 IC601 IC602 IC604 (MT1336E) (MOTOR) (MT1379) (SDRAM) (EEPROM) (BUFFER) (FLASH) (KARAOKE) (CS4391) (AMP) (MM1623XFBE) (MT1336E) (MOTOR) (MT1379) (SDRAM) (EEPROM) (BUFFER) - Page 76 Q201 Q202 Q203 Q204 Q205 IC201 IC202 IC501 IC502 IC505 IC510 IC5A1 IC5K1 IC601 IC602 IC604 (MT1336E) (MOTOR) (MT1379) (SDRAM) (EEPROM) (BUFFER) (FLASH) (KARAOKE) (CS4391) (AMP) (MM1623XFBE) STOP PLAY STOP PLAY STOP PLAY STOP PLAY STOP PLAY PIN STOP PLAY STOP PLAY STOP PLAY STOP PLAY STOP PLAY STOP PLAY STOP PLAY STOP PLAY STOP PLAY STOP PLAY STOP PLAY 5.14 4.34...
-
Page 77: Printed Circuit Diagrams
PRINTED CIRCUIT DIAGRAMS 1. MAIN P.C.BOARD 5600AD LOCATION GUIDE 3-43 3-44... -
Page 78: Key P.c.board
2. KEY P.C.BOARD (Solder Side) 3. TIMER P.C.BOARD LOCATION GUIDE (Solder Side) 3-45 3-46... -
Page 79: Smps P.c.board
4. SMPS P.C.BOARD 5. 5.1CH P.C.BOARD LOACTION GUIDE LOCATION GUIDE (Solder Side) (Solder Side) 3-47 3-48... - Page 80 SECTION 4 MECHANISM OF DVD PART CONTENTS 5. Frame Assembly Up/Down ....4-4 DECK MECHANISM PARTS 6. Belt Loading........4-4 LOCATIONS 7. Gear Pulley ........4-4 8. Gear Loading ........4-4 • Top View..........4-1 9. Guide Up/Down.........4-4 • Top View(without Tray Disc) ....4-1 • Bottom View ...........4-1 10.
- Page 81 DECK MECHANISM PARTS LOCATION • Top View (With Tray) Procedure Disass Fig- Parts Fixing Type embly Starting No. Holder 2 Screws, Clamp 2 Locking Tabs Clamp Assembly Disc 1, 2 Plate Clamp 1, 2, 3 Magnet Clamp 1, 2, 3, 4 Clamp Upper Tray Disc 1, 6...
- Page 82 DECK MECHANISM DISASSEMBLY Fig. 4-1 Fig. 4-2 1. Holder Clamp (Fig. 4-1) 2. Tray Disc (Fig. 4-2) 1) Release 2 Screws(S1). 1) Insert and push a Driver in the emergency eject 2) Unhook 2 Locking Tabs(L1). hole(A) at the right side, or put the Driver on the 3) Lift up the Holder Clamp and then separate it from the Lever(B) of the Gear Emergency and pull the Lever(B) Base Main.
- Page 83 DECK MECHANISM DISASSEMBLY Fig. 4-3 3. Base Assembly Sled (Fig. 4-3) 3-3. Gear Assembly Rack 1) Release the Scerw(S3) 1) Release 4 Screw(S2). 2) Disconnect the FFC Connector(C1) 4. Rubber Rear (Fig. 4-3) 3-1. Gear Assembly Feed 3-2. Gear Assembly Middle...
- Page 84 DECK MECHANISM DISASSEMBLY Fig. 4-4 5. Frame Assembly Up/Down (Fig. 4-4) 8. Gear Loading (Fig. 4-4) 9. Guide Up/Down (Fig. 4-4) Note 1) Move the Guide Up/Down in direction of arrow(A) as Put the Base Main face down(Bottom Side) Fig.(A) 1) Release the Screw(S4) 2) Push the Locking Tab(L5) down and then lift up the 2) Unlock the Locking Tab(L3) in direction of arrow and...
- Page 86 EXPLODED VIEWS 1. Deck Mechanism Exploded View 024A 024B 024A 011A 015A 015B 015C...
- Page 88 SECTION 5 REPLACEMENT PARTS LIST TOSHIBA MODEL : SD-4900-S-TU/SD-4900-S-TC NSP : Not avallable as service parts. RUN DATE : 27-JULY-02 S AL LOCA. NO. TOSHIBA PART LG PART NO. DESCRIPTION SPECIFICATION REMARKS *** INDIVIDUAL PARTS *** 79096706 3110R-D001C...
- Page 89 S AL LOCA. NO. TOSHIBA PART LG PART NO. DESCRIPTION SPECIFICATION REMARKS R908 79093029 0RH1002C622 RESISTOR,METAL GLAZED(CHIP) 10K OHM 1 / 16 W 1608 5.00% D R909 79093029 0RH1002C622 RESISTOR,METAL GLAZED(CHIP) 10K OHM 1 / 16 W 1608 5.00% D...
- Page 90 S AL LOCA. NO. TOSHIBA PART LG PART NO. DESCRIPTION SPECIFICATION REMARKS *** DECK ASSEMBLY 79096645 6721RH0370A DECK ASSEMBLY,VIDEO DECK/MECHA DP-7(55) MITSUMI GO AF000173 4861R-0016B CLAMP ASSEMBLY DISC DP7 - SH 79096682 3041R-M003B BASE ASSEMBLY MAIN(DP-7R) - SH AF000163 3041R-M002B...
- Page 91 S AL LOCA. NO. TOSHIBA PART LG PART NO. DESCRIPTION SPECIFICATION REMARKS C232 79092014 0CH1104K942 CAPACITOR,CHIP[CERAMIC M/L HD 0.1UF 50V Z Y5V(F) 1508 R/TP C233 79092014 0CH1104K942 CAPACITOR,CHIP[CERAMIC M/L HD 0.1UF 50V Z Y5V(F) 1508 R/TP C234 79092014 0CH1104K942 CAPACITOR,CHIP[CERAMIC M/L HD 0.1UF 50V Z Y5V(F) 1508 R/TP...
- Page 92 S AL LOCA. NO. TOSHIBA PART LG PART NO. DESCRIPTION SPECIFICATION REMARKS C518 79092014 0CH1104K942 CAPACITOR,CHIP[CERAMIC M/L HD 0.1UF 50V Z Y5V(F) 1508 R/TP C519 79092014 0CH1104K942 CAPACITOR,CHIP[CERAMIC M/L HD 0.1UF 50V Z Y5V(F) 1508 R/TP C520 79092014 0CH1104K942 CAPACITOR,CHIP[CERAMIC M/L HD 0.1UF 50V Z Y5V(F) 1508 R/TP...
- Page 93 S AL LOCA. NO. TOSHIBA PART LG PART NO. DESCRIPTION SPECIFICATION REMARKS C5A8 79092014 0CH1104K942 CAPACITOR,CHIP[CERAMIC M/L HD 0.1UF 50V Z Y5V(F) 1508 R/TP C5A9 79092014 0CH1104K942 CAPACITOR,CHIP[CERAMIC M/L HD 0.1UF 50V Z Y5V(F) 1508 R/TP C5D1 79098709 0CE2274C638 CAPACITOR,ELECTROLYTIC 220M SRA 6.3V M FM5 TP(5)
- Page 94 S AL LOCA. NO. TOSHIBA PART LG PART NO. DESCRIPTION SPECIFICATION REMARKS C6W2 79092014 0CH1104K942 CAPACITOR,CHIP[CERAMIC M/L HD 0.1UF 50V Z Y5V(F) 1508 R/TP C6W3 79097104 0CE1064F638 CAPACITOR,ELECTROLYTIC 10M SRA 16V M FM5 TP(5) C6W4 79097121 0CH4101K412 CHIP CAPA CERAMIC M/L T.C F/S 100P 50V J COG 1.6X0.8 R/TP...
- Page 95 S AL LOCA. NO. TOSHIBA PART LG PART NO. DESCRIPTION SPECIFICATION REMARKS R212 79096547 0RJ7503C677 RESISTOR,METAL GLAZED(CHIP) 750K OHM 1/16 W 5% 1608 R/TP R213 79096553 0RH3903C622 RESISTOR,METAL GLAZED(CHIP) 390K OHM 1 / 16 W 1608 5.00% D R214 79096547...
- Page 96 S AL LOCA. NO. TOSHIBA PART LG PART NO. DESCRIPTION SPECIFICATION REMARKS R529 79093020 0RH0000C622 RESISTOR,METAL GLAZED(CHIP) 0 OHM 1 / 16 W 1608 5.00% D R534 79098767 0RH1001C622 RESISTOR,METAL GLAZED(CHIP) 1K OHM 1 / 16 W 1608 5.00% D...
- Page 97 S AL LOCA. NO. TOSHIBA PART LG PART NO. DESCRIPTION SPECIFICATION REMARKS R644 79093020 0RH0000C622 RESISTOR,METAL GLAZED(CHIP) 0 OHM 1 / 16 W 1608 5.00% D R649 79093033 0RH1500C422 RESISTOR,METAL GLAZED(CHIP) 150 OHM 1 / 16 W 1608 1.00% D...
- Page 98 S AL LOCA. NO. TOSHIBA PART LG PART NO. DESCRIPTION SPECIFICATION REMARKS C322 79097104 0CE1064F638 CAPACITOR,ELECTROLYTIC 10M SRA 16V M FM5 TP(5) C323 79097104 0CE1064F638 CAPACITOR,ELECTROLYTIC 10M SRA 16V M FM5 TP(5) C324 79096608 0CH1392K566 CAPACITOR,FIXED CERAMIC(Temp.c 3900P 50V K X7R 2.0X1.2 R/TP...
- Page 99 S AL LOCA. NO. TOSHIBA PART LG PART NO. DESCRIPTION SPECIFICATION REMARKS R321 79096346 0RH1003D622 RESISTOR,METAL GLAZED(CHIP) 100K OHM 1 / 10 W 2012 5.00% D R322 79096355 0RH2200D622 RESISTOR,METAL GLAZED(CHIP) 220 OHM 1 / 10 W 2012 5.00% D...
- Page 100 S AL LOCA. NO. TOSHIBA PART LG PART NO. DESCRIPTION SPECIFICATION REMARKS C121 79092005 0CE2276F638 CAPACITOR,ELECTROLYTIC 220U SMS 16V M FM5 TP(5) C122 79092035 624-085D CAPACITOR CE 47UF/50V KME (SMPS) C123 79092003 0CE108BF630 CAPACITOR,FIXED ELECTROLYTIC 1000UF KME 16V M FM5 BULK...
- Page 101 S AL LOCA. NO. TOSHIBA PART LG PART NO. DESCRIPTION SPECIFICATION REMARKS R112 79096692 0RD0392F608 RESISTOR,FIXED CARBON FILM 39 OHM 1/6 W 5% TA26 R114 79093006 0RD1003F608 RESISTOR,FIXED CARBON FILM 100K OHM 1/6 W 5% TA26 R115 79097165 0RD0182F608 RESISTOR,FIXED CARBON FILM 18 OHM 1/6 W 5.00% TA26...
- Page 102 TOSHIBA CORPORATION 1-1, SHIBAURA 1-CHOME, MINATO-KU, TOKYO 105-8001, JAPAN...