Advertisement
Quick Links
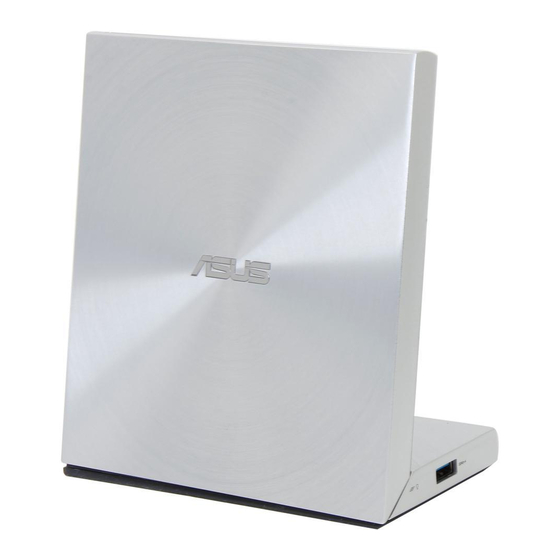
VariDrive
ENGLISH
Your package includes:
• ASUS VariDrive (with USB 3.0 cable)
• AC Adapter
• This Quick Installation Guide
Connecting devices
USB 3.0
AC adapter
USB 3.0 HDMI
LAN
Notebook PC
To start using your VariDrive:
1. Connect the bundled USB cable to your computer.
Using the ODD.
2. Connect the USB 3.0 (B-type) connector of the bundled USB 3.0 cable to
the USB 3.0 (B-type) port on your VariDrive.
3. Connect the DC-in connector of the AC adapter into the DC-in jack of the
VariDrive, then plug the AC adapter to a power outlet.
4. You can now connect any of the following devices to your VariDrive:
• Connect an RJ-45 LAN connector to the RJ-45 10/100/1000 LAN port.
• Connect USB 3.0 devices such as an external storage drive, camera,
videocam, or printer to any of the three USB 3.0 ports.
• Connect an HDMI appliance such as LCD monitor or TV to the HDMI port.
• Connect a monitor to the VGA port.
NOTES: - We DO NOT guarantee the performance of the optical drive connected
using a USB hub..
- Your ASUS VariDrive is recommended for use with an ASUS Ultrabook
PC.
- DO NOT press the drive while in operation, to prevent noise or damage
to your device or optical disk.
Removing the VariDrive
1. From the taskbar of your computer, click the Safely Remove Hardware icon
(
).
2. When prompted, click Eject BD-ROM Drive (X:) ASUS VariDrive to eject the
drive.
3. When the message Safe to Remove Hardware pops up, disconnect the USB
cable from your computer.
Q7712_VariDrive_V2.indd 1
繁體中文
您的包裝盒內容物包含有以下項目:
• 華碩 VariDrive(包含 USB 3.0 排線)
Installation
Guide
• AC 電源供應器
• 快速安裝指南
連接裝置
請依照以下步驟開始使用您的 VariDrive:
1. 將隨貨附贈的 USB 3.0 排線連接至電腦。
2. 將隨貨附贈的 USB 3.0 排線上的 USB 3.0(
B-type)連接至 VariDrive 的 USB 3.0(B-type)連
接埠。
3. 將 AC 電源供應器的 DC-in 連接端連接至 VariDrive
VGA
的 DC-in 接頭,然後將 AC 電源供應器插入電源
插頭。
4. 您可以連接以下任一裝置至您的 VariDrive:
• 將 RJ-45 網路裝置連接至 RJ-45 10/100/1000
LAN 網路連接埠。
• 將 USB 3.0 裝置如外接式儲存裝置、相機、錄影
機或印表機等連接至三個 USB 3.0 連接埠中的任
一個。
• 將 HDMI 裝置如 LCD 顯示器或電視,連接至
HDMI 連接埠。
• 將螢幕連接至 VGA 連接埠。
說明:
- 若將光學裝置連接在 USB 集線器,不保證該裝置的
執行效能。
- 華碩 VariDrive 建議連接華碩筆記型電腦使用。
- 在執行運作時請勿按 VariDrive,以防止對裝置或光
碟產生噪音或損害。
移除裝置
1. �電腦的�作���安������示。
�電腦的�作���安������示。
2. 當訊息對話框出現時,�� 退出 ED-ROM 光碟機
(X:) ASUS VariDrive 來退出光碟機。
3. 當 現在您可以安全的移除硬體裝置 的訊息出現
時,即可將光碟機�電腦上��。
簡體中文
您的包裝盒內容物包含有以下項目:
Contenu de la boîte :
• 華碩 VariDrive(包含 USB 3.0 排線)
• ASUS VariDrive (avec câble USB 3.0)
• AC 電源
• Adaptateur secteur
• 快速安裝手冊
• Ce guide d'installation rapide
連接設備
Connecter des appareils
請依照以下步驟開始使用您的 VariDrive:
Pour utiliser votre VariDrive :
1. 將隨貨附贈的 USB 3.0 排線連接至計算機。
1. Connectez le câble USB fourni à l'un des ports USB
2. 將隨貨附贈的 USB 3.0 排線上的 USB 3.0(
de votre ordinateur.
B-type)連接至 VariDrive 的 USB 3.0(B-type)
2. Connectez l'autre extrémité (type B) du câble
連接端口。
USB 3.0 fourni au connecteur USB 3.0 (type B) du
3. 將 AC 電源的 DC-in 連接至 VariDrive 的 DC-in 接
VariDrive.
口,然後將 AC 電源插入電源插頭。
3. Connectez l'adaptateur secteur à la prise
4. 您可以連接以下任一設備至您的 VariDrive:
d'alimentation du VariDrive, puis reliez le tout à une
• 將 RJ-45 網絡設備連接至 RJ-45 10/100/ 1000
prise électrique.
LAN 網絡連接端口。
4. Vous pouvez dès lors connecter un ou plusieurs des
• 將 USB 3.0 設備如外接式存儲設備、相機、攝像
appareils suivants à votre VariDrive :
機或打印機等連接至三個 USB 3.0 連接端口中的
任一個。
• Connectez un câble réseau RJ-45 au port RJ-45
• 將 HDMI 設備如 LCD 屏幕或電視,連接至 HDMI
10/100/1000 du VariDrive.
連接端口。
• Connectez un périphérique USB 3.0 tel qu'un
• 將屏幕連接至 VGA 連接端口。
dispositif de stockage externe, un appareil photo,
說明:
un caméscope ou une imprimante à l'un des trois
ports USB 3.0 disponibles.
- 若將光驅連接在 USB 集線器,不保證該設備的運
行性能。
• Connectez un appareil doté d'une interface HDMI
- 華碩 VariDrive 推薦連接華碩筆記本電腦使用。
tel qu'un téléviseur ou un ,oniteur LCD au port
HDMI.
- 在運行時請勿按 VariDrive,以防止對設備或光盤產
生噪音或損害。
• Connectez un moniteur LCD par le biais du port
VGA.
NOTES: - Nous ne garantissons pas les performances du
Déconnecter le VariDrive
卸除設備
1. Cliquez sur l'icône
1. �計算機的任����安�������。
�計算機的任����安�������。
notification de Windows.
2. 當信息對話框出現時,�� 退出 ED-ROM 光驅
2. Lorsque vous y êtes invité, cliquez sur Éjecter le
(X:) ASUS VariDrive 來退出光驅。
lecteur BD-ROM (X:) ASUS VariDrive.
3. 當 現在您可以安�的移���設備 的信息出現
3. Lorsque le message Le matériel peut être retiré en
時,即可將光驅�計算機移�。
toute sécurité apparaît, déconnectez le câble USB
de votre ordinateur.
Français
Verpackungsinhalt:
• ASUS VariDrive (mit USB 3.-Kabel)
• Netzteil
• Schnellstartanleitung
Geräteanschluss
So verwenden Sie VariDrive:
1. Verbinden Sie das mitgelieferte USB-Kabel mit
Ihrem Computer.
2. Verbinden Sie den USB 3.0 (B-Typ) -Stecker des
mitgelieferten USB 3.0-Kabels mit dem USB 3.0 (B-
Typ) -Anschluss Ihres VariDrive.
3. Verbinden Sie den Stromanschlussstecker des
Netzteils mit der Stromversorgungsbuchse Ihres
VariDrive, und stecken Sie das Netzteil dann in eine
Steckdose.
4. Sie können nun die folgenden Geräte an Ihr
VariDrive anschließen:
• Verbinden Sie ein RJ-45 LAN-Kabel mit der RJ-45
10/100/1000 LAN-Buchse.
• Verbinden Sie USB 3.0-Geräte, z. B. externe
Datenträger, Kamera, Videokamera oder Drucker
mit einen der drei USB 3.0-Anschlüsse.
• Verbinden Sie ein HDMI-Gerät, z. B. LCD-Monitor
oder TV mit dem0 HDMI-Anschluss.
• Verbinden Sie einen Monitor mit dem VGA-
Anschluss.
HINWEISE: - Wir garantieren NICHT die Leistung
optischer Laufwerke, die über einen USB-Hub
lecteur optique lorsque celui-ci est connecté à
angeschlossen sind.
un hub USB.
- Ihr ASUS VariDrive wird für die Verwendung mit
- Il est recommandé d'utiliser le ASUS VariDrive
einem ASUS-Notebook-PC empfohlen.
avec un ordinateur portable ASUS.
- Drücken Sie NICHT auf das Laufwerk
- NE manipulez pas le lecteur optique lorsque
während es arbeitet, um Geräusche oder eine
celui-ci est en cours d'opération afin d'éviter
Beschädigung der Disk zu vermeiden.
d'endommager l'appareil ou le disque. Using
Using
the ODD.
Laufwerk entfernen
située dans la zone de
1. Klicken Sie in der Taskleiste Ihres Computers
auf das USB-Symbol zum sichern entfernen der
Hardware (
2. Klicken Sie dann auf BD-ROM-LAufwerk (X:)
ASUS VariDrive auswerfen, um das Laufwerk zu
entfernen.
3. Nach der Aufforderung Hardware sicher entfernen
können Sie das Kabel von Ihrem Computer
trennen.
Q7712
Deutsch
).
2/10/12 11:10:47 AM
Advertisement

Related Manuals for Asus Varidrive


Summary of Contents for Asus Varidrive
- Page 1 • Connectez un moniteur LCD par le biais du port Anschluss. 碟產生噪音或損害。 VGA. 4. You can now connect any of the following devices to your VariDrive: HINWEISE: - Wir garantieren NICHT die Leistung NOTES: - Nous ne garantissons pas les performances du optischer Laufwerke, die über einen USB-Hub •...
- Page 2 USB 3.0 in dotazione alla porta USB 3.0 (tipo B) del 2. Подключите USB кабель к разъему USB (тип B) kabelu USB 3.0 k portu USB 3.0 (B typ) na VariDrive. 2. ��� ���� USB 3.0 ������ USB 3.0(B �...
- Page 3 2. Konektor USB 3.0 (typ B) dodaného kábla USB 3.0 2. Csatlakoztassa a mellékelt USB 3.0 kábel USB 3.0 (B USB 3.0 do portu USB 3.0 (typ B) napędu VariDrive. 3.0 incluído à porta USB 3.0 (de tipo B) na sua 2.
- Page 4 3. Inserte el conector de entrada de CC del adaptador portuna bağlayın. izmenični tok vključite v priključek DC-in na de CA en la toma de entrada de CC de su VariDrive 3. Підключіть сполучувач входу постійного CD-ROM Drive Safety Warning pogonu VariDrive, nato vključite napajalni adapter...