Brother P-Touch 3600 User Manual
Hide thumbs
Also See for P-Touch 3600:
- User manual (129 pages) ,
- Parts reference list (16 pages) ,
- User manual (1 page)

Related Manuals for Brother P-Touch 3600


Summary of Contents for Brother P-Touch 3600
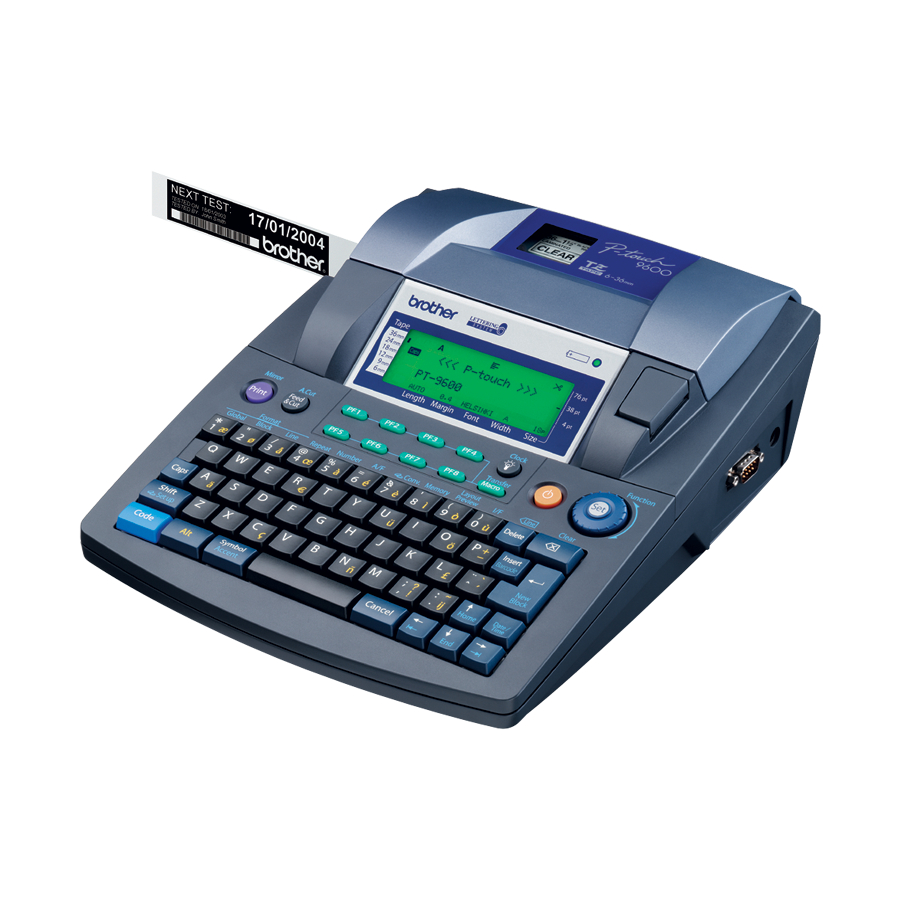
- Page 1 9600/3600 9600/3600 USER’S GUIDE USER’S GUIDE USER’S GUIDE • Read this User’s Guide before you start using your P-touch. • Keep this User’s Guide in a handy place for future reference.
- Page 2 PREFACE Thank you for purchasing this P-touch! With your new P-touch, you can create labels for any purpose. Select from a variety of frames, fonts and character styles to design beautiful custom labels. In addition, the many pre-formatted templates available make label-making quick and easy. In addition, three types of AV label cassettes can be used to create easy-to-peel-off, pre-sized address and filing labels (AV2067: 3/4"...
- Page 3 QUICK REFERENCE Entering text Adding a space Space bar Entering/Exiting Insert mode Adding an uppercase h or t + Desired character letter Adding a series of c → Type character uppercase letters (enter- ing Caps mode) Adding a lowercase let- h or t + desired character ter in Caps mode a + Type character...
- Page 4 Formatting text Changing formats for d + 1 → j or k to select function → m or g to select setting entire text → n Changing formats for a j, k, m or g to select text block → d + 2 → j or k to block of text select function →...
- Page 5 Printing in reverse (mir- d + p → m or g to select setting → n ror printing) Formatting text for a d + S → m or g to select setting → n stamp Rotating the text d + 1 or 2 → j or k to select ROTATE → m or g to select setting →...
- Page 6 Storing, recalling, deleting & printing text files Saving a file d + 8 → m or g to select STORE → n → m or g to select file number → Type file name → n Recalling a previously d + 8 → m or g to select RECALL → n → m or g to select saved file file number →...
-
Page 7: Table Of Contents
CONTENTS Chapter 1 Before You Start ............. 1 GENERAL DESCRIPTION .............2 Top view ......................2 Bottom view ......................3 LCD display ......................3 Keyboard ......................4 Chapter 2 Getting Started ............5 PRECAUTIONS ................6 Connecting the AC adaptor ................7 Turning on/off the P-touch .................. - Page 8 Chapter 4 Machine Adjustments ........... 73 Machine adjustments ..................74 ERROR MESSAGE LIST .............. 77 TROUBLESHOOTING ............... 84 MACHINE SPECIFICATIONS ............. 88 Appendix .............. 89 Symbols ......................90 Special barcode characters ................93 Fonts ........................93 Sizes and widths ....................94 Type styles ......................96 Framing and shading patterns ................98 Pre-set templates ....................99 Template text styles ..................104 INDEX ..................
-
Page 9: Before You Start
Ch.1 Before You Start Chapter efore tart... -
Page 10: General Description
GENERAL DESCRIPTION Top view Tape compartment cover P-touch 9600: Recharging indicator LCD display Cover release button AC adaptor connector RS-232C port USB port Keyboard P-touch 3600: Tape compartment cover LCD display Cover release button AC adaptor connector USB port Keyboard... -
Page 11: Bottom View
Ch.1 Before You Start Bottom view Battery compartment cover (PT-9600 only) Handle Tape exit slot LCD display 1 2 3 4 5 6 7 8 9 A B C D E F K Q Q Q Q Q Q Q Q Q Q Q Q Q <<<P-touch>>>... -
Page 12: Keyboard
Ch. 1 Before You Start Keyboard P-touch 9600: P-touch 3600: 1 Power key ➩ p. 7 6 Arrow keys ➩ p. 38 2 Screen backlight key (PT-9600 only) 7 Return key ➩ p. 39 ➩ Refer to the Advanced Functions booklet. -
Page 13: Getting Started
Ch. 2 Getting Started Chapter etting tarted... -
Page 14: Precautions
Ch. 2 Getting Started PRECAUTIONS ● Use only Brother TZ tapes or Brother/Avery AV labels with this machine. Do not use tapes that do not have the mark. ● Do not pull on the tape being fed from the P-touch, otherwise the tape cassette may be dam- aged. -
Page 15: Connecting The Ac Adaptor
Ch. 2 Getting Started Connecting the AC adaptor NOTE ● ● ● ● ● ● ● ● ● ● ● ● ● ● ● ● ● ● ● ● ● ● ● ☞ Do not unplug the AC adaptor if the P-touch is This P-touch can be used anywhere a standard plugged in and turned on, otherwise the data electrical outlet is available. -
Page 16: Connecting The P-Touch To A Computer
Ch. 2 Getting Started P-touch 3600: P-touch 3600: 2 If a tape cassette is already installed and you wish to replace it, remove it by pulling 5 Close the compartment cover, and then it straight up. press o to turn on the machine, if it is off. -
Page 17: Installing The Software & Printer Driver
On a Computer Running ® Windows Before installation Check that your system configuration meets the following requirements. P-touch 3600: Computer: IBM PC or compatible. ® Operating system: Pre-installed with Microsoft ® Windows 98, 98 SE, Me, 2000 Professional or NOTE ®... - Page 18 Ch. 2 Getting Started Installing the P-touch Editor 3.2 3 Click the upper button (P-touch Editor). The ® software InstallShield Wizard for installing the P-touch Editor software starts up, and then The P-touch Editor 3.2 software includes a variety the Welcome dialog box appears. of more complex functions for printing barcodes and images, enabling you to design just about any label that you can image.
- Page 19 Ch. 2 Getting Started ● For a Typical or Compact installation Selecting “Typical” or “Compact”, then clicking the Next button immediately starts installation. Typical: All of the basic options (P-touch Editor 3.2, Clip art, Auto Format tem- plates, Help and fonts) are installed. Compact: Only P-touch Editor 3.2 is installed.
- Page 20 Ch. 2 Getting Started Transfer Manager: (PT-9600 only-not compatible with the software for the PT-3600) Two applications: Transfer Manager (which allows you to transfer templates, a database linked to a tem- To upgrade P-touch Editor 3.2 for Access 2000, plate or image data to the P-touch from click the Yes button, and then follow the a computer) and Backup Manager instructions that appear.
- Page 21 Ch. 2 Getting Started NOTE NOTE ☞ If the dialog box does not automatically appear, To install just the printer driver, click the lower double-click “My Computer” on the desktop, and button (Driver). The first Driver Setup dialog then double-click the CD-ROM drive containing box appears, allowing you to select whether the ®...
- Page 22 Ch. 2 Getting Started 5 Type the necessary information into the 8 Select the desired locations for the short- appropriate boxes (If the information has cuts, and then click the Next button. A dia- ® log box appears, allowing you to select already been registered in Windows , it whether or not to install the printer driver.
- Page 23 Ch. 2 Getting Started To install the USB printer driver 4 Click the Finish button. NOTE ® With Windows 98, 98 SE, Me or 2000: 1 In the dialog box that appears, allowing you to select whether the P-touch will be con- nected with a USB cable or an RS-232C cable, select “USB cable”, and then click the OK button.
- Page 24 Ch. 2 Getting Started 3 Connect the P-touch to the computer using 6 Click the Finish button. the enclosed USB interface cable as NOTE described on page 9, and then turn on the P-touch. The first Found New Hardware Wizard dialog box appears. If a Driver Setup dialog box appears, indicating that the printer driver has been installed, click the Finish button.
- Page 25 9, and then turn on the P-touch. A dialog box appears, indicating that the printer driver has been installed. 5 Select either “Replace with new Brother PT- 9600/3600.” or “Add Brother PT-9600/ 3600.”, and then click the Next button.
- Page 26 Ch. 2 Getting Started 9 Click the Continue Anyway button to con- 8 Click the Finish button. tinue with the installation. A Found New NOTE Hardware Wizard dialog box appears, indi- If a dialog box appears, explaining that the com- cating that the Found New Hardware Wiz- puter should be restarted, select the option for ard has finished installing the software for...
- Page 27 Ch. 2 Getting Started Memory: At least 32 MB 6 Double-click the P-touch Editor 3.2 Installer icon in the folder that appears. The installer USB port (installed as standard equipment) starts up. CD-ROM drive Installing the P-touch Editor 3.2 soft- ware The P-touch Editor 3.2 software includes a vari- ety of more complex functions for printing bar-...
- Page 28 Ch. 2 Getting Started 8 When the dialog box appears, indicating 6 Double-click the P-touch Editor 3.2 Installer icon that the installation is finished, click the in the folder that appears. The installer starts up, Quit button. and then the Introduction dialog box appears. 9 When the dialog box appears, asking if you wish to restart the computer, click the Restart button to restart the computer.
- Page 29 Ch. 2 Getting Started 0 Check that the installation will be per- NOTE formed as desired, and then click the Install button. After P-touch Editor is installed, a If certain options (such as the Auto Format Tem- plates and the Clip Art) are not installed, some P- dialog box appears, indicating that the touch Editor functions may not be available.
- Page 30 Ch. 2 Getting Started 4 Double-click the Mac OS 9 folder to open it. 7 When the dialog box appears, indicating that the installation is finished, click the Quit button. 8 When the dialog box appears, asking if you 5 Double-click the P-touch Quick Editor wish to restart the computer, click the Installer icon in the folder that appears.
- Page 31 Ch. 2 Getting Started 6 Double-click the P-touch Quick Editor Installer icon in the folder that appears. The installer starts up, and then the Introduction dialog box appears. 9 Check that the installation will be performed as desired, and then click the Install button. After P- touch Quick Editor is installed, a dialog box appears, indicating that the installation is finished.
- Page 32 Ch. 2 Getting Started 4 Double-click the Mac OS X folder to open 5 Double-click the Driver Installer icon in the folder that appears. The installer starts up, and then the Introduction dialog box 8 Click the Done button, and then restart the appears.
-
Page 33: Reading The User's Guide
Ch. 2 Getting Started 4 Click “The User’s Guide P-touch Editor 3.2”. NOTE If no printers have been added, a message appears, On a Macintosh Computer allowing you to add to your list of printers. Click the Add button. To view the User’s Guide from the CD-ROM: ●... -
Page 34: Displaying The Properties
Ch. 2 Getting Started Entering text When P-touch Editor is started, the following window is displayed. NOTE Rulers Layout area Print area Title bar Although the screens shown in the following expla- Menu bar ® nations are for Windows 98, 98 SE and Me, the Draw toolbar ®... -
Page 35: Using P-Touch Quick Editor
Ch. 2 Getting Started ● P-touch Editor 3.2 can import files other than mdb files, such as csv files. Files saved NOTE as csv files with an application such as ☞ With P-touch Editor 3.2, text is always typed in Microsoft Excel can be used with P-touch using the insert mode. -
Page 36: Specifying A Label Size
Ch. 2 Getting Started When P-touch Quick Editor is started, the fol- lowing window is displayed. NOTE The Tape Settings can also be displayed by select- Toolbar ing [View Properties], then clicking [Tape Settings] Label view in the pop-up menu, displayed by right-clicking ®... -
Page 37: Importing Text
Ch. 2 Getting Started 4 Click in the label view, and then type or ® 1 Windows : Right-click in the label view (or import the text. text box), select [Symbols] in the menu that appears, and then click [Insert/Change]. NOTE The Input Symbol dialog box appears. -
Page 38: Viewing The Text
Ch. 2 Getting Started Viewing the text NOTE Layouts that are too long to fit in the screen can If you want to start printing without changing the be scrolled by clicking the Arrange button ( print options simply click the Print button ( to view the left, the center, then the right side of or click the arrow beside the Print button and click the layout with each click of the button. -
Page 39: Uninstalling The Software & Printer Driver
Ch. 2 Getting Started Uninstalling the Software & To uninstall the printer driver: 1 Turn off the P-touch 9600/3600, and then Printer Driver disconnect it from the computer. ● ● ● ● ● ● ● ● ● ● ● ● ●... - Page 40 Ch. 2 Getting Started 5 Select “Delete Brother PT-9600/3600.”, and 3 Drag the following to the Trash icon: then click the Next button. A dialog box • PT-9600/3600 icon (to delete the printer appears, asking for confirmation to delete driver) all PT-9600/3600 printer drivers.
-
Page 41: Attaching Labels
7 In the Library folder, open the Printers backing to easily be peeled off. folder, and then open the Brother folder. 8 Drag the following to the Trash icon. Iron-on transfer tape •... - Page 42 Ch. 2 Getting Started Ironing Iron garments with transfers using normal tem- NOTE perature settings. ☞ White garments made from 100% cotton with a Be sure to place a piece of cloth between the plain (smooth) surface are best for iron-on trans- iron and the label when you iron over it to pre- fers.
-
Page 43: Assembling Stamps
Ch. 2 Getting Started Assembling stamps ● ● ● ● ● ● ● ● ● ● ● ● ● ● ● ● ● ● ● ● ● ● ● Glossy side In addition to labels, your P-touch can be used to make custom, pre-inked stamps for various uses (optional stamp kit required). - Page 44 30 seconds, the holder so that its bottom edge is on the replace the stamp holder with a new one. Do same side of the stamp holder as the raised not try to refill the stamp holder. “brother” logo.
-
Page 45: Functions
Ch. 3 Functions Chapter unctions... -
Page 46: Performing Basic Operations
Ch. 3 Functions k (right arrow key) Performing basic operations ● ● ● ● ● ● ● ● ● ● ● ● ● ● ● ● ● ● ● ● ● ● To move the cursor one character to the The following keys are necessary for using the right: many functions. - Page 47 Ch. 3 Functions g (down arrow key) To select an item from a list or to apply the selected setting: To move the cursor down to the following Press n. ● line: Press g once. ● Cancel key (e) NOTE The Cancel key can be used to quit most func- If this key is pressed when the cursor is in the last tions and return to the previous display without...
-
Page 48: Entering Text
Ch. 3 Functions Entering text ● ● ● ● ● ● ● ● ● ● ● ● ● ● ● ● ● ● ● ● ● ● NOTE If the P-touch is in Caps mode, holding down h Typing in the text for your labels is almost the or t while pressing a letter key will enter a lower- same as typing on a typewriter or a computer. - Page 49 Ch. 3 Functions Alt mode (a) For TZ tapes: Maximum Number of Accented characters or special punctuation Tape Width Lines That Can Be marks on the right-hand side of the keys can be Printed added to the text using the Alt mode. Enter or 1/4"...
- Page 50 Ch. 3 Functions 2 Press m or g to select the desired cate- gory of symbols, and then press j or k NOTE until the desired symbol is displayed ☞ A single label can only contain a maximum of enlarged within the frame in the middle of fifty text blocks.
- Page 51 Ch. 3 Functions Barcode key (d + i) To add an accented character to the text: 1 Hold down d and press s. The mes- The Barcode function, which enables barcodes sage “ACCENT a-u/A-U? PRESS to be printed as part of labels, is one of this REQUIRED CHARACTER”...
- Page 52 Ch. 3 Functions To enter the barcode data: To add special characters to barcodes (only with protocols CODE39 or CODE128): 1 Hold down d and press i. 8 Press j or k until the cursor is below the NOTE character immediately to the right of where ☞...
-
Page 53: Editing Text
Ch. 3 Functions Editing text To delete a sequence of characters: 1 Press j, k, m or g to position the cur- ● ● ● ● ● ● ● ● ● ● ● ● ● ● ● ● ● ● ●... -
Page 54: Formatting
Ch. 3 Functions 2 Since ! is already beside TEXT&FORMAT, Formatting press n. All of the text is erased and all of ● ● ● ● ● ● ● ● ● ● ● ● ● ● ● ● ● ● ●... - Page 55 Ch. 3 Functions Block format functions Line format functions (d + 2) (d + 3) Formatting with the Block Format functions The Line Format functions allow you to empha- enables you to change the appearance of each size a single line of the text by printing it with a of the label’s text blocks, created using the New Font, Size, Width, Style1, Style2, Line Effects Block function.
- Page 56 Ch. 3 Functions Font function (FONT) NOTE With the Font function, you can change the font ☞ If “*****” appears as a setting, the Font function of the text to one of the many that are available. has already been applied to part of the current For samples of the available Font settings, refer text (either a line in the current block if the to page 93.
- Page 57 Ch. 3 Functions To change the setting for the Size function: 1 Hold down d and press 1, 2 or 3. NOTE ☞ Since the text sizes that can be printed depends NOTE on the width of the tape, the following table This step may be skipped if settings for several for- shows the maximum text size that can be used mat functions are being applied at the same time.
- Page 58 Ch. 3 Functions Width function (WIDTH) NOTE The Width function can be used with any of the ☞ If “*****” appears as a setting, the Width func- text sizes to make the size of the characters tion has already been applied to either a line in wider or more narrow.
- Page 59 Ch. 3 Functions Style2 function (STYLE2) To change the setting for the Style1 function: 1 Hold down d and press 1, 2 or 3. Two more text styles are available with the Style2 function: ITALIC and VERTICAL. Either of NOTE these styles can be combined with each of the This step may be skipped if settings for several for- text styles available with the Style1 function.
- Page 60 Ch. 3 Functions To change the setting for the Line Effects function: NOTE ☞ If “*****” appears as a setting, the Style2 func- 1 Hold down d and press 1, 2 or 3. tion has already been applied to either a line in the current text block (if the Block Format or the NOTE Global Format function is being set) or a block...
- Page 61 Ch. 3 Functions Frame function (FRAME) NOTE With the Frame function, you can choose from a ☞ Even if a frame setting has already been applied variety of frames and highlights for emphasizing to either a line in the current text block (if the certain parts or all of the text in your label.
- Page 62 Ch. 3 Functions In addition, if the Text Rotation function is set to OFF, the text will align within the length set NOTE with the Block Length function. If the Text Rota- ☞ If “*****” appears as a setting, the Text Align- tion function is set to any setting other than ment function has already been applied to OFF, the text will align within the width of the...
-
Page 63: Tape Margin Function
Ch. 3 Functions 4 Press n to apply the setting. When any setting other than OFF is selected for the text at the cursor’s current position, the Text NOTE Rotation indicator at the top of the display To apply several format settings at the same time, comes on. - Page 64 Ch. 3 Functions Tape Length function (T. LENGTH) K Q Q Q Q Q 1 2 3 4 5 6 7 8 9 B C D E F Q Q Q Q Q Q Q Q 09/13 Q Q Q Q Although the length of the printed label auto- Q Q Q Q T.
- Page 65 Ch. 3 Functions NOTE K Q Q Q Q Q 1 2 3 4 5 6 7 8 9 B C D E F ☞ Q Q Q Q To return the function to its default setting Q Q Q Q 11/13 Q Q Q Q Q Q Q Q...
-
Page 66: Mirror Printing Function
Ch. 3 Functions Mirror Printing function To change the setting for the Block Length function: (d + p) 1 Hold down d and press 1 or 2. This function prints your label so that the text NOTE can be read from the adhesive side of the tape. If This step may be skipped if settings for several for- mirror-printed labels are attached to glass or mat functions are being applied at the same time. -
Page 67: Auto Format Function
Ch. 3 Functions Stamp Stencil function Auto Format function (d + S) (d + 6/ 7 [v/w on the PT-3600]) The Stamp Stencil function allows you to quickly and easily create your own stamp sten- The Auto Format function keys (6 and 7) cil films for chemical etching. - Page 68 Ch. 3 Functions TZ Tape NOTE 1 2 3 4 5 6 7 8 9 A B C D E F ☞ If g is pressed while the last field is displayed, ADDRESS-1 the first field appears. If n is pressed while the 1×3.2"...
- Page 69 Ch. 3 Functions To finish using the Auto Format function: D Press m or g until ! moves beside EXIT. NOTE The default setting (ORIGINAL) can be selected by pressing the space bar. 1 2 3 4 5 6 7 8 9 A B C D E F K Q Q Q Q Q Q Q Q Q Q Q Q Q 02/04...
-
Page 70: Printing
Ch. 3 Functions Printing When the last label is printed, press to feed the chain of labels and cut it. ● ● ● ● ● ● ● ● ● ● ● ● ● ● ● ● ● ● ● ● ●... -
Page 71: Repeat Printing Function
Ch. 3 Functions NOTE NOTE ☞ After printing a label on TZ tape with the Auto To quit printing at any time, press Cut function set to 5, 6, 7 or 8, press f to feed the tape, then cut it. 1 2 3 4 5 6 7 8 9 A B C D E F K Q Q Q Q Q ☞... - Page 72 Ch. 3 Functions NOTE NOTE ☞ ☞ To select the default setting (1), press the space bar. Only one numbering field can be selected from ☞ any text. To change the setting in steps of 5, hold down either m or g, and then release the key when ☞...
-
Page 73: Storing And Recalling Files
Ch. 3 Functions 4 Press n. The NUMBER screen appears. Storing and recalling files ● ● ● ● ● ● ● ● ● ● ● ● ● ● ● ● ● ● ● ● ● ● 1 2 3 4 5 6 7 8 9 A B C D E F K Q Q Q Q Q Q Q Q Q Q Q Q Q Memory functions (d +... - Page 74 Ch. 3 Functions 4 Press m or g until the file number where you wish to store the text is displayed. 1 2 3 4 5 6 7 8 9 A B C D E F K Q Q Q Q Q Q Q Q Q NOTE Q Q Q Q...
- Page 75 Ch. 3 Functions To overwrite the stored file with the new For a TZ tape template file: one: 1 2 3 4 5 6 7 8 9 A B C D E F K Q Q Q Q Q Press n to delete the previously stored file Q Q Q Q ●...
- Page 76 Ch. 3 Functions 4 Press m or g until the file number con- Deleting a file taining the text that you wish to delete is displayed. The file name is shown beside To delete a file that has been saved: the file number and the text stored under 1 Hold down d and press 8.
- Page 77 Ch. 3 Functions Printing stored text and Auto Format templates NOTE ☞ Multiple stored text or Auto Format templates If multiple files are to be deleted, follow steps can be printed immediately without first being to mark them with . If only one file recalled.
- Page 78 Ch. 3 Functions 5 Press the space bar so that ! appears to the For a TZ tape template file: right of the file name. 1 2 3 4 5 6 7 8 9 A B C D E F K Q Q Q Q Q Q Q Q Q Q Q Q Q 1 2 3 4 5 6 7 8 9 A B C D E F K Q Q Q Q Q...
- Page 79 Ch. 3 Functions To print more stored Auto Format template files: NOTE D Press m or g until ! moves beside PRINT ☞ If multiple files are to be printed, follow steps MORE. to mark them with . If only one file is to be printed, steps can be skipped.
- Page 80 Ch. 3 Functions For a TZ tape template file: 1 2 3 4 5 6 7 8 9 A B C D E F K Q Q Q Q Q Q Q Q Q Q Q Q Q PRINT 3/4" Q Q Q Q Q Q Q Q 00TZ[00:VIDEO...
-
Page 81: Machine Adjustments
Ch. 4 Machine Adjustments Chapter Machine Adjustments... -
Page 82: Machine Adjustments
Ch. 4 Machine Adjustments 1 Hold down d and press A. Machine adjustments ● ● ● ● ● ● ● ● ● ● ● ● ● ● ● ● ● ● ● ● ● ● NOTE This step may be skipped if settings for several Setup functions (d + A) Setup functions are being applied at the same time. - Page 83 Ch. 4 Machine Adjustments 3 Press m or g until the desired setting is 4 Press n to apply the setting. displayed. NOTE NOTE To apply several Setup settings at the same time, To return the function to its default setting (0), press continue pressing j or k to select the function, the space bar.
- Page 84 Ch. 4 Machine Adjustments To change the HALF CUTTER setting: To change the USB ID SELECTION setting: This function allows you to adjust how deep a This function allows you to specify a unique half cut is cut with laminated tape, for example, identification number for each P-touch con- if the tape is cut too much or not enough.
-
Page 85: Error Message List
ERROR MESSAGE LIST ERROR MESSAGE LIST ERROR MESSAGE CAUSE SOLUTION 16 LINE LIMIT! ● This message appears if 16 lines ● Limit the number of lines in a text block to 16. have already been entered in a text block of text when you press n. - Page 86 ERROR MESSAGE LIST ERROR MESSAGE CAUSE SOLUTION CHARGE BATTERIES! ● This message appears when the ● Recharge the battery or rechargeable Ni-MH battery has use the AC adaptor. (PT-9600 only) reached a low voltage. CLOSE CASSETTE ● This message appears if the tape ●...
- Page 87 ERROR MESSAGE LIST ERROR MESSAGE CAUSE SOLUTION INTERFACE ERROR! ● This message appears if the Windows wrong port is selected for a USB Under “Print to the following connection. port” in the printer Properties dialog box, select “PTUSB:” for the USB connection. For Windows 98 and Me: ☞...
- Page 88 ERROR MESSAGE LIST ERROR MESSAGE CAUSE SOLUTION LINE LIMIT! ● This message appears if you try ● Reduce the number of XX LINES MAXIMUM to print or use the Layout Pre- lines or install a wider view function when the number tape.
- Page 89 ERROR MESSAGE LIST ERROR MESSAGE CAUSE SOLUTION REPLACE BATTERIES! ● This message appears when the ● Replace the battery or use installed Ni-MH battery is about the AC adaptor. (PT-9600 only) to run out, or when the battery has reached a high voltage. SET 1/4"...
- Page 90 ERROR MESSAGE LIST ERROR MESSAGE CAUSE SOLUTION SET AV2067 TAPE! ● This message appears if an ● Install an AV2067 Address AV2067 Address label cassette label cassette. is not installed when printing an AV2067 Address template of the Auto Format function. SET STAMP-L! ●...
- Page 91 ERROR MESSAGE LIST ERROR MESSAGE CAUSE SOLUTION VALUE OUT OF RANGE! ● This message appears if the ● Type in a value that is CHECK VALUE AND value entered while setting the within the allowable RE-ENTER. Tape Margin, Tape Length, range.
-
Page 92: Troubleshooting
TROUBLESHOOTING TROUBLESHOOTING Problem Solution (1) The display stays blank after you have ● Check that the AC adaptor is connected. turned on the machine, or abnormal char- ● Check that the rechargeable Ni-MH bat- acters are displayed. tery is properly charged. (PT-9600 only) ●... - Page 93 TROUBLESHOOTING Problem Solution (4) The P-touch is not working correctly. ● Reset the P-touch by turning it off, then while holding down d and R, turning the machine back on. ☞ All settings will be reset to their defaults and the entire contents of the memory will be cleared.
- Page 94 TROUBLESHOOTING Problem Solution (7) A blank horizontal line appears through 1 Turn off the machine, and then disconnect the text in the printed label. the AC adaptor and (for the PT-9600 only) remove the rechargeable battery. 2 Open the tape compartment cover, then remove the tape cassette if one is installed.
- Page 95 TROUBLESHOOTING Problem Solution (8) The tape is not ejected correctly after ● Turn off the machine, open the tape com- being automatically cut. partment cover, and remove the tape cas- sette if one is installed. ● Using a cotton swab, clean off the metal piece in the exit slot to the left of cutter.
-
Page 96: Machine Specifications
MACHINE SPECIFICATIONS MACHINE SPECIFICATIONS HARDWARE Power supply: AC adaptor 24 V, 2.5 A (PT-9600 only : Rechargeable Ni-MH battery) Input device: Keyboard (PT-9600 : 68 keys ; PT-3600 : 58 keys) 24 × 119 dots LCD: + Caps, Alt and other indicators (with screen backlight—PT-9600 only) Print tape: TZ tape is available in the following six widths:... -
Page 97: Appendix
Appendix ppendix... -
Page 98: Symbols
Appendix Symbols ➩ p. 42 The following symbols are available. Symbols Category PUNCTUATION • × ÷ ± § ¶ ¿ ¡ (A01-A18) & BRACKET « » < > (B01-B08) ARROW → ← ↑ ↓ (C01-C14) UNIT ° ¥... - Page 99 Appendix Symbols Category PROHIBITIVE (I01-I29) CAUTION (J01-J42) SAFETY1 (K01-K19) FIRE (L01-L08) TRANSPORT (M01-M13) EMERGENCY (N01-N06) SAFETY2 (O01-O43)
- Page 100 Appendix Symbols Category OTHER SIGNS (P01-P11) VIDEO (Q01-Q09) OFFICE (R01-R44) GENERAL (S01-S27) GARDENING (T01-T14) VEHICLES (U01-U13) OCCASIONS (V01-V18)
-
Page 101: Special Barcode Characters
Appendix Special barcode characters ➩ p. 43 The following special characters can only be added to barcodes created using protocols CODE39 or CODABAR. Value Character The following special characters can only be added to barcodes created using protocols EAN128 and CODE128. Value Character Value... - Page 102 Appendix Sizes and widths ➩ p. 48 & 50 Samples of some available text sizes and widths are shown below. Width WIDE NORMAL NARROW NARROWEST Size 76 points 72 points 64 points 56 points 48 points 40 points 36 points 32 points 28 points 24 points...
- Page 103 Appendix Width WIDE NORMAL NARROW NARROWEST Size 7 points 6 points 5 points 4 points ☞ If the 4 point or 5 point text size setting is selected, the text will be printed with the BRUSSELS font setting, regardless of the font setting that is selected. ☞...
- Page 104 Appendix Type styles ➩ p. 50 & 51 Style1 NORMAL BOLD OUTLINE SOLID SHADOW INVERT Setting Style2 NORMAL NORMAL NORMAL NORMAL NORMAL NORMAL Setting Helsinki Brussels San Diego Florida Brunei Bold Angeles Bermuda Script Istanbul Letter Gothic Style1 NORMAL BOLD OUTLINE SOLID SHADOW...
- Page 105 Appendix Style1 NORMAL BOLD OUTLINE SOLID SHADOW INVERT Setting Style2 ITALIC ITALIC ITALIC ITALIC ITALIC ITALIC Setting Angeles Bermuda Script Istanbul Letter Gothic ☞ The VERTICAL style setting can be combined with all Style1 text styles (NORMAL, BOLD, OUTLINE, SOLID, SHADOW and INVERT). ☞...
- Page 106 Appendix Framing and shading patterns ➩ p. 53 The following frame and shading patterns are available. Set- Set- Set- ting Sample ting Sample ting Sample...
- Page 107 Appendix Pre-set templates ➩ p. 59 Samples of the available TZ tape templates are shown below. Template Tape Label Sample Name Width Length 1" 3.2" ADDRESS-1 (24 mm) (80 mm) 1" 3.1" ADDRESS-2 (24 mm) (78 mm) 1" 4.1" ADDRESS-3 (24 mm) (104 mm) 1 1/2"...
- Page 108 Appendix Template Tape Label Sample Name Width Length 1" 2.2" PRICE-1 (24 mm) (57 mm) 1" 4.3" PRICE-2 (24 mm) (110 mm) 1 1/2" 4.5" SIGN (36 mm) (114 mm) 1" 2.8" FLOPPY-1 (24 mm) (70 mm) 1" 2.8" FLOPPY-2 (24 mm) (70 mm) 1 1/2"...
- Page 109 Appendix Template Tape Label Sample Name Width Length 3/8" 3.5" AUDIO-1 (9 mm) (89 mm) 3/8" 3.5" AUDIO-2 (9 mm) (89 mm) 3/8" 3.5" AUDIO-3 (9 mm) (89 mm) 1/2" 1.7" SLIDE (12 mm) (42 mm) 1 1/2" 7.9" FILE-1 (36 mm) (200 mm) 1"...
- Page 110 Appendix Samples of the available AV label templates are shown below. Template Label Type Sample Name AV2067 2067 ADDRESS-1 3/4" × 2 5/8" (20 mm × 67 mm) AV2067 2067 ADDRESS-2 3/4" × 2 5/8" (20 mm × 67 mm) AV2067 2067 ADDRESS-3 3/4"...
- Page 111 Appendix Template Label Type Sample Name AV1957 1957 RETURN-3 3/4" × 2 1/4" (19 mm × 57 mm) AV1957 1957 RETURN-4 3/4" × 2 1/4" (19 mm × 57 mm) AV1789 1789 FILING-1 5/8" × 3 1/2" (17 mm × 89 mm) AV1789 1789 FILING-2 5/8"...
-
Page 112: Fonts
Appendix Template text styles ➩ p. 59 Samples of the available template text styles are shown below. CHAR. style Sample Font Style ORIGINAL Template default ITALIC Template ITALIC default DYNAMIC ISTANBUL SOLID CUTE FLORIDA OUTLINE FORMAL BRUSSELS ITALIC ELEGANT NORMAL NATURAL SAN DIEGO NORMAL... - Page 113 Appendix...
-
Page 114: Index
INDEX Framing 53 Global format 46 AC adaptor 7 Label length 56 AC adaptor connector 2 Line effect 52 Accent function 42 Line format 47 Accented characters 42 Margins 55 Accessories 110 Text alignment 54 Adaptor 7 Text in template 61 Aligning text 53 Text rotation 55 Alt indicator 41... - Page 115 Size 49 Entire text 46 Stamp 59 Text 46 Style 2 52 Text automatically 59 Style1 51 Text blocks 47 Tape Length 57 Frame function 53 Tape Margin 56 Framing 53 Text Alignment 54 Functions Text Rotation 55 Accent 42 Width 50 Auto Cut 62 Delete key 45...
- Page 116 Caps 40 Mirror Printing function 58 Font 48 Modes Frame 53 Alt 41 Ins 40 Caps 40 Line Effects 52 Insert 40 Size 48 Multiple copies 63 Style 50, 51 Tape Length 56 Tape Margin 55 New Block function 41 Text Alignment 54 New line 41 Text Rotation 55...
- Page 117 Text lines 45 Entering 60 Repeat Printing function 63 Printing 61, 71 Replacing tape cassette 7 Style 60, 71 Return key 39, 41 Text Alignment function 53 Right alignment 53 Text formats 46 Roller cleaning 86 Text Rotation function 54 Rotating text 54 Transferring RS-232C port (PT-9600) 2...
-
Page 118: Accessories
The following supplies and accessories are available for your P-touch and can be purchased from an authorized Brother dealer or directly from Brother should your dealer not stock them. Use only Brother TZ tapes or Brother /Avery AV labels with this machine. Brother/Avery cannot be held responsible for trouble caused by the use of unauthorized supplies. - Page 119 Stock No. Description Qty/Package Price** TZ-345 White characters on black adhesive $28.99 TZ-545 White characters on blue adhesive $28.99 TZ-641 Black characters on yellow adhesive $24.99 *TZ-B41 Black characters on fluorescent orange adhesive $29.99 TZ-S141 Industrial (strong adhesive) black characters on clear adhesive $27.99 TZ-S241 Industrial (strong adhesive) black characters on white adhesive...
- Page 120 Non-Laminated Tapes Stock No. Description Qty/Package Price** 3/4” (18 mm) TZ-N641 Black characters on yellow adhesive $21.99 TZ-N541 Black aharacters on blue adhesive $21.99 TZ-NF41 Black characters on purple adhesive $21.99 1/2” (12 mm) TZ-N631 Black characters on yellow adhesive $17.99 TZ-N531 Black characters on blue adhesive...
- Page 121 Stamp Kit/Holder Stock No. Description Qty/Package Price** 3/4” (18 mm) Stamp Area 9 × 55 mm SK-MB Additional stamper for Large stamp with black ink $49.95 SH-MB Additional stamper for Medium stamp with black ink $24.95 Options Stock No. Description Qty/Package Price** TZ-CL6...
-
Page 122: P-Touch Contact Information (For Canada Only)
Accessories & Supplies / Accessoires et fournitures To order Brother Accessories or supplies by Visa or MasterCard, you may call toll free 1-877-BROTHER (1-877-276-8437), or to order by mail, complete the accessories order form in your user’s guide and mail it along with your payment to: Pour commander les accessories et les fournitures Brother en utilisant votre carte Visa ou MasterCard, vous pouvez téléphoner sans frais au 1-877-BROTHER (1-877-276-8437),... - Page 123 This order form is provided for your convenience should your retailer not stock the item(s) needed or if you prefer to order by telephone. To order by phone, please call Brother International at 1-877- BROTHER (1-877-276-8437) and have your Visa or MasterCard available.
- Page 124 Accessories & Supplies / Accessoires et fournitures To order Brother Accessories or supplies by Visa or MasterCard, you may call toll free 1-877-BROTHER (1-877-276-8437), or to order by mail, complete the accessories order form in your user’s guide and mail it along with your payment to: Pour commander les accessories et les fournitures Brother en utilisant votre carte Visa ou MasterCard, vous pouvez téléphoner sans frais au 1-877-BROTHER (1-877-276-8437),...
- Page 125 This order form is provided for your convenience should your retailer not stock the item(s) needed or if you prefer to order by telephone. To order by phone, please call Brother International at 1-877- BROTHER (1-877-276-8437) and have your Visa or MasterCard available.
- Page 127 Printed in China LA8770001...
- Page 128 9600 9600 ADVANCED FUNCTIONS ADVANCED FUNCTIONS ADVANCED FUNCTIONS • Read this User’s Guide before you start using your P-touch. • Keep this User’s Guide in a handy place for future reference.
- Page 129 QUICK REFERENCE Printing in Interface mode Entering/exiting d + 0 Interface mode (RS- 232C connection) Changing interface d + 2 m or g to select the setting j or k to select the param- parameter settings n (Parameters can only be set if e is pressed to set the P-touch eter offline.) Changing interface...
- Page 130 5 Printing the next m or g to select NEXT RECORD record 6 Printing a range m or g to select CONT. PRINT m or g to select (or type) the of records j or k to select the ending record first record number in the range m or g to select (or type) the last record number in the number setting...
- Page 131 CONTENTS Chapter 1 Getting Started ............1 Installing the rechargeable battery ..............2 Recharging the battery ..................2 Chapter 2 Advanced Functions ..........3 Performing advanced operations ............... 4 Using data transferred to/from a computer ............6 Using Backup Manager ..................13 Printing from a computer (RS-232C connection) ..........
-
Page 133: Getting Started
Ch. 1 Getting Started Chapter etting tarted... -
Page 134: Installing The Rechargeable Battery
Ch. 1 Getting Started Installing the rechargeable battery ● ● ● ● ● ● ● ● ● ● ● ● ● ● ● ● ● ● ● ● ● ● If the rechargeable Ni-MH battery (9.6 V, 1500 mAh) is installed and fully charged, the PT-9600 can be used away from a power source, and is capable of printing labels from two 1 1/2"... -
Page 135: Advanced Functions
Ch. 2 Advanced Functions Chapter dvanced unctions... -
Page 136: Performing Advanced Operations
Ch. 2 Advanced Functions 2 Press m or g until the desired setting is Performing advanced displayed, or use the number keys to type in operations the setting. ● ● ● ● ● ● ● ● ● ● ● ● ●... - Page 137 Ch. 2 Advanced Functions 3 Press m or g to select either OFF (the 2 Press the PF key where you wish to assign time stamp is added to the text immedi- the operation. ately) or ON (the time stamp is added to the label when it is printed).
-
Page 138: Using Data Transferred To/From A Computer
Ch. 2 Advanced Functions Using data transferred NOTE to/from a computer ☞ To stop the operation from being performed, ● ● ● ● ● ● ● ● ● ● ● ● ● ● ● ● ● ● ● ● ● ●... - Page 139 Ch. 2 Advanced Functions While data is being sent from the computer to the PT-9600, the following screen appears. NOTE Be sure not to turn off the PT-9600 while data is being sent to it, otherwise the data will be lost. 1 2 3 4 5 6 7 8 9 A B C D E F K Q Q Q Q Q Q Q Q Q Q Q Q Q...
- Page 140 Ch. 2 Advanced Functions NOTE NOTE ☞ Only the character image files that are selected The PT-9600 can only contain one database. All will be transferred. To transfer more than one templates are linked to the single transferred data- character image at the same time, hold down base.
-
Page 141: Notes On Creating Templates
Ch. 2 Advanced Functions ● Only the first 9999 lines of a database linked to a template is read by the P-touch. NOTE ● Only the first line of text typed into a data- Only one character image or template can be base field is read by the P-touch.Therefore, assigned to each PF key. - Page 142 Ch. 2 Advanced Functions To transfer a database to the P-touch: To use a template transferred from a computer: 1 On the Start menu, point to “Programs”, 1 Press the PF key where the template that you then “P-touch Editor 3.2”, and then click wish to use is assigned.
- Page 143 Ch. 2 Advanced Functions 9 Press n to begin printing the set number of copies. The number of each copy is dis- NOTE played while it is being printed. The MENU ☞ To quit editing text in a template, press e, screen appears in the display again.
- Page 144 Ch. 2 Advanced Functions To print a range of records: E Press m or g until ! moves beside NOTE CONT. PRINT. To change the setting in steps of 5, hold down or g, and then release the key when the either desired setting is displayed.
-
Page 145: Using Backup Manager
Ch. 2 Advanced Functions 3 Press n. The first record after the current Using Backup Manager one (indicated by ! ) that contains the ● ● ● ● ● ● ● ● ● ● ● ● ● ● ● ● ●... - Page 146 Ch. 2 Advanced Functions NOTE NOTE ☞ Only the selected data will be backed up. To To stop transferring the data, click the Cancel but- select more than one file to back up, hold down ton in the dialog box that appears during transfer. the keyboard’s Ctrl key, and then click the 4 When the message “The transfer was com- names of the desired files.
-
Page 147: Printing From A Computer (Rs-232C Connection)
Ch. 2 Advanced Functions Printing from a computer Signal INPUT/ (RS-232C connection) Name OUTPUT Explanation ● ● ● ● ● ● ● ● ● ● ● ● ● ● ● ● ● ● ● ● ● ● ● Not connected The PT-9600 is also equipped with a serial port, Receive Data INPUT... - Page 148 Ch. 2 Advanced Functions If a P-touch (PTCOM) port is already 6 Check that the installation will be carried installed, click the Next button and con- out as desired, and then click the Next but- tinue with step 5 below. ton.
- Page 149 Ch. 2 Advanced Functions A Click the Finish button. A dialog box appears, showing that installation is fin- ished. 9 Select the desired baud rate, and then click the Next button. B Click the Finish button. NOTE NOTE Normally “9600 bps” is selected; however, your computer may not be able to support a baud rate of 9600 bps.
- Page 150 Ch. 2 Advanced Functions To change the settings for the standard serial (RS-232C) interface parameters: NOTE ☞ 1 Hold down d and press 2. To exit Interface mode and return to the text, hold down d and press 0. 2 Press j or k until the desired parameter ☞...
- Page 151 Ch. 2 Advanced Functions ASCII hex codes Parameter Settings T. MARGIN 23 24 40 5B 5C 5D 5E 60 7B 7C 7D 7E (For details on the available settings, (Tape Margin refer to the User’s Guide.) # $ @ [ function) France # $ à...
- Page 152 ESC A ESC $ Absolute location control* As for the Bar Code printing, P-touch 9600 has a ESC \ Relative location control* subset of BROTHER 4318 DOT MATRIX ESC @ Printer initialization. PRINTER BARCODE CONTROL PROTOCOL. ESC K ESC L Bit Image data commands.
- Page 153 Ch. 2 Advanced Functions Effective commands ESC i [PARAMETERS] B [BAR CODE DATA] [TERMIANTOR] • i SMALL LETTER i • [PARAMTERS] TYPE CODE 39 (DEFAULT) INTERLEAVED 2 OF 5 EAN 8/13, UPC-A UPC-E CODABAR (NW-7) STYLE WILL BE IGNORED NUMBER OF PASSES WILL BE IGNORED CHARACTER UNITS OF MEASUREMENT...
-
Page 154: Advanced Function Error Messages
ADVANCED FUNCTION ERROR MESSAGES ADVANCED FUNCTION ERROR MESSAGES ERROR MESSAGE CAUSE SOLUTION IMAGE CHARACTER SIZE ● This message appears if the ● Select a larger text size ERROR! user-defined character image setting or use a smaller transferred from a computer user-defined character and added to the text is larger... -
Page 155: Appendix
Appendix ppendix... - Page 156 Appendix Pre-set templates ➩ Refer to the User’s Guide. Samples of the available TZ tape templates are shown below. ☞ For samples of templates 1 through 31 and AV label templates, refer to the Appendix in the User’s Guide. Template Tape Label Sample...
-
Page 157: Index
INDEX A. CUT parameter 18 Frequently performed operations 5 Advanced functions 3 Functions Appendix 23 Clock Setting 4 Assigning operations to PF keys 5 Date/Time 4 Macro 5 Backing up data 13 Backing up data from PT-9600 6 Interface mode 17 Backlight 4 INTERFACE MODE parameter 19 Backup Manager... - Page 158 Setting clock 4 T. MARGIN parameter 19 Template text Editing 10, 11 Printing 11 Templates from computer 8 Time & date formats 4 Time stamps 4 Transfer mode 6 Transferring Character image from computer 7 Data to/from computer 6 User-defined character image 7 Using computer data 6...
- Page 159 Printed in China LA8784001...