
Related Manuals for Mitsubishi Electric FR-A500L Series


Summary of Contents for Mitsubishi Electric FR-A500L Series
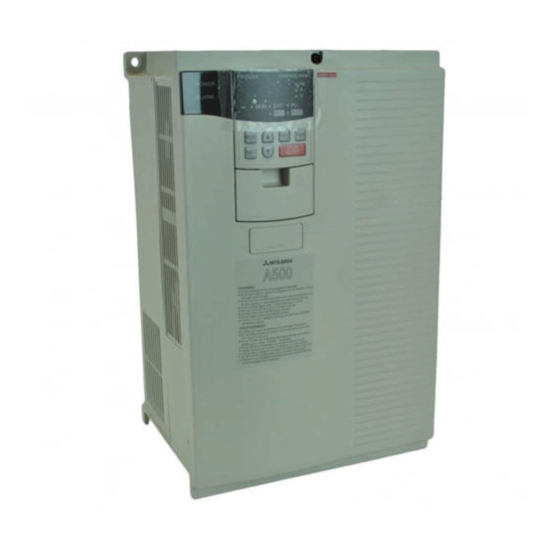
- Page 1 LARGE CAPACITY INVERTER FR-A 500L HIGH PERFORMANCE HIGH-FUNCTIONS FR-A560L-375K~900K-NA - INSTRUCTION MANUAL - Supplementary Manual Refer to Operation/Instruction Manual for FR-A500L. MITSUBISHI ELECTRIC...
- Page 2 Incorrect handling might cause an unexpected fault. Before using the inverter, please read this manual carefully to use the equipment to its optimum. This manual describes the parts which are different from the FR-A500L chassis drive, up to 280kw. Please refer to the FR-A500L instruction manual for further details.
-
Page 3: Safety Instructions
SAFETY INSTRUCTIONS 1. Electric Shock Prevention WARNING While power is on or when the inverter is running, do not open the front door. You may get an electric shock. Do not run the inverter with the front door opened. Contact with the exposed high-voltage terminals or charging part of circuitry will cause an electric shock. - Page 4 4. Additional instructions Also note the following points to prevent an accidental failure, injury, electric shock, etc.: (1) Transportation and installation CAUTION When carrying products, use correct lifting gear to prevent injury. Ensure that installation position and material can withstand the weight of the inverter. Install according to the information in the Instruction Manual.
- Page 5 (4) Operation CAUTION When you have chosen the retry function, stay away from the equipment as it will restart suddenly after an alarm stop. The [STOP] key is valid only when the appropriate function setting has been made. Prepare an emergency stop switch separately.
-
Page 6: Table Of Contents
CONTENTS 1 OUTLINE ............................1 1.1 Pre-Operation Information ......................1 1.1.1 Precautions for operation......................1 1.2 Basic Configuration......................... 2 1.2.1 Basic configuration........................2 2 INSTALLATION AND WIRING .......................3 2.1 Installation............................3 2.1.1 Instructions for installation ....................... 3 2.2 Wiring ............................. 5 2.2.1 Terminal connection diagram .................... -
Page 7: Outline
1.1 Pre-Operation Information 1.2 Basic Configuration <Abbreviations> Operation panel (FR-DU04) Operation panel (FR-DU04) and parameter unit (FR-PU04) Inverter Mitsubishi Large Capacity inverter FR-A500L series FR-A500L Mitsubishi Large Capacity inverter FR-A500L series Parameter number PU operation Operation using the PU (FR-DU04/FR-PU04) -
Page 8: Pre-Operation Information
This manual is written for the FR-A500L series large capacity inverters. For handling information on the parameter unit (FR-PU04), inboard options, stand-alone options, etc., refer to the corresponding manuals. -
Page 9: Basic Configuration
Basic Configuration OUTLINE 1.2.1 Basic configuration The following devices are required to operate the inverter. Proper peripheral devices must be selected and correct connections made to ensure proper operation. Incorrect system configuration and connections can cause the inverter to operate improperly, its life to be reduced considerably, and in the worst case, the inverter to be damaged. -
Page 10: Installation And Wiring
CHAPTER 2 INSTALLATION AND WIRING This chapter gives information on the basic "installation and wiring" of this product. Always read the instructions in this chapter before using the equipment. 2.1 Installation 2.2 Wiring CHAPTER 1 OUTLINE CHAPTER 2 INSTALLATION AND WIRING CHAPTER 3 OPERATION CHAPTER 4... -
Page 11: Installation
Installation INSTALLATION AND WIRING 2.1.1 Instructions for installation 1) Handle the unit carefully. The inverter uses plastic parts. Handle it gently to protect it from damage. Also, hold the unit with even strength and do not apply too much strength to the front cover alone. 2) Install the inverter where it is not subjected to vibration. - Page 12 INSTALLATION AND WIRING 3) Note on ambient temperatures FR-A560L-530 900K 40 C at 5cm (1.97 inch) FR-A560L-375, 450K...
-
Page 13: Wiring
Wiring INSTALLATION AND WIRING 2.2.1 Terminal connection diagram... -
Page 14: Installation And Wiring
INSTALLATION AND WIRING ( 1 ) Description of main circuit terminals Type Symbol Terminal Name Description Connect to the commercial power supply. Keep these terminals unconnected when R, S, T AC power input <L > using the high power factor converter (MT-HC). U, V, W Inverter output Connect a three-phase squirrel-cage motor. - Page 15 INSTALLATION AND WIRING Type Symbol Terminal Name Description 10VDC, permissible load current When the frequency setting potentiometer is 10mA connected in the factory-set state, connect it to Frequency setting terminal 10. power supply 5VDC, permissible load current When it is connected to terminal 10E, change the 10mA input specifications of terminal 2.
-
Page 16: Wiring Of The Main Circuit
INSTALLATION AND WIRING 2.2.2 Wiring of the main circuit ( 1 ) Wiring instructions 1) Power must not be applied to the output terminals (U, V, W) of the inverter. Otherwise the inverter will be damaged. 2) After wiring, wire off-cuts must not be left in the inverter. Wire off-cuts can cause an alarm, failure or malfunction. - Page 17 INSTALLATION AND WIRING ( 2 ) Terminal block layout In the main circuit of the inverter, the terminals are arranged as shown below: FR-A560L-530K 900K Left Side Front Right Side MAIN CIRCUIT TERMINAL (Detail) Units <mm>...
- Page 18 INSTALLATION AND WIRING FR-A560L-375K, 450K 1100 1900 P1 N 108 96 96 96 104 (Bottom View) U, V, W, P0 P1, P, N R, S, T TERMINAL (Detail) TERMINAL (Detail) 37.5 37.5 17.5 17.5 17.5 17.5 Units mm...
- Page 19 INSTALLATION AND WIRING ( 3 ) Connection of the power supply and motor ( 4 ) Connecting the control circuit to a power supply separately from the main circuit If the magnetic contactor (MC) in the inverter power supply is opened when the protective circuit is operated, the inverter control circuit power is lost and the alarm output signal cannot be kept on.
-
Page 20: Wiring Of The Control Circuit
INSTALLATION AND WIRING 2.2.3 Wiring of the control circuit ( 1 ) Wiring instructions 1) Terminals SD, SE and 5 are common to the I/O signals and isolated from each other. These common terminals must not be connected to each other or earthed. 2) Use shielded or twisted cables for connection to the control circuit terminals and run them away from the main and power circuits (including the 200V relay sequence circuit). - Page 21 INSTALLATION AND WIRING ( 3 ) Changing the control logic The input signals are set to sink logic for the NA version, and to source logic for the EC version. To change the control logic, the connector on the back of the control circuit terminal block must be moved to the other position.
- Page 22 INSTALLATION AND WIRING 4) Sink logic type • In this logic, a signal switches on when a current flows out of the corresponding signal input terminal. Terminal SD is common to the contact input signals. Terminal SE is common to the open collector output signals.
- Page 23 INSTALLATION AND WIRING 5) Source logic type • In this logic, a signal switches on when a current flows into the corresponding signal input terminal. Terminal PC is common to the contact input signals. Terminal SE is common to the open collector output signals.
-
Page 24: Connection To The Pu Connector
• Connector: RJ45 connector Example: 5-554720-3, Nippon AMP • Cable: Cable conforming to EIA568 (e.g. 10BASE-T cable) Example: SGLPEV 0.5mm 4P, MITSUBISHI CABLE INDUSTRIES, LTD. Note: The maximum wiring length is 20m (65.62 feet). ( 2 ) For RS-485 communication With the operation panel disconnected, the PU connector can be used for communication operation from a personal computer etc. -
Page 25: Design Information
INSTALLATION AND WIRING 2.2.5 Design information 1) For commercial power supply-inverter switch-over operation, provide electrical and mechanical interlocks for MC1 and MC2 designed for commercial power supply-inverter switch-over. When there is a commercial power supply-inverter switch-over circuit as shown below, the inverter will be damaged by leakage current from the power supply due to arcs generated at the time of switch-over or chattering caused by a sequence error. -
Page 26: Operation
CHAPTER 3 OPERATION This chapter provides the basic "operation" information for use of this product. Always read this chapter before using the equipment. 3.1 Pre-Operation Information Refer to FR-A540L/A560L 3.2 Operation Refer to FR-A540L/A560L CHAPTER 1 OUTLINE CHAPTER 2 INSTALLATION AND WIRING CHAPTER 3 OPERATION CHAPTER 4... - Page 27 CHAPTER 4 PARAMETERS This chapter explains the "parameters" of this product. Always read the instructions before using the equipment. 4.1 Parameter List 4.2 Parameter Function Details Refer to FR-A540L/A560L Note: By making parameter settings, you can change the functions of contact input terminals RL, RM, RH, RT, AU, CS and open collector output terminals RUN, SU, IPF, OL, FU.
-
Page 28: Parameter
Parameter List PARAMETERS PARAMETER Refer To Minimum Func- Parameter Page: Name Setting Range Setting Factory Setting tion Number Increments <Note9> Torque boost (Note 1) 0 to 30% 0.1% Maximum frequency 0 to 60Hz 0.01Hz 60Hz Minimum frequency 0 to 120Hz 0.01Hz Base frequency 0 to 400Hz... - Page 29 PARAMETERS Refer To Minimum Func- Parameter Page: Name Setting Range Setting Factory Setting tion Number Increments <Note9> 0, 5 to 14, 17, 18, 20, DU/PU main display data selection 23, 24, 25, 100 PU level display data selection 0 to 3, 5 to 14, 17, 18 1 to 3, 5 to 14, FM terminal function selection 17, 18, 21...
- Page 30 P A R A M E T E R S Refer To Minimum Func- Parameter Page: Name Setting Range Setting Factory Setting tion Number Increments <Note9> V/F4 (fourth frequency voltage) 0 to 1000V 0.1V (Note 1) V/F5 (fifth frequency) (Note 1) 0 to 400Hz, 9999 0.01Hz 9999...
- Page 31 PARAMETERS Refer To Minimum Func- Parameter Page: Name Setting Range Setting Factory Setting tion Number Increments <Note9> Output current detection level 0 to 200% 0.1% 150% Output current detection period 0 to 10 sec 0.1 sec Zero current detection level 0 to 200% 0.1% 5.0%...
- Page 32 PARAMETERS Refer To Minimum Func- Parameter Page: Name Setting Range Setting Factory Setting tion Number <Note9> Increments Programmed operation minute/second 0 to 3 selection 0 to 2: Rotation direction Program set 1 0 to 400, 0.1Hz 9999 1 to 10 9999:Frequency Minute or second 0 to 99.59: Time...
- Page 33 PARAMETERS Refer To Minimum Func- Parameter Page: Name Setting Range Setting Factory Setting tion Number Increments <Note9> Brake opening frequency (Note 3) 0 to 30Hz 0.01Hz Brake opening current (Note 3) 0 to 200% 0.1% 130% Brake opening current detection time 0 to 2 sec 0.1 sec 0.3 sec...
-
Page 34: Protective Functions
CHAPTER 5 PROTECTIVE FUNCTIONS This chapter explains the "protective functions" of this product. Always read the instructions before using the equipment. 5.1 Errors (Alarms) 5.2 Troubleshooting 5.3 Precautions for Maintenance and Inspection CHAPTER 1 OUTLINE CHAPTER 2 INSTALLATION AND WIRING CHAPTER 3 OPERATION CHAPTER 4... -
Page 35: Errors (Alarms)
Errors (Alarms) PROTECTIVE FUNCTIONS If any fault has occurred in the inverter, the corresponding protective function is activated and the error (alarm) indication appears automatically on the PU display. When the protective function is activated, refer to "5.2 Troubleshooting" and clear up the cause by taking proper action. If an alarm stop has occurred, the inverter must be reset to restart it. - Page 36 PROTECTIVE FUNCTIONS Operatio Paramete n Panel r Unit Name Description Display (FR-PU04) (FR-DU04) This function stops the inverter output if a ground fault occurs in the Ground Output side ground fault inverter's output (load) side and a ground fault current flows. A ground E.
- Page 37 PROTECTIVE FUNCTIONS Operatio Paramete n Panel r Unit Name Description Display (FR-PU04) (FR-DU04) When the operation panel power (P5S of the PU connector) is shorted, this function shuts off the power output. At this time, the operation Operation panel power E.CTE panel (parameter unit) cannot be used and RS-485 communication from short circuit...
- Page 38 PROTECTIVE FUNCTIONS Main circuit error [E,15] details Name Details The inverter output will stop if the brake unit's cooling fin temperature rises above the Brake unit cooling fin overheating specified value. The inverter output will stop if the ambient temperature of the control board rises above Control board ambient temperature error the specified value.
-
Page 39: Correspondences Between Digital And Actual Characters
PROTECTIVE FUNCTIONS To know the operating status at the occurrence of alarm When any alarm has occurred, the display automatically switches to the indication of the corresponding protective function (error). By pressing the [MODE] key at this point without resetting the inverter, the display shows the output frequency. -
Page 40: Alarm Code Output
PROTECTIVE FUNCTIONS 5.1.3 Alarm code output By setting Pr. 76 "alarm code output selection", an alarm definition can be output as a 4-bit digital signal. This signal is output from the open collector output terminals equipped as standard on the inverter. Correlations between alarm definitions and alarm codes are as follows. -
Page 41: Troubleshooting
Troubleshooting PROTECTIVE FUNCTIONS If any function of the inverter is lost due to occurrence of a fault, clear up the cause and make correction in accordance with the following procedure. Contact your sales representative if the corresponding fault is not found below, the inverter has failed, parts have been damaged, or any other fault has occurred. - Page 42 PROTECTIVE FUNCTIONS Operation Panel Check Point Remedy Display Reduce the load GD . Reduce the braking frequency. Is the usage frequency of the Brake unit brake unit appropriate? Clean the cooling fins. cooling fin Are the cooling fins clogged? Replace the cooling fan. overheating Is there any error in the inverter unit cooling fan?
-
Page 43: Faults And Check Points
PROTECTIVE FUNCTIONS 5.2.2 Faults and check points POINT: Check the corresponding areas. If the cause is still unknown, it is recommended to initialize the parameters (return to factory settings), re-set the required parameter values, and check again. ( 1 ) Motor remains stopped. 1) Check the main circuit ·... - Page 44 PROTECTIVE FUNCTIONS ( 5 ) Motor current is large. · Check that the load is not too heavy. · Check that the torque boost (Pr. 0, Pr. 46, Pr. 112) setting is not too large. ( 6 ) Speed does not increase. ·...
-
Page 45: Precautions For Maintenance And Inspection
Precautions for Maintenance and Inspection PROTECTIVE FUNCTIONS The transistorized inverter is a static unit mainly consisting of semiconductor devices. Daily inspection must be performed to prevent any fault from occurring due to adverse influence by the operating environment, such as temperature, humidity, dust, dirt and vibration, changes in the parts with time, service life, and other factors. -
Page 46: Insulation Resistance Test Using Megger
PROTECTIVE FUNCTIONS 5.3.4 Insulation resistance test using megger 1) Before performing the insulation resistance test using a megger on the external circuit, disconnect the cables from all terminals of the inverter so that the test voltage is not applied to the inverter. 2) For the continuity test of the control circuit, use a tester (high resistance range) and do not use the megger or buzzer. - Page 47 PROTECTIVE FUNCTIONS Daily and Periodic Inspection Interval Area of Inspection Periodic Inspec- Description Method Criterion Instrument Item Daily tion year years Disconnect cables from inverter and Inverter measure across module, Check resistance terminals R, S, T, P, N (See the following ¡...
- Page 48 PROTECTIVE FUNCTIONS Checking the inverter and converter modules <Preparation> (1) Disconnect the external power supply cables (R, S, T) <L > and motor cables (U, V, W). (2) Prepare a tester. (Use 100 range.) <Checking method> Change the polarity of the tester alternately at the inverter terminals R, S, T, U, V, W, P and N <L U, V, W, + and ->, and check for continuity.
-
Page 49: Replacement Of Parts
PROTECTIVE FUNCTIONS 5.3.6 Replacement of parts The inverter consists of many electronic parts such as semiconductor devices. The following parts may deteriorate with age because of their structures or physical characteristics, leading to reduced performance or failure of the inverter. For preventive maintenance, the parts must be changed periodically. ( 1 ) Cooling fan The cooling fan cools heat-generating parts such as the main circuit semiconductor devices. -
Page 50: Measurement Of Main Circuit Voltages, Currents And Power
PROTECTIVE FUNCTIONS 5.3.7 Measurement of main circuit voltages, currents and power Measurement of voltages and currents Since the voltages and currents on the inverter power supply and output sides include harmonics, accurate measurement depends on the instruments used and circuits measured. When instruments for commercial frequency are used for measurement, measure the following circuits using the instruments given on the next page. - Page 51 PROTECTIVE FUNCTIONS Measuring Points and Instruments Remarks Item Measuring Point Measuring Instrument (Reference Measured Value) •– Commercial power supply Power supply voltage Across R-S, S-T and T-R Moving-iron type AC voltmeter Within permissible AC voltage <Across L and L > •i •j fluctuation...
-
Page 52: Specifications
CHAPTER 6 SPECIFICATIONS This chapter provides the "specifications" of this product. Always read the instructions before using the equipment. 6.1 Standard Specifications CHAPTER 1 OUTLINE CHAPTER 2 INSTALLATION AND WIRING CHAPTER 3 OPERATION CHAPTER 4 PARAMETERS CHAPTER 5 PROTECTIVE FUNCTIONS CHAPTER 6 SPECIFICATIONS APPENDICES... -
Page 53: Model Specifications
(2640) (2640) Note: 1. The applicable motor capacity indicated is the maximum capacity applicable when Mitsubishi 4-pole standard motor is used For A540K. (When National Electric Code based motor is used for A560L) 2. The rated output capacity indicated is based on National Electric Code for 460V for A540L. (575V for A560L) 3. -
Page 54: Common Specifications
SPECIFICATIONS 6.1.2 Common specifications Soft-PWM control/high carrier frequency PWM control (V/F control or advanced magnetic flux Control system vector control can be selected) Output frequency range 0.2 to 400Hz 0.015Hz/60Hz (terminal 2 input: 12 bits/0 to 10V, 11 bits/0 to 5V, terminal 1 input: 12 bits/ 10 Frequency Analog input to +10V, 11 bits/ 5 to +5V) - Page 55 SPECIFICATIONS Selection can be made from output frequency, motor current (steady or peak value), output voltage, frequency setting, running speed, motor torque, converter output voltage (steady or Operating Display on peak value), electronic overcurrent protection load factor, input power, output power, load status operation panel meter, motor exciting current, cumulative energization time, actual operation time, watt-hour...
-
Page 56: Outline Drawings
SPECIFICATIONS 6.1.3 Outline drawings l FR-A560L-450K, 375K This (Top attachment) should be removed at operating because of air Air exhaust exhaust. Control Panel These (Side attachments) can be used for fixing this inverter unit. Air inlet Cabling Hole Bottom View (For main circuit) l Accessory DC REACTOR (for FR-A560L-450K, 375K) - Page 57 SPECIFICATIONS FR-A560L-530K 900K DC reactor is internally mounted and wired.
- Page 58 SPECIFICATIONS...
-
Page 59: Appendices
APPENDICES This chapter provides the "appendices" for use of this product. Always read the instructions before using the equipment. Appendix 1 Data Code List Refer to FR-A540L/A560L Appendix 2 List of Parameters Classified by Purpose of Use Refer to FR-A540L/A560L Appendix 3 Installation Procedure for Cooling Fan Appendix 4 Installation Procedure for Brake Unit (Option) Appendix 5 Shipment Case... -
Page 60: Appendix3
Appendix 3 APPENDICES Appendix 3 Installation procedure for cooling fan (FR-A560L-530K 900K) 1. Install and fix bolts and screws. Step1 Put cooling fans and fan covers. Step2 Fix cooling fans and fan covers by M12 bolts. Step3 Put cooling fan ceilings and fix by M4 screws. Screw Cooling fan ceilings M12 bolt... - Page 61 INSTALLATION AND WIRING 2. Wiring between cooling fan and terminals is as follows; EF-40ETB EF-30ETB EF-40ETB K : Black W : White R : Red G : Green CONVERTER CONTROL INVERTER Step 4 Connect cooling fan wires as above drawing. 3.
-
Page 62: Appendix4
Installation procedure for brake unit (option) (FR-A560L-530K 900K) Step1 Connect wires as the next drawing. Wiring between FR-A500L and MT-BR5 (option) Step2 Set parameter 30 : when brake unit is used, set to 1. Step3 Set parameter 70 : when brake unit is used, set to 10%. -
Page 63: Appendix5
Appendix 5 APPENDICES Appendix 5 Shipment case example... - Page 64 MITSUBISHI ELECTRIC CORPORATION HEAD OFFICE : MITSUBISHI DENKI BLDG MARUNOUCHI TOKYO 100-8310 IB-T7260-06 (200203) Printed in Japan ST036F(200203)í∑ MEE Specifications subject to change without notice.