Electrolux EHL7640FOK User Manual
Induction hob
Hide thumbs
Also See for EHL7640FOK:
- User manual (72 pages) ,
- User manual (20 pages) ,
- User manual (44 pages)
Chapters
Table of Contents

Related Manuals for Electrolux EHL7640FOK


Summary of Contents for Electrolux EHL7640FOK
- Page 1 ....................EHL7640FOK EN INDUCTION HOB USER MANUAL ES PLACA DE INDUCCIÓN MANUAL DE INSTRUCCIONES...
-
Page 2: Table Of Contents
ENVIRONMENT CONCERNS ........... . 18 WE’RE THINKING OF YOU Thank you for purchasing an Electrolux appliance. You’ve chosen a product that brings with it decades of professional experience and innovation. Ingenious and stylish, it has been designed with you in mind. -
Page 3: Safety Information
ENGLISH SAFETY INFORMATION Before the installation and use of the appli- • If the appliance is installed above draw- ance, carefully read the supplied instruc- ers make sure that the space, between tions. The manufacturer is not responsible the bottom of the appliance and the up- if an incorrect installation and use causes per drawer, is sufficient for air circulation. -
Page 4: Care And Cleaning
• Do not let cookware to boil dry. leakage trips and contractors. • Be careful not let objects or cookware fall on the appliance. The surface can be damaged. • Do not activate the cooking zones with WARNING! empty cookware or without cookware. -
Page 5: Product Description
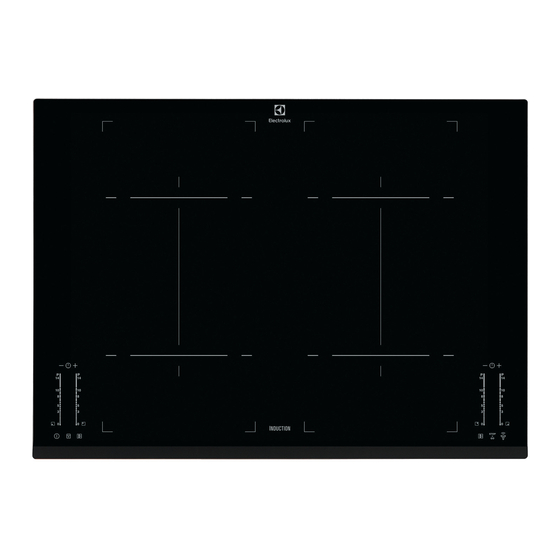
ENGLISH PRODUCT DESCRIPTION GENERAL OVERVIEW Induction cooking zone Induction cooking zone Control panel Induction cooking zone Induction cooking zone Control panel CONTROL PANEL LAYOUT 10 11 Use the sensor fields to operate the appliance. The displays, indicators and sounds tell which functions operate. sensor field function To activate and deactivate the appliance. -
Page 6: Heat Setting Displays
Timer indicators of cooking To show for which cooking zone you set zones the time. To lock/unlock the control panel. To activate and deactivate the STOP+GO function. HEAT SETTING DISPLAYS Display Description The cooking zone is deactivated. -
Page 7: Daily Use
ENGLISH DAILY USE ACTIVATION AND DEACTIVATION Touch for 1 second to activate or deac- tivate the appliance. AUTOMATIC SWITCH OFF The function deactivates the appliance automatically if: • All cooking zones are deactivated ( • You do not set the heat setting after you activate the appliance. -
Page 8: Count Down Timer
TIMER Count Down Timer Use the Count Down Timer to set how long the cooking zone operates for only this one time. Set the Count Down Timer after the se- lection of the cooking zone. You can set the heat setting before or after you set the timer. -
Page 9: The Child Safety Device
ENGLISH THE CHILD SAFETY DEVICE play switches between and counted time (minutes). This function prevents an accidental opera- • To see how long the cooking zone tion of the appliance. operates: set the cooking zone with To activate the child safety device . - Page 10 10 www.electrolux.com onds. comes on, because the sound is off. Touch comes on. The sound is...
-
Page 11: Helpful Hints And Tips
ENGLISH HELPFUL HINTS AND TIPS INDUCTION COOKING ZONES • whistle sound: you use one or more cooking zones with high power levels and the cookware is made of different For induction cooking zones a strong elec- materials (Sandwich construction). tro-magnetic field creates the heat in the •... - Page 12 12 www.electrolux.com The data in the table is for guid- ance only. Use to: Time Hints Nominal power con- sumption Keep warm the food as required Put a lid on a cook- you cooked ware Hollandaise sauce, 5 - 25 min Mix from time to time 3 –...
-
Page 13: Care And Cleaning
ENGLISH CARE AND CLEANING Clean the appliance after each use. Always use cookware with clean bottom. Scratches or dark stains on the glass-ceramic cause no effect on how the appliance operates. To remove the dirt: – Remove immediately: melted plastic, plastic foil, and food with sugar. -
Page 14: Troubleshooting
14 www.electrolux.com TROUBLESHOOTING Problem Possible Remedy You cannot activate the Activate the appliance appliance or operate it. again and set the heat set- ting in less than 10 sec- onds. You touched 2 or more Touch only one sensor sensor fields at the same field. - Page 15 ENGLISH Problem Possible Remedy No cookware is on the Put cookware on the comes on cooking zone. cooking zone. Incorrect cookware. Use the correct cookware. The diameter of the bot- Use cookware with cor- tom of the cookware is rect dimensions. too small for the cooking zone.
-
Page 16: Installation
16 www.electrolux.com INSTALLATION WARNING! built-in units and work surfaces that align Refer to "Safety information" chap- to the standards. ter. CONNECTION CABLE Before the installation • The appliance is supplied with the con- nection cable. Before the installation of the appliance, re- •... -
Page 17: Technical Information
1) The protection box accessory may not be available in some countries. Please contact your local supplier. TECHNICAL INFORMATION Modell EHL7640FOK Prod.Nr. 949 596 020 00 Typ 58 GDD D4 AU 220-240 V 50-60 Hz Induction 7.4 kW... -
Page 18: Environment Concerns
18 www.electrolux.com The power of the cooking zones can be dif- the table. It changes with the material and ferent in some small range from the data in dimensions of the cookware. ENVIRONMENT CONCERNS and electronic appliances. Do not dispose... - Page 19 ASPECTOS MEDIOAMBIENTALES ..........38 PENSAMOS EN USTED Gracias por adquirir un producto Electrolux. Ha escogido un producto que contiene décadas de experiencia e innovación profesionales. Ingenioso y elegante, se ha diseñado pensando en usted.
-
Page 20: Información Sobre Seguridad
20 www.electrolux.com INFORMACIÓN SOBRE SEGURIDAD Antes de instalar y utilizar el aparato, lea • No instale el aparato junto a una puerta atentamente las instrucciones facilitadas. El o debajo de una ventana. De esta forma fabricante no se hace responsable de los se evita que los recipientes calientes cai- daños y lesiones causados por una instala-... - Page 21 ESPAÑOL en contacto con un electricista o con el • Las grasas o aceites calientes pueden servicio técnico para cambiar un cable generar vapores inflamables. Mantenga de red dañado. las llamas u objetos calientes alejados de grasas y aceites cuando cocine con •...
- Page 22 22 www.electrolux.com ELIMINACIÓN ADVERTENCIA Existe riesgo de lesiones o asfixia. • Desconecte el aparato de la red. • Corte el cable de conexión a la red y de- séchelo.
-
Page 23: Descripción Del Producto
ESPAÑOL DESCRIPCIÓN DEL PRODUCTO DESCRIPCIÓN GENERAL Zona de cocción por inducción Zona de cocción por inducción Panel de control Zona de cocción por inducción Zona de cocción por inducción Panel de control DISPOSICIÓN PANEL DE CONTROL 10 11 Utilice el aparato con los sensores. Las pantallas, indicadores y señales acústicas anuncian qué... - Page 24 24 www.electrolux.com sensor función Indicadores de tiempo de las Muestran la zona de cocción para la que zonas de cocción se ha ajustado la hora. Bloquea y desbloquea el panel de control. Activa y desactiva la función STOP+GO. INDICACIÓN DE LA TEMPERATURA EN PANTALLA Indicador Descripción...
-
Page 25: Uso Diario
ESPAÑOL USO DIARIO ACTIVACIÓN Y DESACTIVACIÓN Toque durante 1 segundo para encen- der o apagar el aparato. DESCONEXIÓN AUTOMÁTICA La función desconecta automáticamente el aparato siempre que: • Todas las zonas de cocción estén apa- gadas ( • no se ajusta un nivel de calor después de encender el aparato FUNCIÓN PUENTE •... - Page 26 26 www.electrolux.com TEMPORIZADOR Temporizador Utilice el temporizador para regular el tiem- po que desee mantener encendida una zo- na de cocción sólo por esta vez. Ajuste el temporizador después de se- leccionar la zona de cocción. Elija el nivel de calor antes o después de ajustar el temporizador.
- Page 27 ESPAÑOL se encienda el indicador de la zona perti- control, pero no . Evita el cambio acci- nente. dental del nivel de calor. Ajuste primero la temperatura. • Para activar CountUp Timer:pulse Para activar esta función, toque . Se del temporizador, se enciende.
- Page 28 28 www.electrolux.com DESACTIVACIÓN DE LOS SONIDOS) Desactivación de los sonidos Apague el aparato. Toque durante 3 segundos. Los indica- dores se encienden y se apagan. Toque durante 3 segundos. se enciende; el sonido está activado. Toque se en- ciende y la señal acústica se desactiva.
-
Page 29: Consejos Útiles
ESPAÑOL CONSEJOS ÚTILES ZONAS DE COCCIÓN POR IN- RUIDOS DURANTE LA DUCCIÓN UTILIZACIÓN En las zonas de cocción por inducción, la Es posible que escuche los ruidos presencia de un fuerte campo magnético siguientes: calienta los recipientes muy rápidamente. • crujido: el utensilio de cocina está fabri- cado con distintos tipos de materiales RECIPIENTES PARA LAS (construcción por capas). - Page 30 30 www.electrolux.com ÖKO TIMER (TEMPORIZADOR Cuando se aumenta el ajuste de calor, no es proporcional al aumento del consumo ECOLÓGICO) de potencia de la zona de cocción. Significa que la zona de cocción con el Con el fin de ahorrar energía, la re- ajuste de calor medio usa menos de la mi- sistencia de la zona de cocción se...
- Page 31 ESPAÑOL Utilícelo para: Tiempo Sugerencias Consumo de poten- cia nominal Freír ligeramente: esca- como esti- Dar la vuelta a media 25 – 45 % lopes, ternera “cordon me necesa- cocción bleu”, chuletas, ham- burguesas, salchichas, hígado, filetes rusos, huevos, tortitas, rosqui- llas Freír a temperatura 5 - 15 min...
-
Page 32: Mantenimiento Y Limpieza
32 www.electrolux.com MANTENIMIENTO Y LIMPIEZA Limpie el aparato después de cada uso. Utilice siempre recipientes cuya base esté limpia. Los arañazos o las marcas oscuras de la superficie vitrocerámica no afectan al funcionamiento normal del aparato. Para eliminar la suciedad: –... -
Page 33: Solución De Problemas
ESPAÑOL SOLUCIÓN DE PROBLEMAS Problema Posible Solución El aparato no se enciende Vuelva a encender el apa- o no funciona. rato y ajuste el nivel de ca- lor en menos de 10 se- gundos. Ha pulsado 2 o más sen- Toque sólo un sensor. - Page 34 34 www.electrolux.com Problema Posible Solución Están activados el blo- Consulte el capítulo "Ins- Se enciende el símbolo queo de seguridad para trucciones de uso". niños o el bloqueo. No hay ningún recipiente Ponga un utensilio de co- Se enciende el símbolo en la zona de cocción.
- Page 35 ESPAÑOL trucciones sobre servicio técnico y condi- ciones de garantía se encuentran en el fo- lleto de garantía que se suministra con el aparato.
-
Page 36: Instalación
36 www.electrolux.com INSTALACIÓN ADVERTENCIA vez encastrados en los muebles adecua- Consulte el capítulo "Información dos y con las encimeras y superficies de sobre seguridad". trabajo apropiadas. Antes de la instalación CABLE DE CONEXIÓN • El electrodoméstico se suministra con el Antes de instalar el aparato, anote esta in- cable de conexión. -
Page 37: Información Técnica
1) El accesorio de la caja de protección puede no estar disponible en algunos países. Póngase en contacto con el proveedor local. INFORMACIÓN TÉCNICA Modell EHL7640FOK Prod.Nr. 949 596 020 00 Typ 58 GDD D4 AU 220-240 V 50-60 Hz Induction 7.4 kW... -
Page 38: Aspectos Medioambientales
38 www.electrolux.com Zona de coc- Potencia no- Función Po- Duración má- Diámetro mí- ción minal (ajuste wer activada xima de la nimo del reci- de calor má- función Po- piente [mm] ximo) [W] wer [min] Anterior iz- 2300 W 3200 W quierda —... - Page 39 ESPAÑOL...
- Page 40 892951868-B-452011...