Kenwood DPX405BT Manual
Hide thumbs
Also See for DPX405BT:
- Quick start manual (60 pages) ,
- Service manual (64 pages) ,
- Manual (36 pages)

Related Manuals for Kenwood DPX405BT


Summary of Contents for Kenwood DPX405BT
- Page 1 DPX405BT/DPX305U Before reading this manual, click the button below to check the latest edition and the modified pages. Check the latest edition...
-
Page 2: Safety Precaution
Wipe off the dirt on the panel with a dry silicon or soft cloth. Failure to observe this precaution may result in damage to the monitor or unit. If you experience problems during installation, consult your Kenwood dealer. -
Page 3: How To Reset Your Unit
Reset button is pressed. Notes When you purchase optional accessories, check with your Kenwood dealer to make sure that they can work with your model and in your area. Characters that conform to ISO 8859-5 or ISO 8859-1 can be displayed. Refer to "RUSSIAN SET"... - Page 4 DPX405BT/DPX305U 1. Before use 1-3. Regulatory Compliance 1-3. Regulatory Compliance Information on Disposal of Old Electrical and Electronic Equipment and Batteries (applicable for EU countries that have adopted separate waste collection systems) Products and batteries with the symbol (crossed-out wheeled bin) cannot be disposed as household waste.
- Page 5 Hierbij verklaart JVC KENWOOD dat het toestel DPX405BT in overeenstemming is met de essentiële eisen en de andere relevante bepalingen van richtlijn 1999/5/EG. Bij deze verklaat JVC KENWOOD dat deze DPX405BT voldoet aan de essentiële eisen en aan de overige relevante bepalingen van Richtlijn 1999/5/EC.
- Page 6 JVC KENWOOD vakuuttaa täten että DPX405BT tyyppinen laite on direktiivin 1999/5/EY oleellisten vaatimusten ja sitä koskevien direktiivin muiden ehtojen mukainen. Slovensko S tem JVC KENWOOD izjavlja, da je ta DPX405BT v skladu z osnovnimi zahtevami in ostalimi ustreznimi predpisi Direktive 1999/5/EC. Slovensky Spoločnosť...
-
Page 7: Specifications
DPX405BT/DPX305U 2. Appendix 2-1. Specifications 2-1. Specifications FM tuner section Frequency range (50 kHz step) : 87.5 MHz – 108.0 MHz Usable sensitivity (S/N = 26dB) : 0.63 μV/75 Ω Quieting Sensitivity (S/N = 46dB) : 1.6 μV/75 Ω Frequency response (±3 dB) : 30 Hz –... - Page 8 Middle : 1 kHz ±8 dB Treble : 12.5 kHz ±8 dB Preout level/ Load (CD) : 2500 mV/10 kΩ Preout impedance : ≤ 600 Ω Bluetooth section (DPX405BT) Version : Bluetooth Ver.2.1+EDR Certified Frequency range : 2.402 – 2.480 GHz Output Power...
- Page 9 : 1200 mV Input Impedance : 10 kΩ General Operating voltage DPX405BT : 14.4 V (10.5 – 16V allowable) DPX305U : 14.4 V (11 – 16V allowable) Maximum Current consumption : 10 A Installation Size (W x H x D)
- Page 10 Microsoft Corporation in the United States and/or other countries. The Bluetooth word mark and logos are owned by the Bluetooth SIG, Inc. and any use of such marks by JVC KENWOOD Corporation is under license. Other trademarks and trade names are those of their respective owners.
-
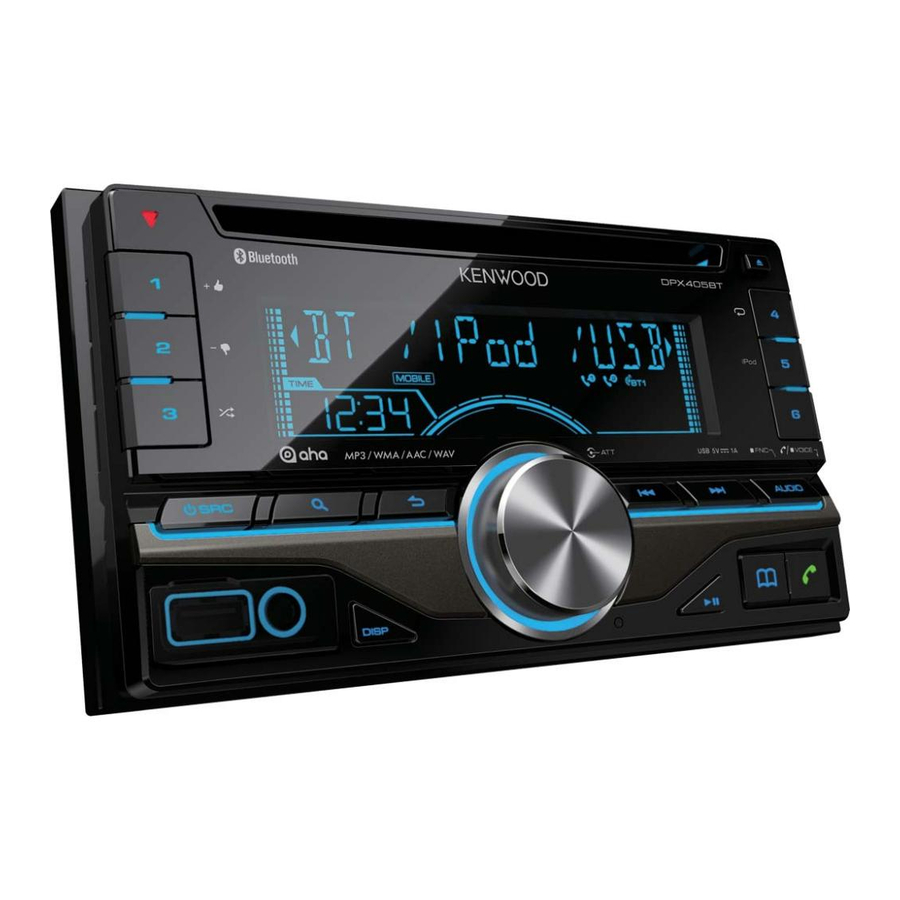
Page 11: Component Names
DPX405BT/DPX305U 3. Basic operations 3-1. Component names 3-1. Component names 1. Disc slot Insert a disc (label side up) in this slot. 2. [1] - [6] button When listening to the radio, press the button to call a registered station. - Page 12 [7] button DPX405BT Press the button to select the Phone Book. [A~Z] button DPX305U Press the button to enter the alphabet search mode. [Ú] button DPX405BT Press the button to make, answer, or disconnect a hands-free call. [iPod] button DPX305U Press the button to switch to the iPod source.
- Page 13 DPX405BT/DPX305U 3. Basic operations 3-2. Preparations 3-2. Preparations Exiting the Demonstration mode Turn off the Demonstration mode when you use the unit for the first time after installation. 1. Press the [Control knob] to quit the Demonstration mode when the message "CANCEL DEMO PRESS VOLUME KNOB"...
-
Page 14: How To Select The Item
DPX405BT/DPX305U 3. Basic operations 3-3. How to select the item 3-3. How to select the item For how to select setting items such as a function setting item, see the following example: Example: Adjusting the text scroll of the display 1. -
Page 15: Adjusting The Clock
DPX405BT/DPX305U 3. Basic operations 3-4. Adjusting the clock 3-4. Adjusting the clock 1. Press and hold the [Control knob]. The hour display blinks. 2. Turn the [Control knob] to adjust the hour, and then press the [Control knob]. The minute display blinks. -
Page 16: Source Selection
CD[1] "CD" Auxiliary Input "AUX" This source can be selected only when it can be played. Function of DPX405BT. Source switching setting "AHA" and "AUX" sources are not selectable when not in use. For more details, see <11-6. Initial settings>. -
Page 17: Audio Control
DPX405BT/DPX305U 4. Audio adjustments 4-1. Audio control 4-1. Audio control You can adjust the audio control items. 1. Select the source. Refer to <Source selection>. 2. Press the [AUDIO] button. Enter the Audio control mode. 3. Use the [Control knob] to select an audio item. - Page 18 "DETAILED SET" "LPF SUBWOOFER"[2] Low Pass Filter 85/ 120/ 160/ Through (Hz) "SUB-W Subwoofer Reverse (180°)/ PHASE"[2][3][4] Phase Normal (0°) "SUPREME Supreme ON/ OFF SET"[5] setting "VOLUME –8 — ±0 (dB) Volume offset OFFSET" (AUX: -8 — +8) (0) (Colored text: Factory setting) "USER": The customized Bass, Middle, and Treble settings are effective.
-
Page 19: Models Of Ipods/Iphones That Can Be Connected To This Unit
If you start playback after connecting the iPod, the music that was playing on the iPod is played first. In this case, "RESUMING" appears without displaying a folder name, etc. Changing the browse item will display a correct title, etc. You cannot operate the iPod if "KENWOOD" or " " appears on the iPod. -
Page 20: Playing Music
If an unsupported application has started when connecting iPod touch or iPhone, "APP&iPod MODE" appears and sometimes playback does not starts. Press the [5] button (DPX405BT) or Press and hold the [iPod] button (DPX305U). Selecting a song Press the [ ] or [ ] button. -
Page 21: Music Search
DPX405BT/DPX305U 5. Listen to the iPod 5-3. Music search 5-3. Music search You can search for the song you want to play. 1. Press the [ ] button. "SEARCH" appears and enters the Music search mode. 2. Search for a song... -
Page 22: Alphabet Search
DPX405BT/DPX305U 5. Listen to the iPod 5-4. Alphabet search 5-4. Alphabet search You can select an alphabetic character from the list in the browse item (artist, album, etc.) currently selected. When DPX305U is used DPX305U allows you to enter the Alphabet search mode by pressing [A to Z] buttons instead of executing the following steps 1 and 2. -
Page 23: Skip Search Ratio Setting
DPX405BT/DPX305U 5. Listen to the iPod 5-5. Skip search ratio setting 5-5. Skip search ratio setting You can change the ratio of skip performed as mentioned in <Skip Search>. 1. Select the iPod source. Refer to <Source selection>. 2. Press and hold the [AUDIO] button. -
Page 24: Play Function
DPX405BT/DPX305U 5. Listen to the iPod 5-6. Play function 5-6. Play function Repeat play Press the [4] button. Switches between Repeat ("FILE REPEAT") and off ("REPEAT OFF") when pressed. Random play Press the [3] button. Randomly plays the music. Pressing the button toggles the setting between Random play on ("FOLDER RANDOM") and off ("RANDOM OFF"). - Page 25 DPX405BT/DPX305U 5. Listen to the iPod 5-7. APP & iPod Mode 5-7. APP & iPod Mode Allowing you to operate iPod with the control on the iPod. DPX405BT Press the [5] button. DPX305U Press and hold the [iPod] button. When the APP & iPod mode is selected, "MODE ON" appears.
-
Page 26: Requirements Aha
DPX405BT/DPX305U 6. Aha Radio 6-1. Requirements Aha™ 6-1. Requirements Aha™ Requirements for listening to Aha™ are as follows: In the application on your device, log in and create a free account with Aha. Internet connection by 3G, LTE, EDGE, or WiFi. -
Page 27: Listening To The Aha Radio
DPX405BT/DPX305U 6. Aha Radio 6-2. Listening to the Aha Radio 6-2. Listening to the Aha Radio Android (DPX405BT only) You need to register your cell-phone before using it with this unit. See <12-2. Reg istering a Bluetooth device>. Disconnect the iPhone or iPod touch. -
Page 28: Basic Operations
DPX405BT/DPX305U 6. Aha Radio 6-3. Basic operations 6-3. Basic operations Pause and play a content Press the [L] button. Selecting a content Press the [ ] or [ ] button. Forward 30 seconds a content Press and hold the [ ] button. -
Page 29: Station Search
DPX405BT/DPX305U 6. Aha Radio 6-4. Station search 6-4. Station search You can select the station you want to listen to from your station list. 1. Press the [ ] button. "SEARCH" appears and enter the Station List mode. 2. Use the [Control knob] to select a station. -
Page 30: Calling A Number In The Content
DPX405BT/DPX305U 6. Aha Radio 6-5. Calling a number in the content 6-5. Calling a number in the content You can call the phone number obtained from the content from a smartphone connected to this unit via Bluetooth. 1. Press the [3] button. - Page 31 DPX405BT/DPX305U 7. Listen to the CD/ Audio file 7-1. Playing music 7-1. Playing music Playing a disc Insert a disc in the Disc slot. When it is inserted, the source is switched automatically and playback starts. Playing a USB device Connect a USB device to the USB terminal using CA-U1EX connecter (500 mA Max.: optional accessory).
- Page 32 DPX405BT/DPX305U 7. Listen to the CD/ Audio file 7-2. Music search 7-2. Music search You can select the music you want to listen to from the device or media being played now. 1. Press the [ ] button. "SEARCH" appears and enters the Music search mode.
- Page 33 DPX405BT/DPX305U 7. Listen to the CD/ Audio file 7-3. Skip search ratio setting 7-3. Skip search ratio setting You can change the ratio of skip performed as mentioned in <Skip Search (Music Editor media)>. 1. Select the USB source. Refer to <Source...
- Page 34 DPX405BT/DPX305U 7. Listen to the CD/ Audio file 7-4. Play function 7-4. Play function Repeat play Press the [4] button. Switches between Track Repeat ("TRACK REPEAT") and OFF ("REPEAT OFF") when pressed while playing a CD. Switches between File Repeat ("FILE REPEAT"), Folder Repeat ("FOLDER REPEAT"), and OFF ("REPEAT OFF") when pressed while playing an Audio file.
-
Page 35: Direct Music Search
DPX405BT/DPX305U 7. Listen to the CD/ Audio file 7-5. Direct music search 7-5. Direct music search (Function of remote control) You can search for music by entering the track number. 1. Press the [DIRECT] button on the remote control. "– –" appears and enter the Direct Music search mode. -
Page 36: About The Audio File
: folder : Audio file For the online manual describing audio files, visit www.kenwood.com/cs/ce/audiofile/. In this online manual, detailed information and notes which are not provided in this manual are provided. Make sure to read through the online manual as well. -
Page 37: About The Usb Device
DPX405BT/DPX305U 7. Listen to the CD/ Audio file 7-7. About the USB device 7-7. About the USB device When the USB device is connected to this unit, it is charged when this unit is powered. Install the USB device in the place where it will not prevent you from driving your vehicle properly. - Page 38 "KMC"). When you use the audio file with database information added by the "KENWOOD Music Editor Light" or "KENWOOD Music Control", you can search for a file by title, album or artist name using Music Search. "KENWOOD Music Editor Light" and "KENWOOD Music Control" are available from the following web site: www.kenwood.com/cs/ce/...
-
Page 39: About The Discs Used With This Unit
DPX405BT/DPX305U 7. Listen to the CD/ Audio file 7-9. About the discs used with this unit 7-9. About the discs used with this unit This unit can only play the CDs with The following discs cannot be used: A discs that is not round... -
Page 40: Handling Discs
DPX405BT/DPX305U 7. Listen to the CD/ Audio file 7-10. Handling discs 7-10. Handling discs Do not touch the recording surface of the disc. Do not stick tape etc. on the disc, or use a disc with tape stuck on it. -
Page 41: Listening To The Radio
DPX405BT/DPX305U 8. Listen to the tuner 8-1. Listening to the radio 8-1. Listening to the radio Selecting a tuner source Press the [SRC] button to select "TUNER". Selecting a band Press the [ ] button. Pressing the button switches the receiving band (FM1, FM2, FM3, LW/MW). -
Page 42: Station Preset Memory
DPX405BT/DPX305U 8. Listen to the tuner 8-2. Station preset memory 8-2. Station preset memory You can store a station in the memory. 1. Press the [ ] or [ ] button to select the channel. 2. Press and hold the button ([1] to [6]) to which you want to assign the selected station. -
Page 43: Auto Memory
DPX405BT/DPX305U 8. Listen to the tuner 8-3. Auto memory 8-3. Auto memory You can register 6 stations with good reception automatically. 1. Select the Tuner source. Refer to <Source selection>. 2. Press and hold the [AUDIO] button. Enter the Function setting mode. -
Page 44: Preset Tuning
DPX405BT/DPX305U 8. Listen to the tuner 8-4. Preset tuning 8-4. Preset tuning Recalling a station from the memory. 1. Press the [ ] button to select a band. 2. Press the button ([1] to [6]) corresponding to the station you want to listen to. - Page 45 DPX405BT/DPX305U 8. Listen to the tuner 8-5. PTY (Program Type) 8-5. PTY (Program Type) You can search for a station by selecting a Program Type. 1. Press and hold the [AUDIO] button. Enter the Function setting mode. 2. Use the [Control knob] to select "SETTINGS"...
- Page 46 Speech and music include the following types of programs. Speech: Program type indicated by colored letters Music: Program type indicated by black letters 4. Use the [Control knob] to select a language. Language Display English "ENGLISH" French "FRENCH" German "GERMAN" 5.
-
Page 47: Tuner Setting
DPX405BT/DPX305U 8. Listen to the tuner 8-6. Tuner setting 8-6. Tuner setting You can set up the tuner. 1. Select the Tuner source. Refer to <Source selection>. 2. Press and hold the [AUDIO] button. Enter the Function setting mode. 3. Use the [Control knob] to select "SETTINGS". -
Page 48: Direct Access Tuning
DPX405BT/DPX305U 8. Listen to the tuner 8-7. Direct access tuning 8-7. Direct access tuning (Function of remote control) You can search for a station directly by entering frequency. 1. Press the [DIRECT] button on the remote control. "– – – –" appears and enter the Direct access tuning mode. -
Page 49: Start Listening
DPX405BT/DPX305U 9. Listen to the AUX 9-1. Start listening 9-1. Start listening 1. Connect a portable audio player with 3.5 mm stereo mini plug audio cable (commercially available). 2. Select the AUX source. Refer to <Source selection>. 3. Turn on the portable audio player and start playback. -
Page 50: Auxiliary Input Display Setting
DPX405BT/DPX305U 9. Listen to the AUX 9-2. Auxiliary input display setting 9-2. Auxiliary input display setting You can set the display when switched the AUX source. 1. Select the AUX source. Refer to <Source selection>. 2. Press and hold the [AUDIO] button. -
Page 51: Illumination Color Selection
DPX405BT/DPX305U 10. Display settings 10-1. Illumination color selection 10-1. Illumination color selection You can select the illumination color of the panel. 1. Press and hold the [AUDIO] button. Enter the Function setting mode. 2. Use the [Control knob] to select "SETTINGS"... -
Page 52: Adjusting The Illumination Color
DPX405BT/DPX305U 10. Display settings 10-2. Adjusting the Illumination color 10-2. Adjusting the Illumination color You can adjust the illumination color of the panel. 1. Select the illumination color you want to adjust. Select from among "COLOR01" to "COLOR24" with reference to <10-1. -
Page 53: Display & Illumination Setting
AD-CON : Connection status for BT Audio. (YES: Connected, NO: Not STATUS" connected) BATT : Battery level of cell-phone. SIGNAL : Signal strength of cell-phone. (Function of DPX405BT) (Colored text: Factory setting) 4. Use the [Control knob] to select a setting. The previous item appears. -
Page 54: Text Display Selection
DPX405BT/DPX305U 10. Display settings 10-4. Text Display Selection 10-4. Text Display Selection You can change the information displayed on each of the following sources: 1. Press the [DISP]. On Audio file/ iPod source Information Display Title and Artist name "TITLE/ARTIST"... - Page 55 On Bluetooth audio source Information Display Song title and Artist name "TITLE/ARTIST" Album name and Artist name "ALBUM/ARTIST" Play time "P-TIME" Display off "DISP OFF MODE" On Standby/ Auxiliary input source Information Display Source name "SOURCE NAME" Display off "DISP OFF MODE" Text display notes When you select the Display off mode, the display setting of each source will be changed to the Display off.
-
Page 56: Text Scroll
DPX405BT/DPX305U 10. Display settings 10-5. Text scroll 10-5. Text scroll Press and hold the [DISP]. The displayed text scrolls. -
Page 57: Clock Setting
DPX405BT/DPX305U 11. General settings 11-1. Clock setting 11-1. Clock setting 1. Press and hold the [AUDIO] button. Enter the Function setting mode. 2. Use the [Control knob] to select "SETTINGS" > "CLOCK". For how to use the [Control knob], refer to <3-3. -
Page 58: Muting The Audio Upon Reception Of A Phone Call
DPX405BT/DPX305U 11. General settings 11-2. Muting the audio upon reception of a phone call 11-2. Muting the audio upon reception of a phone call Function of DPX305U The audio system automatically mutes when it receives an incoming call. When a call comes in "CALL"... -
Page 59: Demonstration Mode Setting
DPX405BT/DPX305U 11. General settings 11-3. Demonstration mode setting 11-3. Demonstration mode setting You can turn on/off the demonstration mode. 1. Press and hold the [AUDIO] button. Enter the Function setting mode. 2. Use the [Control knob] to select "DEMO MODE". -
Page 60: Activating Security Code
DPX405BT/DPX305U 11. General settings 11-4. Activating Security Code 11-4. Activating Security Code When Security Code is set, possibility of theft is reduced because input of Security Code is prompted to turn on the unit once it is turned off. Security Code notes You can set the Security Code with a 4 digit number of your choice. -
Page 61: Deactivating Security Code
DPX405BT/DPX305U 11. General settings 11-5. Deactivating Security Code 11-5. Deactivating Security Code To deactivate the Security Code function. 1. Select the Standby source. Refer to <Source selection>. 2. Press and hold the [AUDIO] button. Enter the Function setting mode. 3. Use the [Control knob] to select "INITIAL SET"... -
Page 62: Initial Settings
"20M"/ "40M"/ "60M": Turns the power OFF after minutes. Sets whether to display aha during source selection. "AHA "ON" / "OFF" SRC" (Function of DPX405BT) "BUILT- Sets whether to display AUX during source selection. IN AUX" "ON" / "OFF" Sets the method for reading CD. - Page 63 Selecting "YES" and then pressing the [Control knob] starts upgrading the UPDATE" firmware. For how to update the firmware, access our web site. http://www.kenwood.com/cs/ce/ (Colored text: Factory setting) 5. Use the [Control knob] to select a setting. The previous item appears.
-
Page 64: About The Bluetooth Module
DPX405BT/DPX305U 12. Registering a Bluetooth (DPX405BT) 12-1. About the Bluetooth module 12-1. About the Bluetooth module This unit conforms to the following Bluetooth specifications: Version Bluetooth Ver.2.1+EDR Certified HFP (Hands Free Profile) SPP (Serial Port Profile) PBAP (Phonebook Access Profile) -
Page 65: Registering A Bluetooth Device
1. Start registering a unit by operating the Bluetooth device. By operating the Bluetooth device, register the hands-free unit or audio unit (pairing). Select "DPX4**BT" (for DPX405BT) from the list of found units. 2. If "PAIRING PASS ****** (Bluetooth device name) PRESS VOLUME KNOB" appears, proceed to step 4. -
Page 66: Selecting The Bluetooth Device You Wish To Connect
DPX405BT/DPX305U 12. Registering a Bluetooth (DPX405BT) 12-3. Selecting the Bluetooth device you wish to connect 12-3. Selecting the Bluetooth device you wish to connect When two or more Bluetooth devices have already been registered, you need to select the Bluetooth device you wish to use. -
Page 67: Deleting A Registered Bluetooth Device
DPX405BT/DPX305U 12. Registering a Bluetooth (DPX405BT) 12-4. Deleting a registered Bluetooth device 12-4. Deleting a registered Bluetooth device You can delete a registered Bluetooth device. 1. Press the [Ú] button. "BT MODE" appears and enter the Bluetooth mode. 2. Use the [Control knob] to select "SETTINGS"... -
Page 68: Bluetooth Device Registration Test
3. By operating the Bluetooth device, register the hands-free unit or audio unit (pairing). Select "DPX4**BT" (for DPX405BT) from the list of found units. 4. If "(Bluetooth device name)" appears, proceed to step 6. 5. Input the PIN code ("0000") in the Bluetooth device. -
Page 69: Receiving A Call
DPX405BT/DPX305U 13. Hands-free phoning (DPX405BT) 13-1. Receiving a call 13-1. Receiving a call You can answer a phone call Press the [Ú] button. The following operations disconnect the line Inserting a CD. Connecting a USB device. Rejecting an incoming call... -
Page 70: Calling A Number In The Phone Book
DPX405BT/DPX305U 13. Hands-free phoning (DPX405BT) 13-2. Calling a number in the phone book 13-2. Calling a number in the phone book 1. Press the [7] button. 2. Search for a name in the phone book. Operation type Operation Selection of name list Turn the [Control knob]. - Page 71 DPX405BT/DPX305U 13. Hands-free phoning (DPX405BT) 13-3. Alphabet search 13-3. Alphabet search You can search for a name in the phone book by the alphabet. 1. Press the [7] button. 2. Press the [ ] button. Enter the Alphabet search mode and "<ABCDEFGHIJK>" appears.
-
Page 72: Dialing A Number
DPX405BT/DPX305U 13. Hands-free phoning (DPX405BT) 13-4. Dialing a number 13-4. Dialing a number 1. Press the [Ú] button. "BT MODE" appears and enter the Bluetooth mode. 2. Use the [Control knob] to select "NUMBER DIAL". For how to use the [Control knob], refer to <3-3. -
Page 73: Calling A Number In The Call Log
DPX405BT/DPX305U 13. Hands-free phoning (DPX405BT) 13-5. Calling a number in the call log 13-5. Calling a number in the call log 1. Press the [Ú] button. "BT MODE" appears and enter the Bluetooth mode. 2. Use the [Control knob] to select "CALL HISTORY". -
Page 74: Speed Dialing (Preset Dial)
DPX405BT/DPX305U 13. Hands-free phoning (DPX405BT) 13-6. Speed dialing (Preset dial) 13-6. Speed dialing (Preset dial) 1. Press the [Ú] button. "BT MODE" appears and enter the Bluetooth mode. 2. Press number button ([1] to [6]). 3. Press the [Control knob]. -
Page 75: Registering In The Preset Dial Number List
DPX405BT/DPX305U 13. Hands-free phoning (DPX405BT) 13-7. Registering in the preset dial number list 13-7. Registering in the preset dial number list 1. Press the [Ú] button. "BT MODE" appears and enter the Bluetooth mode. 2. Enter the phone number you wish to register Enter the phone number with reference to the following: <13-2. -
Page 76: During A Call
DPX405BT/DPX305U 13. Hands-free phoning (DPX405BT) 13-8. During a call 13-8. During a call Disconnecting a call Press the [SRC] button. Switching to the Private mode Press the [L] button. Pressing this knob each time switches between the private talk mode ("PV TALK") and hands-free talk mode ("HF TALK"). -
Page 77: Switching Between Two Connected Cell-Phones
DPX405BT/DPX305U 13. Hands-free phoning (DPX405BT) 13-9. Switching between Two Connected Cell-phones 13-9. Switching between Two Connected Cell-phones When two Bluetooth devices are connected, you can assign the Bluetooth device to be used in priority to the other Bluetooth device. When selecting the priority device using the button 1. -
Page 78: Clearing The Disconnection Message
DPX405BT/DPX305U 13. Hands-free phoning (DPX405BT) 13-10. Clearing the disconnection message 13-10. Clearing the disconnection message Press the [Ú] button. "HF DISCONCT" disappears. -
Page 79: Making A Call By Voice Dialing
DPX405BT/DPX305U 13. Hands-free phoning (DPX405BT) 13-11. Making a call by voice dialing 13-11. Making a call by voice dialing You can make a voice call using the voice recognition function of the cell-phone. 1. Press and hold the [Ú] button to start voice recognize. -
Page 80: Display Of Phone Number Types (Categories)
DPX405BT/DPX305U 13. Hands-free phoning (DPX405BT) 13-12. Display of phone number types (categories) 13-12. Display of phone number types (categories) The category items in the phone book are displayed as follows: Display Information Home Mobile Office General Other... -
Page 81: Before Use
DPX405BT/DPX305U 14. Bluetooth audio (DPX405BT) 14-1. Before use 14-1. Before use You need to register your Bluetooth audio player before using it with this unit. For more details, see <12-2. Registering a Bluetooth device>. You need to select the Bluetooth audio player you wish to connect. Refer to <12-3. - Page 82 DPX405BT/DPX305U 14. Bluetooth audio (DPX405BT) 14-2. Basic operations 14-2. Basic operations Selecting a Bluetooth audio source Press the [SRC] button. Pause and play a song Press the [L] button. Selecting a song Press the [ ] or [ ] button.
- Page 83 DPX405BT/DPX305U 14. Bluetooth audio (DPX405BT) 14-3. Play function 14-3. Play function Random play Press the [3] button. Switches between Folder Random ("FOLDER RANDOM"), All Random ("ALL RANDOM"), and OFF ("RANDOM OFF"). Repeat play Press the [4] button. Switches between File Repeat ("FILE REPEAT"), All Repeat ("ALL REPEAT"), and OFF ("REPEAT OFF").
-
Page 84: Registering The Pin Code
DPX405BT/DPX305U 15. Bluetooth settings (DPX405BT) 15-1. Registering the PIN code 15-1. Registering the PIN code By operating the Bluetooth device, specify the PIN code necessary for registering this unit. 1. Press the [Ú] button. "BT MODE" appears and enter the Bluetooth mode. -
Page 85: Downloading The Phone Book
DPX405BT/DPX305U 15. Bluetooth settings (DPX405BT) 15-2. Downloading the phone book 15-2. Downloading the phone book If the phone book is not downloaded automatically to this unit to which a cell-phone - which is not compatible with PBAP- is connected, download it in the following manner: 1. -
Page 86: Deleting The Phone Book
DPX405BT/DPX305U 15. Bluetooth settings (DPX405BT) 15-3. Deleting the phone book 15-3. Deleting the phone book You can delete the phone book stored in this unit to which a cell-phone − which is not compatible with PBAP − is connected. 1. Press the [7] button. -
Page 87: Displaying The Firmware Version
DPX405BT/DPX305U 15. Bluetooth settings (DPX405BT) 15-4. Displaying the firmware version 15-4. Displaying the firmware version You can view the version of the firmware of this unit. 1. Press the [Ú] button. "BT MODE" appears and enter the Bluetooth mode. 2. Use the [Control knob] to select "SETTINGS"... -
Page 88: Bluetooth Detail Setting
DPX405BT/DPX305U 15. Bluetooth settings (DPX405BT) 15-5. Bluetooth detail setting 15-5. Bluetooth detail setting You can configure the initial settings of this unit. 1. Press the [Ú] button. "BT MODE" appears and enter the Bluetooth mode. 2. Use the [Control knob] to select "SETTINGS"... -
Page 89: Before Using Remote Control
DPX405BT/DPX305U 16. Basic operation of remote control 16-1. Before using remote control 16-1. Before using remote control Preparing the remote control unit Pull the battery sheet out from the remote control unit in the direction of the arrow. Changing the battery of the remote control unit Use a commercially available button battery (CR2025). -
Page 90: Basic Opreation
DPX405BT/DPX305U 16. Basic operation of remote control 16-2. Basic opreation 16-2. Basic opreation General control [VOL] Volume control: [SRC] Source selection: Press and hold to turn off the power. [ATT] Volume reduction: When the button is pressed again, the volume returns to the previous level. -
Page 91: Hands-Free Phone Control
Enter the Music search mode: Selecting folders/files during Music search mode: Returning to previous folder: On iPod source Enter Music search mode: Selecting items during Music search mode: Returning to previous item: Pause/Play: On Aha source Selecting a content: [ENT] Pause/Play: Enter the station search mode: [ Select item: [... -
Page 92: Setting Error
DPX405BT/DPX305U 17. Troubleshooting guide 17-1. Setting error 17-1. Setting error Some functions of this unit may be disabled by some settings made on this unit. Cannot set up display. The demonstration mode is not turned off as mentioned in <11-3. Demonstration mode setting>. -
Page 93: Operation/Wiring Error
DPX405BT/DPX305U 17. Troubleshooting guide 17-2. Operation/wiring error 17-2. Operation/wiring error What might seem to be a malfunction in your unit may just be the result of a slight operation error or a wiring error. Before calling for service, first check the following table for possible problems. - Page 94 Close the vehicle windows to reduce noise. Small voice. If voice is too small, it cannot be recognized properly. Speak into the microphone a little more loudly and naturally. The sound from the Bluetooth audio player is discontinuous. Another Bluetooth device is affecting the Bluetooth communication. Turn off another Bluetooth device.
- Page 95 DPX405BT/DPX305U 17. Troubleshooting guide 17-3. Error messages 17-3. Error messages The messages shown below indicates your system condition. General "PROTECT" (blink) The speaker wire has short-circuited or touched the chassis of the vehicle, and then the protection function has been activated.
-
Page 96: Bluetooth Messages
is repeated, use another USB device. Bluetooth Messages "AUD DISCONCT" The unit cannot communicate with the Bluetooth audio player. "DEVICE FULL" 5 Bluetooth device have already been registered. No more Bluetooth devices are registered. "HF DISCONCT" The unit cannot communicate with the cell-phone. "HF ERROR 68"... - Page 97 "NETWORK UNAVAILABLE" The network has been disconnected. "NO CONTENT" There is no receivable content. "POOR GPS" The GPS reception condition of your smartphone is poor.