Table of Contents
Advertisement
Quick Links
Advertisement
Table of Contents

Related Manuals for AEG 8290 D

Summary of Contents for AEG 8290 D
- Page 1 8290 D Cooker hood Operating and Installation Instructions...
-
Page 2: Table Of Contents
Contents Safety instructions ............. 2 Description of the cooker hood ........3 Using the cooker hood ..........4 Maintenance and cleaning .......... 5 What to do if .............. 7 Service and Spare Parts ..........8 Customer Care ............8 Guarantee Conditions ..........9 Technical data ............ -
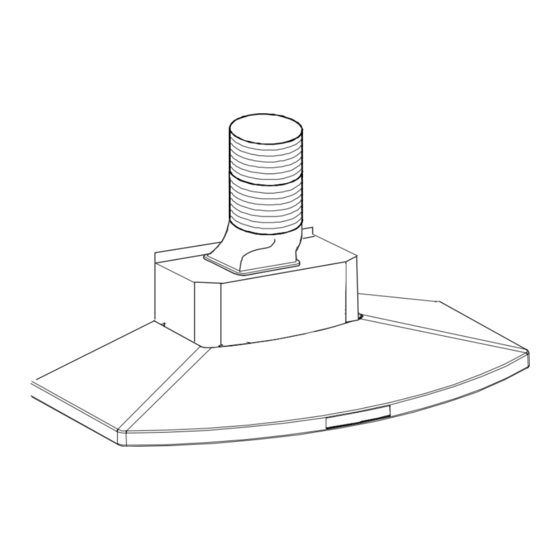
Page 3: Description Of The Cooker Hood
Use of cooker hood This appliance is for domestic use only in a normal household. Never leave any deep-frying, melting fat, paraffin or any other inflammable liquid unattended on the hob. In the event of fire: Immediately switch off the cooker hood and the cooker. Note! Cover the fire. -
Page 4: Using The Cooker Hood
Using the cooker hood The control panel Best results are obtained by using a low speed for normal conditions and high speed when odours are more concentrated. The control panel has five push buttons, one for switching the lamp on/off, the others for choosing the motor speed, 0-1-2-3. -
Page 5: Maintenance And Cleaning
Maintenance and cleaning Before doing any maintenance work on the hood, disconnect it from the main supply by disconnecting the plug from the wall socket or unscrewing the fuse. Cleaning the hood Clean the outside of the hood using a damp cloth and a mild detergent. Never use corrosive, abrasive or flammable cleaning products. -
Page 6: Changing The Light
After approximately three years of use, the KF8 filter should be replaced with a new, as the odour reduction capacity will be reduced. To remove the filter (Fig. 4): Remove the grease filters. Press the red buttons (A), lower the front of the carbon filter. Remove the carbon filter. -
Page 7: What To Do If
What to do if If your appliance fails to work properly please carry out the following checks. Symptom Solution The cooker hood will not start... The hood is connected to the electricity supply. Check that the fan speed control is set to 1, 2 or 3. -
Page 8: Service And Spare Parts
Service and spare parts In the event of your apppliance requiring service, or if you wish to purchase spare parts, contact your local AEG Service Force Centre by telephoning 08705 929 929 Your call will be automatically routed to the Service Centre covering your post code area. -
Page 9: Guarantee Conditions
3. Should guarantee repairs be necessary the purchaser must inform the nearest customer service office (manufacturer`s service or authorised agent). AEG reserves the right to stipulate the place of the repair (i.e.the customer`s home, place of installation or AEG workshop). -
Page 10: Technical Data
+49 (0) 911 323 2600 Italy Pordenone +39 (0) 1678 47053 Sweden Stockholm +46 (0) 8 738 7910 Slough +44 (0) 1753 219899 Technical data Model 8290 D Size Height 800-1370 mm Width 898 mm Depth 480 mm Light Max 2X20 W Grease filter 3 pcs. -
Page 11: Installation
Installation Unpacking Check that the cooker hood is not damaged. Transportation damages should immediately be reported to the transport company. Damages, faults and missing parts should immediately be reported to the retailer. Dispose carefully of the packaging material so that it is out of the way of small children. -
Page 12: Mounting The Chimney
Mounting the cooker hood - Fig. 7 Position the template on the wall and mark the position, and drill the holes (2 x Ø 8 mm).Mount the two rawl plugs with the hooks (3) Hang the hood on the hooks and level it with the adjustment screws (4) Remove the grease filters (5) and mark for the two screws (6). - Page 13 Fig. 7...
-
Page 14: Power Outlet
Exhaust tube Power outlet Electric hob 500 mm Gas hob 650 mm Charcoal and oil 700 mm Wall bracket Electric hob 500 mm Gas hob 650 mm Charcoal and oil 700 mm Fig. 8... - Page 16 AEG Hausgeräte GmbH Postfach 1036 D-90327 Nürnberg http://www.aeg.hausgeraete.de © Copyright by AEG LI1H9C...