Table of Contents
Advertisement
All about the
Use
of your
Important Safeguards .................................................. 2
Coffee Maker Safety Instructions................................. 2
Parts and Features .....................................................3
Brewing Your First Pot of Coffee ................................. 7
&
Coffee Maker
TA B L E O F C O N T E N T S
USA and Canada 1-888-845-7330
Care
Brewing Tips ....................................................... 8
Cleaning the Coffee Maker................................... 8
Troubleshooting ................................................. 8
Major Appliance Warranty .................................... 9
Advertisement
Table of Contents

Related Manuals for Frigidaire FPDC12D7MS


Summary of Contents for Frigidaire FPDC12D7MS
-
Page 1: Table Of Contents
All about the & Care Coffee Maker of your TA B L E O F C O N T E N T S Brewing Tips ............8 Important Safeguards ..........2 Cleaning the Coffee Maker........8 Coffee Maker Safety Instructions......... 2 Troubleshooting .......... -
Page 2: Important Safeguards
11 Do not use appliance for other than intended use. pulled on by children or tripped over. To reduce the 12 Do not use appliance without lid properly placed risk of injury, do not drape cord over the counter top on container (carafe). or table top where it can be pulled on by children or 13 The container (carafe) is designed for use with tripped over unintentionally. this appliance. It must never be used on a range top or in a microwave oven. 14 Do not set a hot container (carafe) on a wet or Product Specifications cold surface. Model Number FPDC12D7MS 15 Extreme caution must be used when moving an Volts 120V AC only appliance containing hot oil or other hot liquids. Rated Wattage 1100 Watts 16 Do not use a cracked container (carafe) or a Hertz 60Hz container having a loose or weakened handle. 17 Do not clean container with abrasive cleaners, Made in China steel wool pads, or other abrasive material. -
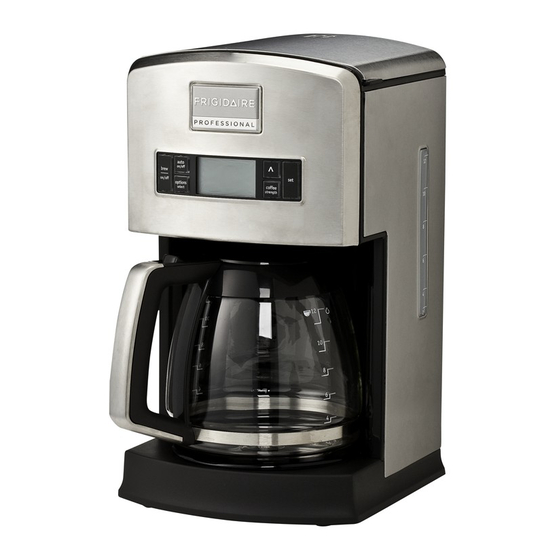
Page 3: Parts And Features
F Active Carbon Filter Cartridge B Water Tank/Brew Basket Lid G Pre-Measured One-tablespoon Coffee Scoop c Permanent Gold-Tone Filter h Control Panel D Filter Basket I Water Level Indicator Window E Water Filter Holder warming plate within 30 seconds to prevent an Glass carafe With Attached Lid overflow from the Filter Basket becoming too full. The Frigidaire Coffee Maker comes with a 12-cup glass Permanent Gold-Tone Filter carafe with an attached lid for easy pouring. The lid also helps keep foreign objects from getting inside the carafe. The reusable Gold-Tone Filter eliminates the need for paper filters. However, if paper filters are preferred, Digital LcD Panel use #4 cone filters. To prevent overflowing, do not use The LCD panel provides accuracy and easy access to paper filters and the Gold-Tone filter at the same time. your personal settings. The panel also displays the Active carbon Water Filter and Water current time and AM/PM indicators. To save energy, the... -
Page 4: Display And Control Panel
DISPLAY AND cONTROL PANEL A Brew On/Off c Options Select E Menu Up-arrow B Auto On/Off D LCD Display F Coffee strength G Set Auto: Brew On-Off Button 1 To set the auto start timer, press the Option Select The Coffee Maker features one touch brewing that button until the display reads Auto. Then, press the will begin brewing by pressing the Brew on-off button up-button to set the hour. Once the hour is correct, whether the LCD is active or in standby mode. To turn press the Set button. off the Coffee Maker, press the Brew On/Off button 2 Press the up-button to select the desired minute again. setting. Once again, press the Set button. Option Select 3 Press the up-button to select AM or PM. Press the set button. Press the Option Select button to cycle through the following options: 4 Now that the Auto time is set, press the Auto on-... -
Page 5: Coffee Strength
4 Press and hold the Option Select button to exit the Up-Arrow Button Options menu. Use this button to navigate the various options in the Self clean: LCD panel and to adjust the timer and clock. 1 To clean your Coffee Maker, Mix a 12-cup ratio coffee Strength consisting of 1/3 white vinegar and 2/3 water. Use this button to set the coffee strength. Press once 2 Pour the mixture into the reservoir. for Strong coffee, and a second time for Regular 3 Press the option Select button to enter the options strength coffee. mode. Continue pressing the Option Select button incrementally until the arrow is pointing to “Self Clean”. 4 Press the up-arrow button. The LCD panel will indicate “Self Clean On”. 5 Press the set button. 6 Press and hold the Option Select button to exit the Options menu. 7 Press the Brew On-Off button to begin the cleaning process. During the Cleaning cycle, the Coffee Maker will fill the carafe to about 6 cups, and then rest as the cleaning solution soaks the water passageways and reservoir. This rest cycle will last about 30 minutes. The LCD panel will continue to flash “Self Clean On”. Do not turn the Coffee Maker off during the cleaning cycle. After about 30 minutes, the cleaning cycle will process the remaining solution in the reservoir; the Self Cleaning process takes... -
Page 6: Installing The Water Filter Holder And The Water Filter
INSTALLING ThE WATER FILTER hOLDER AND cARBON FILTER The supplied filter reduces many of the contaminants that the excess water to run out the back of the unit and on can negatively affect the flavor of the coffee. Although to the counter top. the Coffee Maker will function normally without it, use of If you are using a container other than the carafe to the filter is highly recommended. fill the reservoir, use the water level indicator window on the right side of the Coffee Maker to measure the desired amount of water. 1 The filter assembly consists of a Water Filter Holder, and an active carbon filter cartridge. Prior to inserting 5 Place the Filter Basket into position and lower the the cartridge into the holder, place the carbon filter Permanent Gold-Tone filter into the basket - Do not cartridge into a container of clean cool water, and let add coffee at this time! Place the empty carafe onto soak. After 10 minutes, remove the cartridge from the the warming plate and press the On-Off button once container and thoroughly rinse under running tap water to start the brewing process. Allow the Coffee Maker for 10 to 15 seconds. This will remove any carbon to cycle with water-only for the first use. The unit will dust particles that could make their way into your first sound three alert tones once the brewing process has brew. This step is only necessary for new carbon filters. completed. Discard the water from the break-in cycle. Repeat this procedure each time you replace the filter. It is recommended that the carbon filter be replaced NOTE after each 60 brew cycles. A reminder on the LCD panel will alert you once you have reached the 60th brew cycle. To clear the reminder, simply press and hold the Repeat these steps each time you replace the carbon... -
Page 7: Brewing Your First Pot Of Coffee
BREWING YOUR FIRST POT OF cOFFEE 1 Thoroughly wash the Filter Basket, the Permanent Gold-Tone Filter, the Water Filter Holder, and the carafe in hot soapy water. Rinse with clean water and dry. Do not use abrasive cleansers or scouring pads. Do not submerge the Coffee Maker in water or any other liquid, or permanent damage to the Coffee Maker will result! 2 Lift the reservoir lid on top of the Coffee Maker, and pour the desired amount of cool water into the reservoir. Be sure to pour the water into the reservoir, and not into the Filter Basket. 3 With the Filter Basket in place, insert the Permanent Gold-Tone Filter, or a #4 paper cone filter into the Filter Basket – but not both! 4 Add the desired amount of ground coffee into the filter. It is recommended that you start out using one tablespoon of ground coffee for every cup of water in the reservoir. However, you may adjust the amount of coffee to water ratio to suit your personal taste. 5 Press the On-Off button once to start the brewing process. Prior to pushing the On-Off button to begin brewing, you may want to adjust the strength setting by pressing the Coffee Strength button on the control panel. You may choose from Regular or Strong. 6 Once the brewing cycle has ended, 3 alert tones will sound. -
Page 8: Brewing Tips
Do not use abrasive cleansers or scouring pads. location. Do not refrigerate the beans, as condensation These parts can also be washed in the upper rack will likely form on the beans once they are removed of a dishwasher. from the refrigerator. Although freezing may help 3 Unplug the Coffee Maker and wipe the housing preserve the beans, the flavor could be negatively with a warm, damp cloth. Then wipe clean with affected over time. damp cloth and dry with a soft cloth. Do not use abrasive cleansers or scouring pads. To brighten Grinding Your coffee and clean the stainless steel exterior, Frigidaire Although pre-ground coffee is perfectly acceptable, the recommends Ecosential Stainless Steel Cleaner by best coffee will come from fresh ground beans. It is Smart Choice . Purchase online at http://frigidaire. recommended that you grind your beans immediately stores.yahoo.net/ or call Toll-free number: 1-800- prior to brewing, and set your grinder to the medium 599-7569 grind level setting. Medium grind is the optimum setting for most automatic drip coffee makers. Troubleshooting how Much coffee to Use For Each Pot • If the unit does not turn on, check to make sure... -
Page 9: Major Appliance Warranty
SMALL DOMESTIc APPLIANcE WARRANTY INFORMATION Your appliance is covered by a one year limited MERCHANTABILITY OR FITNESS FOR A PARTICULAR warranty. For one year from your original date of PURPOSE, ARE LIMITED TO ONE YEAR OR THE purchase, Electrolux will repair or replace the appliance SHORTEST PERIOD ALLOWED BY LAW. ELECTROLUX or parts, at Electrolux’s option, that prove to be defective SHALL NOT BE LIABLE FOR CONSEQUENTIAL OR in materials or workmanship when the appliance is INCIDENTAL DAMAGES SUCH AS PROPERTY DAMAGE installed, used, and maintained in accordance with the AND INCIDENTAL EXPENSES RESULTING FROM ANY provided instructions. Labor and all costs associated with BREACH OF THIS WRITTEN LIMITED WARRANTY returning the appliance or parts to us and our returning OR ANY IMPLIED WARRANTY. SOME STATES AND the appliance or parts to you are excluded under this PROVINCES DO NOT ALLOW THE EXCLUSION OR warranty. As a matter of warranty policy, Electrolux will LIMITATION OF INCIDENTAL OR CONSEQUENTIAL not refund the consumer’s purchase price. If a product DAMAGES, OR LIMITATIONS ON THE DURATION or part under warranty is no longer available, Electrolux OF IMPLIED WARRANTIES, SO THESE LIMITATIONS will replace with a comparable product of equal or OR EXCLUSIONS MAY NOT APPLY TO YOU. THIS greater value. WRITTEN WARRANTY GIVES YOU SPECIFIC LEGAL RIGHTS. YOU MAY ALSO HAVE OTHER RIGHTS THAT Exclusions: This warranty does not cover VARY FROM STATE TO STATE.