Table of Contents
Advertisement
Quick Links
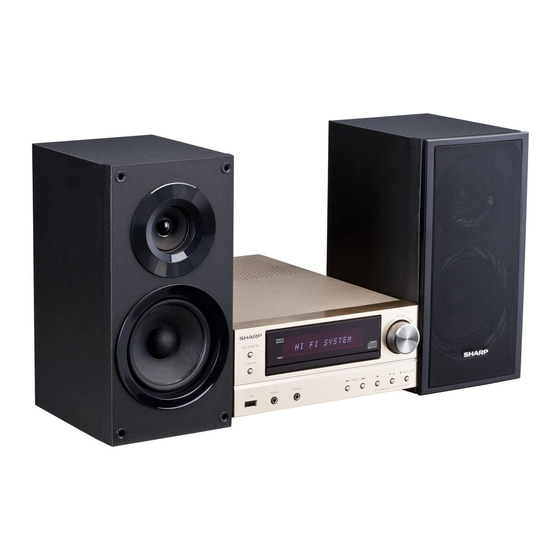
● XL-E171DVH DVD Hi Fi Component System consisting of XL-E171DVH (main unit) and CP-E171 (speaker system).
Introduction
Thank you for purchasing this SHARP product. To obtain the best performance from this product, please read this manual
carefully. It will guide you in operating your SHARP product.
Special Note
Supply of this product does not convey a license nor imply any right to distribute content created with this product in
revenue-generating broadcast systems (terrestrial, satellite, cable and/or other distribution channels), revenue-generating
streaming applications (via Internet, intranets and/or other networks), other revenue-generating content distribution
systems (pay-audio or audio-on-demand applications and the like) or on revenue-generating physical media (compact
discs, digital versatile discs, semiconductor chips, hard drives, memory cards and the like). An independent license for
such use is required. For details, please visit http://mp3licensing.com
MPEG Layer-3 audio coding technology licensed from Fraunhofer IIS and Thomson.
Accessories
Please confirm that the following accessories are included.
Video cable x 1
FM aerial x 1
CONTENTS
General Information
Precautions . . . . . . . . . . . . . . . . . . . . . . . . . . . . . . . . . . 2
Controls and indicators . . . . . . . . . . . . . . . . . . . . . . 2 - 4
Types of playable discs . . . . . . . . . . . . . . . . . . . . . . . . 5
Description of discs . . . . . . . . . . . . . . . . . . . . . . . . . . . 6
Preparation for Use
System connections . . . . . . . . . . . . . . . . . . . . . . . . . 7 - 8
Remote control . . . . . . . . . . . . . . . . . . . . . . . . . . . . . . . 8
Changing the setup menu . . . . . . . . . . . . . . . . . . . . 9 - 13
Basic Operation
General control . . . . . . . . . . . . . . . . . . . . . . . . . . . . . . 14
Setting the clock (Remote control only) . . . . . . . . . . . . 15
DVD playback . . . . . . . . . . . . . . . . . . . . . . . . . . . . 15 - 16
Basic operation . . . . . . . . . . . . . . . . . . . . . . . . . . . 16 - 17
Useful operation. . . . . . . . . . . . . . . . . . . . . . . . . . . 18 - 19
Various settings . . . . . . . . . . . . . . . . . . . . . . . . . . . . . . 20
Video CD and Super Video CD playback . . . . . . . 21 - 22
CD operation . . . . . . . . . . . . . . . . . . . . . . . . . . . . . . . . 23
DivX/MP3/WMA (disc) operation and JPEG
(Disc/USB Video) operation . . . . . . . . . . . . . . . . . . . 23 - 25
ENGLISH
Remote control x 1
AC Cord
Page
MP3/WMA folder mode (disc) operation. . . . . . . . . . . . 26
USB
MP3/WMA playback (USB Audio Function) . . . . . 26 - 29
Radio
Listening to the radio . . . . . . . . . . . . . . . . . . . . . . . . . . 30
Advanced Features
Using the Radio Data System (RDS) . . . . . . . . . 31 - 33
(Remote control only) . . . . . . . . . . . . . . . . . . . . . 33 - 35
Enhancing your system . . . . . . . . . . . . . . . . . . . . . . . . 35
References
Troubleshooting chart . . . . . . . . . . . . . . . . . . . . . 36 - 37
Maintenance . . . . . . . . . . . . . . . . . . . . . . . . . . . . . . . . 37
Specifications . . . . . . . . . . . . . . . . . . . . . . . . . . . . . . . 38
E-1
"AAA" size battery
(UM-4, R03, HP-16 or similar) x 2
Page
Advertisement
Table of Contents
Troubleshooting

Related Manuals for Sharp XL-E171DVH


Summary of Contents for Sharp XL-E171DVH
-
Page 1: Table Of Contents
● XL-E171DVH DVD Hi Fi Component System consisting of XL-E171DVH (main unit) and CP-E171 (speaker system). Introduction Thank you for purchasing this SHARP product. To obtain the best performance from this product, please read this manual carefully. It will guide you in operating your SHARP product. -
Page 2: Precautions
SHARP ● Keep the unit away from direct sunlight, strong will not be held responsible for any damage resulting from... - Page 3 Controls and indicators (continued) ■ Remote control Page 1. Remote Control Transmitter ....8 2. On/Stand-by Button ..... 9, 15 3.
-
Page 4: Controls And Indicators
Controls and indicators (continued) ■ Display Page 5 6 7 8 10 11 13 12 14 1. USB Indicator ......26 2. -
Page 5: Types Of Playable Discs
Types of playable discs The DVD player can play back discs bearing any of the following marks: Disc type Disc contents DVD Video Disc Audio and video (movies) Super Video CD Audio and video (movies) Icons used in this operation manual Video CD Audio and video (movies) -
Page 6: Description Of Discs
Description of discs ■ Discs that cannot be played ■ Icons used on DVD discs ● DVDs without the region ● CDG Check the icons on the DVD case before playing your discs. ● CDV number on the disc. ● DVDs with SECAM system ●... -
Page 7: System Connections
System connections Make sure to unplug the AC power lead before making any connections. Right FM aerial Video cable speaker (not supplied) To video input socket Left speaker Black Wall socket (AC 220 - 240 V ~ 50/60 Hz) Label is located at the bottom of the unit. -
Page 8: Remote Control
System connections (continued) Remote control ■ Connecting a TV, etc. ■ Battery installation Connect to the TV using an audio cable. Open the battery cover. To audio Insert the supplied battery according to the direction output sockets indicated in the battery compartment. When inserting or removing the battery, push it towards the (–) battery terminals. -
Page 9: Changing The Setup Menu
Changing the setup menu Turn on the TV, and switch the input to the “VIDEO 1”, Press the button to select a menu and press the “VIDEO 2”, etc. accordingly. ENTER button. ● See the list on pages 9 - 13 for setup menu. Press the button to change the setting and press the ENTER button. - Page 10 Changing the setup menu (continued) Setup Selectable parameters (* indicates default setting) Description menu AUDIO ANALOG DOWNMIX LT/RT SETUP AUDIO STEREO* GENERAL AUDIO DOLBY VIDEO PREFEREN. PAGE - - AUDIO SETUP PAGE - - DIGITAL DIGITAL SPDIF OFF When playing a disc recorded with ANALOG AUDIO DIGITAL AUDIO AUDIO...
- Page 11 NONE -9 –> 0* –> +9 SATURATION -9 –> 0* –> +9 LUMA DELAY 0T* DIVX (R) VOD OK SHARP provide you the DivX registration code that allows you DIVX(R) VIDEO ON DEMAND to rent and purchase videos using REGISTER the DivX service.
- Page 12 Changing the setup menu (continued) Setup menu Selectable parameters (* indicates default setting) Description SUBTITLE ENGLISH* Select the subtitle displayed on the POLISH TV screen. CZECH SLOVAK SWEDISH HUNGARIAN GERMAN DISC MENU ENGLISH* POLISH CZECH SLOVAK SWEDISH HUNGARIAN GERMAN PARENTAL 1 KID SAFE Set a restriction level for DVD viewing.
-
Page 13: Changing The Setup Menu
Changing the setup menu (continued) ■ TV type setting ■ Parental setting Select “PREFERENCE” on the setup menu screen (see Indicator Setting steps 1 - 3 on page 9). AUTO Select this mode for the multi-system TV. After selecting “PARENTAL” in step 4 on page 12, select the parental level and press the ENTER button. -
Page 14: General Control
General control ■ X-Bass control When the power is first turned on, the unit will enter the extra bass mode which emphasises the bass frequencies, and “X-BASS” will appear. To cancel the extra bass mode, press the X-BASS button on the remote control. ■... -
Page 15: Setting The Clock (Remote Control Only)
Setting the clock (Remote control only) DVD playback ■ Playback In this example, the clock is set for the 24-hour (00:00) display. Press the ON/STAND-BY button to turn the power on. Press the ON/STAND-BY button to turn the power on. Press the CLOCK/TIMER button. -
Page 16: Dvd Playback
DVD playback (continued) Basic operation Notes: ● During disc initialisation, the volume cannot be adjusted. ● Stop positions may be recorded on some discs. When you play such a disc, playback stops there. ● During an operation, “ ” may appear indicating that the operation is disabled by the disc. - Page 17 Basic operation (continued) In the playback mode ■ To play in the desired order (programmed play) Whilst in the playback mode, press the DIRECT button. TV screen You can playback the desired tracks with titles or chapters in a specific order. Maximum of 20 tracks can be programmed.
-
Page 18: Useful Operation
Useful operation On SVCD/VCD/DivX, only forward play is possible and the speed changes as follows: 1/16 PLAY (Normal play) Press the / button to return to the normal playback. Note: On some discs, the slow-motion play functions are disabled. ■ To change the angle You can change the angle of view when playing a DVD disc that contains scenes recorded from multiple angles. -
Page 19: Useful Operation
Useful operation (continued) ■ To play repeatedly (repeat play) Press the A - B button again to enter the end point (B). TV screen You can play a chapter (track) or a title repeatedly by specifying it during playback. This starts A-B repeat play from the start point (A) to the Whilst a disc is playing, press the RANDOM/ button. -
Page 20: Various Settings
Various settings DVD: The subtitle language, audio language and TV type you select during playback are reset each time you set this unit TITLE ELAPSED to the stand-by mode or switch the input. To keep your own settings, set them in the Setup menu (see page 9). TT:01/03 CH:01/29 0:15:01... -
Page 21: Video Cd And Super Video Cd Playback
Video CD and Super Video CD playback The following playback functions are the same as DVD ■ To play without activating the playback or CD operations. control function Page To locate the beginning of a chapter (track) (skip) ........16 Fast forward/Fast backward (search) . -
Page 22: Video Cd And Super Video Cd Playback
Video CD and Super Video CD playback (continued) ■ Disc digest selection ■ Track digest selection You can look at the sections and select the scene you want to start watching from. This function is convenient when you want to start from the middle of an undivided track, for example, a movie. -
Page 23: Cd Operation
CD operation DivX/MP3/WMA (disc) operation and JPEG (disc/USB video) operation This system can play back a standard CD, CD-R/RW in the CD format, but cannot record on them. MP3: Some audio CD-R and CD-RW discs may not be playable MP3 is a form of compression. It is an acronym which due to the state of the disc or the device that was used for stands for MPEG Audio Layer 3. - Page 24 DivX/MP3/WMA (disc) operation and JPEG (disc/USB video) operation (continued) Repeat play on the JPEG menu screen: ■ Playback on the menu screen Condition A You can play all images in the disc. Playback will stop after complete playback all the images in the disc. You can play CD-R/RW recorded in the MP3/WMA and To perform repeat play, press the RANDOM ( ) button JPEG formats.
- Page 25 DivX/MP3/WMA (disc) operation and JPEG (disc/USB video) operation (continued) Repeat play on the MP3/WMA menu screen: ■ Simultaneously playback the MP3 and Condition A JPEG You can play all songs in the disc. Playback will stop after complete playback all the songs in the disc. To perform repeat play, press the RANDOM ( ) button You can enjoy to see images of JPEG files whilst listening whilst in the stop mode.
-
Page 26: (Disc/Usb Video) Operation
MP3/WMA folder mode (disc) MP3/WMA playback (USB Audio operation Function) To play back MP3/WMA (Windows Media Audio) file There are many music sites on the internet that you can download MP3/WMA (Windows Media Audio) music files. Follow the instructions from the website on how to download the music files. - Page 27 MP3/WMA playback (USB Audio Function) (continued) 4 Press the (CD/USB / ) button. Playback will start and file name will be displayed. ● Title, Artist and Album name are displayed if they are recorded on the disc. ● In case of playback with the folder mode on, press the PRESET ( ) button, and the folder can be selected even though it is in playback/pause mode.
- Page 28 MP3/WMA playback (USB Audio Function) (continued) ■ Repeat play ■ Programmed play (MP3/WMA) Repeat play can play one track, all tracks or a programmed Whilst in the stop mode, press and hold the MEMORY sequence continuously. button to enter the programming save mode. To repeat one track: Press the RANDOM button repeatedly until “Repeat One”...
- Page 29 Notes: ● The display playback time may not be displayed ● SHARP will not be held liable for the loss of data whilst correctly when playing back a variable bitrate file. the USB memory device is connected to the audio ●...
-
Page 30: Listening To The Radio
Listening to the radio ■ Memorising a station You can store 40 FM stations in memory and recall them at the push of a button. (Preset tuning) Perform steps 1 - 3 in “Tuning”. Press the MEMORY button. Within 30 seconds, press the PRESET ( ) button to select the preset channel number. -
Page 31: Using The Radio Data System (Rds)
Using the Radio Data System (RDS) RDS is a broadcasting service which a growing ■ Using the Auto Station Programme number of FM stations provide. These FM stations Memory (ASPM) send additional signals along with their regular programme signals. They send their station names, Whilst in the ASPM operation mode, the tuner will and information about the type of programme such as automatically search for new RDS stations. - Page 32 Using the Radio Data System (RDS) (continued) Notes: ■ Notes for RDS operation ● If the display has stopped flashing, start again from step 2. If the unit finds a desired programme type, the If any of the following events occur, it does not mean corresponding channel number will lit for about 8 that the unit is faulty: seconds, and then the station name will remain it.
-
Page 33: Timer And Sleep Operation (Remote Control Only)
Using the Radio Data System (RDS) Timer and sleep operation (Remote (continued) control only) OTHER M Musical styles not fitting into any of the other categories. Particularly used for specialist music of which Rhythm & Blues and Reggae are examples. WEATHER Weather reports and forecasts and meteorological information. - Page 34 Timer and sleep operation (Remote control only) (continued) ■ Timer playback When the timer end time is reached, the system will enter the power stand-by mode automatically. Once timer: Before setting timer: The timer will be cancelled. ● Check that the clock is set to the correct time (refer to Daily timer: page 15).
-
Page 35: Enhancing Your System
Timer and sleep operation (Remote Enhancing your system control only) (continued) The connection lead is not included. Purchase a commercially available lead as shown below. ■ Sleep operation The tuner, DISC, USB, Audio In and Line In can all be turned off automatically. -
Page 36: Troubleshooting Chart
■ USB without calling a service technician. If something is wrong with this product, check the following Symptom Possible cause before calling your authorised SHARP dealer or service centre. ● Device cannot ● Is there any MP3/WMA file ■ General be detected. -
Page 37: Maintenance
Troubleshooting chart (continued) ■ Care of compact discs ■ If problem occurs Compact discs are fairly resistant to damage, however When this product is subjected to strong external mistracking can occur due to an accumulation of dirt on the interference (mechanical shock, excessive... -
Page 38: Specifications
Specifications As part of our policy of continuous improvement, SHARP ■ Video Section reserves the right to make design and specification changes for product improvement without prior notice. The Signal level performance specification figures indicated are nominal Composite: 1 Vp-p (75 ohms) values of production units.